Can Rubber Plants Live Outside? A Complete Guide with Care Tips
Can rubber plants live outside? Yes, but only in warm climates.
They survive year-round outdoors in USDA zones 10 to 12. These areas keep temperatures above 30°F (-1°C), preventing frost damage.
Rubber plants prefer temperatures between 65 and 80°F (18 to 27°C). They can suffer stress if it dips below 50°F (10°C) for long. You’ll need to bring them indoors before cold snaps hit.
Choose a spot with partial shade, avoiding full sun all day. Too much direct sunlight or heat above 115°F can burn the leaves. You’ll notice browning or curled edges if the plant is stressed.
Water your rubber plant regularly but avoid soggy soil outdoors. Let the top inch of soil dry before watering again. Check the weather forecast to move your plant inside when temperatures drop unexpectedly.
Key Takeaways
- Rubber plants live outdoors best in USDA zones 10 to 12 without freezes.
- Keep temperatures between 65 and 80°F for happy rubber plants outside.
- Bring plants indoors when temperatures drop below 50°F to avoid damage.
- Choose a partially shaded spot; avoid direct afternoon sun and heat.
- Protect your plant from frost and cold nights in marginal zones.
- Rubber plants can grow tall, so provide enough space outdoors.
Can Rubber Plants Survive Outdoors Year-Round?

Rubber plants thrive outside year-round in USDA zones 10 to 12. These zones don’t drop below 30°F (about -1°C) in winter, which the plants need.
Zone 10a is the coldest place they might survive using frost protection. Zones 11 and 12 offer perfect winter warmth with no freezing danger.
These plants cannot survive freezing temperatures or frost. Even a brief dip below 30°F can cause damage to leaves and roots. Living in zone 9 or colder means your rubber plant won’t survive winters outside.
You’ll need to bring it indoors when temperatures get too low. Protecting it outdoors during winter in these zones isn’t safe. It will need to move indoors or receive heavy frost protection during cold months.
Warmer zones have winter temperatures between 30°F and over 55°F. Zones 11 and 12 are the safest for rubber plants. These areas keep the plant safe from cold damage. These places give consistent warmth and humidity, similar to the rubber plant’s native tropical environment.
In these zones, your rubber plant can grow quite large outside. It will thrive as a big tree without winter worries. You don’t have to move it inside at all.
How Temperature and Humidity Affect Outdoor Rubber Plants
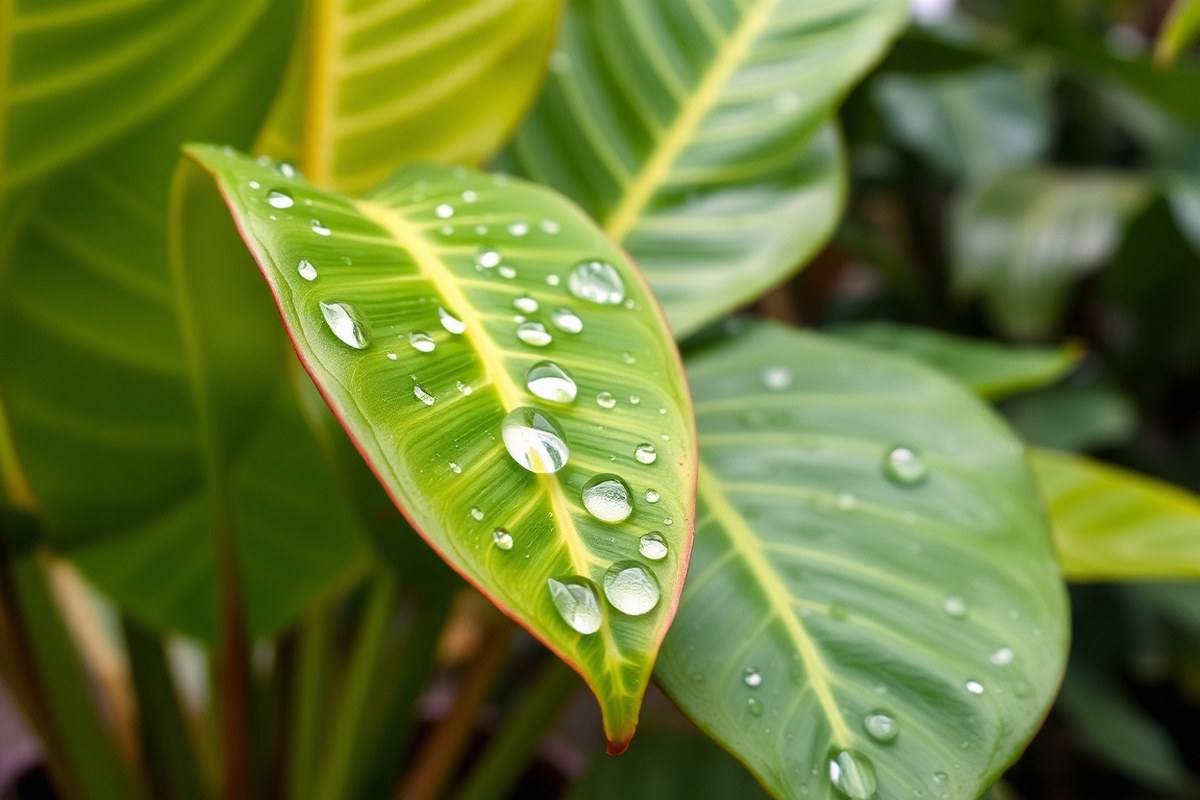
Rubber plants grow best outdoors in temperatures between 60 and 85 degrees Fahrenheit. Night temperatures around 60 to 65 degrees keep the plant healthy. Daytime highs near 75 to 80 degrees help it stay active.
These temps are ideal for rubber plants outdoors. Temperatures below 50 degrees can cause cold stress to the plant.
This stress can lead to leaf drop and root damage. Even short drops in temperature harm rubber plants.
These plants cannot handle freezing temperatures. You should bring outdoor rubber plants indoors before temperatures reach about 30 degrees Fahrenheit. Cold winds can also harm them.
So watch for sudden temperature changes that might stress the plant. Avoid direct afternoon sun in warmer climates.
Temperatures over 115 degrees can scorch rubber plant leaves. Keep it in shade during the hottest part of the day.
Humidity affects the rubber plant’s health outdoors since it comes from tropical areas. Moderate humidity levels work fine. If the air is dry, mist the rubber plant leaves.
You can also place the plant on pebbles filled with water. This helps raise humidity around the leaves.
This helps increase humidity around the foliage. Low humidity and high heat combined can cause the leaves to droop or brown along edges.
Keep rubber plants away from temps below 50°F and windy conditions. These can cause stress and leaf drop. Protect the plant during cold, dry weather.
Step-By-Step Acclimation to Outdoor Conditions
Acclimating your rubber plant to outdoor conditions takes about two weeks. The goal is to avoid sunburn and shock by slowly increasing light exposure. Start with full shade and gradually add direct sun before placing it in its final spot.
Phase 1: Full Shade Placement (Days 1, 3)
Move your rubber plant outside to a fully shaded spot for the first three days. A porch or covered patio is a good option. Keep the plant out of any direct sun during this phase to avoid leaf burn.
Check the temperature before moving it outdoors. Daytime temps should stay above 60°F to prevent cold stress. Keep watering the same as indoors, about once every 1 to 2 weeks, watching soil moisture.
Phase 2: Dappled Morning Light Exposure (Days 4, 7)
After three days, shift the plant to a spot with dappled light. A tree canopy or a sheer curtain over a porch works well. This lets the plant get some gentle sun without strong, direct rays.
Offer about 1 hour of indirect morning sun. Avoid afternoon sun, which can stress the leaves. Increase watering slightly if the soil dries faster in the light.
Phase 3: Partial Sun Introduction (Days 8, 11)
Move the rubber plant where it can safely receive 2 to 4 hours of morning sun. The rest of the day should be shaded or filtered light. Morning sun is less intense and helps the plant adjust without sunburn.
Look for signs like crisp edges or leaf drop. When those appear, cut down the sun exposure slightly. Check soil daily since outdoor plants often need more frequent watering than indoors.
Phase 4: Full Outdoor Placement (Day 12+)
After about 11 days, place your plant in its final outdoor location. Choose a spot with bright, indirect light or partial shade. Avoid intense afternoon sun, especially from 12 PM to 4 PM, to prevent leaf damage.
Maintain regular watering as outdoor soil may dry in a few days. In climates Zone 9 or colder, bring the plant inside before frost hits. Gradual exposure now helps the plant grow faster safely.
Before starting, here are clear steps to follow for smooth acclimation:
- Choose a shaded outdoor spot with mild temperatures above 60°F.
- Move the plant outside to full shade for three days.
- Shift to dappled morning light for about four days.
- Increase to 2, 4 hours of morning sun and shade the rest.
- Inspect the plant daily for stress signs like leaf burn.
- Adjust watering frequency as soil dries quicker outdoors.
- After about 11 days, move the plant to its final spot.
- When temperatures drop below 55°F, move the plant indoors.
Choosing the Right Outdoor Location and Sunlight Exposure
Rubber plants prefer bright, indirect light outdoors. Direct afternoon sun often scorches their large leaves. A morning sun spot with afternoon shade works best.
Choose a place that avoids harsh midday sun and deep shade. Too much shade slows growth and dulls leaf colors. Filtered sunlight mimics their natural understory habitat.
Wind can be a real threat because rubber plant leaves are large and thick. They catch the wind like sails, which can stress branches or cause leaf drop. Plant rubber plants on the north or east side of buildings.
This helps protect them from wind. It’s best in cooler zones like USDA zone 9.
- Look for morning sun exposure only, not afternoon sun
- Plant near a taller structure to provide wind shelter
- Avoid south or west-facing spots with strong afternoon sun
- Keep clear of areas with sustained strong winds or drafts
- Use natural shade from trees or shrubs for filtered light
- Check that leaves don’t get burnt or dry quickly
Selecting the right spot means balancing light with protection from weather extremes. For example, a shaded patio corner facing east usually fits these needs. Watch your plant the first week outside to spot sunburn or wind damage.
Move the plant to more shade when leaves look scorched. You can also add a shade cloth. Use a windbreak if wind is strong.
Or move the plant closer to walls. Taking these steps helps your rubber plant stay healthy outside.
Soil, Watering, and Planting Options Outdoors
Rubber plants need well-draining soil and careful watering when grown outdoors. They do best with soil that dries well between waterings. Choosing containers lets you move plants if temperatures drop below 50°F.
Recommended Soil Components
Rubber plants tolerate most soil types outdoors if the soil drains well. Avoid wet, soggy conditions to prevent root disease. You can use peat-free houseplant compost designed for ficus or add sand to improve drainage.
Start by digging a hole slightly larger than the root ball when planting in ground. For containers, use a mix of compost and gritty material to keep air flowing around roots. No fancy or expensive soil is needed for healthy, growing plants.
Watering Frequency and Best Practices
Water rubber plants deeply but infrequently. Wait until the top 1 to 2 inches of soil dry out before watering again.
Outdoors, you often need to water more than indoors. Check the soil with your finger to avoid overwatering. Excess moisture can cause disease or leaf drop.
During hot, dry spells, expect to water every few days. In cooler, shaded spots, watering weekly might be enough.
In-Ground vs. Container Planting Pros and Cons
In-ground planting suits only consistent warm zones 11 or 12. Here, the plant can grow large, up to 50 feet tall. It needs space and warmth all year long.
Containers let you move plants indoors if temperatures drop near 50°F at night. They control soil quality better and fit patios or decks. Container plants may need more frequent watering but avoid cold damage.
Below is a table comparing in-ground and container planting. It can help you decide what works best for your situation. Use this guide to choose the right method.
| Factor | In-ground Planting | Container Planting |
|---|---|---|
| Temperature tolerance | Only in warm zones (11, 12) year-round | Can relocate indoors during cold spells |
| Size potential | Can grow up to 50 feet tall | Limited by pot size |
| Watering needs | Needs less frequent watering if soil drains well | Needs more frequent watering to prevent drying out |
| Soil control | Depends on native soil drainage | Use specialized compost mixes for optimal drainage |
| Mobility | Fixed in one spot | Can be moved indoors or to shade |
Moving container rubber plants indoors before nighttime dips below 50°F protects their roots from cold damage.
Managing Pests and Common Outdoor Risks
Rubber plants outdoors can attract pests like aphids, mealybugs, spider mites, and thrips. Thrips mainly target outdoor plants and can cause leaf damage. These pests feed on the plant’s sap.
They make leaves yellow and curl up. Brown, crispy edges also appear on infected leaves.
Environmental hazards include strong winds, intense sun, and heavy rain. Wind can break branches, while too much sun may scorch leaves. Protect your plant by placing it where it gets morning sun but afternoon shade.
- Inspect plants weekly for pests, focusing on leaf undersides and stems
- Spray leaves with water to remove dust and slow mites’ spread
- Use insecticidal soap or neem oil every 7 to 10 days if pests appear
- Introduce beneficial insects like ladybugs to control aphids naturally
- Prune infested or damaged leaves promptly to reduce pest population
- Keep the plant’s base free of debris to avoid pest hiding spots
- Before moving indoors, check thoroughly for pests and treat as needed
Insecticidal soap costs about $10 to $15 per bottle. It is safe for organic gardening. You can use it to treat pests on rubber plants.
Apply it in the early morning or late evening to avoid leaf burn. Neem oil works well against pests and fungal problems.
It costs about $15 to $20 for a bottle. You can use it as a fungicide too.
Regular feeding during spring and summer helps plants stay healthy and resist pests better. Use fertilizer made for acid-loving plants. You can also spread a 1-inch layer of compost.
This gives your rubber plant nutrients it needs. Healthy plants recover faster and attract fewer pests.
Protecting Rubber Plants During Colder Months or in Marginal Zones
Bring rubber plants indoors when temperatures fall below 50°F (10°C). In colder zones, use containers so you can move them quickly. For ground plantings in USDA zone 9 or cooler, prepare for frost.
Protect plants from cold weather in winter. Use covers or bring plants indoors if needed.
Temperature Thresholds for Indoor Transition
Rubber plants do best above 60°F (15°C). Between 50°F and 60°F (10-15°C), watch your plants closely and move them to sheltered spots. When temperatures drop below 50°F, cold damage risk increases.
Move plants inside or cover them well. Use heavy protection to keep plants safe.
Below 40°F (4°C), immediate indoor relocation is critical to prevent plant death. Cold temperatures cause leaf drop and slow growth. Check local weather daily in fall and early spring to plan the move.
Winter Protection Methods
Use these winter protection steps when moving indoors is not an option. Cover plants with frost cloth or burlap to shield leaves from cold wind and frost damage. Mulch the soil around the plant base to keep roots warmer.
Set up windbreaks, such as fences or dense shrubs, to cut down chilling winds. Frost cloth unavailable? Plastic sheets can work instead.
Ventilate during the day to prevent overheating. Keep plants cool and protected this way. Consider using outdoor heaters or heat lamps carefully, following safety guidelines.
- Cover plants with frost cloth or burlap
- Add mulch to insulate roots
- Set up windbreaks around the plant
- Use plastic sheets with ventilation
- Deploy outdoor-safe heaters cautiously
These protections work for short cold spells but are not a permanent fix. Regular checks prevent surprises. Strong or prolonged freezes still require moving the plant inside.
Containers vs. In-Ground in Cold Zones
Growing rubber plants in containers makes winter care easier. You can move pots indoors or to a protected porch when cold approaches. Containers also allow better root control and reduce risk of frost injury.
Plants grown permanently in the ground in zone 9 or colder face frost risks. They may die or suffer severe damage during cold snaps. Plant in the ground only with strong winter shelter.
Use a cold frame or insulated greenhouse for protection. This helps plants survive cold seasons outside.
A container setup might limit size but helps the plant survive year to year. Keep plants indoors or in a warm garage during winter.
They stay healthier and look better this way. Plants will bounce back with spring growth.
Recognizing and Responding to Outdoor Stress Signs
Outdoor rubber plants often show leaf drop when stressed from cold, heat, or shock. Leaves falling off suddenly means too much sun or a quick temperature drop. The drop must be below 50°F (10°C).
Your plant reacts quickly to these changes. You might also see dry, crispy brown leaf tips, which signals sunburn or wind damage. Catching these signs early lets you adjust care quicker to keep the plant healthy.
Leaf scorch looks like brown, dry patches on leaves. It happens when the plant gets too much direct sunlight. Move the rubber plant to a spot with filtered light.
Only morning sun is okay. This change helps stop leaf loss. Avoid sudden moves to full sun, since abrupt light changes cause leaf drop from shock.
You can spot pests like scale or spider mites during routine leaf wipe-downs. Using a soft damp cloth to clean leaves regularly removes dust and insects. It also helps you check for early signs of problems.
Keep plants away from strong winds to avoid dry leaf edges. Use shade cloth on very hot days. This protects the plant well.
- Sudden leaf drop: Gradually acclimate plants to outdoor light and temperature.
- Pale yellow leaves: Check soil moisture and add balanced fertilizer if needed.
- Crispy brown tips: Move plant to sheltered spot and flush soil with distilled water.
- Remove sunburned leaves by pruning to allow new growth.
- Prune young plants to encourage strong branches and good shape.
- Keep the plant within 1.5 meters of a light source to prevent leaf loss.
Pruning helps keep the plant sturdy and reduces stress from damaged leaves. Cut off any dried or damaged foliage to focus the plant’s energy on healthy parts.
Young rubber plants benefit from pruning to shape them and encourage scaffold branches at 45-degree angles. This keeps the plant balanced and less prone to breaking outdoors.
Never move your rubber plant outdoors abruptly; slow changes prevent shock-induced leaf drop.
Adjust watering if leaves turn yellow from overwatering or root damage. Well-draining soil helps prevent root rot, which causes sudden leaf loss too. Watch the weather closely.
Bring your rubber plant inside if temperatures drop below 50°F (10°C). This stops cold stress. Spotting and treating stress signs early protects your plant and helps it thrive outside.
Step-by-Step Action Plan for Growing Rubber Plants Outdoors
Follow this quick plan to help your rubber plant adjust and thrive outside. Watch for healthy growth signs to make sure it’s working.
- Before Moving Outdoors: Check local temperatures stay above 55°F (13°C) at night. Delay moving your plant if colder nights occur.
- Day 1-3: Place your plant in a shaded, protected spot outside. Look for no leaf droop or browning to confirm it’s handling the change.
- Week 1: Gradually increase sunlight exposure by a few hours daily. Healthy, firm leaves mean it’s adapting well so far.
- Week 2: Begin watering outdoors like indoors but adjust if soil dries faster. Check soil moisture often by touch; avoid soggy or dry soil.
- After 3 Weeks: Move plant into full filtered sunlight if leaves look strong and vibrant. Move back to some shade if you see leaf scorch.
- Monthly: Inspect for pests such as aphids or spider mites. Remove pests with gentle water spray or insecticidal soap if needed.
- Cold Weather Prep: When nighttime temps hit 50°F (10°C), bring the plant inside. You can also cover it with frost protection to stay safe. Keep an eye on the temperature each evening. Watch for wilt as a sign of cold stress.
- Ongoing Care: Fertilize the plant every 6 to 8 weeks in the growing season. Use a balanced houseplant fertilizer that’s suitable for outdoor plants. This helps keep the plant healthy and growing well. Check for steady new growth.
Frequently Asked Questions
Can Rubber Plants Grow Outside in Pots?
Yes, you can grow rubber plants outside in pots. Make sure the pots have good drainage and use well-draining soil for healthy roots and growth.
Will Rubber Plants Grow Bigger Outdoors Than Indoors?
Rubber plants often grow larger outdoors due to more space and natural light. They can reach much taller heights in ideal outdoor settings.
Do Rubber Plants Need Pruning When Grown Outside?
Yes, outdoor rubber plants benefit from regular pruning. It helps control size, promotes bushier growth, and removes damaged leaves.
Can Rubber Plants Tolerate Partial Shade Outside?
Rubber plants can handle partial shade but prefer bright, indirect light. Too much shade might slow growth and reduce leaf shine.
Should I Fertilize My Rubber Plant If Grown Outdoors?
Feeding outdoor rubber plants during growing season helps. Use a balanced fertilizer monthly for healthy leaves and branches.
Is It Better to Plant Rubber Plants Directly in the Ground or in Containers Outside?
Containers offer mobility and root control, which suits cooler climates. Ground planting works well in warm, frost-free zones for faster growth.
Final Thoughts
Your rubber plant can live outside with the right care and climate. Start by watching its response to light and temperature changes. Adjust your care based on what you see to keep it healthy and growing strong.