Can Spider Plants Live Outside? A Complete Guide for Safe Outdoor Growing
Can spider plants live outside? Yes, they can live outdoors for part of the year.
They prefer temperatures between 55°F and 80°F and thrive in moderately cool, shaded spots during summer. You should wait to move them outside only when nighttime temperatures stay above 50 degrees Fahrenheit.
Before fully settling outdoors, spider plants need about two weeks of gradual hardening off. This helps prevent shock from sudden weather changes. Also, watch out for too much direct sun, which can cause leaf damage quickly.
Spider plants outdoors need moderate humidity and well-draining soil with occasional feeding. Keep an eye on pests, as outdoor conditions sometimes trigger infestations. Cold winters mean you should bring spider plants inside before frost hits.
Key Takeaways
- Move spider plants outside only after nighttime temperatures stay above 50°F.
- Harden off spider plants gradually over 14 days before full outdoor exposure.
- Place spider plants in areas with 40, 60% dappled light, avoiding full sun.
- Use a balanced 10-10-10 fertilizer sparingly during the outdoor growing season.
- Let the soil dry about 2 inches before watering to keep plants healthy.
- Watch for pests like mealybugs, especially under heavy shade conditions.
Can Spider Plants Live Outside Permanently?

Spider plants can live outside year-round only in USDA zones 10 and 11. These zones have mild winters with rare or no frost. This helps plants avoid cold damage.
In these areas, spider plants grow as perennials in ground or pots. You don’t have to worry about them dying in winter.
In USDA zone 9, outdoor survival through winter is possible but risky. The winter lows can sometimes dip near 20 °F (-6 °C), which can stress the plant.
Use extra protection during cold snaps to keep plants safe. Mulch helps, or you can move plants indoors.
For zones 3 through 8, spider plants cannot stay outside all year. Frost and freezing temperatures will kill or severely damage them.
So treat them as seasonal plants. Bring them indoors before temperatures drop below 50 °F (10 °C) to prevent harm.
Check your USDA zone to decide if your spider plant can live outside. This simple step guides your choice. You live in zones 10 or 11, so you can plant outside year-round.
For zone 9, plan on moving your plant indoors during cold spells. Zones 3 to 8 require seasonal outdoor use only.
Florida, southern Texas, and parts of southern California have mild climates. Spider plants thrive outside there all year long.
These places match the plant’s native tropical climate well. Outside these zones, expect to move your spider plant indoors before winter arrives.
Even in suitable zones, monitor weather and protect your spider plant from frost or extreme heat. Cover plants or bring pots inside when frost is forecasted. This occasional care helps prevent damage and keeps your spider plant healthy through all seasons.
How to Prepare and Harden Off Spider Plants for Outdoors
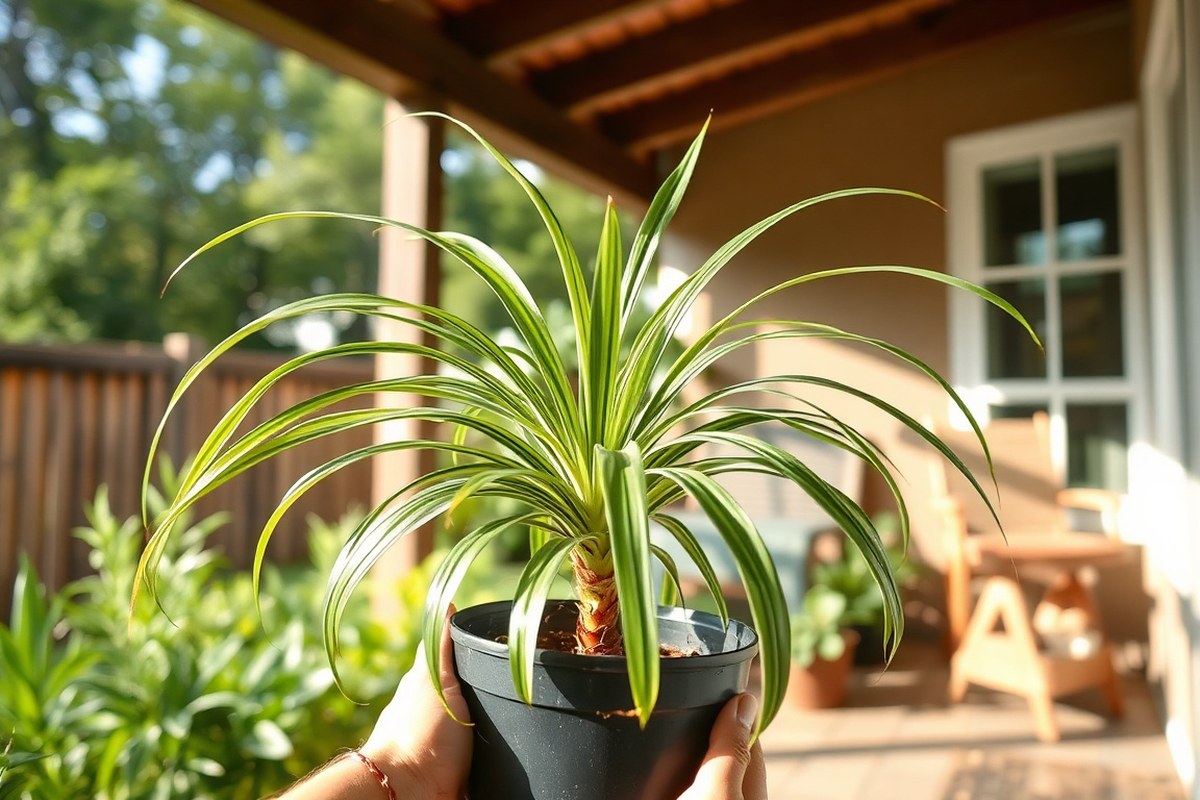
You need to harden off spider plants before leaving them outside permanently. This means moving them outdoors slowly over about two weeks. The process helps your plant adjust to sunlight, wind, temperature, and pests safely.
Step 1: Start with Short Outdoor Periods
Begin by placing your spider plant outside for one to two hours daily. Choose a shaded spot away from direct sun and strong winds. Bring the plant back indoors each night to prevent cold damage.
Keep an eye out for any stress signs like wilting or leaf discoloration. When the plant looks fine, add more time outdoors the next day.
Step 2: Gradually Increase Sunlight Exposure
Every few days, add 30 minutes to two hours of outdoor time. Move your spider plant to spots with gentle morning or late afternoon sun. Avoid direct midday sun, which can burn its leaves quickly.
By the end of the first week, your plant should handle about 6 hours outside daily. Shade it when the sun is strongest to prevent leaf burn.
Step 3: Monitor Soil Moisture and Leaf Health
Check soil moisture daily during hardening off. Outdoor conditions dry the soil faster, so water when the top inch feels dry. Avoid letting the soil dry out completely or stay soggy, which risks root rot.
Watch leaf tips and edges for browning or curling. These signs mean sun or water stress and may require adjusting your care or shading.
Step 4: Watch for Pests During Transition
Spider plants can attract pests outdoors, so check leaves and soil weekly. Look under leaves for small insects or sticky residue. Remove pests by gently wiping leaves or use insecticidal soap if they appear.
Ignoring pests can weaken your plant and slow its adjustment to outdoor life.
Step 5: Move to Full-Time Outdoor Living
After 14 days of this gradual process, your spider plant is ready to stay outside. Make sure nighttime temperatures are consistently above 50°F before leaving it out for good. Continue monitoring water, pests, and leaf health regularly.
Cold nights or frost? Move your plant inside for a short time.
- Pick a day with no frost forecast and temperatures above 50°F at night.
- Place the plant outside for 1, 2 hours in bright shade, then bring it in.
- Increase outdoor exposure by 1, 2 hours every two days, adding filtered sunlight.
- Water when the top inch of soil feels dry; adjust if stress signs appear.
- Inspect leaves and soil for pests weekly and treat if needed.
- After 14 days, keep the plant outdoors all day if nights stay above 50°F.
- Be ready to move the plant indoors if cold weather returns unexpectedly.
Moving your spider plant outside too fast can cause leaf burn or shock. Take at least two weeks to let it adjust gently.
Ideal Outdoor Conditions: Light, Temperature, and Humidity
Spider plants need bright, indirect light to thrive outdoors. They do best in dappled sunlight or shaded spots under trees.
Direct afternoon sun can scorch their leaves. So aim for filtered light, especially in summer.
Spider plants do best with about 1,500 to 2,000 foot-candles of light. They grow more plantlets and stay healthier with less than 20% shade. More than 80% shade reduces plantlet growth and invites pests.
| Light Level | Effect on Spider Plant Health |
|---|---|
| Bright Indirect (40-60% shade) | Healthy growth, many plantlets, low pest issues |
| Heavy Shade (80%+ shade) | Fewer plantlets, higher mealybug problems |
| Direct Full Sun | Leaf scorch, stress, reduced health |
Pick your outdoor spot based on the season. Place plants in partial shade during summer to protect them from harsh sun.
In spring and fall, they can handle slightly brighter light without damage. Avoid full sun exposure any time of year.
Temperature is key. They grow best between 55 and 80 degrees Fahrenheit.
Outdoor spider plants tolerate brief dips below 45°F but begin to suffer damage then. Frost or freezing temperatures will kill their roots quickly.
Your USDA zone matters. In zones with a frost-free growing season, spider plants can thrive outside through summer. Colorado State University saw spider plants die back after mid-October in Zone 5.
This happened even when frost cloth was used to cover them. Outdoor survival past this time is risky. This happens because cold soil chills roots.
Humidity outdoors should stay moderate to high, around 40-60%. This matches their native tropical conditions.
Dry air can stress spider plants and stunt growth. They adapt to average household humidity but thrive best with some moisture in the air.
Plant spider plants near water sources or areas with natural humidity, like a shaded garden corner. Avoid windy, dry spots. Misting leaves keeps moisture up during dry weather.
This supports healthy leaves and roots. It helps spider plants stay vibrant and strong.
Proper Watering, Feeding, and Soil for Outdoor Spider Plants
Spider plants growing outdoors need more water than indoor ones. Check soil moisture weekly in spring and summer. Water when the top 1 to 2 inches feel dry, usually about once a week.
Rainfall helps, but on hot, windy days, watering might be necessary more often. Overwatering can cause root rot, so always ensure good drainage to avoid soggy soil.
Choose soil that drains well but holds some moisture. A mix rich in organic matter with sand or perlite works best. Avoid heavy clay soils because they stay wet too long and harm roots.
Plant directly in the ground or in containers with drainage holes. Using pots without holes is a common mistake that leads to standing water and root issues.
- Use rainwater or distilled water if possible for best results
- Fertilize during spring and summer only, skip fall and winter
- Use a balanced 10-10-10 fertilizer, diluted for safety
- Fertilize once a month or every other month
- Water when the soil dries to the top 1-2 inches
- Ensure containers have drainage holes to prevent root rot
- Adjust watering frequency based on weather and soil feel
Fertilize spider plants outdoors sparingly to avoid chemical burn. Use a 10-10-10 liquid fertilizer diluted to half strength. Apply once a month or every other month through spring and summer.
Fertilizing during fall and winter can stress the plant since growth slows. This careful feeding supports steady growth without overwhelming the plant.
During colder months, reduce watering to prevent root rot. The soil should be barely moist, not wet.
Checking soil rather than sticking to a calendar helps you adapt to changing weather. Proper watering, feeding, and soil create the foundation for healthy, outdoor spider plants.
Common Outdoor Pests and How to Manage Them
Spider plants outdoors can face pests like aphids, spider mites, mealybugs, and scale insects. These pests cause damage by sucking sap and weakening plants. Spotting pests early and using organic treatments helps keep your spider plant healthy.
Aphids: Signs and Control
Aphids are small, soft insects that cluster on leaf undersides and new growth. They often look green, black, or yellow and leave a sticky residue called honeydew. You can catch them early by checking leaves regularly for these tiny pear-shaped bugs.
Spraying aphids with a mix of water and mild dish soap controls them well. Use one teaspoon of soap for every quart of water. Spray the affected areas well.
Repeat this every few days until the aphids are gone. This treatment costs little and avoids harsh chemicals.
Check new outdoor leaves daily to catch aphids before they spread widely.
Spider Mites and Their Management
Spider mites are tiny and hard to see at first. You may notice fine webbing and tiny moving dots on leaf undersides when they attack. Leaves may look speckled or turn a dusty yellow from their feeding damage.
To manage spider mites, spray the plant with water to knock them off. Then apply neem oil or insecticidal soap every 7 to 10 days for three weeks.
Neem oil costs about $10 to $15 per bottle and also stops eggs from hatching. This natural treatment can protect spider plants without chemicals.
Preventing Mealybugs and Scale
Mealybugs appear as small, white cottony clumps on leaves and stems. Scale insects look like brown or gray bumps sticking tightly to stems or leaf veins. Both suck plant juices and cause yellowing or wilting.
Remove mealybugs and scale by wiping them with a cotton swab dipped in rubbing alcohol. Repeat every few days for two weeks to catch new bugs.
You can also spray with insecticidal soap if the problem worsens. Monitoring regularly helps avoid infestations before they damage your plant.
When to Bring Spider Plants Indoors for Winter
When the outdoor temperature drops below 50°F (10°C), start moving your spider plant indoors. Do this before cold weather sets in completely. Cold stress happens quickly and shows as brown leaf tips or curling leaves.
Waiting too long can cause irreversible harm to the plant. You might not notice the damage right away.
Timing depends on your USDA zone. For zone 7 or colder, bring your plant inside when night temps hit 50°F. Don’t wait until colder nights arrive. In zone 8, monitor frost forecasts closely and move the plant in before any hard freezes.
Zones 9 to 11 with light frost may allow some outdoor time with frost cloth protection. But bring the plant in during cold snaps.
Start the indoor transition one to two weeks before the cold arrives. This helps the spider plant adjust from outdoor sun and wind to indoor air and light. A sudden move can shock it, causing drooping or leaf drop.
Here’s a checklist to get your spider plant ready for winter inside:
- Check the temperature forecast and plan to move the plant one week before lows hit 50°F.
- Bring the plant in on a dry day to prevent moisture stress and fungal problems.
- Trim any dead or damaged leaves to reduce stress and pests.
- Inspect the plant carefully for bugs and treat before moving indoors to avoid infestations.
- Let your spider plant adjust slowly before bringing it inside fully. Put it in a shady, protected outdoor spot for a few hours each day.
- Place the plant inside in a bright spot with indirect light. Avoid drafts and keep it away from heaters.
- Reduce watering slightly to avoid root rot indoors since the plant’s growth slows.
Doing this preparation takes about 15 to 30 minutes. It prevents shock and keeps your spider plant healthy through winter.
You’ll see less brown leaf tips and fewer pests. Ignoring the signs or delaying the move means leaf damage and stunted growth.
How Big Do Spider Plants Grow Outdoors and What to Expect
Spider plants grown outdoors often outgrow their indoor size by a large margin. Indoors, these plants typically reach 12 to 15 inches in height and width.
Outside, they can get up to 24 inches tall and wide. Size depends on the variety and conditions.
Outdoor light is stronger, usually 1,500 to 2,000 foot-candles. This helps plants make more food through photosynthesis. That causes bigger growth.
More light means faster growth and fuller leaves. When you move them outside in summer, they grow twice as fast.
This growth shows up in a few months. Usually by mid to late summer.
Compared to indoor plants, outdoor spider plants produce more flowers and plantlets. The flowers grow on long stems. They turn into tiny spiderettes.
You can use these to make new plants. You might see several clusters of plantlets on a single outdoor plant during the growing season.
The typical seasonal growth starts mid-spring after frost risks stop, around mid-May in zones like 7b. In early summer, the plant grows leaves quickly. Later, it starts flowering and makes spiderettes.
This happens by mid to late summer. Watch for spiderettes to cut off or pot up. You usually do this from July through September.
Growing outdoors takes some patience. But it gives you bigger plants. Plus, lots of new spiderlets to share.
Watch for weather changes, since cool nights below 50°F can slow growth. Your results change with local climate and sunlight. In shadier spots, growth may stay like indoor plants.
| Growth Aspect | Indoor Size | Outdoor Size |
|---|---|---|
| Typical Height & Width | 12, 15 inches | Up to 24 inches |
| Growth Speed | Moderate, steady | Can double indoor rate |
| Plantlets/Spiderettes Produced | Few to moderate | More numerous, clusters |
| Flower Production | Occasional flowers | More frequent flowers |
Top Mistakes to Avoid When Growing Spider Plants Outside
Spider plants outdoors face a few common pitfalls that can kill or stress them. Watch for early mistakes like sunburn, water woes, bugs, cold damage, and timing errors. Fix these right away to keep your spider plant healthy outside.
Mistake 1: Moving Plants Out Too Early
Many gardeners put spider plants outside before the last frost really passes. This can cause cold damage, making leaves brown and wilt quickly. Check daily for these signs; bring your plant inside immediately if you spot them.
Wait until nighttime temperatures stay above 50°F (10°C) consistently before moving plants out. Harden off your spider plant slowly. Give it more sun and wind each day.
Do this for 1 to 2 weeks. Sudden outdoor exposure shocks the plant and lowers survival chances.
Mistake 2: Exposing to Direct Harsh Sun
Spider plants dislike harsh afternoon sun and can get leaf burn outdoors. Leaves look bleached or brown at the edges when the sun is too strong. This damage slows growth and weakens the plant.
Place your spider plant in partial shade or filtered light spots. Early morning sun or dappled shade works best. Move the plant to a spot with less sun quickly when tips turn brown.
- Use light-colored mulch to reflect heat
- Provide shade cloth or plant near taller shrubs
- Avoid west-facing spots with hot afternoon sun
- Check leaves daily for sunburn signs
- Adjust placement as the seasons change
Mistake 3: Overwatering and Root Rot
Too much water is a common killer of outdoor spider plants. Their soil must stay slightly moist but never soggy. Standing water invites root rot, a fungal problem that kills roots fast.
Test soil before watering. Stick your finger 1 to 2 inches down; water only when it feels dry.
Ensure pots or garden beds drain well to keep roots healthy. Remove fallen leaves and debris that block airflow around the plant.
Mistake 4: Ignoring Pest Early Signs
Spider plants outdoors can attract tiny pests like spider mites or aphids. These bugs cause leaf yellowing, sticky residue, and slow growth. Early detection makes treatment easier and lowers damage.
Inspect leaves and stems weekly for pests. Look under leaves and along the crown. Use natural insecticidal soap when you notice pests.
Apply neem oil if needed. Both keep pests away without hurting the plant.
- Wash leaves with water to remove bugs
- Remove heavily infested leaves promptly
- Keep the area clean and clear of dead plant material
- Encourage beneficial insects like ladybugs
- Repeat treatment every 7 to 10 days until clear
Mistake 5: Failing to Bring Plants Inside Before Cold
Spider plants aren’t frost hardy and suffer quickly in cold weather. Temperatures below 50°F start stress; frost kills leaves and roots fast. Many gardeners forget to bring plants inside in time.
Keep a daily watch on temperature forecasts once fall nears. Move spider plants indoors or to a protected spot before frost arrives. Dig up plants to overwinter indoors if you grow them as annuals outdoors.
Don’t wait for frost damage, move your spider plant inside at the first cold warning.
Step-by-Step Action Plan to Grow Spider Plants Outdoors
Follow these clear steps to get your spider plant thriving outside. Each phase helps you spot if your plant is adjusting well.
- Before planting: Check your local climate. Make sure temperatures stay above 50°F regularly. Your spider plant won’t do well below this.
- Week 1: Start by placing your spider plant in a shady outdoor spot. Watch for signs like leaf curling or discoloration, these tell you if it’s stressed.
- Weeks 2-3: Gradually increase sun exposure each day. Aim for up to 4 hours of indirect or morning sun. Healthy green leaves mean it’s adapting.
- Week 4: Plant your spider plant in well-draining soil outdoors. Keep soil lightly moist, not soggy. Check soil moisture by feeling the top inch.
- Month 2: Start a feeding routine with a balanced liquid fertilizer every 4 weeks. Look for steady new growth for a sign it’s happy.
- Ongoing: Examine your plant weekly for pests like aphids or spider mites. Use insecticidal soap if you spot any. Constant healthy leaf color means pest control worked.
- Before first frost: Move your spider plant inside. Cold can kill it quickly. Leaves will look fresh and firm if the move is timely.
Frequently Asked Questions
Can Spider Plants Survive Outside Year-Round in Zone 7b?
Spider plants can live outside year-round in Zone 7b if temperatures stay above 50°F at night. You should watch the weather forecast every day.
Bring your plants inside if a cold snap is coming. Don’t let them stay outside in freezing temperatures.
Should I Plant Spider Plants Directly in the Garden or Keep Them in Pots?
It’s better to start spider plants in pots outside. This makes it easier to move them indoors during cold weather or bad storms.
What Kind of Mulch Works Best for Outdoor Spider Plants?
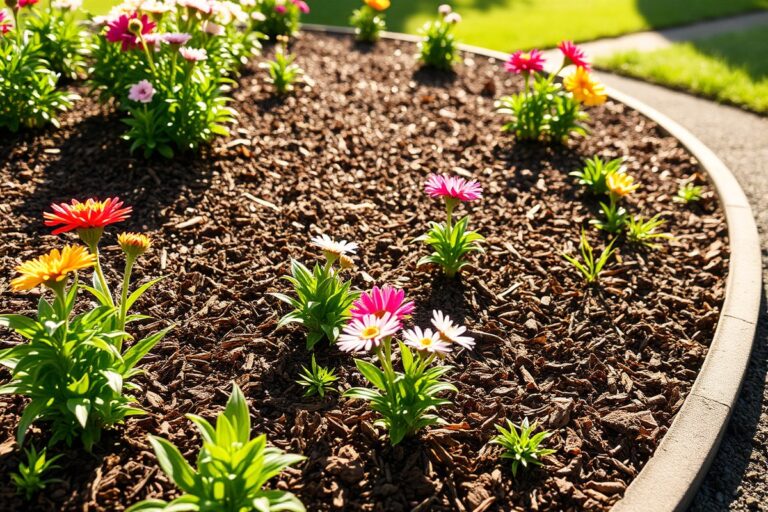
Organic mulch like bark or compost works well for spider plants outdoors. It helps keep soil moist and controls weeds without harming the roots.
How Often Should Spider Plants Be Repotted When Grown Outside?
Repot spider plants every 1-2 years outdoors to prevent root crowding. Watch for roots coming out of the drainage holes as a sign.
Do Spider Plants Need Shade or Full Sun Outside?
Spider plants prefer partial shade outdoors. Too much sun can burn spider plant leaves.
Choose a place with morning sun or filtered light. Avoid harsh afternoon sun to protect your plant.
Can Spider Plants Handle Outdoor Wind and Rain?
Spider plants can tolerate some wind and rain but not heavy storms. Strong winds can damage their leaves, so place them in a sheltered spot.
Final Thoughts
Spider plants can live outside if your climate suits them and you adjust care steps. Starting slow and watching for stress is key. Try moving your plant outdoors this week to see how it reacts.