How to Prevent Weeds in Flower Beds: 8 Proven Methods That Really Work
Knowing how to prevent weeds in flower beds saves you time and effort. Start by blocking sunlight to stop weed seeds from sprouting. A thick layer of mulch, about 2 to 3 inches deep, works well for this job.
Another key step is preparing your flower beds properly. Clean out any existing weeds and loosen the soil 6 to 12 inches deep. This breaks up weed seed layers and makes it harder for new weeds to grow.
Using pre-emergent herbicides can also prevent 85 to 95 percent of weeds. Apply them after spreading mulch and water the area to activate the herbicide. Avoid disturbing treated spots for at least 48 hours to let the herbicide work fully.
Key Takeaways
- Spread 2 to 3 inches of mulch to block sunlight from weed seeds.
- Loosen soil 6 to 12 inches deep before planting to disrupt weed seeds.
- Remove all existing weeds before preparing flower beds to avoid regrowth.
- Apply pre-emergent herbicides after mulching and water them in well.
- Don’t disturb treated areas for 48 hours to ensure herbicide absorption.
- Use raised beds or add soil to raise flower bed surfaces about 6 inches.
1. Effective Strategies to Prevent Weeds in Flower Beds
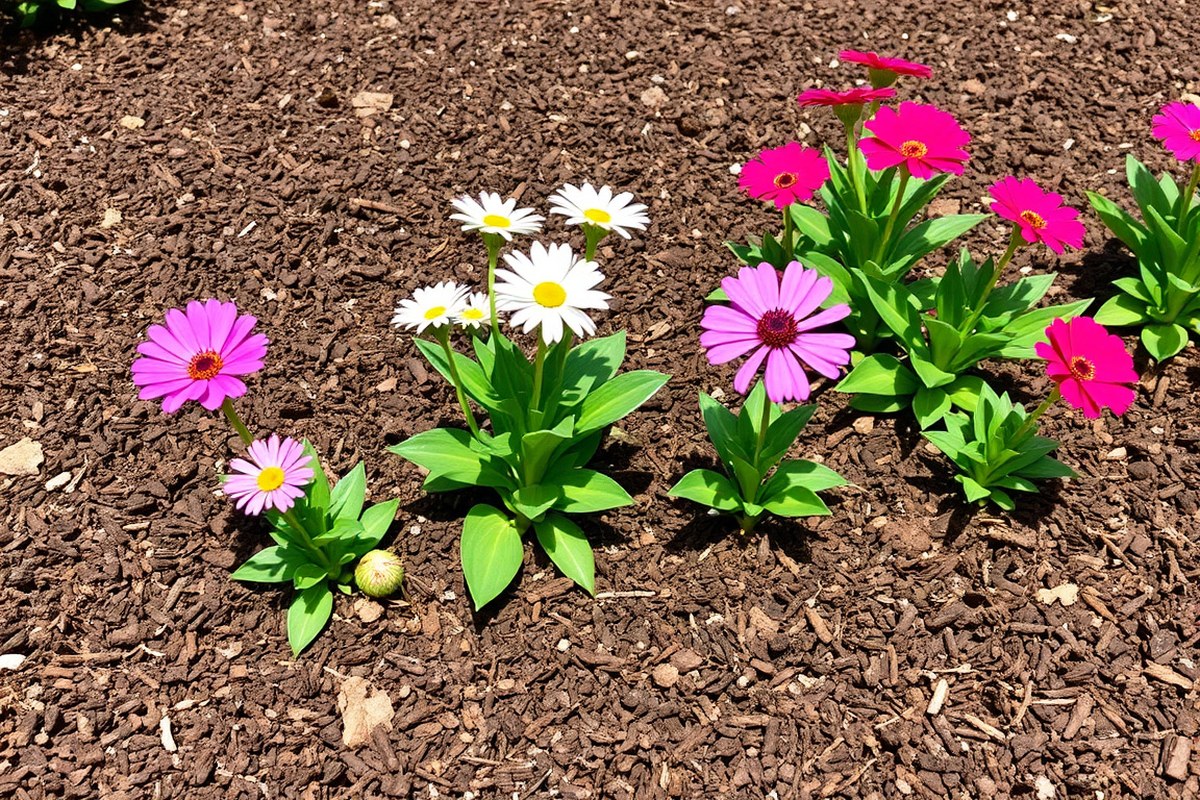
Keeping weeds out of flower beds works best when you combine methods. Mulching is powerful because it blocks sunlight, stopping weed seeds from sprouting.
Apply a 2 to 3-inch layer of organic mulch around plants, and replace it yearly. This also helps your soil stay moist and healthy.
Planting flowers close together fills gaps where weeds like to grow. Dense planting shades the soil, making it harder for weed seeds to take root.
Choose ground covers or low-growing plants for bare spots. It may take one growing season before your beds look full enough to block weeds well.
Pulling out any weeds by hand right when they appear keeps them from spreading seed. Look at your flower beds every few days. Pull out young weeds by hand or with gloves.
Use a small hand tool if needed. This quick action reduces chemical needs and stops weeds from taking over.
Garden edging along beds helps keep grass and weeds from creeping in. Materials like metal, stone, or plastic create a physical barrier at the bed’s edge. This makes it easier to maintain a clean, defined flower bed without extra effort.
Using natural treatments like coffee grounds can also help deter weeds. Spread used coffee grounds thinly to avoid harming plants. This method works best paired with mulch and hand weeding rather than alone.
Combining these methods cuts down how often you need herbicides or intensive weeding. Mulching, dense planting, and regular hand weeding help reduce weeds fast. Most gardeners notice fewer weeds in one season.
These methods work well together. Persistence matters, checking your flower beds every few days is key.
2. Preparing Flower Beds for Weed Control Success

Preparing your flower beds well keeps weeds from getting a strong hold. Clearing old grass and loose debris limits weed seeds and roots from lingering in the soil. Starting clean lets your plants grow without competing against unwanted growth.
Raising flower beds about 6 inches helps stop weeds by improving drainage and warming soil faster. Raised beds also make it harder for grass and weeds to creep in from the edges. Adding sterilized packaged soil can reduce weeds further, cutting the chance of soil-borne pests.
Edging is another simple step to keep weeds out. Solid borders made from brick, metal, or plastic help block weeds. These borders create a barrier weeds find hard to cross.
They keep your flower bed clean and neat. Check the edge often for gaps or soil buildup.
This stops weeds from sneaking in around the border. Keep your borders tight and weed-free.
- Remove all grass, roots, and debris using a garden fork or hoe.
- Loosen the soil to about 8 inches deep to break weed root networks.
- Add at least 6 inches of good soil for raised beds. This works best if your garden soil is clay or packed. It helps plants grow better by giving roots space.
- Mix sterilized packaged soil into your native soil to lower weed seeds and pests.
- Install edging around the flower bed’s perimeter with stakes, leaving no gaps.
- Fill any cracks or holes near the edging with soil or mulch to seal.
- Avoid disturbing soil after planting, since turned soil can bring weed seeds to the surface.
- Water only the base of your plants to keep weeds from getting moisture.
Keep soil disturbance to a minimum after planting. It brings new weed seeds to the surface and encourages their growth.
3. Choosing and Applying Mulch for Long-Term Weed Suppression
Mulch blocks sunlight and keeps soil moist, stopping weed seeds from growing. Applying 2 to 4 inches of mulch creates a barrier that weeds can’t easily penetrate. Using the right type of mulch helps keep weeds down.
Using the right amount also saves you time. You spend more time enjoying your flower beds.
Best Mulch Types for Flower Beds
Bark chips and shredded leaves work well for weed control. They block light effectively and prevent many weed seeds from sprouting. Shredded leaves also add nutrients as they break down, which supports healthy plants.
Some organic mulches, like straw or grass clippings, may contain weed seeds if not properly prepared. Avoid mulches made from fresh compost that still holds viable weed seeds. You want mulch that suffocates weeds, not encourages them.
Inorganic mulches include rubber and landscape fabric under mulch. They block weeds from growing well. These mulches do not improve soil health.
Inorganic mulches can last longer than organic ones. They might not look natural in your garden. They don’t help improve soil over time.
Proper Mulch Depths and Application Tips
Layers between 2 and 4 inches give the best weed protection. Below 2 inches, light still reaches weed seeds. Over 4 inches, mulch might dry out soil or harm plant roots.
Spread mulch evenly, avoid piling it against plant stems to prevent rot. Refresh mulch yearly or when it starts decomposing so it keeps blocking sunlight. Watch for exposed soil and add more mulch if gaps appear.
Applying mulch right after planting or after a pre-emergent treatment increases its effectiveness. The mulch blocks light that weed seeds need to germinate. This reduces your weeding workload by about 90 percent in the growing season.
Seasonal Considerations When Mulching
In fall, use leaf mulch to stop cool-season weeds and cover soil. It helps prevent weed seeds from taking hold during colder months. Layer it thickly enough to keep light from reaching the ground.
Spring mulching supports warm-season flower growth by keeping soil moist and blocking early weeds. Use a fresh layer of bark chips or shredded leaves after the last frost. This step pairs well with pre-emergent herbicides for best results.
During hot summers, the right mulch protects soil from drying out and reduces weed growth. Avoid mulches that decompose too fast, which might require frequent replacement. Pick a longer-lasting mulch if you want less garden work in busy months.
The table below compares typical mulch types, their weed control benefits, and ideal depths.
| Mulch Type | Weed Control | Ideal Depth | Notes |
|---|---|---|---|
| Bark Chips | Strong light barrier, long-lasting | 3 to 4 inches | Good for warm seasons, slow decomposition |
| Shredded Leaves | Blocks light well, adds nutrients | 2 to 4 inches | Best in fall, aids soil health |
| Straw | Moderate weed control | 3 inches | May contain weed seeds; use clean straw |
| Grass Clippings | Limited, if fresh; decomposes quickly | 1 to 2 inches | Use dried; avoid thick layers |
| Rubber Mulch | Blocks weeds, no soil benefit | 2 to 3 inches | Long-lasting, inorganic |
Refreshing mulch yearly keeps your flower beds protected. Keep a 2- to 4-inch layer and adjust based on season and plant needs. Proper mulch stops most weeds and makes flower beds easier to maintain long-term.
4. Using Pre-Emergent Herbicides Safely and Effectively
Pre-emergent herbicides stop weed seeds from sprouting in flower beds. Apply them before weeds appear for best results. Follow product instructions closely to avoid harming your plants.
How Pre-Emergent Herbicides Prevent Weeds
These herbicides form a barrier in the soil that stops weed seeds from growing. They don’t kill existing weeds, so timing matters. This barrier lets your flowers keep growing while weeds can’t start.
Pre-emergent herbicides are most helpful where you have room between plants. They protect the soil but don’t work if sprayed directly on leaves. Many products focus on specific weed types to protect your flowers.
Timing Applications by Common Weed Types
Apply pre-emergent herbicides before weed seeds begin to sprout. For grassy weeds, treat flower beds in early spring right before soil warms up. Broadleaf weed treatments often work best in early fall just before seedlings start.
Check the label for specific timing because it depends on the weed and local climate. If crabgrass is your problem, apply pre-emergent herbicide in spring. Do this when soil temperatures reach 55°F for a few days.
This timing helps stop crabgrass before it grows. Regular reapplication may be needed according to product guidelines.
Safety Tips and Application Best Practices
Wear gloves and avoid inhaling sprays or dust when applying herbicides. Keep children and pets away from treated areas until the product dries. Follow label directions for how long to wait.
This keeps everyone safe from chemicals. Use a shield or cardboard to protect flower leaves if spraying nearby.
Spot-apply carefully to avoid contact with your flowering plants. Use a spreader or drop spreader for even coverage on bare soil. Water the herbicide in lightly unless the product says not to, which helps activate the barrier.
Follow these steps to apply pre-emergent herbicides properly:
- Identify the main weeds in your flower bed to select the right herbicide.
- Read the product label for timing and application details.
- Clear the area of existing weeds before treatment.
- Wear protective gear like gloves and a mask.
- Apply the herbicide evenly over bare soil, avoiding direct contact with plants.
- Use a shield if you must spray close to flowers and shrubs.
- Water the area lightly if the product recommends it to activate the herbicide.
- Keep pets and children off the treated area until safe.
5. Hand Weeding Techniques and Tools for Persistent Weeds
Hand weeding works best on young, small weeds before they grow deep roots. It’s ideal for flower beds where you want to avoid using chemicals. Doing it regularly stops weeds from spreading and becoming tougher to remove.
Best Tools for Efficient Hand Weeding
Using the right tools makes hand weeding easier and less tiring. A hand weeder or a dandelion fork is great for digging up roots. A hoe or a small garden fork helps with loosening soil around tough weeds.
Sharp, clean tools cut through soil smoothly and reduce effort. You’ll need gloves to protect your hands from dirt and possible irritants. Having a small bucket nearby lets you collect weeds quickly and keep your hands free.
Step-by-Step Hand Weeding Techniques
Doing hand weeding properly gives you the best chance to clear weeds completely. Follow these steps to get it done efficiently without harming your flowers:
- Water your flower bed lightly the day before to soften the soil. Soft soil helps pull weeds out with roots.
- Put on gloves and grab your hand weeder or hoe. Work in sections to avoid missing spots.
- Loosen the soil around the weed base using your tool. Get under the root carefully.
- Pull the weed steadily upward, keeping a firm grip on the base. Avoid snapping the stem.
- Check the root zone to ensure no pieces are left behind, as they regrow easily.
- Drop weeds into your bucket to dispose of later. Don’t leave roots in the soil.
- Use your finger or tool to fill holes left in the soil and firm it gently.
- Repeat the process regularly to catch new weeds early.
Pull weeds after watering when soil is soft to get roots out fully.
Root Removal and Preventing Regrowth
Weeds grow back if you leave any root fragments in the soil. Digging deep and steady pulling helps remove as much root as possible. For tough perennial weeds, target the entire root system, not just the visible top.
Look for roots that break off as you dig up plants. Drop these roots in your bucket. Don’t leave any roots behind in the soil.
You can prune your tools occasionally to keep them sharp and effective. Regular hand weeding stops weeds from building strong roots that become impossible to pull.
Missed roots lead to weed regrowth, so dig carefully and don’t rush.
6. Natural and Organic Methods to Prevent and Kill Weeds
Vinegar, boiling water, corn gluten meal, and flame weeding help kill weeds. They also stop weeds from growing without chemicals. You can use these natural ways in your garden.
Vinegar with 5 to 20 percent acetic acid dries out weeds quickly. It can hurt flowers nearby if you spray it carelessly. Be careful where you apply vinegar in your flower beds.
Use it on young weeds and apply on dry, windless days to limit drift. Avoid vinegar on plants you want to keep because it kills by burning the leaves.
Boiling water can kill weeds by causing cell damage where it touches. Pour it slowly directly onto weeds in cracks or bare spots.
Be careful near flowers because boiling water can harm their roots too. This method is free but may require repeat treatments for stubborn weeds.
Corn gluten meal acts as a pre-emergent, stopping weed seeds from sprouting. Spread it in early spring or fall around your flowers. It doesn’t kill existing weeds, so combine it with hand pulling or mulching.
Corn gluten meal feeds your lawn and prevents weeds from growing. A 10-pound bag costs about $10 to $20. It covers around 500 square feet of lawn.
Flame weeding uses a propane torch to burst weed cells. Pass the flame quickly over young weeds without lingering.
This method is fast and chemical-free but needs caution to avoid burning flowers or starting fires. It costs between $30 and $100 for a handheld torch and propane refill.
| Method | How It Works | Best Use | Safety Tips | Cost Range |
|---|---|---|---|---|
| Vinegar | Dries and burns weeds | Young weeds on dry, windless days | Avoid contact with flowers | $3, $10 per bottle |
| Boiling Water | Kills by heat damage | Weeds in cracks or bare spots | Pour carefully near flowers | Free |
| Corn Gluten Meal | Stops seed germination | Pre-emergent in spring or fall | Not a killer for established weeds | $10, $20 per 10 lbs |
| Flame Weeding | Uses heat to kill weeds | Young, small weeds | Avoid fire risks near plants | $30, $100 for torch |
Natural weed killers rarely work as fast or completely as chemical ones. Vinegar and boiling water often need repeat use. Corn gluten meal requires correct timing to stop seed growth.
Flame weeding is quick but takes practice to avoid damage. These methods fit gardeners avoiding chemicals and willing to put in regular effort. Always test on a small spot before broad use to protect your flowers.
7. When Landscape Fabric and Weed Barriers Make Sense
Landscape fabric and weed barriers differ from mulch mainly in how they block weeds. Mulch, like wood chips or bark, covers soil and limits light to weed seeds.
Fabric acts as a physical shield under mulch, preventing weed roots from growing through. Mulch breaks down and enriches soil, while fabric does not.
Landscape fabric isn’t best for flower beds you change often. It makes pulling out plants harder. Choose a different weed control if you like to swap plants.
It feels like a permanent fix, but you may struggle to dig and replant. Fabric can also trap water and soil nutrients, sometimes causing poor plant growth. It works best in beds with permanent shrubs or perennials that won’t need frequent rearranging.
To install landscape fabric properly, clear the bed of weeds and rocks first. Roll the fabric tightly over the soil. Overlap seams by at least 6 inches.
This stops weeds from sneaking in through gaps. Secure edges with landscape staples every 12 inches to keep it from shifting. Cut X-shaped slits only where each plant will go.
Then cover the fabric with 2 to 3 inches of mulch. This keeps the fabric safe from sun damage.
Keep an eye on spots where weeds might poke through cuts or edges. You’ll still need some hand-pulling or spot herbicide to catch these early.
Cardboard laid under 3 to 4 inches of wood mulch also makes a good natural barrier. It blocks light like fabric but breaks down over time, improving soil health.
Inorganic weed barriers cost about $0.30 to $0.65 per square foot, adding around $50 to $100 for a 100-square-foot bed, plus mulch costs. Organic mulches vary but run about $25 to $50 for the same area.
Fabric may save time in beds with large permanent plants. But it can backfire in beds you want to change often.
Thin fabric won’t stop all weeds. Tough grasses can root in mulch on top. You may still see some weeds growing.
Organic mulches might introduce weed seeds but enrich the soil as they decompose. Fabric lasts about 5 to 10 years.
It gets harder to remove over time. It can hold soil moisture and cause rot for some plants.
8. Avoiding Common Mistakes and Maintaining Weed-Free Flower Beds
Weed prevention often fails because of a few common mistakes. One is waiting too long to act once weeds appear.
Another is applying mulch or herbicides unevenly or too thin. Skipping regular upkeep lets small weed seedlings get established and spread fast.
For reliable weed control, set a maintenance schedule and stick to it. Check your flower beds every two weeks during growing season. Look for young weeds.
Remove them promptly before they spread. Refresh mulch layers yearly, adding 2 to 3 inches to block light and keep weeds down.
Use pre-emergent herbicides as directed on the label. Reapply every 2 to 3 months to keep weeds down.
- Pull weeds when they’re small to prevent spreading roots
- Apply mulch thickly, especially after planting or heavy rains
- Use hand tools to uproot stubborn weeds, not just cut them
- Reapply pre-emergent herbicides before seed germination periods
- Plan flower beds with dense planting to shade soil
- Inspect beds regularly for bare soil spots to cover quickly
- Switch tactics if weeds keep returning in the same spots
Your flower bed needs stronger weed control when weeds grow too tough. Act before you continue regular upkeep. Clear the worst patch first by pulling weeds by hand.
Use spot herbicides to treat stubborn areas. Do this early in the season for best results.
After clearing, lay down fresh mulch and restart your regular maintenance cycle. Changing your weed prevention tools or increasing mulch depth helps if weeds resist your current methods.
Don’t skip quick daily checks; early weed removal saves hours later. Small effort can stop a big weed takeover.
Following a steady routine is key. Set calendar reminders so prevention tasks don’t slide. Each small step prevents weeds from seeding and protects your flowers.
Check your weed control plan every season. Find new weed issues early. Change your approach as needed to keep weeds away.
Step-by-Step Action Plan to Keep Flower Beds Weed-Free
Follow this plan to stop weeds from taking over your flower beds. Each step helps you check your progress and stay on track.
- Before planting: Clear the bed of old weeds and debris. You’ll see clean soil ready for planting.
- Day 1: Apply a layer of mulch about 2, 3 inches thick around your plants. Check that it covers the soil evenly.
- Week 1: Set up landscape fabric under mulch in problem areas. Make sure it lies flat without gaps.
- Week 2: Use a pre-emergent herbicide suitable for your plants if needed. Follow label instructions carefully.
- Every 1, 2 weeks: Inspect beds and hand weed any small sprouts. Removing weeds when tiny is easier.
- Monthly: Refresh mulch to keep it dense and thick. You’ll notice less bare soil showing through.
- Seasonally: Turn soil gently to disrupt weed roots without disturbing your plants. Check that no new weeds appear.
- After heavy rain or watering: Inspect beds again for weeds. Pull them before they grow bigger.
Frequently Asked Questions
What Is the Best Way to Prevent Weeds in Flower Beds?
The best way is to use mulch consistently. It blocks sunlight, stopping weed seeds from sprouting and keeps the soil moist. Mulching with organic materials like bark or straw works well in flower beds.
Can Garden Edging Help Prevent Weeds in Flower Beds?
Yes, garden edging acts as a barrier. It stops grass and weeds from creeping into flower beds. It also makes it easier to mow nearby areas without disturbing the beds.
Are Coffee Grounds Effective for Weed Prevention in Flower Beds?
Yes, coffee grounds can help. They create an acidic surface that some weeds find hard to grow in. Use them in thin layers mixed with mulch to avoid mould issues.
Can Sheet Mulching with Cardboard Eliminate Weed Problems Completely?
No, some weeds can still grow through cardboard and mulch. However, this method greatly reduces weed growth by blocking light and smothering existing weeds. It’s highly effective if done well.
Does Regular Hand Weeding Prevent Flower Bed Weeds Long Term?
Hand weeding helps, but it’s not enough alone. Pulling weeds before they seed reduces future problems. Combine hand weeding with mulching for better, longer-lasting control.
Are Pre-Emergent Herbicides Safe for Use in Flower Beds?
Yes, if used according to instructions. They stop weed seeds from germinating but won’t kill established weeds. Always follow label directions and protect your plants.
Final Thoughts
Weed prevention in flower beds works best when you stay consistent. Starting with clean beds and keeping mulch thick limits weed growth. Now, go check your flower beds and pull any small weeds before they spread.