How to Use Tumbler Compost Bin for Faster, Cleaner Composting: A Complete Guide
Wondering how to use tumbler compost bin to make compost faster and cleaner? Start by choosing the right size tumbler that fits your household waste. Feed it every 1 to 2 days.
Stop when it’s 4 inches from full. This keeps the process going smoothly.
Turning the tumbler properly is key. Spin it every 3 to 5 days. This keeps the compost aerated.
It also helps build heat inside. Avoid turning it too often or too little, or the compost will slow down.
Keep an eye on the temperature. Aim for 100°F to 130°F for faster composting. But don’t let it rise above 160°F. This range helps break down waste quickly without killing the good microbes.
Key Takeaways
- Choose a tumbler size based on how much waste you produce weekly.
- Feed your tumbler every 1-2 days until about 4 inches from the top.
- Turn the tumbler fully every 3 to 5 days for best heat and aeration.
- Keep compost temperature between 100°F and 130°F for speedy breakdown.
- Don’t spin the tumbler more than every 3 days to protect beneficial microbes.
- Avoid compost temperatures above 160°F to prevent killing helpful organisms.
What Is a Compost Tumbler and How Does It Work

A compost tumbler is a sealed drum-shaped bin you rotate to mix waste. It holds kitchen scraps and garden trimmings inside a closed container. Unlike a stationary compost pile, tumblers keep the materials enclosed and tilted on an axis.
Turning the drum helps speed up composting by mixing fresh and older materials. This moves air through the pile and speeds breakdown by microbes. The faster spinning keeps moisture inside the bin.
It keeps heat even too. This speeds up decomposition compared to a still bin.
Most compost tumblers have a drum or barrel. The barrel sits on a frame. It has handles or levers for spinning.
The drum has a door for adding waste. You spin it several times every few days.
That mixes the compost inside well. This spinning reduces the work of shoveling or using a pitchfork to turn compost piles.
Rotating the drum spreads oxygen evenly through the compost mixture. Oxygen feeds the bacteria and fungi that break down waste. More oxygen and steady heat help compost faster.
This speeds up composting to weeks, not months. Piles without tumblers take longer.
The sealed design retains heat, helping microbial activity even in cooler weather. Some tumblers have insulated walls to keep a steady temperature inside. This feature costs more but lets you compost all year round without turning cold.
Size and capacity vary widely between models. Some smaller tumblers hold a few cubic feet, fitting patios or balconies. Larger tumblers hold about 100 gallons.
They fit bigger gardens well. These models make more compost at once.
One downside of tumblers is the mixing of fresh and finished material. This can make it harder to separate fully decomposed compost unless the tumbler has two compartments. However, many gardeners find tumblers save more effort overall by cutting down manual turning.
In general, tumblers suit gardeners who want faster compost with less physical work. It may cost between $50 and $300 depending on size and insulation. Investing in a sturdy, well-ventilated drum with easy handles makes the spinning easier and more effective.
Choosing the Right Compost Tumbler for Your Needs
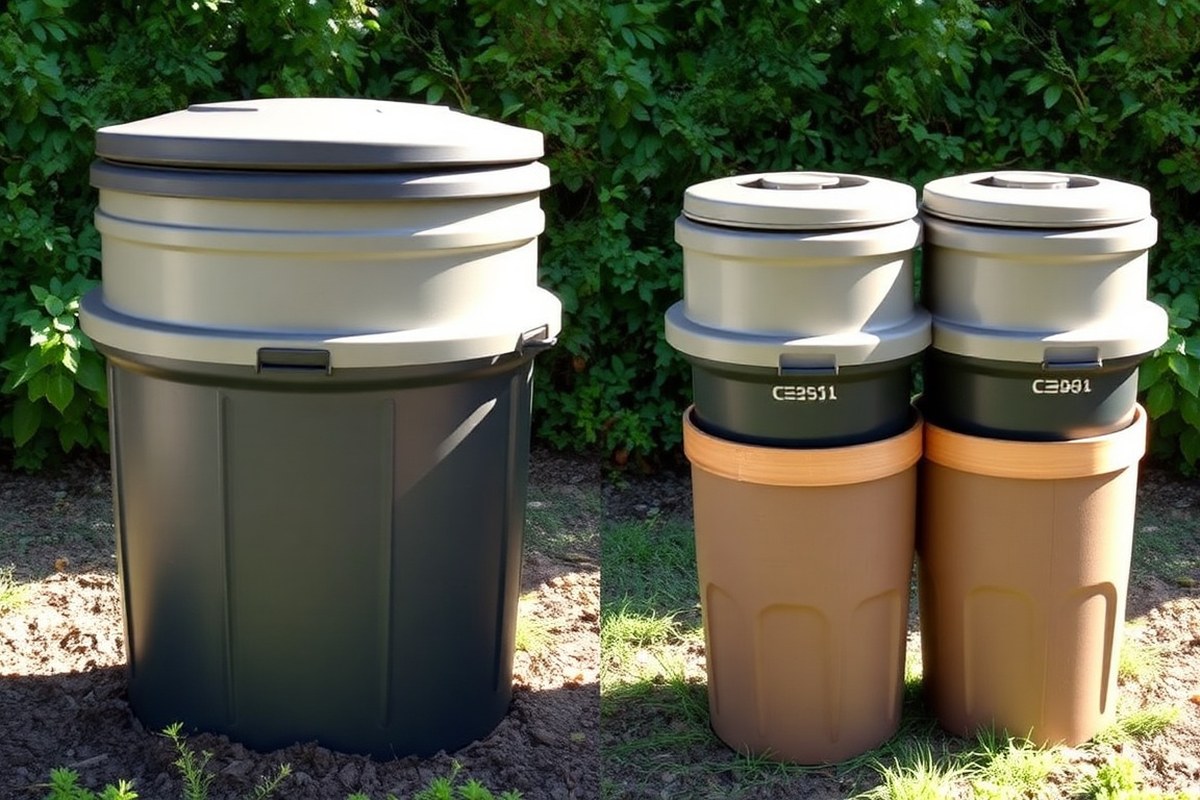
Pick a compost tumbler size based on your household’s weekly waste. For one to four people, small tumblers covering 2 to 4 gallons of waste work well. Bigger families or shared setups need tumblers holding 6 to 8 gallons.
These tumblers can handle more waste at once. This size fits multiple users easily.
Single and dual-chamber tumblers serve different composting habits. Single chambers suit batch composting where you fill, wait, then empty the whole bin. Dual chambers let you add waste to one side.
The other side breaks down compost at the same time. This setup works well for continuous use.
| Model | Household Size | Chambers | Capacity | Best For |
|---|---|---|---|---|
| Jora JK125 | 1 to 4 people | Dual, insulated | 4.5 cu ft | Continuous composting |
| Jora JK270 | 4 or more people | Dual, insulated | 9.5 cu ft | Continuous composting |
| Jora JK400 | Larger households, shared use | Dual, insulated | 14.2 cu ft | Continuous composting |
| EZ Compost Wizard Jr. | Varies | Single | 7 cu ft | Batch composting |
| EZ Compost Wizard | Varies | Single | 12 cu ft | Batch composting |
Focus on features like insulation and ease of turning. Insulated tumblers keep compost warm, speeding breakdown, especially in cooler climates.
Make sure your tumbler sits on level, firm ground to prevent tipping while spinning. Position it close to your kitchen or garden for easy access.
Choosing a tumbler with a capacity that matches your waste production saves time and effort. You risk slow composting if the tumbler is too small and overfilled. Overfilling makes turning harder and reduces airflow, causing odor and slow decay.
Don’t fill the tumblers beyond the turn bar inside each chamber. Overfilling messes with aeration and slows composting.
Starting Your Compost Tumbler: Materials and Setup
Place your compost tumbler in a sunny spot. Load it with the right mix of organic materials.
Chop your scraps small and balance greens with browns. Add some soil or finished compost to jump-start decomposition.
Ideal Location and Ground Surface
Place your compost tumbler where it gets full sun all day. The warmth helps materials heat up and break down faster. Put your tumbler on a flat, stable surface.
Use compacted soil or crushed gravel. This helps keep it steady and easy to spin.
Avoid rocky or muddy ground to keep your tumbler clean and accessible. Good air circulation around your tumbler also helps prevent damp smells. Leaving 6 to 12 inches of space around it promotes airflow and keeps pests away.
Preparing Browns and Greens Mix
Gather kitchen scraps, grass clippings, and garden waste as greens. Add shredded cardboard, dried leaves, or straw for browns. Use two to three parts brown to one part green.
Measure by volume for the best balance. This keeps your mix dry enough.
Chop or shred all materials into pieces about 1 to 2 inches in size. Smaller bits compost faster since microbes can work better. Adding a scoop of garden soil or finished compost adds helpful bacteria and fungi.
Loading the First Batch
Start filling your compost tumbler on one side to make mixing easier. Layer your materials by adding greens first, then cover them tightly with browns. This cover reduces odor and keeps critters out.
Stop adding materials when the tumbler is nearly full. Let the compost mature untouched inside the drum. Turning too soon or too often slows down the process and causes odors.
- Place the tumbler in a sunny area with a stable, flat base.
- Collect and chop greens like fruit scraps and grass clippings.
- Gather browns such as shredded cardboard and dry leaves.
- Mix two to three parts browns to one part greens by volume.
- Add chopped greens to the tumbler first on one side.
- Layer chopped browns on top of the greens for coverage.
- Add a small scoop of garden soil or finished compost.
- Close the tumbler and stop adding new materials once full.
How and When to Turn a Compost Tumbler for Best Results
Turn your compost tumbler every 3 to 5 days. Spin it 3 to 4 full turns each time. This schedule keeps oxygen flowing inside the tumbler.
Microbes get the air they need to work. Too much turning cools the pile and disturbs helpful fungi. Too little slows decomposition and can cause bad smells.
Rotate your tumbler fully 3 to 4 times each time you turn it. This mixes the compost well and stops mats from forming. When the tumbler feels too heavy or stiff, remove some compost or add dry brown material like shredded paper or dry leaves to help airflow and lighten the load.
Maintaining warmth inside the tumbler makes composting faster. Try to keep the pile between 100°F and 130°F. Turning every 3 to 5 days helps sustain this heat by mixing in oxygen. Check moisture often by squeezing a handful of compost.
It should feel like a damp sponge. Avoid having it dripping or too dry. Add water if it seems dry during turning.
You can also spin the tumbler whenever you add new material. This keeps the pile oxygenated and speeds warming up. But don’t turn it constantly.
Turning your tumbler every day can cool the pile too much. Cold compost breaks down slowly and delays results. Compost should be done in about 4 weeks if you follow these steps well.
Remember, finding the right pace is about watching and feeling the compost. A sour or rotten smell means the compost needs more air.
A compost pile that stays cold too long may be too wet or packed down. Adjust turning frequency and material mix as needed to keep it healthy and working.
What to Compost and What to Avoid in a Tumbler Bin
Putting the right stuff in your compost tumbler helps it work fast. Use about two or three parts brown material for every one part green.
Browns are dry and full of carbon. Greens have more moisture and nitrogen, which breaks down compost faster.
Use brown materials like dry leaves, shredded paper, straw, or cardboard. Greens include food scraps, green leaves, and grass clippings. Don’t add grass treated with weedkillers to your compost.
The harmful chemicals can survive. They might hurt your plants once the compost is used.
Some items cause odor, pests, or slow composting in tumblers. Stay away from meat, fish, dairy, bones, fats, and oily foods.
These materials attract fruit flies and create foul smells. Unlike some commercial tumblers that handle meat, your home tumbler does not.
- Dry leaves, shredded paper, straw for brown materials
- Fruit and vegetable scraps, fresh green leaves for green materials
- Fresh grass clippings without chemicals
- Herbivore manure (like from rabbits or horses) is okay
- Wood chips and small branches for extra carbon
- No meat, fish, dairy, bones, or oily foods
- Skip grass treated with broadleaf weedkillers
Never put food scraps with oils, fats, or meat in your tumbler. These cause bad smells. They also attract pests you don’t want around.
Stockpile brown materials near your tumbler so you can balance out green scraps easily. Balancing prevents your compost from becoming too wet or slimy. Compost piles too wet can get stinky and slow to break down.
Remember to keep the volume ratio near 60% brown and 40% green. That balance gives microbes the right mix of carbon and nitrogen. These easy rules stop problems like bad smells and fruit flies.
They also help your compost break down faster. Following them makes your tumbler work better.
Monitoring Compost Progress: Moisture, Temperature, and Timeframes
Check the moisture by squeezing a handful of compost. It should feel like a wrung-out sponge, moist but not dripping water.
Too wet means you need more dry materials like shredded paper or leaves. Too dry means add some water evenly before turning the tumbler.
To check temperature, use a compost thermometer. Insert it into the center through the tumbler’s opening.
Ideal temperatures are between 100°F to 140°F. This warmth speeds up decomposition by encouraging beneficial microbes. Temperature drops below 90°F or stays over 160°F, slow composting or kill microbes.
Compost in a tumbler usually takes 4 to 8 weeks to finish. Warmer weather and regular turning speed this up.
Cold weather slows the process, so turn more often and keep moisture balanced. Larger batches might take longer, especially with slow-breaking materials like cotton fabric.
Look for compost that is dark brown or black and crumbly. You shouldn’t see recognizable food scraps or large plant pieces. It will smell earthy, not sour or rotten.
Some tough materials break down slower. So a few small bits might remain even in finished compost.
Watch for signs your compost needs help. It may smell bad. It might feel soggy or show visible mold.
These mean too much moisture or poor aeration. So open the tumbler and add dry ingredients. Turning the compost every few days helps keep air flowing and moisture even.
The timeline you can expect: check moisture and temperature every 3 to 5 days. Turn the tumbler at least twice a week to mix materials.
After about 4 weeks, start looking closely for crumbly texture and uniform color. By 8 weeks, your compost should be ready to use or cure further.
Using Dual-Chamber Compost Tumblers for Continuous Composting
Dual-chamber compost tumblers let you work in two batches at once. You add fresh material to one chamber while the other one breaks down. This keeps your composting steady and saves time.
How Dual Chambers Work
Each chamber is a separate drum you can spin independently. You fill one chamber with fresh scraps and turn the other chamber as it decomposes. This setup means you always have compost in progress while starting fresh material.
Both chambers have vents for airflow and usually spin on a center axle. You’ll want to keep an eye on moisture and temperature in each chamber. Managing them separately helps you avoid the common issue of material not breaking down evenly.
Feeding and Turning Schedule
Follow a clear routine to keep each chamber active and healthy. Add fresh greens and browns to the empty chamber while the other cooks. Turn the chamber every three days to mix air and speed breakdown.
Here are the basic steps for managing your dual-chamber tumbler:
- Load fresh kitchen scraps and yard waste into the empty chamber.
- Close and seal the chamber to keep critters out.
- Turn the other chamber every three days to aerate compost.
- Check moisture; add water if it feels dry or add dry material if too wet.
- Monitor temperature; hot compost will be between 110 to 160 °F.
- Harvest finished compost after about 4 to 6 weeks of active tumbling.
- Switch chambers when the active batch is done, beginning the cycle again.
This method works well for small-space gardeners who want constant compost. You avoid waiting months to finish material in one big batch.
Advantages over Single Chambers
Dual chambers let you compost continuously without downtime. You always have one batch ready or nearly done while a fresh one starts. Single chambers mean starting over only after a long wait.
They also make managing volume easier. Since tumblers have small capacity, splitting your scraps keeps material moving and space free. Dual chambers reduce odor and pest risks by sealing fresh material separately.
Dual-chamber tumblers usually cost more, around $150 to $250. But the faster turnover and cleaner process save you time and effort overall. They fit gardeners serious about composting without messy piles or long waits.
Harvesting Finished Compost and Using It Effectively
Finished compost comes out dark, crumbly, and smells earthy. Removing it from your tumbler is simple if you rotate with care. Store it in a ventilated container to cure before using it.
Removing Compost Safely
Check that the compost looks ready: it should be dark and crumbly. Avoid scooping compost if it’s still wet or smelling sour. This means it needs more time or turning to break down.
Loosen the compost inside the tumbler by rotating it gently. This makes it easier to empty. If your tumbler has a hatch, open it carefully to avoid spilling.
- Wear gloves to protect your hands from debris and pests.
- Rotate the tumbler slowly to break apart compacted material.
- Open the hatch or lid fully so compost can fall out easily.
- Use a small shovel or your hands to scoop compost into a ventilated tote or bin.
- Check for any unfinished materials and set those aside to return to the tumbler.
- Close the tumbler tightly to keep pests out and moist inside for the next batch.
Do not remove compost if it still feels warm or smells bad. It isn’t ready yet.
Storing or Curing Compost
Put your finished compost in a ventilated tote or a protected pile. Let it cure for two to three weeks to stabilize nutrients and let beneficial fungi grow. This curing helps make compost safe against pathogens.
Place the container in a shaded area close to your garden beds for easy use. Cover it loosely with a breathable cloth or mesh to keep bugs out but allow airflow. Avoid sealed plastic bags because they trap moisture and cause rotting.
Dormant compost can last months if kept dry and cool. Use a known bin or spot exclusively for curing to prevent mixing fresh scraps. Check it occasionally to make sure it stays crumbly and smells fresh.
Making and Using Compost Tea
Compost tea helps feed plant roots with valuable nutrients and microbes. Use cured compost and non-chlorinated water to avoid killing microbes. Steep one part compost in five parts water for about 24 hours.
Stir the mixture a few times to help oxygenate it and release nutrients. Strain the tea through a fine cloth before applying it to soil or spraying onto leaves. Use it fresh to get the best effect.
Apply compost tea during early morning or late afternoon to avoid leaf burn from the sun. Use a watering can or spray bottle for easy application. This boosts soil life and helps your plants grow stronger.
Step-by-Step Action Plan
Follow these steps to start your compost tumbler right. Check progress as you go to keep things on track.
- Day 1: Add equal parts green and brown materials. Make sure the mix is about half and half.
- Day 2: Give the tumbler your first turn. It should spin easily without lumps.
- Week 1: Check moisture. The compost should feel like a wrung-out sponge.
- Week 2: Turn the tumbler three times this week. You should smell earthy, not rotten.
- Week 3: Watch the temperature. It should rise above 100°F if active.
- Week 4: Add new scraps only if the tumbler is well mixed and not too full.
- Week 6: Look for dark, crumbly compost with no food pieces. It’s ready to harvest.
- After harvesting: Use the compost in garden beds or pots to feed your plants well.
Frequently Asked Questions
What Should You Not Put in a Compost Tumbler?
Avoid meats, dairy, oily foods, and pet waste in your tumbler. These materials attract pests and cause odors that spoil compost quality.
How Long Can You Leave Compost in a Tumbler?
Compost can stay in a tumbler for several weeks to a few months. Stop adding material once it’s nearly full and let it mature.
Should I Put My Compost Tumbler in the Sun or Shade?
Place your tumbler where it gets partial sun or dappled shade. Sun helps heat the compost for faster breakdown. But too much heat can dry it out.
What Is the Disadvantage of a Compost Tumbler?
Tumblers need to be turned regularly and have mechanical parts that might wear out. They also hold less material than large static bins.
How Often Should I Turn My Compost Tumbler?
Turn your tumbler every few days to mix materials and add air. Regular turning speeds up decomposition and prevents smell.
Can I Compost Weeds in a Tumbler Bin?
You can compost weeds if they haven’t gone to seed. Otherwise, avoid them to prevent spreading weed seeds in your garden.
Before You Go
A tumbler compost bin speeds up turning waste into healthy soil. Keep your mix balanced and turn regularly for best results. Start today by adding your first materials and spinning the drum.