How to Attach Fence to T Post: 8 Reliable Methods for Strong Fencing
How to attach fence to T post depends on your fence type. Use heavy-duty wire or metal clips to secure wood panels tightly. This prevents looseness and keeps the wood firmly in place.
Keep your fastenings tight to improve fence strength and stability. A strong fence resists wind and animals pushing it over. It holds steady for a longer time.
Space T-posts 8 to 12 feet apart for best support. Let wood fence boards overlap each post by about 3 feet. This overlap adds extra strength and durability to the fence.
Drive T-posts 18 to 24 inches into the ground for a solid base. This depth stops posts from loosening during freeze and thaw cycles. It keeps your fence standing straight and secure.
Key Takeaways
- Use metal clips or heavy wire to fasten wood panels securely to T posts.
- Space T-posts 8 to 12 feet apart for standard fences to balance stability and cost.
- Drive T-posts 18 to 24 inches deep for solid support and long life.
- Overlap fence boards at least 3 feet on each side of T posts to add strength.
- Check your local frost line to adjust post depth and prevent heaving.
- Use treated wood boards at least 1.5 inches thick for durability and strength.
1. How to Attach Wood or Panels to T-Posts Securely

You can attach wood or fence panels to metal T-posts. Use wire, zip ties, or screws depending on the material. Choose based on the strength you need.
Combining methods often provides firmer, longer-lasting holds. These options work well for garden fences, panels, or temporary barriers.
Using Metal Wire or Hog Rings
Metal wire or hog rings offer strong, durable attachments for wire fencing or chain link panels. Use fencing pliers to twist wire or close hog rings tightly around the post and fence. This mechanical grip resists wind and animal pressure well.
Wire or hog rings are low-cost and reusable, fitting tightly to prevent sagging. They’re best for wire mesh or chain link fences.
The wire can wrap easily around the post studs. This makes attachment simple and secure.
- Cut a length of 12- to 14-gauge steel wire for your fence. You can also choose hog rings that fit your fence size.
- Wrap the wire around both the T-post and the fence panel at the intersection point.
- Use fencing pliers to twist the wire ends tightly together or close the hog ring securely.
- Check tension to avoid slack that could let panels shift or sag.
- Repeat at least every 12 to 18 inches along the fence panel for even support.
Attaching with Heavy-Duty Zip Ties and Plastic Clips
Heavy-duty zip ties and plastic clips provide flexible, easy-to-use options for wood or plastic fencing. Zip ties can be threaded through pre-drilled holes or wrapped around posts and boards. Plastic clips designed for fencing slide over T-post studs and lock the panel in place.
Ties and clips work well on lighter fences or where you want quick installation. They resist corrosion but may degrade in prolonged sun exposure. Check often and replace ties as needed.
- Position the wood board or panel against the T-post at the desired height.
- Thread a heavy-duty zip tie through a hole or around the post and fence material.
- Tighten the zip tie securely, leaving no slack for movement.
- Use plastic clips by hooking them over the T-post studs with the panel between.
- Fasten a zip tie or wire through the clip if extra holding power is needed.
- Space ties or clips about every 12 inches along the fence line.
Fastening with Self-Drilling Screws and Metal Brackets
Self-drilling screws with washers offer the strongest fixation of wood directly to T-posts. Drill pilot holes through the wood first.
Then tighten screws into the metal post using a power drill. Adding metal brackets helps stabilize the connection, especially for heavier panels.
These fasteners cost more and take more time to install. But they resist loosening under heavy wind or animal pressure.
Use galvanized screws to prevent rust. This method is ideal for permanent, weather-exposed fencing sections.
- Hold the wood board or panel flush with the T-post.
- Mark and drill pilot holes through the wood for each screw location.
- Position metal brackets as needed behind the wood for added support.
- Drive self-drilling, galvanized screws with washers through the wood and bracket into the post.
- Make sure screws are tight but don’t split the wood. Space holes about 6 to 12 inches apart to avoid damage.
- Check the bracket and wood alignment after fastening for a snug fit.
Combining Methods for Maximum Strength
Use wire or hog rings combined with zip ties or screws. This creates a stronger, more secure hold in harsh outdoor conditions.
The wire holds tension and keeps panels from shifting. The zip ties add flexible support, while screws lock everything in place firmly.
For example, attach a wood panel with screws and brackets first. Then wrap wire around both the post and panel for extra strength.
Finally, add zip ties for extra grip and to prevent rattling. This blend reduces wear and extends fence life.
- Start by fastening the wood or panel with self-drilling screws and brackets.
- Wrap 12-gauge wire or attach hog rings around the post and fence material.
- Tighten the wire or close hog rings firmly with pliers.
- Use heavy-duty zip ties to further clamp the panel and reduce movement.
- Space combined fasteners evenly, about every 12 inches, for balanced support.
- Inspect and retighten connections annually, especially after severe weather.
2. Essential Tools and Safety Gear for T-Post Fence Attachment
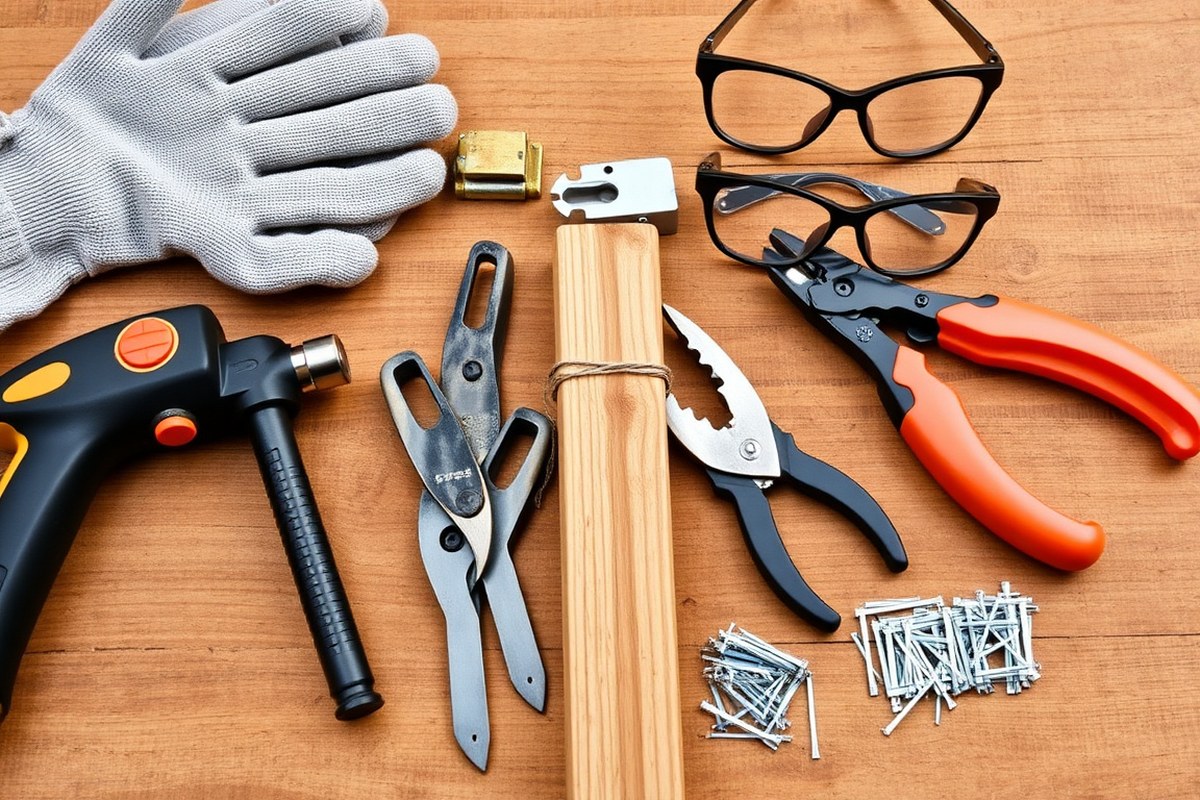
Attaching a fence to T-posts needs the right tools. You also need safety gear to work well. This keeps you safe during the job.
Use a tape measure to mark post spacing. Space posts usually 8 to 12 feet apart.
A string or chalk line helps keep the fence line straight. A spirit level helps make sure your posts stand up straight.
Driving the posts into the ground is a big part of the job. A post driver speeds up the task. You can use a manual or air-powered one.
The 98-E T-Post Driver is an example. This tool lowers injury risk and makes setting posts faster. It helps a lot if you have many posts.
- Tape measure for accurate post spacing and fence line layout
- String or chalk line to mark a straight fence line
- Spirit level to keep posts vertical
- Manual or air-powered T-post driver for fast, safe post setting
- Wire cutters or snips to trim fencing wire or plastic fencing
- T-post clips or fencing staples based on fence type and wood attachment needs
- Heavy gloves to protect your hands from sharp metal and splinters
Safety gear plays a big role in preventing common injuries. Gloves guard your hands from cuts and blisters.
Safety glasses protect your eyes from flying debris when cutting wire or driving posts. Wearing sturdy boots with good grip reduces the chance of slips or impact injuries.
Special tools like an air-powered post driver definitely save sweat and time. Use special clips when installing a plastic fence. These clips allow the fence to expand.
They help the fence move with temperature changes. Those clips slide onto the T-post easily and hold plastic fencing without damaging it.
Always wear gloves and eye protection when handling wire or driving posts to avoid injuries.
3. Setting and Installing T-Posts Correctly for Strong Fencing
Drive T-posts deep enough so the anchor plate is fully buried. Space posts 12 to 16 feet apart for proper support. Use a level and string line to keep posts aligned on uneven ground.
Determining Proper Post Depth
Drive each T-post until the anchor plate at the bottom is fully below the surface. This prevents the post from pulling out or shifting. You live where frost reaches deep.
Drive posts below the frost line. This prevents them from rising each winter.
Using a post driver is the easiest way to reach the correct depth safely. Use a tape measure to check the depth.
Make sure the anchor plate sits 6 to 12 inches underground. Posts driven too shallow will wobble or tilt over time.
In very hard or rocky soil, try softening the ground slightly with water before driving posts. Concrete footings add extra strength. They are usually not needed for standard T-post fencing.
Spacing T-Posts for Different Fence Types
Spacing affects fence strength and appearance. For typical wire or mesh fences, place T-posts 12 to 16 feet apart evenly. Heavier or taller fences may need closer spacing for support.
Measure with a tape before you start. Mark your fence line using spray paint or stakes at the right intervals. Keeping the spacing consistent ensures your fence will stay straight and prevent sagging between posts.
Attach wood panels or heavy gates? Reduce post spacing to about 8 to 10 feet. This gives the fence better stability where extra weight is attached.
Aligning Posts on Uneven or Rocky Ground
Set a string line at fence height along the entire fence path. Use a level on each post to keep it vertical and adjust immediately after driving it. This prevents lopsided or crooked fencing later on.
On slopes, follow the terrain by stepping the fence down in sections. Or angle posts slightly. Avoid forcing posts straight on very uneven ground, which causes pressure and warping.
Dig small holes for posts on rocky soil if driving isn’t possible. Set posts in these holes and pack soil tightly around them to hold them steady.
- Measure and mark your fence line carefully with stakes or spray paint.
- Decide your post spacing based on fence type, generally 12 to 16 feet apart.
- Set a string line at fence height along the marked line for alignment.
- Position each T-post at the marked spots, orienting the anchor plate against the pull direction.
- Use a post driver to push each post deep enough. Make sure the anchor plate is fully buried. Check depth with a tape measure.
- Keep each post vertical using a level. Adjust as you drive it in to stay aligned with the string line.
- On uneven ground, step posts or dig small holes to keep vertical and aligned.
- Repeat for every post, maintaining consistent spacing and depth for a strong fence line.
4. Comparing Attachment Methods: Wire, Clips, Screws, and Staples
Choosing the right way to attach your fence to T-posts depends on speed, cost, and strength. Wire clips and fence staples are common and affordable.
Screws offer a strong hold but take longer and cost more. Your choice also depends on whether the fence is temporary or permanent.
| Attachment Method | Pros | Cons | Cost (Approx.) | Best Use |
|---|---|---|---|---|
| Wire Clips | Quick to install; secure wire by locking behind studs | Can slip if wire tension is low; may rust without coating | $0.10-$0.30 per clip | Permanent wire fences for livestock |
| Fence Staples (U-nails) | Cheap and widely available; good for wood panels and wire | Less secure under heavy animal pressure; can loosen over time | $0.05-$0.15 each | Temporary or lightweight fencing |
| Screws or Bolts | Strongest hold; resists heavy push and pull forces | Higher cost; needs tools and more time to install | $0.20-$0.50 per screw/bolt | Heavy panels or long-term fencing |
| Plastic or Vinyl Clips | Designed for plastic fencing; reusable; resist weather | Less strong than wire clips; limited to compatible materials | $0.15-$0.40 per clip | Plastic or polyethylene fences, temporary setups |
Use wire clips for heavy animal fences. The clips lock wire behind the post studs. This arrangement keeps fences tight as animal pressure presses wire against the post.
Fence staples are best for light, temporary fences. Drive staples every 6 to 12 inches to avoid sagging.
Screws work well when attaching wood panels to T-posts for lasting strength. They resist shifting or damage during bad weather or by animals. Yet they take more time, since you drill and tighten each screw.
Plastic clips help if you want quick removal later and are using plastic fencing types. They don’t hold up like metal clips under heavy strain.
5. How to Brace Corners and Gates When Using T-Posts
Bracing corners and gates with wood or steel is key for fence stability. Heavy wooden posts or steel pipes resist wire tension better than T-posts alone. Brace posts must be set deep in concrete to keep the fence tight and standing straight.
Constructing Wooden H-Braces
Wooden H-braces anchor corners and gate posts firmly. Use thick pressure-treated wood at least 6 to 8 inches wide to handle wire tension. Attach a horizontal brace between two vertical posts to form a sturdy “H” shape.
The horizontal brace usually sits about 40 inches off the ground. You can build the H-brace by notching the posts and securing with nails or bolts. This method holds the fence wire tight and reduces post movement.
- Select two 8-foot-long pressure-treated wood posts, 6 to 8 inches thick.
Using pressure-treated wood for braces prevents early rot and failure.
Setting and Securing Brace Posts Deeply
Brace posts must go into the ground at least 3 feet deep. Dig holes wide enough for concrete around the post to secure it firmly. Setting braces in concrete prevents them from shifting under wire tension.
The hole should be about 10 to 12 inches in diameter around the post. Pour concrete mix around the post and fill to ground level. Let concrete cure for at least 24 hours before stretching wire or adding tension.
- Dig a hole 3 feet deep and 10 to 12 inches wide for each brace post.
- Place the heavy wood post or steel pipe in the hole upright.
- Pour ready-mix concrete around the post, filling the hole completely.
- Use a level to align the post plumb while setting concrete.
- Smooth the concrete surface and let it cure 24 to 48 hours.
- Inspect posts before applying fence wire tension to ensure stability.
Improper setting depth or skipping concrete leads to leaning and failure.
Installing Diagonal Braces for Added Strength
Diagonal braces connect the corner post to the fence line, adding stiffness. Cut a diagonal wood brace that fits tightly between the posts. Start near the corner post at ground level.
Extend it to the next T-post for support. Secure both ends using nails or bolts to reduce side-to-side movement.
Diagonal braces distribute wire tension evenly and prevent posts from leaning. They are especially useful along longer fence runs or where wire tension is higher. Make sure braces contact solid wood and are fastened tightly to metal posts.
- Measure from the corner post base to the next T-post near the fence line.
- Cut a wood brace at a 45-degree angle to fit this length.
- Attach the brace low on the corner post near the ground.
- Connect the other end of the brace to the adjacent T-post securely.
- Use heavy galvanized nails or bolts to fasten both ends.
- Check that the brace is tight and doesn’t allow post movement.
Loose diagonal braces let the fence sag and reduce overall strength.
6. Common Mistakes When Attaching Fence to T-Posts and How to Fix Them
Sagging fences usually result from corner posts that lean inward. This causes the wire or wood to lose tension and droop. Use a strong H-brace at fence corners to keep posts straight.
It also helps keep the fence tight. This prevents sagging over time.
When T-posts bend or lean, the whole fence line can fail. Drive posts at least 2 feet deep into firm soil. Space them between 8 and 12 feet apart.
Proper depth and spacing make the fence stable. Check posts with a level before attaching fencing. Adding concrete footings can help in loose soil.
- Use heavy-duty fence ties or clips designed for metal T-posts
- Don’t over-tighten wire or straps; it can bend posts
- Replace rusty or broken hardware every few years to keep fence secure
- Attach wood panels with two nails through 2x4s into the top rail for extra strength
- Align posts precisely along a string line before attaching fencing
- Check and tighten ties after winter or heavy wind seasons
- Use galvanized or coated hardware to resist rust and last longer
Hardware failure or rust will loosen your fence. Swap out old clips or ties as soon as you see rust spots.
Stainless steel or vinyl-coated fasteners cost more but can last 10 years or more. Regularly inspect the fence and tighten or replace parts to prevent small problems from turning serious.
Sagging, leaning, or loose attachments take time and small fixes to avoid. Proper post setting, strong braces, and the right clips keep your fence sturdy. Check your fence hardware every few years to catch problems early.
Maintaining hardware helps the fence last longer. It reduces the need for big repairs later.
7. Adapting Attachment Methods for Different Fence Materials
Wood fences need strong fasteners like heavy wire or U-nails. Twist the wire tightly around the T-post to keep boards secure. Use wood boards at least 1 1/2 inches thick and 4 inches wide for strength and stability.
Plastic or vinyl fences require lighter, corrosion-resistant clips made just for T-posts. These plastic clips snap on quickly without damaging the fence material. They work great with vinyl fencing because they hold firmly.
These fasteners also allow some movement during weather changes. That helps prevent cracking or breaking of the fence.
Wire fencing needs special wire clips that wrap tightly around both the post and the wire. Use clips designed specifically for metal fencing to prevent slipping or sagging.
When posts are spaced wider than 12 feet, add fiberglass stay posts every 50 feet. They keep the wire from sagging between main steel posts.
Temporary or lightweight fencing benefits from using plastic or vinyl panels attached with plastic clips. These fences are easy to install and remove. Simply snap the clips onto the T-post for quick attachment.
This saves time when installing or removing the fence. Clips make setting up short-term fences easier and faster.
Always match clips and fasteners to the fence material to avoid damage or weak spots. Wood boards need sturdy nails or wire, while vinyl gets light plastic clips.
Wire fences demand tight metal clips for proper tension and stability. Using the right hardware keeps your fence solid and lasting.
Cost varies: plastic clips often run a few cents each. Heavy-duty wire or U-nails might be 10 to 30 cents apiece.
Fiberglass stay posts cost more but add necessary support when spacing is wide. Choose based on fence type, length, and expected load to avoid fence sagging or failure.
8. When to Call a Professional for Fence Attachment Help
Call a professional if your fence project involves complicated terrain or large gates. Uneven ground or slopes make it hard to keep T-posts straight and secure. Without proper alignment, your fence may lean or sag.
You should also hire expert help if underground utilities run near your fence line. Professionals use location tools to avoid damaging pipes or cables when setting posts. Digging fences without this knowledge puts you and your property at risk.
Assess your skill level by how comfortable you feel using power tools and heavy equipment. Projects needing precise measurements and heavy post drivers can be overwhelming. Also, large fences stretching over 100 feet often require experienced crews for faster, safer installation.
Pro installation costs can range from $15 to $30 per linear foot. This price includes both materials and labor. Expect some variation based on location and fence type.
This price gets you guarantees on job quality and often longer-lasting results. However, DIY can save money but may cost more if mistakes cause repairs.
For best results, drive T-posts 24 to 36 inches deep. Make sure they’re evenly spaced and lined up straight. This helps keep your fence stable and looking good.
Wood or panels attach smoothly, holding tightly without gaps or wobbling. Poor results include crooked posts, loose fasteners, or fencing that fails in strong winds.
Call 811 or your local utility before you dig. This helps prevent accidents with underground lines. Always check to stay safe and avoid damage.
Heavy bracing at corners and gates is another scenario where pros help. They know how to match wood posts and T-posts securely to handle stress. Proper bracing prevents fence collapse and saves you time fixing broken sections later.
Professional installers bring tools like post hole diggers, levels, and tensioning devices. These make working faster and more precise than typical household gear. In tricky spots, their skill and experience reduce the chance of costly errors.
Step-by-Step Action Plan for Attaching Fence to T-Posts
Follow these steps to get your fence attached securely to T-posts today. Each step helps you build a strong, lasting fence.
- Before you start: Gather all necessary tools like fencing clips, wire, or screws with safety gear. Make sure you have your fence panels and T-posts ready.
- Day 1: Set your T-posts firmly into the ground using a post driver. Check that each post is vertical and spaced evenly.
- Day 2: Choose your attachment method based on the fence material (wood, wire, or panels). For wood, use screws or fence clips. For wire fences, use tension wire or clips.
- Day 3: Attach the fence securely starting from one corner or gate post. Tighten wires or screws properly so the fence doesn’t sag.
- Day 4: Brace corners and gates with additional wood or metal supports. This improves stability and keeps the fence from leaning.
- Day 5: Inspect all connections for loose wires, clips, or screws. Tighten or replace anything loose to avoid problems later.
- After 1 week: Walk the fence line to check for any movement or sagging. Adjust fence tension or add supports where needed.
- After 2 weeks: Re-check safety gear and tools for upkeep. Plan any repairs or enhancements based on your inspection.
Frequently Asked Questions
What Are the Best Fasteners to Attach Wood Panels to T-Posts?
Use 5-inch screws for wood panels; they hold better than nails. This keeps the panel secure and stops wobbling from wind or animals pushing.
Can You Attach Wire Fencing Directly to T-Posts Without Clips?
Yes, but clips or hog rings provide stronger, longer-lasting attachment. They keep wire tight and prevent it from slipping or popping off.
How Far Should You Space T-Posts When Attaching Fence Panels?
Space posts about 8 feet apart for strong support and fewer sagging spots. Proper spacing keeps the fence straight and easier to attach panels securely.
What’s the Best Way to Prevent Fence Panels from Shifting on T-Posts?
Leave a small gap for expansion. Use tight fasteners like cable ties or screws. This lets wood expand without buckling and keeps panels steady.
Can You Attach Vinyl or Plastic Fence Panels to T-Posts?
Yes, but use specialized fasteners suited to plastic to avoid cracks or damage. Soft clips or zip ties work well for lightweight vinyl fencing.
How Do You Protect Wood Panels Attached to Metal T-Posts from Rust or Decay?
Use treated wood and keep metal and wood from touching tightly by using washers or spacers. This reduces moisture buildup that speeds rust and wood rot.
Final Thoughts
Attaching your fence to T-posts the right way secures your property well. Start by setting your posts solidly and using strong attachments for your fence material. Take the first step by gathering your tools and safety gear today.