How to Construct a Garden Box: A Complete Guide with Expert Tips
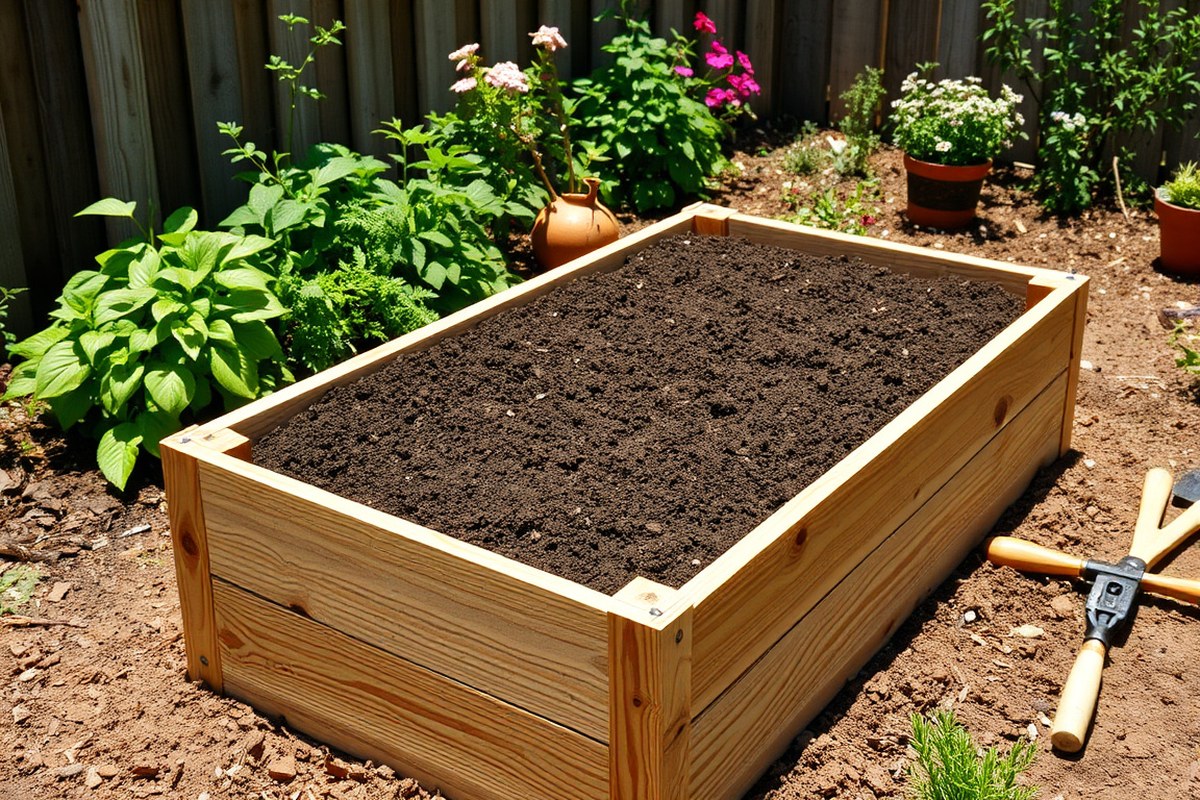
Knowing how to construct a garden box means you can grow fresh veggies and flowers anywhere. Start by picking the right size and good materials to keep your box solid and long-lasting. Use cedar lumber for the walls and bracing.
It builds a strong frame. Cedar also resists rot and pests well.
Choose a sunny spot for your garden box. It needs at least 6 to 8 hours of sunlight every day. Clear the soil where you want to place the box.
Loosen the soil about 8 to 12 inches deep. This helps your plants’ roots grow better. This prep helps water drain and keeps your plants healthy.
Fill your garden box with garden soil and compost. Aim for about 12 inches deep. Add more if you can.
Adding mulch on top keeps moisture in and cuts back weeds. So your plants thrive with less hassle.
Key Takeaways
- Choose a garden box size between 4×4 and 4×8 feet for easy use.
- Use cedar lumber for durable, rot-resistant garden box walls and bracing.
- Pick a location with at least 6 to 8 hours of sunlight daily.
- Loosen soil 8, 12 inches deep before placing the garden box.
- Fill the box with a soil mix rich in compost and nutrients.
- Add a 2-inch layer of hardwood mulch on top to retain moisture.
How to Build a Garden Box Step-by-Step
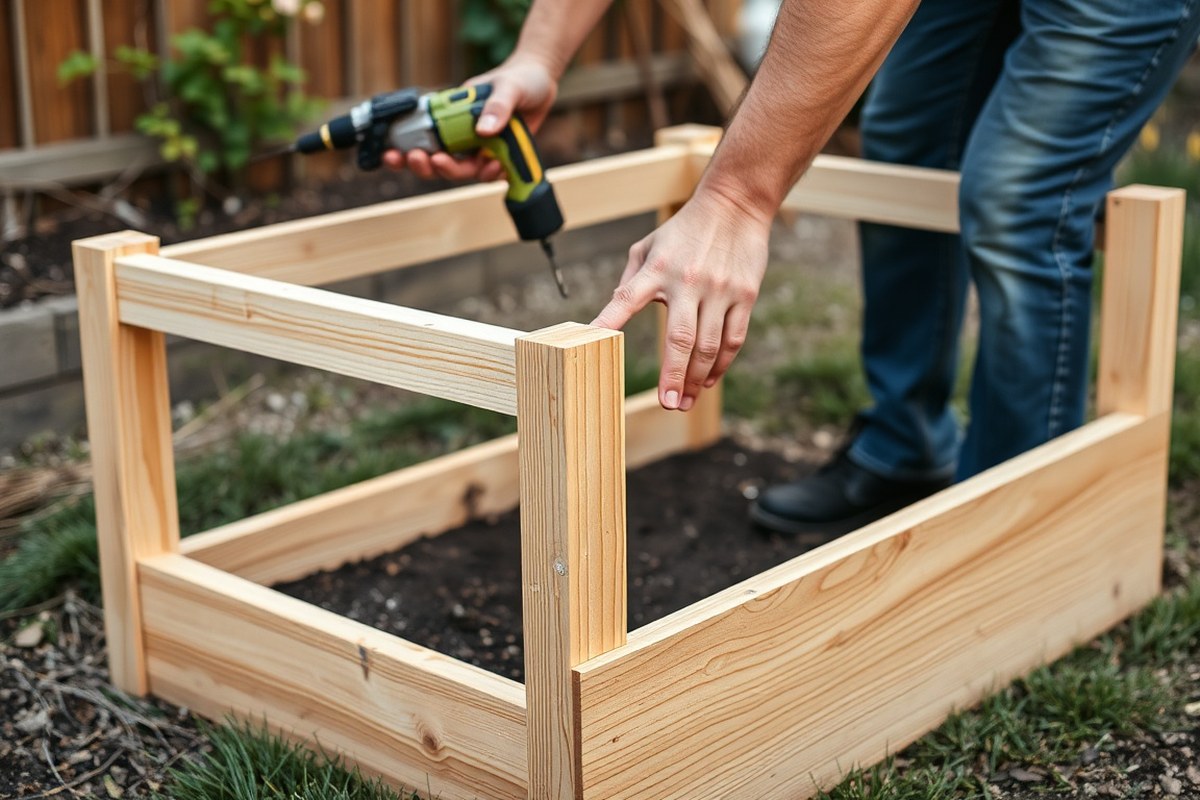
Building a garden box starts with measuring and cutting your wood accurately. Then, assemble the frame by joining the pieces securely with screws. Add corner posts for extra strength and support.
Put in a top trim to give a finished look. These small details improve the garden bed’s durability and style.
Measuring and Cutting Wood Pieces
Measure twice to avoid mistakes before cutting your wood boards. Use a square and measuring tape to mark straight lines on the boards. Cutting accurately helps your garden box fit together tight and stable.
Use a circular saw for straight cuts on wood. For small changes, a handsaw works well.
Pick the saw that fits your wood type. Keep your cuts clean and straight to make assembly easier and the frame sturdier.
Assembling Corners and Frame
Lay out your cut boards in a rectangle on a flat surface before fastening. Use 3-inch galvanized or stainless steel exterior screws as they resist rust. Drive screws straight to avoid splitting the wood.
Secure corners by pre-drilling holes to prevent splitting. You can add a brace inside the frame for extra support if your box is taller. Using a power drill speeds up assembly a lot.
It can take 20 to 30 minutes for a 4×8 frame. This saves you time compared to screwing by hand.
Adding Optional Features
Top trim boards improve stability and give your garden box a neat edge. Cut 1×6 cedar pickets to fit the top edges exactly before screwing them down. Align the trim’s outer edge with the box’s outer edge for a flush finish.
Corner posts reinforce the structure, especially for taller beds. Cut 4×4 posts to match your garden bed height. For 12-inch beds, 14 inches is a good post length.
Attach them inside each corner with screws. These posts also help the soil pressure stay manageable and provide a solid frame.
- Measure the length for four side boards carefully. For a 4×8 box, the boards should be 4 feet long. Mark the boards clearly before cutting.
- Cut the boards cleanly along your marked lines using a saw.
- Arrange the boards on a flat surface to form your box shape.
- Pre-drill holes at corner joins to reduce wood splitting.
- Screw adjoining boards together using 3-inch exterior screws.
- Cut 4×4 posts to your preferred height for corners. Place each post inside the frame at the corners. Secure the posts firmly with screws.
- Measure and cut 1×6 trim boards to fit the top edges of the garden box.
- Screw the trim in place, aligning it flush with the box edges.
Choosing the Right Size and Dimensions
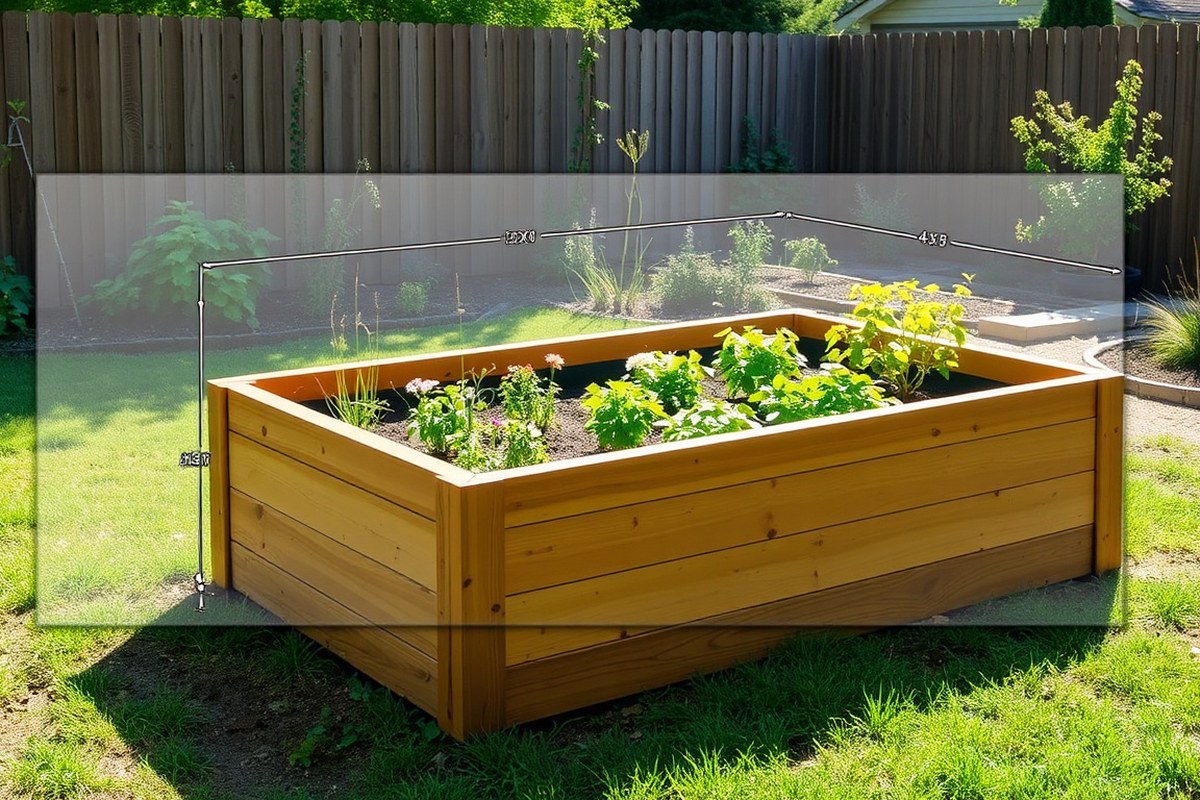
Start by measuring the space where you want your garden box. This helps you choose a size that fits your available area and matches your garden plan. A popular size is 4 feet by 4 feet.
You can reach all parts. This means no stepping into the soil.
Depth matters for root growth. Aim for at least 12 inches deep for most vegetables. You want to grow carrots, potatoes, or deep-rooted plants.
Use 18 to 24 inches of depth. This helps them grow well. Deeper boxes hold more soil, which retains moisture and nutrients better.
Keep the width 2 to 4 feet to avoid stepping inside the box. Four feet is usually the maximum width that allows easy reach from both sides. Wider beds can force you to step on soil, compacting it and making plants less healthy.
Length can vary. 4 by 8 feet beds offer more space for different crops but take up more room.
A 4×2-foot box, 12 inches deep, fits small yards. It works well for greens or herbs. Larger boxes, like 4×8 feet, suit bigger gardens and allow more plant variety.
They need more soil and cost extra materials but give more growing space. Cedar or similar wood costs between $90 and $160.
Prices depend on size and where you live. Building your box takes this budget.
Accessibility is key to reduce strain while gardening. Taller boxes (around 18 inches) let you avoid bending over too much.
This reduces back pain and makes tending your plants easier. Choose height and size based on your comfort and the plants’ needs.
Never make your garden box wider than 4 feet without planning stepping stones. Compacted soil reduces plant health.
Selecting and Preparing Materials for Durability
Choosing the right wood helps your garden box last through weather and soil. Cedar and redwood work great because they resist rot naturally.
Untreated pine is affordable but wears out faster. Avoid treated wood that might leak chemicals into your soil and harm plants.
Using a wood sealant or natural oil extends the life of your box. Apply a non-toxic, plant-safe sealant, especially on cut ends and corners.
This keeps moisture out and slows wood decay. Reseal every year or two for the best protection.
Here’s a simple table comparing common woods and treatments for garden boxes:
| Wood Type | Durability | Treatment | Price Estimate (for 4×8 box) |
Notes |
|---|---|---|---|---|
| Cedar | High | Usually untreated, seal recommended | $70 – $120 | Rot-resistant, smells good, lasts 10+ years |
| Redwood | High | Untreated or natural seal | $80 – $130 | Very durable, natural insect resistance |
| Pine (Untreated) | Low to Medium | Seal strongly recommended | $30 – $60 | Cheapest, but prone to rot in moist soil |
| Treated Wood | Very High | Pre-treated, avoid chemicals for edibles | $40 – $70 | Not recommended for vegetable gardens |
You’ll want corrosion-resistant screws like galvanized or stainless steel. They hold the wood tight and avoid rust stains or breaks. A deck screwdriver or drill with a screwdriver bit helps you work faster.
Essential tools include a saw for cutting boards to size. You also need a drill for making pilot holes and driving screws.
A level makes sure your box sits flat on the ground. Sandpaper smooths rough edges before assembly, keeping the box safer to handle.
Clamps can hold wood pieces steady as you fasten them. They help keep corners square and prevent gaps. Having these tools ready streamlines the build and makes a stronger garden box with long-lasting stability.
Where to Place Your Garden Box for Best Growth
Your garden box needs at least 6 to 8 hours of sunlight a day. Most vegetables and herbs thrive with this much sun. Taller plants, like tomatoes or peppers, grow best in spots with full sun.
Look for a flat place that doesn’t collect water after rain. Avoid low spots where puddles form. Good drainage stops roots from rotting and keeps plants healthy.
You can place a garden box on a patio or balcony if it gets enough sun. Use pots or small raised beds designed for container gardening. Make sure the surface can hold your box’s weight, especially when filled with soil and water.
Before setting your box, check the spot for sunlight during different times of the day. Watch how many hours it stays bright and direct. A sunny fence line, driveway edge, or backyard corner often works well.
Use a garden fork or broadfork to loosen soil inside the box. Dig down at least 8 inches. Work across the entire footprint of your garden box.
This helps roots spread and water drain. Add about 11 inches of gravel or coarse sand for drainage.
This helps if your ground is heavy clay. Put it under your soil mix.
Try to level the ground so the box sits flat. Use a level tool to check each side.
Uneven boxes can cause water to pool or soil to wash out. Move the box if you spot redness or soft spots from standing water.
Grow leafy greens or herbs that handle shade in less sunny spots. Choose these plants when your space has less sun. They do better in shade.
You might also rotate your box during the season to follow the sun path. For tight spots, narrow or square boxes can fit while still giving plants room.
Place your garden box where you can easily reach it for watering and harvesting. This saves effort and helps you keep plants healthy daily. Areas near an outdoor faucet or under a lightweight shade cloth are good choices.
Preparing Ground and Site Before Installation
Preparing the ground well helps plants grow better. It also keeps your garden box stable. Take your time to prepare it right.
Loosen the soil underneath first. Add drainage layers if your soil holds water.
Make sure the site is level and flat. These steps help keep water flowing and the box sturdy over time.
Loosening Native Soil
Breaking up the soil beneath your garden box allows roots to grow deeper and improves drainage. Without loosening, plant roots may struggle to penetrate hard, compacted ground.
Use a garden fork or tiller to break the soil. Dig down 8 to 12 inches deep.
The depth depends on your soil type. Loosening is especially important over clay or packed soils that hold water.
- Clear the site of rocks, weeds, and debris where the box will sit.
- Use a garden fork or tiller to break up soil 8 to 12 inches deep.
- Remove any large clumps or roots from the loosened soil.
- Level the loosened soil roughly to prepare for the next steps.
Never skip loosening soil; compacted ground blocks roots and traps water.
Installing Drainage Layers
Good drainage stops water from pooling around your garden box roots. Adding a gravel layer and optional landscape fabric can help water flow freely away.
Place 2 to 4 inches of gravel at the box bottom if your site drains poorly. Landscape fabric goes on top to keep soil from mixing with the gravel layer.
- Spread gravel evenly within the bottom of your garden box frame.
- Roll out landscape fabric over the gravel and staple it to the box sides.
- Trim excess fabric inside the box to keep it neat and secure.
Use fabric only in wet sites. It slows soil erosion but can hold water otherwise.
Leveling the Site
A level base keeps soil evenly distributed and your garden box steady. Slight slopes are okay to help water drain out. But avoid dropping more than 2 to 3 inches across the frame.
Check levelness with a carpenter’s level before placing the box. Adjust the soil by adding or removing dirt to make the surface flat.
- Place a long level tool across the site where your box will sit.
- Add soil to low spots or remove soil from high spots as needed.
- Compact the soil gently after adjusting to prevent settling later.
- Repeat leveling checks in several spots around the site for accuracy.
Don’t ignore uneven ground; it causes soil to shift and can damage your box.
Filling Your Garden Box with Quality Soil Mix
Use a soil mix of about 50% garden soil and 50% compost. This balance gives your vegetables nutrients and good drainage. Adding 10% perlite or coarse sand can improve drainage.
This is especially true if your garden soil is heavy clay. The amendment helps the water flow better in the soil.
Fill your garden box with this mix, leaving 1 to 2 inches below the edge. This space helps prevent soil overflow when you water.
A soil depth of 10 to 12 inches works well for most vegetable roots. But deeper is better for larger plants like tomatoes.
Layering soil isn’t required if you mix well beforehand. You can start with a base of coarse materials like straw. Use small branches too for extra drainage.
This works well if your garden box is very deep. Then add your soil mix on top for planting.
Fresh soil mix usually allows you to plant right away. Nutrient-rich compost feeds plants without waiting. Still, avoid tight compaction by loosening the soil gently before planting.
Keep soil moist but not soggy. Water slowly so it penetrates deeply and doesn’t wash soil out. Over time, add more compost yearly to keep nutrients high without digging up the whole bed.
Choosing quality garden soil helps avoid poor drainage or low fertility problems. Soil mix for a 4×4-foot box, 12 inches deep, can cost $20 to $40. The price depends on your local area.
This covers enough soil to fill the box. Using compost from your yard or community sources can cut costs.
Planting and Maintaining Your Garden Box
Start planting seeds or seedlings after the last frost date in your area. Check seed packets for exact timing and depth. Plant seeds evenly, then cover lightly with soil to protect them.
For a steady supply of veggies, plant new seeds every 2 to 3 weeks. This keeps your harvest going without long gaps. You can also try companion planting to boost growth and keep pests away.
Water your garden box deeply right after planting. This settles the soil around roots and gives plants a good start.
Raised beds dry out faster. So water often during dry weather, aiming for the soil to stay moist but not soggy.
Use a soaker hose or drip irrigation to water efficiently and avoid wetting leaves. Water early in the morning to reduce evaporation.
Check the soil by sticking your finger an inch deep. It should feel moist, not dry.
Maintain your garden with regular checks for weeds and pests. Pull weeds by hand to stop them from stealing nutrients. Inspect plants weekly, removing dead leaves and damaged stems to keep them healthy.
Each month, spread a thin layer of compost or organic mulch. This helps keep your soil moist and rich. It improves plant growth over time.
This costs little, about $10 to $20 for a bag of compost. Mulch also helps stop weeds and saves watering time.
Every season, remove any plant debris and refresh your soil mix. This prevents diseases and encourages strong growth next year. When your garden box wood looks worn, sand it down first.
Then add a new coat of non-toxic sealant. This can extend its life by years.
Customizing Garden Boxes for Function and Style
Customizing your garden box can boost both function and appeal. Adding vertical structures and protective finishes customizes your space. You can also add features like storage or seating.
These fit what you need best. These upgrades also make your box more enjoyable and practical for growing and relaxing.
Adding Trellises or Vertical Supports
Attach trellises to the north end of your box during the build to avoid awkward retrofitting. Use untreated cedar or rot-resistant wood to match your box for long-lasting vertical supports. Secure the trellis with galvanized screws to keep it stable against wind and plant weight.
Vertical structures let vining plants climb up, saving space. This lets you grow more in a small garden. It keeps plants neat and easier to manage.
This works great for cucumbers, beans, and peas, saving room in smaller garden boxes. Choose a trellis height that fits your plants’ growth.
Most need between 3 and 6 feet tall. This supports healthy growth and easy harvesting.
- Choose trellis height based on plant maturity and space
- Build frames from 1×2 or 1×3 lumber for light support
- Use metal or plastic mesh for additional grip
- Anchor posts deep into soil for stability
- Attach trellis before adding soil or plants
Adding a trellis later often means disturbing plants or soil, so plan early.
Painting and Sealing for Protection
Outdoor-grade, non-toxic paint protects wood from moisture and sun damage. Select light colors to reflect heat and keep roots cooler in hot weather. Paint every outer surface for full protection and recoat every 3-5 years as needed.
Use a clear wood sealer if you prefer a natural look while still guarding against rot. Let paint or sealer dry fully, usually 24-48 hours, before filling the box with soil. This step extends your garden box’s life and keeps it looking fresh.
- Apply primer before painting for better adhesion
- Choose water-based paints safe for vegetable gardens
- Seal all edges and knot holes thoroughly
- Allow time for curing between coats
- Repaint or reseal before each growing season
A proper finish prevents wood warping and decay in wet climates.
Incorporating Benches or Storage
Building benches onto garden box sides creates a comfy spot for planting or relaxing. Use the bench base as hidden storage for tools, gloves, or soil amendments. Ensure bench heights between 16 and 18 inches for comfortable seating and accessibility.
Storage compartments can be simple wooden boxes under a hinged bench seat. Keep compartments ventilated to prevent moisture buildup. Mulching under benches can reduce weeds and drainage issues around the box.
- Attach bench frames securely to garden box sides
- Use weatherproof wood or seal wood for outdoor use
- Plan storage size based on common tools or supplies
- Add removable lids or doors for easy access
- Consider integrated potting shelves or hooks nearby
Combine seating and storage to save space without cluttering your garden area.
Extending Garden Box Life and Avoiding Common Mistakes
Rot often shortens a garden box’s lifespan. Moisture trapped against untreated wood causes decay within months or years. Applying a waterproof wood sealant before you build helps protect wood.
It keeps moisture from damaging the wood. You can also use a wood preservative for extra protection.
Inspect your garden box regularly. Look for soft or crumbling wood, split boards, or loose screws. Early detection lets you fix small issues before they become costly repairs.
- Seal all wood surfaces with waterproof sealant before assembling.
- Place the box on gravel or landscape fabric to improve drainage.
- Keep soil and water inside the box, away from the outside wood surface.
- Use galvanized or stainless steel screws to prevent rust damage.
- Cover your garden box with a tarp or insulating wrap in winter.
- Fix loose boards by tightening screws or adding brackets promptly.
- Replace any rotten or warped wood sections as soon as spotted.
Routine maintenance every three to six months helps extend the box’s life. Clean debris and check sealant layers, especially after heavy rain or winter. Reapply sealant annually or when you see peeling or cracking.
Winter protection prevents frost from damaging the wood fibers inside your box. Use a heavy tarp or bubble insulation wrap around the box during freezing months. This simple step can add years to its lifespan without costing much.
Step-by-Step Action Plan to Build Your Garden Box
Follow this simple plan to get your garden box ready and growing fast. Each step shows what to do and how to check your progress.
- Day 1: Choose a sunny spot with good drainage. Check for at least 6 hours of sunlight per day.
- Day 2: Measure and mark the garden box size on the ground. Use stakes and string to outline the area.
- Day 3: Gather materials like untreated cedar boards and screws. Confirm the wood is straight and rot-resistant.
- Day 4: Assemble the frame using screws and a drill. Make sure corners are square and the box is level.
- Day 5: Prepare the soil mix with compost, topsoil, and vermiculite or peat moss. It should feel loose and crumbly.
- Day 6: Fill the garden box with soil mix. Level the soil and water it lightly until moist.
- Week 2: Plant your seeds or seedlings following spacing instructions. Watch for even soil moisture and healthy growth.
- Week 3 and beyond: Check for pests and remove weeds weekly. Add mulch on top to retain moisture and keep weeds down.
Frequently Asked Questions
What Tools Do I Need to Build a Garden Box?
You need a saw, drill, measuring tape, level, and screws. These help you cut and join the wood accurately for a sturdy box.
Can I Build a Garden Box on a Balcony?
Yes, choose a box with a bottom or use containers to keep soil contained. Ensure your balcony can support the weight of soil and water.
How Deep Should a Garden Box Be for Vegetables?
Aim for at least 12 inches deep soil for most vegetables. This depth lets roots grow well and helps with water retention.
What Wood Types Resist Rot for Garden Boxes?
Cedar and redwood are naturally rot-resistant and ideal choices. They last longer without chemicals and keep your soil safe.
Should I Line the Garden Box Bottom with Plastic?
Avoid plastic liner to prevent poor drainage and root rot. Use landscape fabric instead; it stops weeds but lets water drain.
Can I Add a Garden Box Frame to an Existing Garden Bed?
Yes, adding a frame helps keep soil in place and defines the bed border. Use untreated wood to avoid chemicals leaching into soil.
Final Thoughts
Building your garden box is a clear step toward growing your own fresh produce. Start with choosing the right spot and materials today. Soon you’ll enjoy lifting your first harvest right from your garden box.