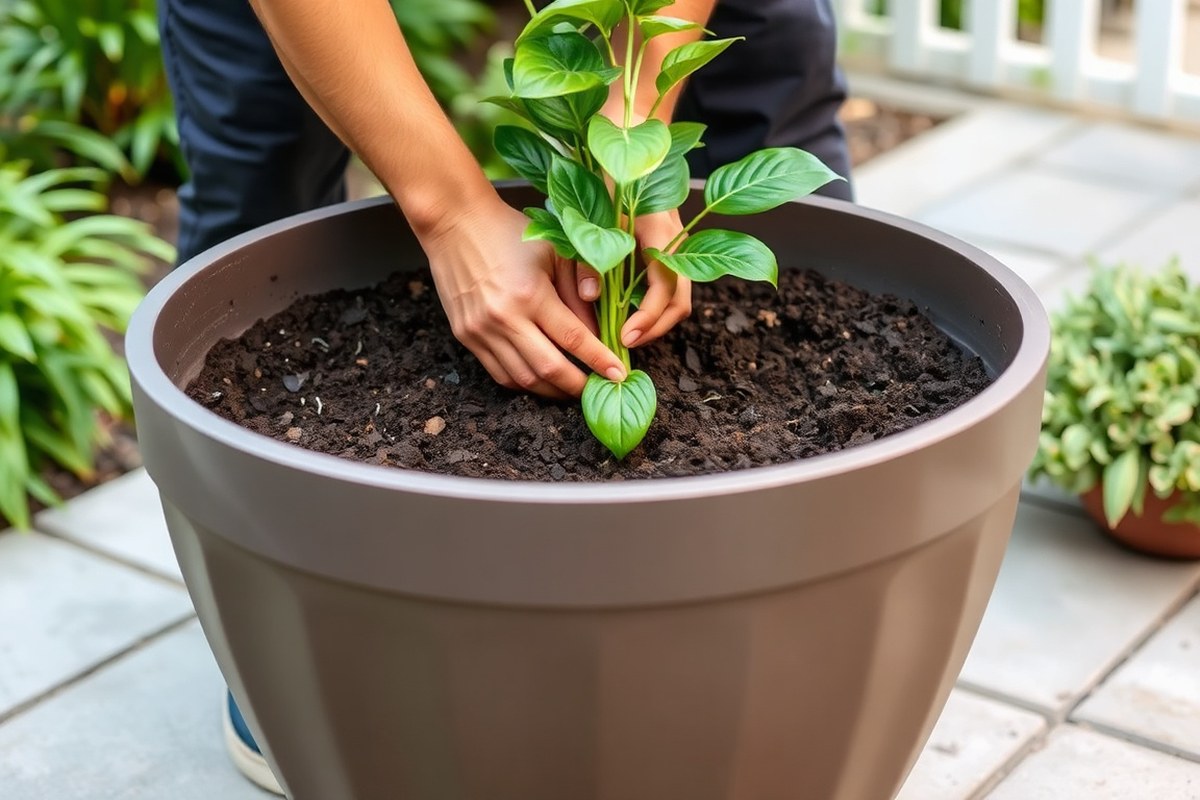
How to Plant a Plant in a Big Pot: Complete Steps and Expert Tips
Knowing how to plant a plant in a big pot helps your plant grow well. You need a pot slightly bigger than the plant’s root ball.
Using a pot 2 to 4 inches larger prevents roots from getting cramped or drowning. This space lets roots spread, supporting healthy growth.
Start by picking a pot with good drainage holes at the bottom. Add a 1 to 2 inch layer of gravel or broken pottery for drainage.
This keeps water from pooling and hurting the roots. Avoid using pots without holes because trapped water can cause root rot.
Choose new soil suited to your plant and keep it loose. Use soil that drains well and holds moisture, depending on your plant type.
Set the plant so the soil surface is 1 to 2 inches below the pot edge. This gap helps prevent water spilling over during watering.
Key Takeaways
- Choose a pot 1 to 2 inches larger than your current plant’s pot.
- Use a bottom layer of 1 to 2 inches of gravel or broken pottery.
- Fill the pot 1 to 2 inches below the rim with fresh soil.
- Plant roots should keep their original soil level after transplanting.
- Pick pots with drainage holes to avoid water buildup and root rot.
- For fast-growing plants, select pots up to 4 inches bigger in diameter.
How to Plant a Plant in a Big Pot Step-by-Step
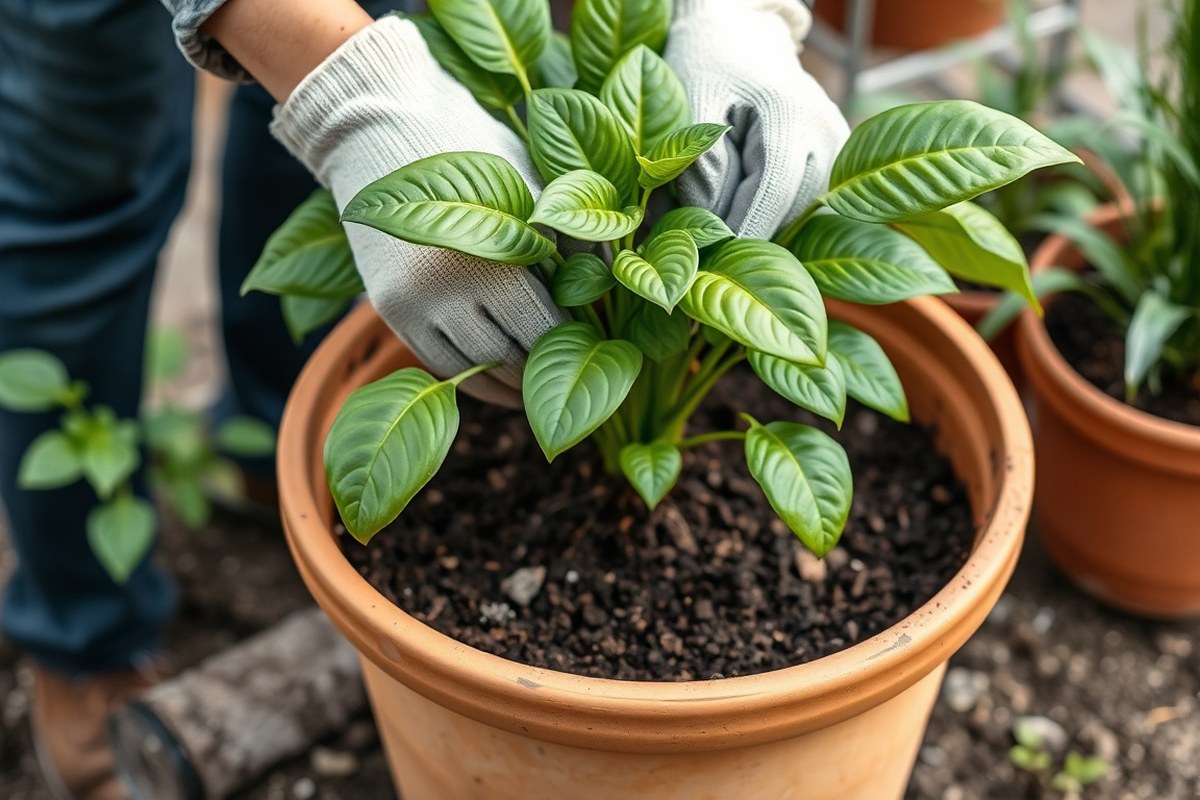
Moving a large plant into a big pot takes care and attention. You want to avoid stressing the plant and give it room to grow well. Follow these steps to do it right, including preparing the roots and watering correctly.
Start by checking the plant’s root health. Gently pull apart very dense or circling roots with your fingers. This helps roots spread into the new soil.
Avoid damaging them too much. Use the right pot size, something at least 14 inches wide works for big plants.
- Prepare the pot: Put broken pottery or big stones at the bottom. This saves soil and makes the pot lighter. Then, add fresh potting soil until it’s about 3 to 4 inches deep.
- Remove the plant from its current container: Turn the pot sideways and tap the bottom gently. Slide the plant out by holding the base of the stems. Support the root ball with one hand.
- Check and loosen the roots: Inspect for any dead or rotten roots and trim them. Tease circling roots gently to help them grow outward in the soil.
- Place the plant in the new pot: Set the root ball on top of the soil. Keep it 1 to 2 inches below the pot’s edge. This stops soil from spilling and makes watering easier.
- Fill around the roots with soil: Add potting mix around the sides. Press down lightly to remove air pockets. Keep the plant straight as you fill.
- Water thoroughly: Water until you see excess draining out of the bottom. This settles the soil and provides moisture to the roots. Check soil moisture by touching the top inch regularly and water again when dry.
- Place the pot in a suitable spot: Put your plant where it gets good light. Avoid harsh direct sun for a few days to help it adjust.
Heavy pots with wide rims make moving big plants more manageable. Plants planted too deep can rot. So keep the root ball level with the soil surface.
Watch for drooping or yellow leaves. These signs show stress or wrong watering.
After planting, adjust watering depending on weather. Hot, dry days need more frequent watering. Cooler or humid weather slows drying, so wait longer.
Good soil moisture feels damp about an inch down without staying soggy. This balance helps your big plant grow strong and healthy in its new home.
Choosing the Right Pot Size and Material for Big Plants

Pick a pot that fits your plant’s current and future size. The pot should grow with the plant but not be too large. Matching pot size and material to your environment helps plants thrive and stay healthy.
Optimal Pot Size Relative to Plant
Pick a pot about 1-2 inches wider than your plant’s pot. This helps the roots have room without excess soil. It keeps the plant healthy and soil manageable.
This range supports steady root growth without causing stress. For plants that are root-bound, a pot twice the current size lets roots spread out comfortably.
Going much bigger than this can cause water to pool and roots to rot. Use a pot that fits the roots snugly at first. It should have enough space for your plant to grow for one season.
This stops the soil from holding too much moisture. Changing pots based on how fast your plant grows keeps conditions balanced.
Advantages and Disadvantages of Common Pot Materials
Pot materials affect weight, moisture retention, and temperature control. Choose materials that suit your local climate and your plant’s water needs. Here’s a comparison to help you decide:
| Material | Pros | Cons | Best for Climate |
|---|---|---|---|
| Terracotta | Breathable, sturdy, classic look | Dries out fast, can crack in cold | Warm, dry |
| Plastic | Lightweight, retains moisture well | Can overheat roots, less breathable | Cooler, shaded |
| Ceramic (glazed) | Retains moisture, attractive finish | Heavy, expensive, can crack easily | Moderate climates |
| Wood | Good insulation, natural look | Rot risk, needs maintenance | Temperate |
| Metal | Durable, modern style | Heats up fast, may rust | Cool, shaded |
Your choice should match your climate and how often you want to water. For example, terracotta suits dry areas where pots dry quickly. Plastic works in cooler spots since it holds water longer.
How Overpotting Affects Plant Health
Using a pot much larger than needed is overpotting. It traps excess water around roots, causing rot and poor growth. Overpotting also delays root development, hurting plant stability.
Choose a pot only 1-2 inches bigger than the old pot. This prevents overpotting, which can harm your plant.
Unless the plant’s roots are tightly packed, don’t pick bigger. For those, double the pot size to give roots space without drowning them.
Choose pot size carefully to avoid soggy soil and weak roots from overpotting.
Preparing Soil, Drainage, and Layers for Large Pots
Use a light, well-draining potting mix designed for containers. Make sure your pot has drainage holes. Add a bottom layer to keep water flowing.
This helps prevent water from pooling inside the pot. Proper soil layering supports root health and prevents water buildup in big pots.
Choosing the Potting Mix
Pick a potting mix that contains peat, vermiculite, and perlite. These ingredients help keep the soil loose, aerated, and draining well. Avoid garden soil; it compacts and holds too much water.
For large pots, use lightweight soil meant for container gardening. It holds moisture without becoming soggy, which keeps roots healthy and prevents rot. Mixing the soil with water before planting can help settle it evenly around the roots.
Setting Up Drainage Layers
Drainage is key to prevent water from pooling at the bottom. Start by checking for drainage holes; drill some if your pot doesn’t have any. Add a 1 to 2 inch layer of coarse stuff at the bottom.
This layer stops soil from blocking drainage holes. It keeps water moving well.
Many gardeners use gravel, broken pottery shards, or large pieces of crockery for this bottom layer. These help water drain faster but don’t rely on them to absorb water.
- Ensure the pot has at least one drainage hole.
- Add 1 to 2 inches of gravel or broken pottery.
- Use a mesh or landscape fabric to keep soil above from washing down.
- Fill with potting mix lightly moistened but not wet.
- Position the plant at the same depth it was in its nursery pot.
This setup creates a water channel, keeping roots away from standing moisture. Without it, roots can suffer and rot, especially in bigger containers holding more soil.
Amending Soil to Suit Different Plants
Adjust your mix based on the plants’ sunlight and moisture needs. More sun means faster draining soil with extra perlite or coarse sand. Shade plants need a very porous mix with lots of grit and less organic matter.
Add gravel to the bottom layer for herbs or Mediterranean plants. This mimics their dry natural soil.
It helps these plants avoid soggy roots. Mixing soil types in layers can help if you’re planting multiple species in one pot.
Keep an eye on soil moisture after planting. The right soil mix and layers cut down how often you water.
Your big plants still get enough moisture to grow well. This balance prevents overwatering.
Positioning and Spacing Plants in Large Containers
Multiple plants can thrive in one big pot if spaced and arranged well. You usually pick one or two types from each plant group to balance size and needs. Put taller plants like canna lilies at the back of the pot.
They can grow up to 6 feet tall even inside containers. This keeps shorter plants visible in front.
Spacing is key for healthy roots and leaves. Flowers that need 6 inches apart in the garden should be 3 inches apart in pots. Container plants tolerate closer spacing because roots have less room.
This helps make the pot look full. This tighter spacing works because the root zone is confined and the plants grow more slowly. Be careful not to crowd, or smaller plants will get overshadowed by bigger ones.
Position plants to consider their final size and view angles. Fill the pot with compost leaving 5 cm below the rim to avoid overflow. Put eye-catching plants like figs or bird of paradise in the center front.
This spot shows off their unique shapes best. It draws attention to those plants first. Position trailing plants near the edge to spill over nicely.
| Plant | Recommended Garden Spacing (inches) | Suggested Container Spacing (inches) | Max Height in Container (feet) |
|---|---|---|---|
| Canna Lilies | 12, 24 | 6, 12 | 6 |
| Petunias | 8, 12 | 4, 6 | 1 |
| Fig Trees | 60, 72 | 24, 30 | 5 |
| Bird of Paradise | 24, 36 | 12, 18 | 4 |
Large containers let you combine plants with different shapes and heights. Group compatible plants that prefer the same light and watering conditions. Mixing fast growers like petunias with slower ones lets the faster ones fill space without crowding.
Give taller plants room to grow upwards so they don’t block smaller ones. Layer plants by height and spread, placing eye-catchers where you see them most. Keep plant health in check by watering properly and avoiding root rot in crowded spots.
Watering and Fertilizing Big Potted Plants for Best Growth
Water big potted plants deeply but not too often. Check soil moisture at least 1 inch below the surface before watering. When the soil feels damp, skip watering to avoid harming roots.
Usually, watering once or twice a week works well for large pots. But hot or windy weather means you’ll need to water more often. Plants in big containers dry out faster than garden soil.
That’s because containers hold less natural moisture. Use a soil moisture meter to check soil often.
You can also stick your finger into the soil. This is especially important during heat waves.
Fertilizing helps replace nutrients that watering washes away. Use a balanced, slow-release fertilizer every 6 to 8 weeks during the growing season.
Avoid fertilizing in autumn or winter when many plants slow down. Follow the fertilizer package instructions to avoid burning roots or causing excess growth.
Adjust your care based on the plant type and season. For example, fast-growing annuals need more frequent watering and feeding.
Perennials in large pots require less. Reducing water and fertilizer during the fall can help plants rest and prepare for cooler months.
Over-watering kills more potted plants than underwatering. Always check below the soil surface for moisture before watering.
Common Mistakes and How to Fix Them When Planting Big Pots
Picking the wrong pot size can stress your plant quickly. A pot that’s too small cramps roots, making the plant grow slowly or drop leaves. When the pot is too large, soil keeps too much water.
This causes root rot in your plant. Pick a pot just 1 to 2 inches wider than the root ball.
That fits the plant’s current size well. Avoid choosing a pot that’s way bigger than needed.
Watering is another tricky spot for big pots. These pots hold moisture longer, so watering daily usually harms more than helps. Instead, check soil moisture by poking your finger 2 inches deep.
Water only when the top 2 to 3 inches feel dry. Overwatering shows up as yellowing leaves, soggy soil, or a bad smell.
- Use pots with drainage holes in the bottom.
- Place pottery shards or stones over drainage holes to stop soil loss.
- Fill gaps around the plant with peat-free compost to prevent soil spills.
- Leave about 1 inch gap at the top of the pot to avoid water overflow.
- Dig a hole deep enough to fit the root ball without bending roots.
- Water thoroughly, then let soil dry before watering again.
Poor drainage leads to ongoing wet soil, which kills roots fast. You can fix it by making sure water flows freely out the bottom holes. Add more stones or larger pieces at the bottom of the pot.
This helps if water pools on top instead of draining. Using well-draining, peat-free compost also helps prevent sogginess.
Signs like roots poking from drainage holes mean your plant is root-bound. Repot into a slightly larger container to relieve pressure. Look for pests or poor soil if leaves still yellow or droop.
Fix watering and drainage before checking these issues. Healthy soil feels loose and drains well; poor soil stays wet and heavy.
Selecting Plants That Thrive in Large Pots and Their Care Needs
Big pots work well for growing tropical plants, shrubs, and perennials. Tropical plants like bird of paradise and palms thrive in warm, humid conditions. They need regular watering and bright indirect light to stay healthy.
Shrubs and small trees also do great in large containers. Examples include boxwood, dwarf citrus trees, and hydrangea. Make sure the pot is at least 24 to 36 inches wide.
This size lets roots and the canopy grow well. A big pot helps the plant stay healthy. These plants need deep watering and occasional feeding with slow-release fertilizer, especially during spring and summer.
Perennials and ornamental grasses such as coneflowers and miscanthus fit nicely in big pots too. They use deep soil well, growing strong roots. These plants like full sun or some shade.
Water them when the top inch of soil feels dry. Check the soil often to keep the plant happy.
Adjust care based on plant type and local climate. Tropicals favor consistent moisture and humidity, so mist leaves if your air is dry. Shrubs and small trees benefit from watering deeply once or twice a week in warmer seasons.
Perennials usually need watering less often. Adding mulch on top of the soil helps keep moisture. Mulch lets the soil stay wet longer.
Light matters a lot for container plants. Most tropicals want bright but filtered light, avoiding harsh direct sun.
Shrubs and perennials usually enjoy full sun but check your specific plant labels. Growing in partial shade works for many perennials and evergreen shrubs.
You can grow fruit trees like dwarf citrus types in large pots successfully. They produce fruit year-round if they get enough sun and water. Protect pots during cold months by keeping them in a sheltered spot.
You can bring pots indoors if freezes happen. This stops frost damage to your plants.
Start with a pot that’s 2 to 4 inches larger than the plant’s current container. This size gives roots room to expand without overwhelming the plant with too much soil. Large pots hold more water but check drainage carefully to avoid root rot.
When and How to Repot Large Plants in Big Containers
Repot large plants when roots crowd the container or soil drains too fast. Handle roots gently during repotting to avoid stress. Use a pot that is 2 to 4 inches bigger in diameter.
Pick one slightly larger than your current pot. This helps give roots room to grow.
Signs That Repotting Is Needed
Roots growing out of drainage holes or circling inside the pot show your plant needs repotting. The soil may dry out quickly or water pools on the surface. The plant might also look stunted or wilt often despite watering.
Check the root ball yearly for big plants in pots. This helps prevent plants from becoming root-bound. Root-bound plants struggle to absorb nutrients, which harms growth and health.
Preparing to Repot a Large Plant
Choose a new pot 2 to 4 inches wider than the old one. Make sure it has drainage holes to avoid waterlogging. Prepare fresh potting mix made for large container plants for good drainage and nutrients.
Water the plant a day before repotting to ease root removal. Place your workspace near the plant’s usual light spot. Clear a space for repotting with newspaper or a tarp for easy cleanup.
Handling Root-Bound Roots During Repotting
Gently slide the plant out by loosening the edges first. Avoid pulling on the plant’s stem or trunk.
Gently tease roots apart with your fingers or a tool. Make sure your tool is clean to avoid damage.
Trim dead or mushy roots carefully to encourage healthy growth. Trim dense roots carefully to stop overcrowding. Cut only enough to keep roots from tangling.
But don’t remove more than 20% of total roots. Place the plant in new soil, spreading roots outward naturally.
Always check for and remove old, damaged roots to prevent rot and disease spread.
Follow these steps to repot your large plant safely and keep it healthy:
- Water the plant well a day before repotting.
- Prepare the new pot with drainage holes and fresh soil.
- Gently remove the plant from its current pot without pulling the stem.
- Inspect and untangle the root ball, trimming dead roots if needed.
- Place a layer of fresh soil in the bottom of the new pot.
- Set the plant into the new pot, spreading roots naturally.
- Fill around the roots with more potting mix and lightly press down.
- Water thoroughly after repotting to settle the soil.
Step-by-Step Action Plan to Plant in a Big Pot
Follow this simple plan to plant and keep your big potted plant healthy. Each step helps you see progress and fix any issues fast.
- Before you start: Gather your pot, soil mix, drainage materials, and plants. Check that your pot has drainage holes for water to escape.
- Day 1: Add a layer of gravel or broken pottery at the pot’s bottom. This stops water from pooling and causing root rot.
- Day 1: Fill the pot halfway with a good soil mix designed for large containers. Lightly press it down to avoid air pockets.
- Day 1: Put your plant in the pot. Place its root ball 1 to 2 inches below the pot rim. Make sure it sits evenly. Fill the rest with soil and press around the plant firmly.
- Day 1: Water the plant deeply until water drains from the bottom. This shows your plant has enough moisture.
- Week 1: Look at your soil every 2 to 3 days. Water if the top 1 inch is dry. Check before watering again. Watch for wilting or yellow leaves indicating water issues.
- Week 2 and after: Start feeding with diluted liquid fertilizer every 2 to 4 weeks. Look for steady new growth as a sign of good health.
- Monthly: Rotate your pot to help the plant grow evenly. Check for pests or diseases regularly and treat quickly if needed.
Frequently Asked Questions
How Do I Know If a Big Pot Has Enough Drainage?
Check for holes at the bottom of the pot. Without them, water can pool, causing root rot in your plant.
Can I Add Fertilizer Directly to Soil Before Planting in a Big Pot?
It’s better to mix slow-release fertilizer into the soil first. That way, nutrients feed your plant gradually.
Should I Soak the Soil or Just Water After Planting in a Big Pot?
Water deeply right after planting so soil settles around roots. Light surface watering won’t reach deep roots.
How Often Should I Rotate My Big Potted Plant?
Rotate your plant every week or two. This helps it grow evenly and avoids leaning toward one light source.
Is It Okay to Use Outdoor Soil in a Big Indoor Pot?
Avoid garden soil indoors; it can hold pests and doesn’t drain well. Use a high-quality potting mix instead.
What Is the Best Time of Year to Plant a Big Plant in a Pot?
Spring is usually best since plants recover and grow well in warmer weather. Avoid winter unless the plant is indoors.
Key Points to Remember
Planting a big plant in a large pot takes care and pacing. Start by making sure your pot drains well and your soil is right. Next, plant carefully and give your new plant regular water and food to see it thrive.