A Pot to Plant: How to Choose and Use Pots for Healthy Plants
A pot to plant your greenery needs careful planning. The pot’s size and material greatly affect your plant’s health and growth.
Start by choosing a pot that offers enough space for your plant’s roots to expand. Too small pots can stunt growth no matter how well you care for them.
Proper drainage is essential to avoid root rot and similar issues. Choose containers with drainage holes or prepare to make your own. Leave 1 to 2 inches of space between the soil surface and the pot’s edge for easier watering and less mess.
Bigger plants or mixed arrangements need containers at least 14 inches wide. This size gives roots room to spread and supports stronger, healthier plants. Using several small pots instead of one larger container often limits growth and makes care harder.
Key Takeaways
- Use one large pot, 14 inches or more, to grow multiple plants together.
- Choose a pot size that fits your plant’s root growth needs clearly.
- Ensure your pot has drainage holes to prevent waterlogging.
- Keep soil about 1 to 2 inches below the rim for easy watering.
- A tomato plant needs a 5-gallon container to avoid stunted growth.
- Repot every 12 to 18 months to maintain healthy root space.
What Is a Pot to Plant and Why It Matters

A pot to plant is simply a container where you grow your plants. It holds soil and supports the roots as the plant grows.
You can use many materials, sizes, and shapes. But the pot’s purpose stays the same: to keep the plant healthy and contained.
Choosing the right pot matters because it affects plant growth, watering, and root health. A pot that’s too small limits root growth. This stunts plant size.
Watering well can’t fix this problem. A tomato needs a container of at least 5 gallons. This equals about a 24-inch tall pot.
Smaller pots can stunt growth. Smaller pots mean weaker plants and less fruit or flowers.
Pots also influence watering because they hold the soil and moisture. Larger pots with more soil dry out slower. So you don’t have to water as often.
Clay pots absorb and lose moisture quickly, which helps with aeration but may need daily watering. Plastic pots keep moisture longer but may cause roots to sit wet if drainage is poor.
The way a pot encourages root spreading matters too. Roots grow close to the pot walls where water and nutrients build up.
In a pot that’s too tight, roots get crowded and find less space to grow. This makes plants more stressed and prone to drying out or disease.
To get the best results, pick a pot that fits the plant’s size and needs. In general, match your plant’s mature size to the pot diameter and depth. Avoid pots that are too small or made of material that holds too much water.
When planting, leave 1 to 2 inches from the root ball to the pot rim. This space helps with watering.
Avoid crowding the roots. Fill soil gently around roots and press lightly to remove air pockets.
A good pot allows enough water to reach the roots. It also keeps roots healthy. The plant should have room to grow well.
It’s a key step to avoid problems like root rot, stunted growth, or wilted leaves. Spending $9 to $15 on a good pot is worthwhile. It often results in healthier plants.
It can also lead to bigger harvests. Choosing well keeps your plants growing strong and looking great all season.
How to Choose the Right Pot Size for Your Plants
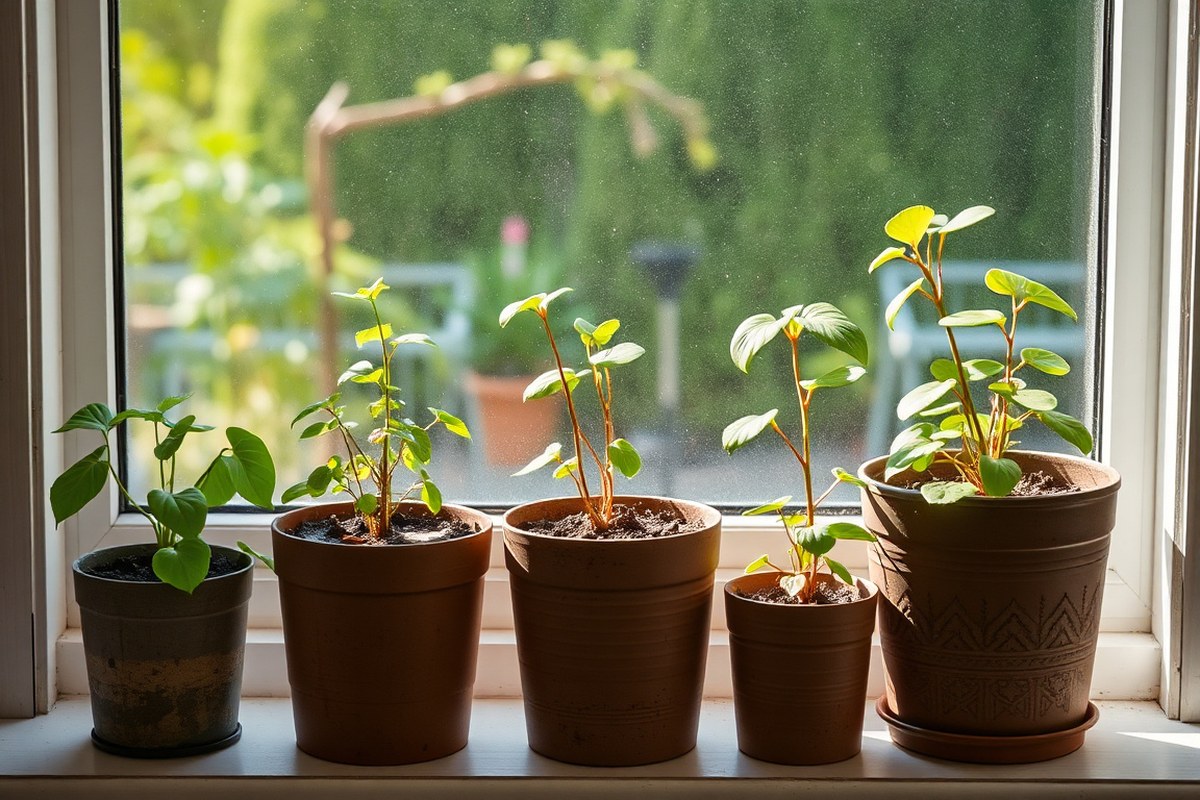
Start by matching your pot size to the plant’s root space. Small flowers and herbs do well in pots 6 to 8 inches wide. Larger vegetables like tomatoes need at least 14 inches in diameter.
A good depth for most plants ranges from 8 to 12 inches. But shrubs may require deeper pots to support root growth.
Choose one larger pot instead of many small ones whenever possible. Bigger pots hold moisture longer and give growing roots more room. For floor planters, increase diameter by no more than 4 inches when upgrading.
Tabletop planters should only be 2 inches larger. This prevents overpotting, which can cause waterlogging and root rot.
Check the plant’s growth potential before selecting your pot. Fast-growing plants need room to expand. When unsure, choose a pot about 2 inches wider than the current one.
Avoid pots that are too small because roots quickly become cramped, stunting growth. Too large a pot may keep soil soggy and harm the plant.
Always keep soil level 1 to 2 inches below the pot rim. This helps prevent soil overflow during watering.
Vegetables often need more depth than flowers. For example, peppers and eggplants grow best in pots at least 12 inches deep. Shallow-rooted flowers like pansies do well in pots that are 6 to 8 inches deep.
They don’t need deep pots. Check the mature plant’s root size by gently loosening roots in the nursery pot. Then pick a new pot based on this.
When the plant fills its pot, increase the pot size diameter by 2 to 4 inches. Avoid large jumps in pot size to keep soil moisture balanced.
Using a pot that’s right-sized helps roots access oxygen, nutrients, and water properly. It also reduces the risk of pests and disease caused by excess dampness.
Comparing Pot Materials: Pros, Cons, and Best Uses
Choosing the right pot material affects your plant’s health and your convenience. Some materials hold water well, while others drain faster and handle cold weather better. Cost, durability, and whether you grow indoors or outdoors also matter when picking pots.
Terra Cotta and Ceramic Pots
Terra cotta pots are porous, so they lose moisture quickly. This suits plants that prefer well-drained soil, but you’ll need to water more often. Ceramic pots with a glaze hold water longer, which helps thirsty plants.
Terra cotta can crack if left outside in freezing weather. Water inside the pot expands about 9% when it freezes. This expansion breaks brittle materials like terra cotta.
Freezing can cause the pot to crack. Ceramic glazed pots usually resist cold better but can still chip or crack if dropped.
Plastic and Fiberglass Pots
Plastic pots are light and affordable. They retain moisture well, which helps plants that need constant hydration. Fiberglass pots are stronger, often mimicking stone or ceramic looks, but cost more.
Neither plastic nor fiberglass cracks in freeze-thaw cycles. This makes them better for outdoor winter planting. They often have built-in saucers to catch water.
This helps prevent mess indoors. Saucers make draining easier.
Specialty Materials and Self-Watering Planters
Concrete and stone pots hold temperature well and are very durable outside. They weigh a lot, so they suit plants that won’t need moving. Self-watering planters include a reservoir that feeds plants slowly, great if you travel or forget watering.
Self-watering pots keep soil moist longer but might not suit all plants. Too much moisture can harm species that like dry roots. You can find many pots with self-watering features.
Some styles have handles for easier moving. These pots suit indoor and outdoor use.
The table below sums up the key features of common pot materials:
| Material | Water Retention | Durability (Freeze Resistance) | Cost | Indoor/Outdoor Use |
|---|---|---|---|---|
| Terra Cotta | Low (porous, dries fast) | Low (cracks when frozen) | Low to moderate | Indoor and Outdoor (avoid freezing) |
| Ceramic (Glazed) | High (holds moisture) | Moderate (resists freeze better) | Moderate to high | Indoor and Outdoor |
| Plastic | High (retains moisture) | High (freeze resistant) | Low | Indoor and Outdoor |
| Fiberglass | High (retains moisture) | High (freeze resistant) | Moderate to high | Indoor and Outdoor |
| Concrete/Stone | Moderate | High (durable outdoors) | High | Mostly Outdoor |
| Self-Watering | Very high (reservoir feeds plant) | Varies by material | Varies | Indoor and Outdoor (depending on pot type) |
Plastic and glazed ceramic pots often perform best for moisture-loving plants. Use terra cotta for plants that hate soggy roots, especially indoors. Choose frost-resistant pots for outdoor winter planting, or bring pots inside before freezing hits.
How to Ensure Proper Drainage for Potted Plants
Pots need drainage holes so water can escape after watering. Without drainage, water pools at the bottom.
This makes soil soggy and roots can rot fast. Root rot kills plants because roots cannot get oxygen when wet too long.
Always pick pots with holes in the bottom. You can cover the holes inside with pottery shards, small stones, or screening.
This stops soil from washing out but still lets water flow out easily. Spread a layer of these materials about one inch deep before adding soil.
Your pot has no holes, but you still have some options. One is to put a smaller nursery pot with holes inside the decorative pot. Plant in the smaller pot.
This gives your plant drainage and keeps the outside pot clean. Make sure water can drain freely and doesn’t sit between the two pots.
You can also drill holes into wood or some thick plastic pots. Use a drill with a spot suitable for the pot material.
Clean up any rough edges after drilling. Drilling lets you keep a favorite pot while giving plants the drainage they need.
Fill pots with fresh potting mix after ensuring drainage. Place your plant in the soil and pack soil around roots.
Water once after planting to check drainage flow. The water should come out of the holes within 30 seconds to one minute.
Water pooling or slow drainage? Try adding stones or a screen. A slow drain means roots could stay too wet.
On the other side, if water drains too fast, plants may dry out quickly. You might add a layer of sphagnum moss or a moisture-retaining soil mix to help.
Some people try growing plants in pots with no holes using very cautious watering. This is risky because even a little extra water causes problems fast.
It’s better to provide drainage or use the double-pot method. Your plants will root well and grow better with proper drainage.
Step-by-Step Guide to Planting in a Pot Properly
Planting in a pot starts with a clean container and careful handling. Position the plant at the right height, add quality soil, and water well. These steps make sure your plant gets a strong start.
Preparing and Cleaning the Pot
Every pot needs a fresh start to keep your plant safe. Clean the pot with soap and water to remove dirt and disease. Rinsing it well stops leftover soap from harming roots.
Check the drainage holes before adding soil. When drainage holes are clogged, clear them using a stick or drill. Proper drainage helps prevent root rot and keeps soil healthy.
Removing the Plant from Its Current Container
Careful removal protects the plant’s roots and limits shock. Water the plant a few hours before repotting. This moistens the soil.
It makes repotting much easier. Gently squeeze the nursery pot sides to loosen the soil.
Turn the pot upside down, holding the plant by its base. Slide the plant out slowly.
Roots may stick to the pot edges. Use a dull knife to separate them gently.
Positioning the Plant and Adding Potting Mix
Place fresh, organic potting mix in the pot to set the plant at the right height. The plant should sit as deep as it was in its nursery pot. Fill in around the roots with potting mix, packing gently.
Press soil lightly but avoid compacting too hard. This prevents air pockets that dry out roots. Add more mix as needed to keep the plant steady and level.
- Add 2 to 3 inches of fresh potting soil to the bottom.
- Set the plant in the pot at nursery soil depth.
- Fill around roots with potting mix, firming gently.
- Check for air pockets and add soil where needed.
- Leave about half an inch from the top edge for watering.
Always use fresh potting mix with nutrients like worm castings for healthy growth.
Final Watering and Placement Tips
Water the plant thoroughly after planting until water drains from the bottom. This settles the soil and helps roots make contact with new soil. Let the soil dry before watering again to avoid overwatering.
Place the pot in a spot that matches your plant’s light needs. Avoid sudden changes in light or temperature for a few days. This helps your plant adjust and thrive.
Choosing and Preparing Soil Mixes for Container Planting
Good potting mix feels loose and drains well but holds moisture. Avoid garden soil because it compacts and blocks airflow in pots. Instead, pick a commercial potting blend made for container plants.
These mixes usually have peat moss or coconut coir inside. They also contain perlite or vermiculite. Some compost or bark goes in too.
Adding organic matter like compost or aged bark boosts nutrients and soil texture. Mix about 10 to 20 percent into the commercial potting mix for best results. Add a slow-release fertilizer before planting.
It feeds your plants steadily. This lasts for about 2 to 3 months.
Never add heavy clay soil or too much compost that stays wet longer. Soggy soil leads to root rot and poor plant health. Check that your mix feels light and crumbly, not muddy or dense, especially around the roots.
A common mistake is putting gravel or rocks at the pot’s bottom for drainage. This layer tends to trap water above it and actually slows drainage. Instead, rely on the pot’s drainage holes and a well-aerated soil mix to avoid soggy spots.
Some plants like succulents or cacti prefer soil that dries fast. Pick a cactus mix for these plants. Or add extra perlite.
Coarse sand can work too. For vegetables or herbs, go lighter on sand and include more compost to keep nutrients up.
Before planting, moisten your mix until it’s evenly damp but not dripping wet. This helps roots settle in without waterlogging.
When soil bakes hard in hot sun, cover pots with shade cloth. You could also water pots lightly twice a day.
Refreshing your soil each season prevents salt build-up and nutrient loss. Take out old soil and put in fresh mix.
Or add 2 inches of new soil on top if plants stay in the same pot all year. This practice keeps your potted plants healthy and happy.
Basic Care and Maintenance for Plants in Pots
Water potted plants when the top inch of soil feels dry. Most container plants need watering every two to four days in warm weather. Cooler temperatures cut back the watering frequency to once a week or less.
Plants in pots lose nutrients faster because water washes them away. Use a balanced, water-soluble fertilizer every two to four weeks during the growing season. Follow the label instructions to avoid burning the roots or causing leaf damage.
Pruning helps keep plants looking tidy and encourages growth. Trim dead or yellow leaves promptly. Pinch back leggy stems to help plants grow fuller.
This stops them from growing too big for pots. It also keeps your plant healthy and neat.
- Check soil moisture daily in hot, dry weather
- Apply fertilizer diluted to half strength for young plants
- Use clean, sharp scissors or pruning shears for trimming
- Look for root crowding or roots growing out drainage holes
- Repot every 1 to 2 years or when growth slows significantly
- Remove faded blooms to encourage new flowers
Watch plants closely for wilting, discolored leaves, or stunted growth. These signs show they need attention or a fresh pot with new soil. Repot by gently removing the plant from its pot.
Trim any damaged roots carefully. Then place it in a slightly larger container with fresh soil mix.
Seasonal Tips: Protecting and Adjusting Care for Potted Plants
Plant pot care shifts with the seasons to keep your plants healthy. You must protect pots from freezing in winter. Watering needs adjusting in summer.
Repot plants at the right time each year. These changes help plants survive stress and grow well.
Winter Protection Strategies
Cold weather can crack some pots, especially terracotta, and freeze damage can harm roots. Move pots indoors or to sheltered spots when temperatures drop below freezing. Wrap pots with bubble wrap or burlap to add insulation if you can’t move them.
Some plants, like Skimmia japonica, handle cold well. They still need dry soil to avoid root rot. Keep this in mind when caring for them.
Avoid watering too much in winter since plants slow down. Mulching the soil surface with straw or bark can help keep roots warm.
Don’t leave pots sitting in ice during freezing weather. Avoid standing water, it harms roots and pot bases. Keep pots dry and improve in cold times.
Summer Care and Watering Adjustments
Hot weather dries pots quickly, especially porous materials like terracotta. Water more often during summer, often daily for outdoor pots in full sun. Aim to moisten the soil fully without letting water pool on the surface.
Check pots early in the morning, so you water before heat stress sets in. Shade pots or move them slightly away from harsh afternoon sun to reduce evaporation. Grouping pots can also increase humidity around plants, helping them hold moisture.
Best Times and Signs for Repotting
Repot plants every one to two years or when roots grow out of drainage holes. Early spring is best, just before new growth begins. This lets roots settle in during the growing season and reduces shock.
Signs like slowed growth or soil that dries out too fast show it’s time to repot. Choose a pot 1 to 2 inches wider in diameter than the current one. Use fresh soil mix and trim off any root-bound or dead roots to help plants thrive.
Step-by-Step Action Plan for Pot Planting Success
Follow this plan to pick the right pot, plant, and care for your container garden.
- Before you start: Choose a pot with drainage holes that suits your plant size. Test drainage by pouring water; it should flow out evenly.
- Day 1: Prepare your soil mix specific to your plant’s needs. It should feel loose and drain easily without falling apart.
- Day 2: Plant your chosen plant at the right depth in the pot. Make sure the roots spread out and soil covers them fully.
- Week 1: Water your plant gently until water drains from the bottom. Check the soil moisture daily to avoid over- or under-watering.
- Week 2: Place the pot where the plant gets proper light for its type. Observe leaf color and growth for signs of health or stress.
- Week 4: Start feeding with a balanced liquid fertilizer every 2-4 weeks. Watch for steady growth and no yellowing leaves.
- Every month: Remove old leaves and check drainage holes for clogs. This keeps the plant healthy and prevents root rot.
Frequently Asked Questions
Can I Reuse Old Pots for Planting?
Yes, you can reuse old pots if cleaned well. Scrub them with soap and water to remove dirt and disease before planting again.
How Do I Know If a Pot Has Good Drainage?
Check for holes at the pot’s bottom to ensure drainage. Without holes, excess water can cause root rot and harm plants.
What’s the Best Way to Water Plants in Pots?
Water thoroughly until water drains from the bottom holes. This ensures roots get enough moisture without sitting in water.
Should I Use Fertilizer When Planting in Pots?
Yes, use a balanced fertilizer suited for container plants. Container soil loses nutrients faster, so regular feeding helps plants grow well.
How Often Should I Repot a Plant?
Repot every 1 to 2 years or when roots crowd the pot. Signs include roots growing out of drainage holes or slow plant growth.
Can I Put Multiple Plants in One Pot?
Yes, but only if they have similar water and light needs. Crowding can affect growth, so pick plants that grow at similar rates.
The Bottom Line
Choosing the right pot and setup makes all the difference in growing healthy plants. Start small and watch your plants respond to care. Grab a pot today and start planting.
It’s an easy way to brighten your space. Adding plants brings life to any area.