How Do You Build a Raised Planter Bed: Step-by-Step Guide with Materials and Tips
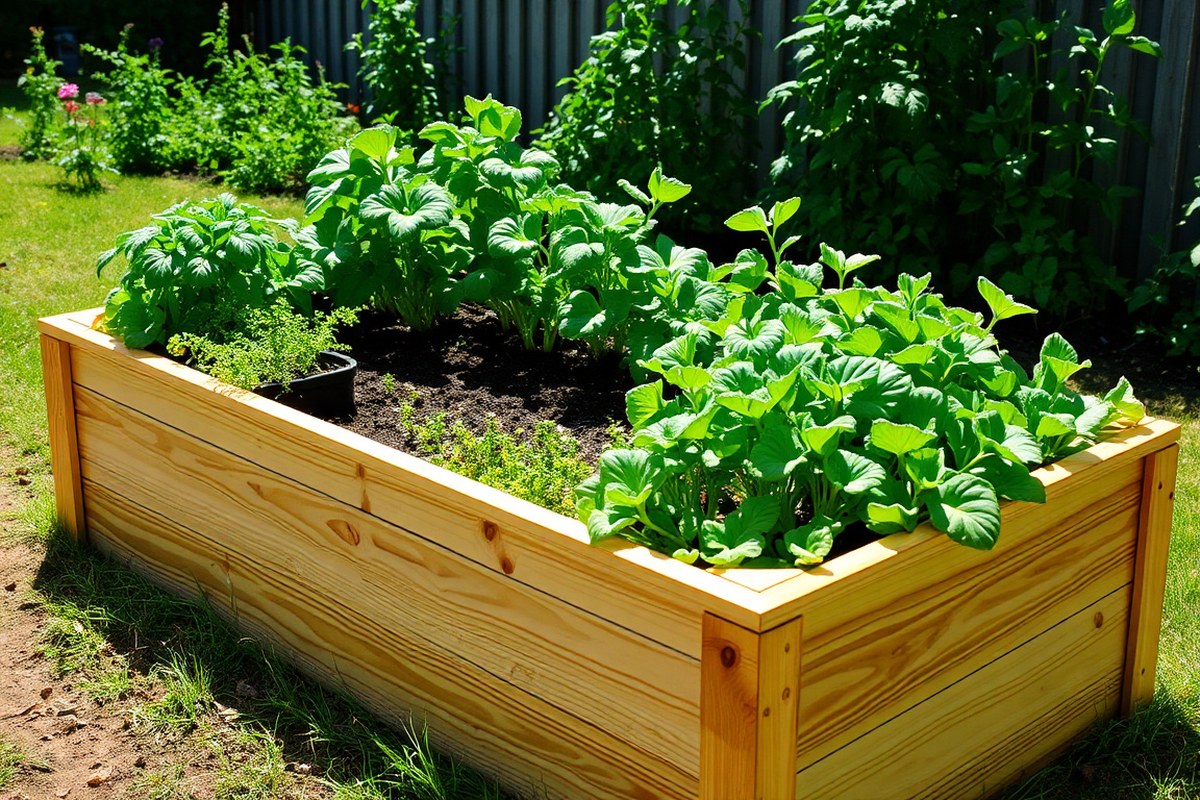
Build a raised planter bed with a solid frame using rot-resistant wood like cedar or redwood. You can also use plastic containers designed for gardening. These materials resist weather damage and keep your bed stable for years.
Fill the bed with nutrient-rich soil mixed with compost. This supports healthy roots and better plant growth.
Keep the bed narrow, about 3 to 4 feet wide. So you can reach the center easily.
Choose a sunny spot with at least six hours of light and good drainage. Use screws and a drill to assemble the frame quickly, usually within 30 minutes. Avoid making the bed longer than 8 feet without extra supports to prevent bowing.
Add wooden stakes or metal brackets at corners for extra strength. This helps keep the structure sturdy over time and protects your garden investment.
Key Takeaways
- Use cedar or treated wood to prevent rot and keep your bed durable.
- Build raised beds no wider than 3 to 4 feet for easy access.
- Choose a location with full or partial sun and good drainage.
- Keep raised beds shorter than 8 feet to maintain stability.
- Fill beds with a mix of topsoil, compost, and organic matter.
- Assemble the frame using screws and a drill for quick setup.
How to Build a Raised Planter Bed Step-by-Step

Building a raised planter bed is straightforward when you follow the right steps. You measure and cut your lumber accurately, then assemble the frame with solid corner supports. Adding good drainage protects your plants and prepares the bed for filling.
Measuring and Cutting Lumber to Size
First, decide the size of your raised bed. A common size is 4 feet by 8 feet with boards about 12 inches high. Use untreated cedar or redwood for long-lasting durability.
Measure and mark your lumber carefully to get precise cuts. Cutting lumber correctly upfront saves headaches when assembling.
- Measure two boards to 8 feet for the long sides.
- Cut two boards to 4 feet for the short ends.
- Ensure all boards have the same height, usually 12 inches.
- Use corner posts by cutting four 4×4 posts to 14 inches each.
- Smooth any rough edges with sandpaper to prevent splinters.
Assembling the Frame and Securing Corners
Attach the cut boards to form a rectangular frame using 3-inch exterior screws. Strengthen corners with 4×4 posts for better stability, especially for beds taller than 12 inches. Drive pilot holes before screwing to avoid wood splitting.
Clamp boards before fastening to keep corners square. Check diagonals with a measuring tape; they should match for a perfect rectangle.
- Arrange boards on a flat surface in the bed shape.
- Clamp corners and drill pilot holes through long boards into ends.
- Screw boards together with 3-inch galvanized or stainless screws.
- Attach 4×4 corner posts at inside corners, screwing through the boards.
- Double-check the frame for squareness by measuring diagonals.
Installing Drainage and Preparing the Bed
Lay landscape fabric inside the frame to block weeds while allowing water flow. Proper drainage prevents root rot and soil compaction in your raised bed.
Add a few inches of gravel or small rocks under the fabric. This helps improve drainage on poor soil.
Set the frame on level ground before lining it. Make sure the fabric overlaps the edges, so soil stays inside.
- Clear the site of weeds and level the ground.
- Place the frame on the prepared spot and adjust for levelness.
- Cut and secure landscape fabric inside the frame as a weed barrier.
- Optional: Add a 2-inch layer of gravel for extra drainage.
- Prepare to fill with your soil mix after this step.
Choosing Materials for Durable Raised Beds
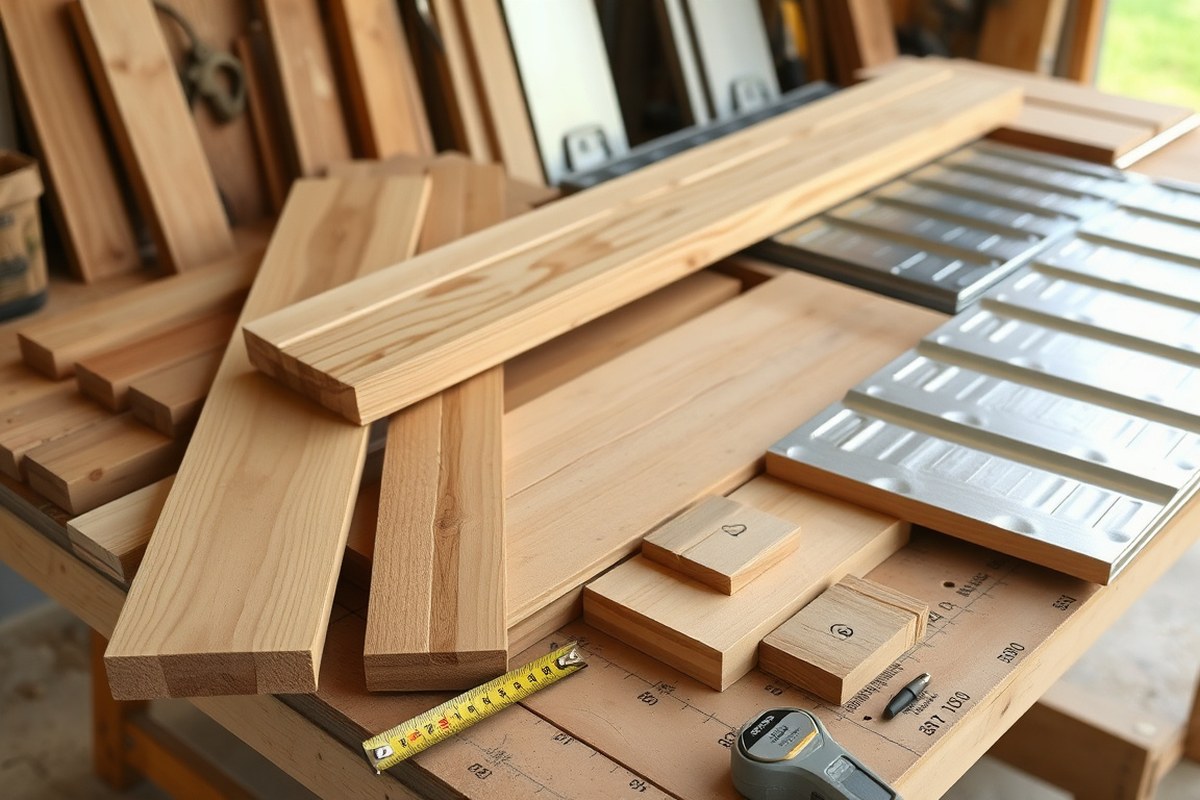
Wood types vary a lot in how long they last and how much they cost. Cedar wood lasts between 10 and 20 years and costs a moderate amount. Redwood lasts up to 25 years but costs more.
It is mostly found in the western US. It is very tough and stands up well outdoors. Douglas fir costs less but lasts only 3 to 7 years.
It works fine for a budget starter bed. Choose it if you plan to rebuild sooner.
Pressure-treated lumber lasts 20 to 30 years and costs about the same as cedar. The newer treatment methods make it safe for growing veggies according to EPA guidelines. So it’s a good choice if you want something durable and affordable.
Composite or recycled plastic beds usually last 25+ years. They can cost up to four times more than wood. These beds are very durable but pricier.
Protecting wood beds from rot means using naturally rot-resistant woods or pressure-treated lumber. Seal the wood with a non-toxic sealant yearly. Focus on the outside surfaces especially.
This helps protect and extend the wood’s life. Add landscape fabric inside the bed to protect the wood.
It keeps soil and water from touching the wood directly. This simple step helps the bed last longer.
Scrap lumber or reclaimed wood can make cheap raised beds. But their lifespan depends on the wood’s type and past use. Old branches or wood scraps might look rustic but will rot faster without treatment.
Look for pressure-treated lumber with a cedar tone. It offers good durability and a nice look. This is a cost-friendly option for raised beds.
Use a food-safe sealant on wood beds every year to slow down rot and weather damage. Avoid sealing the inside soil contact areas to prevent chemicals leaching into your vegetables.
Ideal Size, Depth, and Location for Your Raised Bed
Your raised bed should be wide enough to reach the middle without stepping inside. A common width is 4 feet, letting you access the soil easily from both sides. Length varies, but 8 feet is popular, giving plenty of growing space without awkward stretching.
Depth depends on what you want to plant. A 12-inch depth suits most vegetables well. But root crops like carrots need at least 18 inches.
Shallow beds under 10 inches won’t hold enough soil for healthy roots. So aim for at least a foot of soil depth.
Pick a sunny spot that gets about 6 to 8 hours of direct light. Most vegetables need plenty of sun to thrive and produce well. Avoid shady corners or close proximity to big trees that steal nutrients and water.
Place your raised bed on level ground for stability and easy watering. Check with a level tool, especially on slopes. Also, consider where water drains naturally to prevent pooling or erosion around your bed.
Space multiple beds at least 2 to 3 feet apart. This gap lets you walk between beds and tend to plants without damaging them. Closer spacing cuts off airflow and makes garden work harder.
Your space is small? Use a U-shaped design instead.
It maximizes growing area while keeping all spots within reach. This shape can fit tight yards without making beds too wide or hard to manage.
The final placement should avoid areas with irregular ground or underground utilities. Assemble the bed where you’ll keep it. Moving a filled bed is tough.
It can hurt plants. This upfront planning saves work and protects your garden’s health.
Preparing and Filling Raised Beds with the Best Soil Mix
Start your raised bed soil mix with three equal parts. Use good-quality topsoil, compost, and aeration material. Coarse sand or perlite works for aeration.
This blend keeps your soil loose and drains well, helping roots grow strong. For example, a 4×8-foot bed that’s 18 inches deep needs about 1.Use about 5 cubic yards of this soil mix.
It costs roughly $150 to $300. The price depends on your local area.
Place a weed-blocking fabric at the bottom of your bed. This stops grass or weeds from growing inside. It helps keep your plants safe.
Add about 6 inches of native soil or trench soil first. Do this if your bed sits on poor ground. It improves soil quality below.
Then fill the rest with your soil mix. The compost feeds plants and worms, while the sand or perlite prevents compaction.
Each spring, top off your raised bed with 2 to 3 inches of fresh compost. This replaces nutrients lost when organic matter breaks down over the year. You don’t usually need to replace all the soil.
Only do this if you see disease or bad nutrient problems. Most beds do fine without full soil change. Adding compost yearly keeps your soil healthy and your plants happy.
During the gardening season, check the soil moisture often. Raised beds dry out faster than garden beds on ground. Water deeply but less often to encourage deep roots.
You might need to add more compost or balanced fertilizer. Do this midway through the season. It depends on the types of plants you grow.
In fall, remove dead plants and debris to prevent pests and diseases. Some gardeners like to cover beds with mulch or leaves to protect soil over winter. Avoid walking inside the bed to keep soil loose.
Soil compaction hurts root growth. Staying out helps your plants grow better roots.
Notice plants lagging or soil hard and dry? Add more compost or natural amendments. Worm castings are a good natural choice.
These boost soil life and nutrients. A well-maintained bed with proper soil mix grows healthy plants.
It can last year after year without major work. This keeps gardening easier.
Building Raised Beds on Different Types of Ground
You can build raised beds on uneven or rocky ground with some site preparation. First, clear the area of large rocks, roots, and debris to create a stable spot. Use a shovel or mattock to make the soil as flat as possible.
Dig out high spots. Fill low areas with loose soil or gravel.
On slopes, build your bed in steps or as terraces. Use 18-inch stakes or rebar through holes in the bottom board. This holds the bed firmly and keeps it level over time.
Some raised beds need bottoms; others do not. It depends on the soil type. Also, consider nearby pests.
On grass or lawn, cut and remove a section before placing the bed. You can lay down cardboard or landscaping fabric to block weeds while allowing water to drain.
Remove the top soil if the ground is rocky or tightly packed. Loosen the soil below to help plant roots grow deeper.
Add hardware cloth mesh under the bed to block burrowing pests like gophers and moles. You rarely need a solid bottom unless planting on concrete or very hard ground.
Roots won’t grow below hard surfaces. In those cases, fill the bed with good-quality soil and compost for healthy roots.
Prepare the site by clearing vegetation, leveling as you can, and anchoring the bed for stability. Expect some extra work and materials like stakes or wire mesh. This groundwork sets up your garden for better drainage, root growth, and easier maintenance.
Building raised beds on uneven or rocky soil costs about the same as flat ground. Using local wood and stakes usually costs around $200 per bed.
Always check for slopes or unevenness before building. Anchoring your bed with stakes helps keep it steady over time.
Common Raiser Bed Mistakes and How to Fix Them
Drainage problems top the list of raised bed errors. Raised beds help with drainage. But if your soil stays soggy or floods, the bed alone won’t fix that.
Add a layer of coarse gravel or small rocks beneath the soil. This helps improve drainage.
It stops water from pooling at the bottom. Make sure the bed material doesn’t block water flow.
Size mistakes are common. Beds that are too wide make it hard to reach the middle for planting and harvesting. Aim for no wider than 4 feet to easily reach across.
Beds should be at least 6 to 12 inches deep for most plants. Shallow beds stunt root growth and reduce yields.
Some woods used for beds rot quickly or leak chemicals. Avoid treated lumber with harsh chemicals. Cedar or redwood lasts longer and is safer for vegetables, but costs more.
Untreated pine can work if you line the inside with heavy landscape fabric. Always check the wood feels solid and dry before building.
- Check soil dryness or standing water after heavy rain
- Confirm bed width allows easy access to plants
- Choose rot-resistant wood or line beds properly
- Replace or repair cracked or broken boards quickly
- Add new soil annually to replenish nutrients
Your raised bed sank or the soil got too packed? Fix it fast. Remove some soil and loosen the ground to help.
Tighten or replace loose screws on corners and rails. Add fresh, loose soil to keep roots healthy.
Avoid stepping inside beds to stop crushing soil. Signs your bed isn’t working include yellowing leaves, poor growth, and water pooling.
Adding new wood panels or using corner brackets makes repairs easier. Check your raised bed yearly to catch problems early.
You can also use movable bed kits for flexibility. These let you adjust size or location as needed, which helps avoid site issues.
Tools, Materials, and Budget Checklist for Raised Beds
Building a raised planter bed requires a few key tools and materials. You’ll also want to budget time and money upfront. Knowing what you need keeps the project smooth and helps you avoid surprises.
Essential Tools for Assembly
You’ll need just a handful of tools to build a solid raised bed. A cordless drill or screwdriver is best for driving screws quickly. A saw is necessary for cutting the wood pieces to size.
Other helpful tools include a tape measure. Use a carpenter’s square for right angles. Keep a pencil handy for marking cuts.
A level confirms your bed sits flat and even. These basic tools cover most raised bed projects.
Materials and Hardware List
Wood, screws, and optional landscape fabric make up the core materials. Cedar and redwood are popular for rot resistance but cost a bit more. Pressure-treated lumber is cheaper but avoid direct soil contact with treated wood unless sealed properly.
Get enough lumber for walls about 12 inches high. Size it to fit your garden space.
Many plans use 2×6 or 2×8 boards. Galvanized or stainless steel screws resist rust and keep the bed sturdy.
Landscape fabric lines the bottom to keep weeds out and soil in, though it’s optional. Some builders add corner brackets or stakes for extra stability, especially for large beds.
Time and Cost Estimates
Building one raised bed typically takes about 2 to 4 hours from measuring to finish. Cutting wood and assembly are the most time-consuming. Two people can speed it up by sharing tasks.
Costs vary by material choice and size. A DIY bed from lumber usually runs between $50 and $150 for a 4×8 foot bed. Kits are pricier but simplify buying and can cost $150 to $300+
Professionally installed raised beds tend to cost $300 to $800 depending on size and materials. Doing it yourself usually saves money but takes more time and effort.
| Item | Example | Price Range |
|---|---|---|
| Wood Lumber (4×8 bed) | Cedar or Pressure-treated 2×6 | $40 – $100 |
| Screws | Galvanized deck screws, 3″ | $5 – $10 (box) |
| Landscape Fabric | Weed barrier, 4×8 ft piece | $10 – $20 |
| Raised Bed Kit | Pre-cut wood and hardware | $150 – $300 |
| Professional Installation | Complete build and setup | $300 – $800 |
The table shows price ranges for common materials and options. Your local prices might vary based on wood species and supply. Choosing kits can add convenience but usually costs more.
Enhancements and Optional Features for Raised Beds
Adding features like mesh covers, irrigation, trellises, and heat sinks can improve your raised bed’s success. These upgrades help protect plants, save water, and extend your growing season. You can choose options based on your garden’s needs and your budget.
Installing Mesh or Landscape Fabric
Mesh or landscape fabric helps keep pests out and soil in place. Lay chicken wire or hardware cloth inside the bed before adding soil to stop burrowing animals. Staple garden fabric inside the walls all around the bed.
It stops soil loss and weeds. This keeps your garden cleaner and healthier.
Using mesh is especially useful if your bed touches the ground or has legs. A layer of landscape fabric at the bottom improves drainage and stops soil from washing out. Plan to spend about $10 to $20 for fabric and wire.
This amount covers a 4 by 6-foot garden bed. The materials protect your soil and plants.
Check that the mesh fits tight against the walls. Secure it well to close any gaps. This stops pests from getting into your bed.
Setting Up Irrigation Systems
Drip irrigation and soaker hoses save time and water in raised beds. Lay them on top of the soil before planting and cover lightly with mulch. Connect to a garden hose or timer for automatic watering while avoiding wet foliage.
Installing irrigation is simple but needs planning. Measure your bed’s size first to know what you need. Buy hose lengths that cover the bed evenly.
Place drip emitters near each plant’s roots. Using a water timer adds convenience and helps plants get consistent moisture.
Test your irrigation system before planting to make sure all areas get enough water without pooling.
Building Heat Retaining Beds
Heat sinks or insulated beds can extend the growing season by keeping soil warmer. Add thick layers of straw or compost on sides and top. These help trap heat for your plants.
This keeps the bed warmer during cold nights. Another option is to build sides from insulated panels instead of wood.
Stone or dark-colored materials absorb sunlight during the day, releasing warmth at night. Positioning beds south-facing also increases heat exposure. This approach is more common in cooler climates or for early spring planting.
Avoid over-insulating; good airflow helps prevent mold and root diseases in warmer beds.
Step-by-Step Action Plan for Your Raised Planter Bed
Follow these steps to build your raised planter bed efficiently. Each step confirms your progress and helps avoid common errors.
- Before you start: Choose a sunny spot with good drainage. Check for at least 6 hours of sunlight and no puddles after rain.
- Day 1: Measure and mark your raised bed area. Use stakes and string to ensure straight edges and correct size.
- Day 2: Cut and assemble your chosen materials into the frame. The frame should be stable and square with tight corners.
- Day 3: Level the bottom of the bed area. Use a level or straight board to make sure the base is flat.
- Day 4: Place the frame on the leveled ground. Press down slightly so it settles without gaps underneath.
- Day 5: Fill your bed with a soil mix suited for your plants. Aim for a loose, rich texture that drains well.
- Week 2: Plant your seeds or seedlings. Check that soil stays moist but not soggy during the first week.
- After 1 month: Mulch and check for pests regularly. Healthy growth shows your bed is working as planned.
Frequently Asked Questions
How Long Does It Take to Build a Raised Planter Bed?
Building a raised planter bed typically takes 20 to 30 minutes for assembly. Preparing materials and site can add a few extra hours depending on your experience and tools. A simple design speeds things up considerably.
Can You Build a Raised Planter Bed Without Power Tools?
Yes, you can build one with just hand tools like a saw and screwdriver. It will take longer and require more effort but is totally possible. Power tools just make it faster and easier.
What Type of Wood Is Best for Raised Planter Beds?
Cedar and redwood are good choices because they resist rot naturally. Treated wood can also last well if you follow safety guidelines. Avoid woods that leach chemicals into soil.
Is It Necessary to Line a Raised Planter Bed with Fabric?
Lining with landscaping fabric helps prevent weeds and soil loss while improving drainage. It’s not required but can extend the life of your bed and reduce maintenance. Use a breathable fabric to keep moisture balanced.
How Deep Should a Raised Planter Bed Be for Root Veggies?
Plan for at least 10 to 12 inches deep to give roots room to grow. Some growers prefer deeper beds up to 18 inches for carrots or parsnips. Depth varies by plant but more space is usually better.
Can You Build a Raised Bed on Concrete or Hard Surfaces?
Yes, but use materials like plastic bins or add drainage holes at the bottom. Wood beds on concrete need a barrier or feet to prevent rot from trapped moisture. Proper drainage is the key to healthy plants.
Key Points to Remember
Building a raised planter bed gives you control over soil and growing conditions. Start by picking the right site and materials today. Your garden will benefit from the care and planning you put into the bed.