How to Add Sulfur to Soil for Healthier Plants: 8 Essential Steps That Work
You can improve your plants’ health fast by adding sulfur to soil. Start with a soil pH test to see how much sulfur is needed. Then mix the right amount of sulfur into the top 6 to 8 inches of soil.
Adding sulfur lowers the soil pH, which helps many plants absorb nutrients better. Make sure to work the sulfur in rather than leaving it on the surface. This helps soil microbes break it down into a form plants can use.
After applying, test your soil every six months until you hit the right pH. Avoid adding sulfur during cold months when microbes are inactive. Instead, apply it before the growing season when soil temperatures are above 55°F.
Key Takeaways
- Test soil pH before adding sulfur to know how much to apply.
- Work sulfur into the upper 6 to 8 inches of your soil for effective results.
- Use elemental sulfur to lower soil pH gradually and effectively.
- Depending on your soil test, add between 1 and 2 pounds of sulfur per 100 square feet.
- Wait months after adding sulfur for pH to adjust before planting.
- Avoid applying sulfur on dormant turf to prevent loss by wind or rain.
1. How to Add Sulfur to Soil for Best Results

Adding sulfur to soil improves acidity and nutrient uptake for your plants. You want to mix it into the top layers where roots grow and microbes live. Watering after spreading helps activate sulfur and move it into the soil where it works best.
Follow these steps to add sulfur to your garden soil properly. This ensures the sulfur breaks down and adjusts soil pH over time.
- Test your soil first to know sulfur needs and amount.
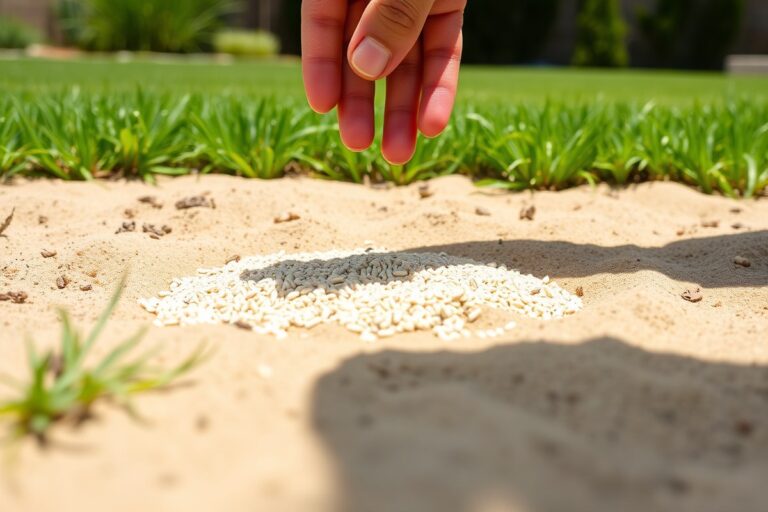
- Spread sulfur evenly over the garden bed’s surface.
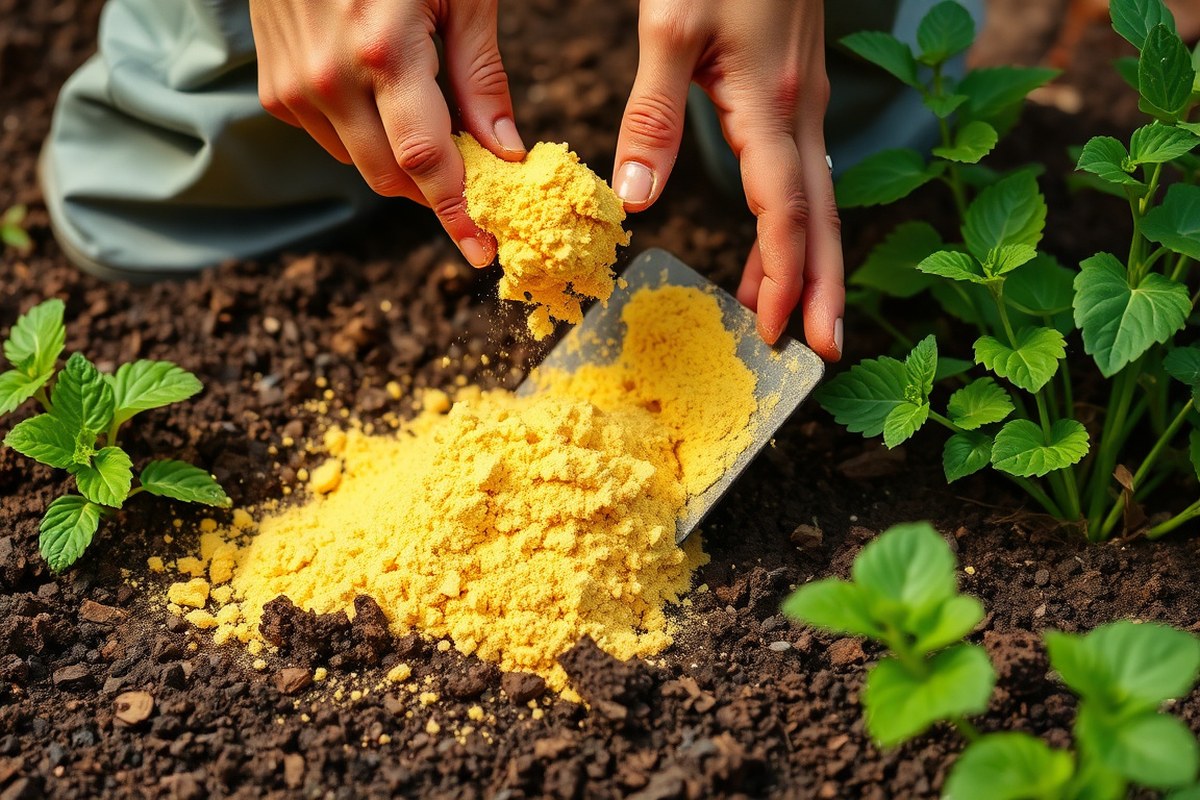
- Use a shovel or garden fork to mix sulfur into the upper 6 to 8 inches of soil.
- Avoid just placing sulfur on the surface; mixing helps microbes interact with it.
- Water the soil gently right after mixing in sulfur to start its activation.
- Make sure soil temperature is above 55°F for microbes to oxidize sulfur effectively.
- Allow several months before planting acid-loving plants to let sulfur alter soil pH.
- Add mulch or compost regularly to maintain acidity and provide organic sulfur naturally.
Work the sulfur deep enough that plant roots and soil microbes can reach it. Sulfur needs to be mixed well to convert into acid and lower pH. Watering right after mixing keeps sulfur moist so it reacts faster.
Timing matters too. Adding sulfur before winter often fails because cold soil reduces microbial action. Doing it in early spring is best when soil temps rise above 55°F. This gives the sulfur time to change pH before you plant your garden.
2. Types of Sulfur to Use in Garden Soil

Elemental sulfur is the top choice for lowering soil pH. It’s slow-acting, taking 3 to 6 months but lasts longer.
This type is usually 90% to 99% pure. It works best mixed into the top 6 to 8 inches of warm soil.
Organic sulfur sources like compost or well-rotted manure add sulfur more slowly. They improve soil gradually and also boost organic matter.
Gypsum is another option but doesn’t lower pH much. Instead, it adds calcium and sulfur without changing acidity.
| Amendment Type | Speed of Action | Cost per 1,000 sq ft | Risks & Drawbacks |
|---|---|---|---|
| Elemental Sulfur | Slow (3-6 mos) | $1.50 – $2.50 | Needs warm soil; slow to show results |
| Aluminum Sulfate | Fast (2-3 wks) | $8.00 – $12.00 | Can cause aluminum toxicity; higher cost |
| Ammonium Sulfate | Moderate (1-2 mos) | $3.00 – $4.00 | Adds excess nitrogen; may burn plants in heat |
Aluminum sulfate works fast to lower pH within weeks but risks hurting roots. Ammonium sulfate adds nitrogen, which may harm some plants or turf. Choose elemental sulfur for vegetable gardens or acid-loving plants like blueberries if you want steady change.
Look for micronized sulfur mixed with bentonite clay. Products like Tiger-Sul or Espoma Organic Soil Acidifier fit this.
They spread evenly and mix into soil easier. For rapid pH adjustment, some gardeners prefer aluminum sulfate but watch for side effects.
Apply sulfur only after checking your soil’s pH and nutrient levels to avoid overuse.
Organic sources take time to release sulfur, offering gentle pH adjustments and soil health benefits. They suit gardens aiming for long-term improvement without quick pH shifts. For fast pH changes, stick to elemental sulfur but start early due to its slow reaction.
3. How Much Sulfur to Apply Based on Soil and Plant Needs
Using Soil Test Results to Calculate Sulfur
Start by getting a soil test to check your soil’s pH and sulfur levels. The test will tell you the soil’s acidity level. It shows if sulfur is needed to lower pH.
This helps balance the soil for better plant growth. Without this information, you risk adding too much or too little sulfur.
Once you have the results, use them to figure out how much sulfur to add. The bigger the drop in pH you want, the more sulfur you’ll need. Many gardeners use online sulfur calculators that ask for soil pH, texture, and desired pH.
Adjusting Amounts for Sandy, Loam, and Clay Soils
Soil type matters for how much sulfur to add. Clay soil holds nutrients and resists change more than sandy soil.
Sandy soil usually needs 1 to 1.5 pounds of sulfur for 100 square feet. Clay soil requires 3 to 5 pounds for the same pH drop.
Loam soils fall in between with moderate sulfur needs, usually 2 to 2.5 pounds per 100 square feet. Putting too much sulfur on clay soil slows results. Changes can take 6 to 9 months or longer.
Patience is key when adjusting acidic levels in clay. Sandy soils usually shift faster, within 3 to 4 months.
Target Soil pH Levels for Different Plants
Each plant has a preferred soil pH. Acid-loving plants like blueberries and azaleas thrive between 4.5 and 5.5. Your soil pH is too high for these plants.
You need to add sulfur to bring the pH down. Lower pH helps these plants thrive. For most vegetables and flowers, a pH around 6.0 to 6.5 works best.
Lowering soil pH too fast or too much can harm plants, so reduce pH gradually. Apply sulfur in stages if you want to drop pH more than one unit. Keep testing every year to avoid overshooting your target.
Example Calculation for a 100-Square-Foot Garden Bed
Your soil test shows pH is 7.5 and soil is loam. To lower pH by one unit, use 2.5 pounds of sulfur per 100 square feet. This amount fits usual advice for loam soils growing acid-loving plants.
Apply 2.5 pounds evenly across the 100 square feet. Till it into the soil at least six months before planting.
Check pH after this period and add more sulfur if needed. But do not add more than 2.5 pounds each time.
This slow, measured approach protects your plants and ensures the pH shifts safely over time. Sulfur effects are gradual, so patience pays with healthier soil and plants.
4. Why and How Sulfur Affects Soil pH and Plant Growth
Sulfur lowers soil pH by increasing hydrogen ion concentration in the soil. When you add sulfur, soil bacteria convert it into sulfuric acid. This acid releases hydrogen ions, which make the soil more acidic and lower the pH level.
Lowering soil pH improves nutrient availability, especially nitrogen, phosphorus, iron, and manganese. These nutrients dissolve better in slightly acidic soils. Plants absorb them more efficiently, leading to healthier growth and stronger roots.
After applying elemental sulfur, microbes slowly break it down over weeks or months. This process depends on soil temperature, moisture, and organic matter.
You may see changes in soil pH within 3 to 4 months. But it can take longer in colder or dry conditions.
Sulfur also supports nitrogen fixation, especially in legumes like peas and beans. These plants rely on bacteria to help them. The bacteria need sulfur to work.
They turn air nitrogen into usable food. Adding sulfur encourages this natural fertilization process, boosting plant health.
Acid-loving plants like blueberries, azaleas, and gardenias benefit the most from sulfur applications. Their roots absorb nutrients best in lower pH soils. Soil that is too alkaline causes problems.
These plants can’t get enough iron. They grow weak and their leaves turn yellow.
Make sure to apply sulfur based on your soil’s current pH and plant needs. Adding too much sulfur too quickly may harm plants by making soil too acidic. Test soil before adding sulfur.
Wait 90 days and test again. This shows how the pH changed.
5. When and How Often to Add Sulfur to Your Soil
Sulfur works best when added in fall or early spring, giving time to change soil pH. Reapply every six months or as soil tests suggest. Sulfur usually takes months to affect the soil, so plan ahead before planting.
Seasonal Timing for Sulfur Application
Applying sulfur in fall or early spring fits the natural soil cycle. Soil microbes start breaking down sulfur during these seasons.
Avoid rushing your plants with sudden pH changes. Go slow for best results.
Warm soils speed up the process. So late winter to early spring is good for early growing crops. Fall gives sulfur months to prep the soil without disturbing active roots.
Frequency and Soil Testing Intervals
After adding sulfur, test your soil pH every six months. This helps you track sulfur’s effect and know if more is needed. Applying 1 to 2 pounds per 100 square feet usually drops the pH by one point.
Repeat sulfur applications only if tests show the pH hasn’t reached your target. Too much sulfur at once can make soil too acidic and harm plants.
- Test soil pH twice a year for best results
- Apply no more than 2.5 pounds per 1,000 square feet at once
- Adjust sulfur amounts based on plant needs and soil test data
- Use compost or mulch containing sulfur as a gentler option
- Wait at least 6 months between sulfur treatments
- Keep records of application dates and dosages for future reference
Waiting Periods Before Planting
It often takes six months to a year for sulfur to lower soil pH effectively. Adding sulfur well before planting gives it time to create a better soil environment. This means applying sulfur in fall before a spring garden starts growing.
You can apply elemental sulfur directly in planting holes. This works for small beds when you’re short on time.
Make sure to spread it evenly. Still, allowing sulfur to mix into soil early reduces risk of plant root damage.
Applying Sulfur in Established Gardens
You can add sulfur around established plants. But do so carefully to avoid root damage.
Spread sulfur evenly and water it in to prevent burning the roots. Using small amounts over time helps maintain soil pH without shocking plants.
Compost and mulch with sulfur support ongoing soil health and release nutrients slowly. This method works well for maintaining soil acidity without repeated sulfur powder applications.
Never apply sulfur on waterlogged soil; it can create harmful gases that damage roots.
6. How to Test Your Soil and Monitor Sulfur Effectiveness
Test your soil pH before adding sulfur and again 8 to 10 weeks later. Use these results to check if sulfur is lowering pH as expected. Change your sulfur amount based on the test results and your plant needs.
Sampling Soil for pH Testing
Collect soil from several spots in your garden to get an average reading. Use a clean trowel to dig 4 to 6 inches deep for each sample. Mix samples in a clean bucket to make a composite sample for testing.
Avoid spots with recent fertilizer or lime, as they can skew pH. Let the mixed soil dry for a day before testing to get accurate results. Label samples if testing different garden areas or if doing repeated tests.
Using DIY and Professional Soil Test Kits
Buy a soil pH test kit from a garden center or order one online. Some kits come with color charts and liquid or powder reagents to test soil right away. Follow the directions carefully, usually mixing soil with water and testing the solution.
Professional soil testing services cost $10 to $30 but offer detailed and precise results. They often test nutrients besides pH and use methods like Mehlich-3 extractant. Keep in mind, extractant tests may show pH 0.3 to 0.5 units lower than soil water pH.
- Collect 4 to 6 soil subsamples from your garden area.
- Mix subsamples in a clean container to blend well.
- Let the mixed sample dry if wet, for one day.
- Follow kit instructions or send sample to lab for testing.
- Record your pH results with date and sample location.
Interpreting Soil pH Results
Soil pH above 7.0 means alkaline soil, where sulfur can help. A drop of 0.3 to 0.5 pH units after applying sulfur shows it is working. If pH stays the same, consider applying more sulfur but wait 8 to 10 weeks between doses.
Target pH ranges depend on your plants but usually 6.0 to 6.5 suits many garden crops. Keep in mind test method differences, lab results can read slightly lower than field pH. Use the results to adjust sulfur amounts carefully to avoid excess acidification.
Scheduling Follow-Up Testing
Test soil pH before adding sulfur for a clear baseline. Wait 8 to 10 weeks after each sulfur application before testing again. This gives sulfur time to change the soil chemistry noticeably.
Repeat testing every spring if you regularly add sulfur to keep pH in range. Adjust timing based on plant growth cycles and weather conditions. Don’t add sulfur too often or in large amounts without testing first.
7. Common Mistakes When Adding Sulfur and How to Avoid Them
Applying too much sulfur is a common mistake that can harm plants. Excess sulfur can make the soil too acidic, which blocks important nutrients.
You might see yellowing leaves or stunted growth when the pH drops too low. Avoid this by checking soil pH before adding sulfur and rechecking after a few weeks.
Another error is uneven spreading. Clumps of sulfur create patches that acidify soil unevenly. This causes some plants to suffer more than others.
Use a spreader or mix sulfur well into the top few inches of soil. Watering after application helps dissolve sulfur evenly for better uptake.
Overapplication may also cause aluminum toxicity in acidic soils. This happens when aluminum becomes more available and harms roots. To avoid issues, do not use more than 1 pound of elemental sulfur per 1,000 square feet.
Apply it slowly over time instead of all at once. This prevents harming your soil or plants. Space applications by at least one season to keep soil chemistry balanced.
Failing to read product labels can lead to misuse. Sulfur products differ in purity and particle size, affecting how fast they act.
Follow recommended rates from the package or trusted university guides. Using less is better than too much, since excess creates waste and risks plant damage.
Wear gloves and a dust mask when handling sulfur powder. The fine particles can irritate skin, eyes, and lungs.
Keep children and pets away during application. Wash hands and tools afterwards to avoid accidental exposure or dust spreading indoors.
Some gardeners add sulfur to soils that don’t need lowering pH. This wastes money and can stunt growth where soils are already acidic.
Always run a soil test to know your starting pH and sulfur levels. Choose sulfur only if the test shows your soil is above 6.5 and plants prefer more acidic conditions.
In clay or heavy soils, sulfur breaks down slower than in sandy soils. Don’t expect quick results. Plan applications months ahead of planting and avoid reapplying too soon.
Also, avoid mixing sulfur with fertilizers unless directions say it’s safe. This helps prevent harmful chemical reactions and nutrient imbalances.
Use a checklist before adding sulfur to your garden. Test soil pH and measure the area for proper dosing. Wear gloves, spread sulfur evenly, water afterward, and plan follow-up soil tests.
Consulting a local extension service can clarify application timing and rates. Simple preparation and care keep your soil healthy and plants thriving without sulfur problems.
8. Practical Tips for Incorporating Sulfur Safely and Effectively
Handle sulfur products with care to avoid skin and eye irritation. Wear gloves, a dust mask, and safety glasses when applying sulfur powder. Keep kids and pets away from treated spots until sulfur is mixed in.
Wait until all dust settles before letting them near again. This keeps them safe from irritation or harm.
Rake or till sulfur deep into soil, about 6 to 8 inches. For small beds, use a hand rake or hoe to spread it. Thorough mixing stops sulfur from sitting on top and causing trouble.
Sulfur can be combined with compost or fertilizers if you add it carefully. Mix the sulfur into the soil first and then apply compost on top. Avoid mixing sulfur directly with fertilizers that contain lime, as lime can reduce sulfur’s acidifying effect.
- Apply sulfur on dry days with mild wind to avoid inhaling dust
- Water the soil lightly after applying sulfur to help it start working
- Check soil pH one to two months after application for adjustment needs
- Store unused sulfur in a sealed container in a dry, cool place
- Wear protective gear every time you handle sulfur powders or granules
Soil temperature affects how fast sulfur turns into usable sulfate. Warm temperatures speed this process.
So apply sulfur in spring or early fall for the best results. Avoid adding sulfur right before heavy rains or irrigation to prevent runoff and loss.
Always read the product label before use and follow recommended safety steps carefully.
Use sulfur treatments sparingly and follow application rates closely. Too much sulfur can lower soil pH too much and harm your plants. Regular soil testing helps you add just the right amount without risking damage or environmental harm.
Step-by-Step Action Plan for Adding Sulfur to Your Soil
Follow these clear steps to add sulfur and check if it’s working for your garden.
- Before planting: Test your soil pH and sulfur levels using a kit. Note the numbers.
- Day 1: Choose the right sulfur type, such as elemental or gypsum. Apply according to your test results.
- Week 1: Mix sulfur evenly into the top 6 inches of soil. This helps it work faster.
- Week 2: Water the soil well but avoid overwatering. Check that the soil feels moist, not soggy.
- Month 1: Test soil pH again to see if it dropped 0.2 to 0.5 points. This shows sulfur is working.
- Month 2: Watch your plants for signs of better growth or less yellowing leaves.
- Every 3 to 6 months: Repeat soil tests to track sulfur levels and pH. Add more sulfur only if needed.
- Before next season: Plan your sulfur application based on test results. Avoid adding too much to protect plants.
Frequently Asked Questions
Can I Add Sulfur to Soil with Plants Already Growing?
Yes, you can add sulfur while plants grow. Just avoid disturbing roots and apply it evenly for best results.
How Does Compost Naturally Add Sulfur to Soil?
Compost contains organic sulfur released as it breaks down. It slowly improves soil sulfur without sharp pH changes.
What’s an Easy Way to Mix Sulfur into Planting Beds?
Mix sulfur thoroughly into the top 6 to 8 inches of soil. This speeds up soil microbes’ activity and lowers pH faster.
Can Mulch or Manure Add Sulfur to My Garden?
Yes, both mulch and manure often have sulfur. They support soil health and add sulfur gently over time.
Is It OK to Spread Sulfur on Dormant Grass Areas?
Spreading on dormant grass risks loss from wind or rain. Wait until soil warms above 55°F for better results.
How Long Does Sulfur Take to Change Soil pH?
It usually takes a few weeks to months. Check pH every six months to track progress and adjust as needed.
Wrapping Up
Adding sulfur to your soil can adjust pH and support healthy plants. Start with a soil test to get it right. Keep checking your soil and plants to make small adjustments as needed.