

How to Build a Hydroponic System: Simple Steps for Fast Indoor Gardens
How to build a hydroponic system depends on what plants you want to grow. The easiest way is to use a plastic container and some tubing. Start simple to get your system running quickly.
This setup works well for beginners. You can build a basic system in one to two hours with common household tools.
Start by choosing a container to hold your nutrient solution, like a 5-gallon bucket. Then pick a water pump or air stone to keep the water moving. This helps plants get oxygen and nutrients faster than soil.
Keep the water temperature between 65 and 75 degrees Fahrenheit and the pH near 6. This range suits most common vegetables and herbs. Avoid using PVC glue if you want a quick setup that’s easy to adjust or move.
Key Takeaways
- Use a 5-gallon bucket as a nutrient reservoir for your hydroponic system.
- Keep water temperature between 65 and 75 degrees Fahrenheit for best growth.
- Keep the pH level around 5.7 to 6.3 for best nutrient use. Plants absorb nutrients easier in this range. Check pH often to maintain balance.
- Choose a water pump or air stone to circulate oxygen and nutrients.
- You can build basic systems using common tools fast. Expect to spend about 1 or 2 hours assembling. This approach suits those starting out.
- Cut a 4-inch fence post in half to make rails for a DIY setup.
How to Build a Basic Hydroponic System at Home

Building your own hydroponic system at home is doable with some simple tools and materials. Most beginners choose a Deep Water Culture (DWC) system first. It costs less and is easy to care for.
This setup uses a bucket or tote as a water reservoir. Plants sit in net pots, and an air pump adds oxygen.
You’ll need a clean bucket or plastic storage tote that holds about 5 gallons of water. A lid with holes fits on top and holds the net pots. Net pots keep plants in the growing medium.
The air pump sends bubbles through an air stone at the bottom. These bubbles give oxygen to keep roots healthy. Mixing your nutrient solution properly is key for strong growth.
- Clean the reservoir: Wash your bucket or tote thoroughly with mild soap. Rinse it well to remove any soap residue that could harm plants.
- Prepare the lid: Trace and cut holes in the lid for your net pots. The holes should fit the pots snugly so they stay put without falling in.
- Drill an air hole: Make a small hole in the lid or side of the bucket. Insert tubing for the air pump, ensuring it fits tightly to prevent leaks.
- Place the air stone at the reservoir’s bottom. Attach the tubing from the air pump. This sends oxygen bubbles into the water.
- Pour clean water into the reservoir. Leave some room at the top so the net pots and plants fit well. Use water around 65 to 75 °F for best root health.
- Mix the nutrient solution: Add hydroponic nutrient mix to the water following package instructions. Stir well until fully dissolved, then test pH if possible, aiming for 5.5 to 6.5.
- Fill the net pots with a growing medium like clay pellets or coconut coir. This helps support your plants as they grow. Plant your seedlings or seeds gently in the media.
- Assemble the system: Place the lid with net pots onto the reservoir. Roots should hang down directly into the nutrient solution below.
This build usually takes 1 to 2 hours, including prep and setup. Expect to spend about $30 to $60 on materials, depending on what you already have.
Plants grow faster in this system than in soil. You’ll see strong leaves in about two weeks with steady care.
Common issues include water level dropping too low or bad odors from stagnant water. Keep the air pump on all the time.
Change the nutrient water every 1 to 2 weeks for best results. That keeps roots healthy and growth steady.
Choosing the Best Hydroponic System for Your Space and Skill Level
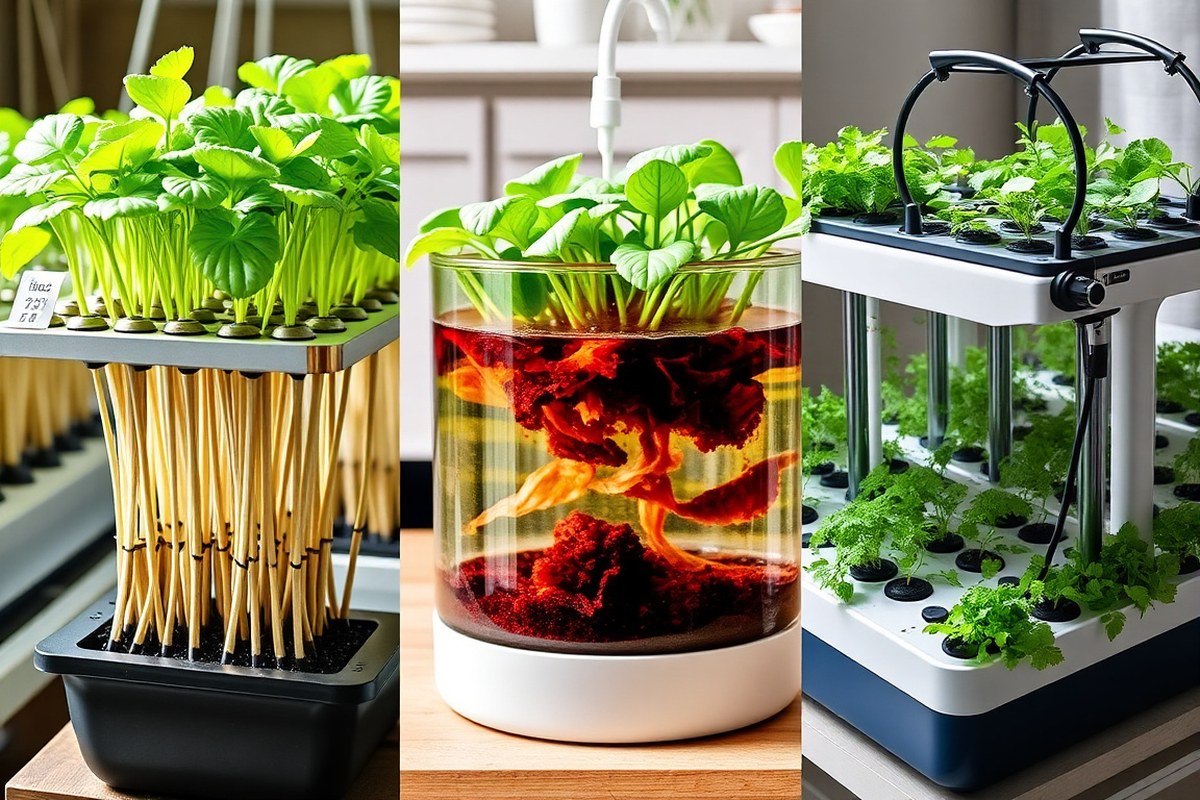
Several types of hydroponic systems work well for home use. But the easiest and cheapest is Deep Water Culture (DWC).
This system is beginner-friendly and needs little space or equipment. More complex types like Nutrient Film Technique (NFT) and aeroponics require pumps and steady electricity.
Wicking Systems: Simplicity and Low Cost
Wicking systems use a wick to draw nutrient solution from a reservoir to the plant roots. They don’t need pumps or electricity, making them perfect for small spaces or off-grid setups. These systems work best for small, light-feeding plants like herbs and strawberries.
A big plus is how easy it is to build and maintain. The main drawback is plants can dry out fast. The wick might not meet their water needs.
That leaves plants thirsty without enough moisture. Wicking works well for slow-growing or low-water plants but not heavy feeders like tomatoes.
Deep Water Culture: Fast Growth, Easy Setup
DWC suspends plant roots in nutrient-rich, oxygenated water. It’s the simplest setup for beginners. Bucket-based DIY systems cost around $20 to $50.
They are easy and affordable to build. An air pump adds oxygen to the water and keeps roots healthy.
DWC supports fast growth because plants can access water and nutrients constantly. It fits well in small indoor spaces. Keep it by adding water when low.
Change the nutrient solution every 1 to 2 weeks. This stops root rot and nutrient loss.
This type does need a power source for the air pump. But you can skip it briefly.
The Kratky method simplifies DWC further. It needs no pump or electricity but has less control over oxygen levels and nutrients.
Nutrient Film Technique and Aeroponics Overview
NFT uses a thin flow of nutrient solution. The roots sit in a slight trough or channel. The solution flows gently across the roots.
Roots get air and nutrients without being fully submerged, which can improve oxygen supply. This system often uses a pump and needs a steady flow to prevent roots drying out.
Aeroponics sprays nutrient mist onto the roots in an enclosed space. It promotes fast growth and efficient nutrient use but is complex and costly to build. Aeroponics suits advanced hobbyists who want high yields and can manage the regular monitoring.
Both NFT and aeroponics require stable electricity and more technical skill than DWC or wicking systems. They use more parts, raising costs and maintenance needs. Here’s a simple comparison to help decide which system fits your space and skills better:
| System Type | Cost Estimate | Space Needed | Electricity Required | Difficulty Level | Best for Plants |
|---|---|---|---|---|---|
| Wicking | Low ($10-$30) | Small | No | Easy | Herbs, Strawberries |
| Deep Water Culture (DWC) | Low to Moderate ($20-$50) | Small to Medium | Yes (Air Pump) | Easy to Moderate | Leafy Greens, Tomatoes |
| Kratky (No Pump DWC) | Low ($10-$30) | Small to Medium | No | Easy | Leafy Greens, Herbs |
| Nutrient Film Technique (NFT) | Moderate ($50+) | Medium | Yes | Moderate | Leafy Greens, Small Fruit |
| Aeroponics | High ($100+) | Medium | Yes | Advanced | Fast-Growing, High Yields |
Most first-timers and those with limited space or budget pick DWC or wicking systems. Use wicking if you don’t have electricity or want the simplest setup.
DWC works best if you want faster plant growth and can supply power. NFT and aeroponics pay off for larger systems and experienced growers.
Tip: Avoid letting your nutrient solution run dry in wicking and DWC systems. Roots can dry quickly and plants may die.
Materials, Tools, and Safe Substitutions for DIY Builds
Building your own hydroponic system needs certain materials and tools. Choosing food-safe and reliable parts helps you avoid safety risks. You can save money with smart substitutions while keeping plants healthy.
Essential Materials for Hydroponic Systems
The reservoir holds your nutrient solution. Use a food-grade plastic bucket or a storage tote that’s opaque. Clear containers can cause algae growth, so avoid them.
Net pots hold your plants and roots. Small plastic cups with drainage holes work if you drill them yourself. However, cheap purpose-built net pots are very affordable and worth buying for better durability.
- Food-grade plastic bucket or storage tote (5 to 10 gallons)
- Net pots, 2 to 3 inches in diameter, food-safe plastic
- Clay pebbles or coco coir as growing media
- Aquarium air pump and air stone for oxygen supply
- Water pump (optional, depending on system type)
- Plastic tubing to connect pumps and air stones
- PH test kit and nutrient solution
Clay pebbles and coco coir are safe and effective growing media. Avoid anything that might rot or trap too much water. These materials help roots get the oxygen they need.
Tools and Equipment Needed
You’ll need basic tools to assemble your hydroponic system at home. A drill with different bits is essential for making holes in containers and net pots.
Other items include scissors, a utility knife, and a screwdriver. These help you cut tubing, trim materials, and assemble supports. Most tools cost under $20 if you don’t have them already.
Food-Safe and Low-Cost Substitutions
You can reuse many items as long as they’re food-safe and clean. For example, you might reuse a large plastic storage tote for your reservoir.
Cheap containers that aren’t labeled food-grade could leach chemicals. Avoid these to keep your plants safe, especially if you plan to eat the harvest.
- Reuse clean food-grade buckets from juice or pickles instead of buying new ones
- Drill holes in sturdy plastic cups instead of buying net pots
- Buy growing media rather than using garden soil or improvised materials
- Pick an aquarium air pump from a pet store for the air supply
- Use silicone or plastic tubing for connections; avoid metal which can corrode
Choosing the right materials impacts your system’s reliability and safety. Spend extra on parts like air pumps and growing media. That keeps your hydroponic garden working well without surprises.
Setting Up Nutrients, Water Quality, and pH for Healthy Plants
Start with a pre-made hydroponic nutrient solution designed for vegetables and herbs. Mix about 5 ml of concentrate per gallon of water in your reservoir. Use clean, room-temperature water between 65 and 75°F for the best results.
Test the pH of your water and nutrient mix before adding plants. The ideal pH range is usually 5.5 to 6.5. Use a pH test kit to check your solution’s pH level.
Add small amounts of pH up or down solution carefully. Adjust the pH slowly until you reach the right level.
Check the pH every few days because water and nutrient uptake can change it. Adjust as needed to keep it in the right range. This helps plants absorb nutrients properly and stay healthy.
Keep an eye on the nutrient solution level and top off with fresh water regularly. Replace the entire nutrient solution every 1 to 2 weeks to prevent salt buildup. This schedule keeps the balance steady and your plants growing strong.
Maintaining the right water temperature prevents stress on your plants. Colder water slows growth, while warmer water reduces oxygen in the solution. Use a thermometer to monitor and aim for steady temperatures in the 65 to 75°F range.
Oxygen is also important at the roots. Use an air pump or ensure good water movement inside the reservoir. This keeps roots healthy and prevents diseases from stagnant conditions.
Placing and Supporting Plants in Your Hydroponic System
Start by transferring seedlings to net pots once you see true leaves. Fill pots with a growing medium that drains well. Use clay pebbles or coconut coir mixed with perlite.
This mix keeps roots healthy by avoiding water buildup. Leave a 1/4 inch gap at the pot’s rim.
This gives the plant room to grow above. The gap helps air reach the plant’s stem.
Place net pots so roots just reach below the water line. Don’t let roots get fully underwater. Fully submerge roots only if you use a Deep Water Culture setup.
Roots should get oxygen from air and nutrients from water without being waterlogged. Support seedlings with a small foam collar or fabric strip around the stem.
This keeps them upright. Support lasts until roots spread inside the medium.
- Use clay pebbles for good drainage and root aeration
- Keep roots partially submerged to avoid rot and suffocation
- Wrap stems gently to support seedlings in early stages
- Add trellis or plant supports once plants reach 6-8 inches tall
- Secure larger plants with stakes or netting to prevent falling
- Adjust net pot size for root space as plants grow
Prevent root rot by ensuring roots never sit in stagnant water. Keep the nutrient solution aerated and flowing if roots are submerged. For larger plants, vertical or trellis supports become necessary early.
Add supports when plants reach 6 to 8 inches tall. These stop stems from breaking.
Supports also help plants grow straight upward. Use lightweight netting or bamboo stakes tied loosely around stems.
Check root color regularly; white roots mean healthy growth, brown signals rot.
The growing medium you choose affects root health and plant stability. Clay pebbles, coconut fiber, and perlite all drain well and allow oxygen to reach roots. Avoid compacted media that traps moisture against roots.
Adjust your net pot size to give roots room as plants mature. You might need larger pots or a deeper system for bigger vegetables like tomatoes or peppers.
Testing, Monitoring, and Maintaining Your System for Best Growth
Check water and nutrient levels every day, ideally twice daily. This keeps your plants fed and hydrated, preventing stress or wilting. Catching any pump issues early helps avoid bigger problems.
Use a simple pH tester to monitor your water’s acidity regularly. Nutrient imbalances show up as yellowing leaves, brown spots, or stunted growth. Wilting or slow growth often means low oxygen or wrong nutrient strength.
Every two weeks, empty and clean your nutrient reservoir. Rinse your pebbles or growing medium under running water for about 30 seconds to clear buildup. Clean components help prevent mold, algae, and bacterial growth.
- Day 1 to 14: Check water level and pH twice daily, adjust as needed
- Every 2 weeks: Empty, clean, and refill nutrient solution
- Weekly: Inspect plants for dead leaves or nutrient deficiency signs
- 30 seconds: Rinse pebbles or medium during reservoir change
- Monitor air pump daily to ensure oxygen flow
Dead leaves slow your system and spread disease. Remove them right away.
Monitor light exposure too, since poor light can mimic nutrient issues. Keep your air pump clean and working to maintain oxygen in the water.
| Problem | Possible Cause | How to Fix |
|---|---|---|
| Wilting plants | Low oxygen, pump failure | Check air pump, increase oxygen flow |
| Yellow leaves | Nutrient deficiency or pH imbalance | Test pH, adjust nutrients, improve light |
| Slow growth | Incorrect nutrient levels or poor light | Check nutrient solution, improve lighting |
| Algae growth | Dirty system, excess light on solution | Clean reservoir, cover nutrient tank |
How Long Does It Take to Build and Start Growing?
Gathering materials and shopping usually takes about 2 to 4 hours. This depends on the availability of items like pumps, containers, and grow lights near you. You might spend a bit longer if ordering online or sourcing special parts.
Building the system itself can take 4 to 8 hours once you have everything. Simple setups like a Deep Water Culture system run faster, often under 4 hours. More complex systems with multiple components and plumbing may stretch to 8 hours or more.
After assembly, cycling the system is the next step before adding plants. Cycling means running the system with water and nutrients to balance pH and check for leaks. This usually takes 24 to 72 hours.
Most growers add seedlings or clones right after cycling finishes. Seedlings should be about 1 to 3 inches tall or have 2 to 3 true leaves. Starting too soon causes stress since roots need oxygen and stable conditions.
Expect harvest times to vary by plant type. Leafy greens like lettuce or spinach can be ready in 4 to 6 weeks. Fruiting plants like tomatoes or peppers need 8 to 12 weeks to grow.
They require good light and proper conditions to fruit. Herbs generally fall between 6 to 8 weeks.
The timeline also changes with system types. NFT (Nutrient Film Technique) and aeroponics may speed up growth by better oxygenating roots.
But these systems need more setup time and monitoring. Wick systems are simpler and faster to build but slower for large plants.
Light availability affects growth speed significantly. Plants need 12 to 16 hours of light daily to thrive in hydroponics.
Use natural sunlight near a window for your plants. You can also buy a grow light made for your plant types.
Skipping proper cycling or rushing to add plants can cause nutrient imbalances and root issues. Take your time to adjust water pH to 5.5 to 6.5 and monitor temperature around 65°F to 75°F. These details make a big difference during the first weeks.
Plan your project across a couple of weekends. This lets you set up, cycle, and plant without rushing. Keep notes on time spent to track your own pace.
This helps you know when to expect your first ripe herbs or veggies. Your home hydroponic farm will produce on schedule.
Avoiding Common Beginner Mistakes and Safety Tips
Beginning gardeners often overlook common mistakes that hurt plant health and system durability. Avoiding contamination and equipment damage keeps your hydroponic setup working well. Knowing how to spot problems and follow safety tips protects your plants and you.
Nutrient and Water Handling Safety
Contamination usually comes from dirty tools or poor water quality. Always use clean containers for mixing nutrients and fresh water. Using a reliable pH meter and testing your nutrient solution weekly helps plants absorb nutrients properly.
Handling nutrients needs care because some formulas irritate skin or eyes. Wear gloves and goggles when mixing to prevent burns or allergic reactions. Store nutrient solutions in a cool, dark place away from children and pets.
Here’s a quick checklist to avoid nutrient and water issues:
- Use distilled or filtered water to reduce impurities
- Clean reservoirs weekly to prevent algae buildup
- Use a fresh nutrient solution every 1-2 weeks
- Mix nutrients exactly as the label directs
- Keep pH between 5.5 and 6.5 for most vegetables
- Rinse tools after use to avoid cross-contamination
Always rinse your hands after handling nutrients to avoid skin irritation.
Electrical and Pump Safety Tips
Hydroponic systems often use pumps and timers, which need careful setup. Keep all electrical devices high and dry to prevent shocks or short circuits. Use waterproof power strips and check cords regularly for wear or damage.
You can build a system without power by using manual watering methods or siphons. These setups usually require more time but reduce electrical risks. Make sure you avoid stagnant water to prevent root rot in systems without pumps.
Sharp edges from cut pipes or containers can harm your plants or your fingers. Sand all edges smooth to protect roots and prevent cuts when handling the system. Securing your equipment firmly also stops accidental spills or leaks.
Signs of System or Plant Problems
Wilting or yellow leaves often mean roots aren’t getting enough oxygen or nutrients. Check your air pump and water flow first to see if they need adjustment or repair. Poor water circulation causes roots to drown or rot quickly.
Root rot looks like brown, slimy roots instead of white and firm. Remove affected plants right away to stop spread. Clean the system well using mild bleach.
Mix 1 part bleach with 10 parts water for cleaning. Replace the nutrient solution and check system aeration.
Look for these common warning signs:
- Slow growth or stunted plants
- Leaves turning yellow, brown, or curling
- Unpleasant odors from the water reservoir
- White residue or algae on surfaces
- Water pooling or leaks under the system
Unplug your system before any maintenance to avoid electrical hazards and equipment damage.
Step-by-Step Action Plan to Start Your Hydroponic System
Follow this simple schedule to build and grow using your hydroponic setup. Each step tells you what to do and how to check if it worked.
- Day 1: Gather your materials and tools based on your chosen system type. Make sure everything matches your space and skill level.
- Day 2: Assemble the basic hydroponic structure, including the reservoir, tubing, and plant holders. Check for any leaks or loose parts.
- Day 3: Prepare the nutrient solution by mixing water with nutrients and adjusting pH to 5.5, 6.5. Use a pH meter to confirm proper balance.
- Day 4: Put seedlings into net pots. Use a good growing medium. Rockwool or clay pellets both work well. Ensure roots have good contact with the nutrient solution.
- Week 1: Turn on the water circulation and aeration. Observe plants for signs of stress or drying, adjusting flow or light as needed.
- After 2 weeks: Test water quality and nutrient levels. Add nutrients or change water if plants’ growth slows or leaves yellow.
- Weekly: Clean the system parts and check pH and electrical conductivity. This keeps your plants healthy and system efficient.
Frequently Asked Questions
Can I Make My Own Hydroponic System?
Yes, you can build your own hydroponic system using common materials. Start with simple designs like NFT or deep water culture to get familiar. Pick safe substitutes for parts to avoid food-safety risks and save money.
What Plants Cannot Be Grown Hydroponically?
Plants with large root systems like mature trees or root crops tend to struggle in hydroponics. Most leafy greens, herbs, and small fruits do well instead. Choose plants suited for soilless growth, especially if you’re new to hydroponics.
What Are the 6 Requirements for Hydroponics?
Hydroponics needs water, nutrients, a growing medium, oxygen, light, and temperature control. Each must be carefully balanced for healthy plant growth. Knowing these basics helps you avoid common problems beginners face.
What Is the Easiest Hydroponic System for Beginners?
Deep water culture (DWC) is often the easiest system for newcomers due to its simple setup. Plants float in nutrient-rich water with an air pump providing oxygen. It requires fewer parts and less maintenance during the start-up phase.
How Long Does It Take to Build a Hydroponic System?
Building a simple hydroponic system can be quick. It takes under two hours. You need all your materials ready first.
More complex systems will demand extra time to assemble and test. Plan ahead and double-check your setup before planting.
Can I Build a Hydroponic System Without Electricity?
Yes, you can create a passive hydroponic system that doesn’t use electricity. These systems rely on gravity and manual watering. They work well for small setups but need more hands-on care.
Before You Go
Building a hydroponic system at home takes some patience but it’s worth it. Start with small, simple steps and you’ll grow healthy plants soon. Try setting up your nutrients today to see your system come alive.


