How to Start Seedlings for Hydroponics: A Complete Guide for Fast Healthy Growth
Knowing how to start seedlings for hydroponics means getting your plants off to a strong start. Begin by choosing the right growing medium, like coco or rockwool, and prepare it well. Soak or buffer mediums if needed to avoid nutrient issues and promote healthy roots.
Seeds usually sprout in 2 to 14 days depending on the plant type. Keep the temperature steady between 70 and 80 degrees Fahrenheit for the best growth. Humidity domes help at first, but remove them once seedlings appear to prevent mold.
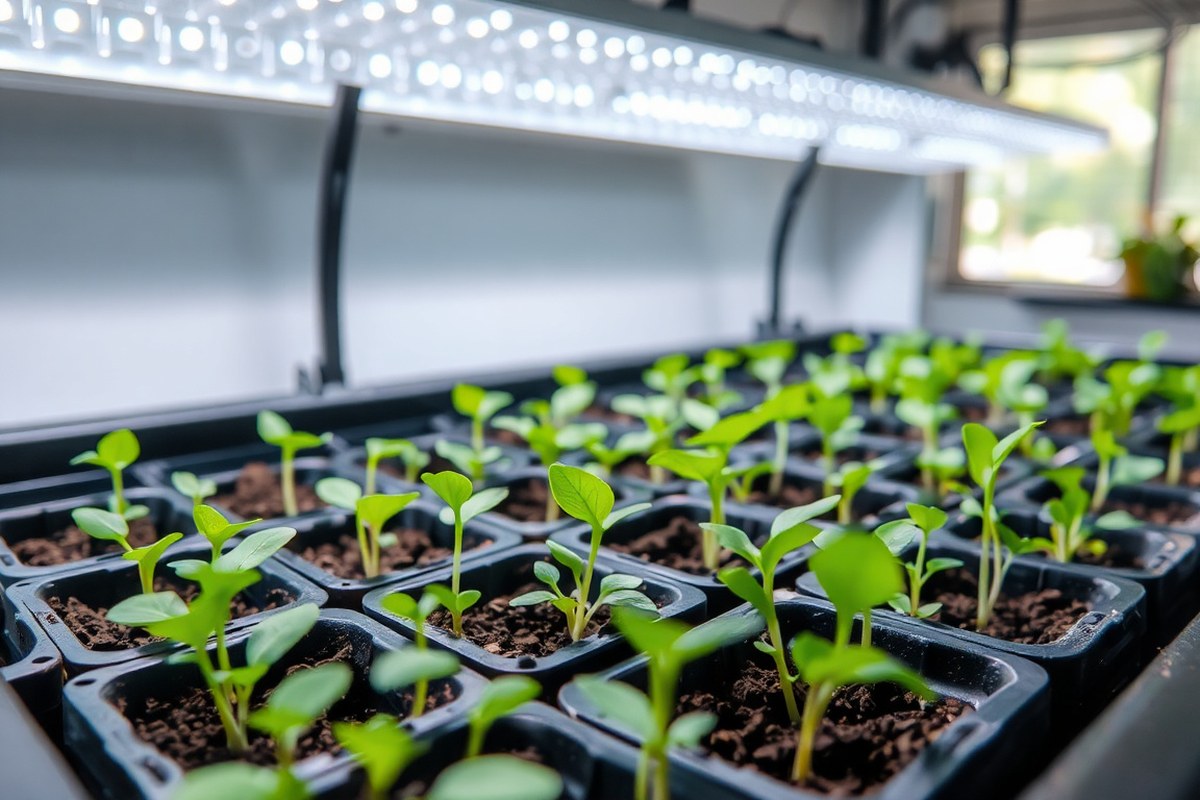
Use low-intensity grow lights 2 to 4 inches above seedlings. Raise the lights as plants get taller. Keep the light close enough to prevent stretching.
Keep nutrient levels low at the start since young roots can’t handle strong solutions. Check pH often and keep it between 5.5 and 6.5 to avoid stress.
Key Takeaways
- Start seeds on damp paper towels in a warm spot. Keep them there for 2 to 5 days. This helps seeds sprout faster before planting.
- Use growing containers 4 to 6 inches deep for adequate root space.
- Buffer coco coir with about 200 ppm calcium-magnesium before use to prevent lockout.
- Keep seedlings’ nutrient solution EC low, around 0.5 to 0.8 mS/cm, until roots develop.
- Maintain temperature between 65°F and 75°F for best seedling growth climate.
- After sprouting, place seedlings 2 to 4 inches under low-intensity grow lights.
How to Start Seedlings for Hydroponics Step-by-Step
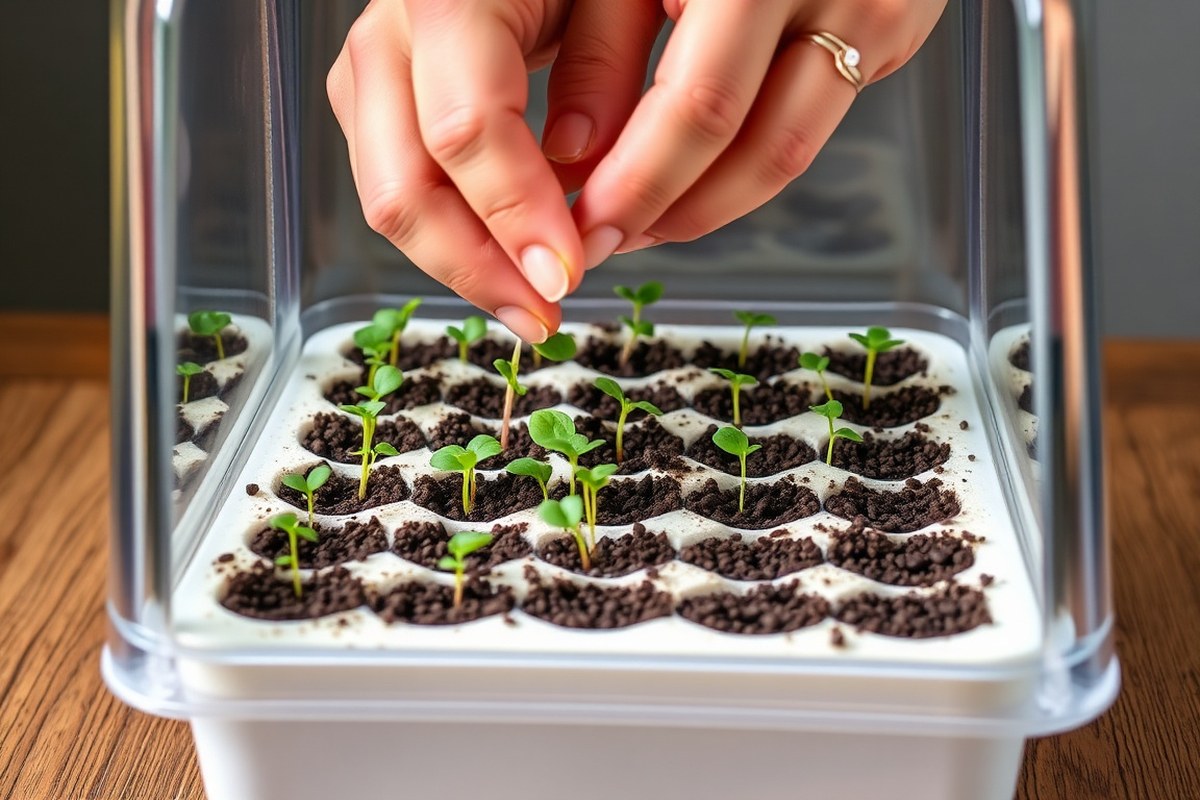
Starting seedlings for hydroponics needs careful steps. Begin with seed preparation. Then handle young plants under the right conditions.
You’ll need basic supplies for seed starting. Get a seed tray, growing medium, and a humidity dome.
Also have a heating mat and grow lights. Maintaining the right moisture and temperature helps your seeds sprout healthy roots fast.
Here’s a clear step-by-step process to start your hydroponic seeds correctly. Change timing a bit based on the seed type.
Follow every step closely. This prevents problems like mold or drying out.
- Prepare your seeds. Soak them in lukewarm water for 4 to 12 hours to soften the seed coat. This speeds up germination and increases success rates.
- Fill your growing medium. Use a light, soilless medium like rockwool cubes or coco coir. Moisten the medium before placing seeds to keep them damp but not soaked.
- Plant seeds appropriately. Push each seed about 1/4 inch into the medium. Cover loosely with vermiculite or a thin layer of your growing medium to trap moisture.
- Apply humidity dome and heating mat. Place a plastic dome over the tray to keep humidity between 80% and 90%. Put a heating mat under the seed tray. Set it to 70 to 78°F (21 to 26°C). This keeps the area warm.
- Keep the seeds moist and monitor conditions. Check daily to keep the medium moist without overwatering. Avoid standing water to prevent damping off disease.
- Remove the dome after sprouting.Seedlings usually break soil in 3 to 5 days. Then slowly remove the dome. This helps reduce humidity gradually. Lower humidity to 60%-70% within a few days to harden seedlings.
- Place seedlings under grow lights. Move seedlings about 2 to 4 inches below low-intensity grow lights. Provide 16 to 18 hours of light daily to support strong, healthy growth.
- Maintain temperature and moisture as seedlings grow. Keep daytime temperatures between 68 and 75°F (20 to 24°C). Water with pH 5.5 to 6.0 water at low nutrient strength (EC 0.5-0.8 mS/cm) to avoid stressing roots.
Timing is key with humidity domes and heating mats. Use the dome and heat during germination, removing the dome soon after sprouting.
This shift prevents fungal growth and encourages sturdier seedlings. Too much moisture or warmth after sprouting invites diseases.
Keep seeds moist but never soggy. Seeds need evenly damp conditions for steady germination. Too dry, and they dry out.
Too wet, and roots can rot or mold may appear. Checking moisture daily saves seedlings from common early death causes.
Choosing and Preparing the Best Growing Mediums
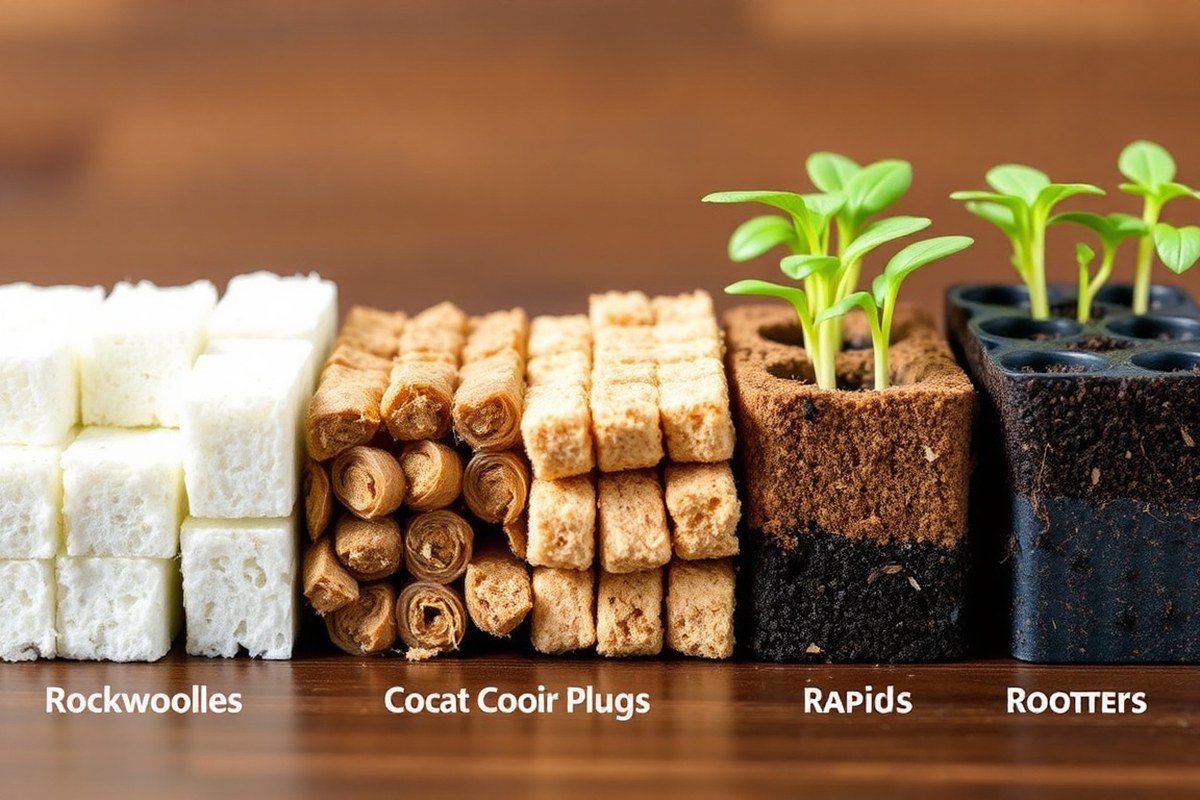
Choosing the right seed starting medium matters for hydroponic success. Your seeds need moisture, oxygen, and steady support to sprout strong roots. Different mediums offer tradeoffs in water retention, aeration, cost, and ease of use.
| Medium | Pros | Cons | Preparation | Best For |
|---|---|---|---|---|
| Rockwool cubes | Excellent aeration, reusable trays | Must soak in pH 5.5 water, dries fast | Soak 30 mins in pH 5.5 water | DWC, NFT, most systems |
| Rapid Rooters (coco plugs) | PH-neutral, supports root growth well | More expensive, less available | Use out of box or rinse if dusty | Beginners, all systems |
| Coconut coir | Sustainable, holds moisture | Can compact and reduce oxygen | Rinse and buffer before use | Drip, ebb and flow |
| Peat pellets | Cheap, easy to handle | May break apart in water | Pre-moisten fully before seeding | Small, Kratky systems |
Rockwool cubes need a soak in water adjusted to pH 5.5. Use filtered or distilled water and soak for about 30 minutes. This stops high pH that can block nutrients.
After soaking, gently squeeze excess water to avoid drowning seeds. Rockwool dries fast so check moisture daily.
Rapid Rooters are ready to use right out of the package. Rinse it briefly with clean water when it’s dusty.
These plugs are made of compressed coconut coir, offering good air and water balance. They’re pricier but encourage strong roots for most hydroponic setups.
Coco coir requires rinsing to remove excess salts. Soak the coir in water for 1 hour, then drain.
Whenever possible, add calcium and magnesium supplements to buffer it and avoid nutrient shortages later. Coco keeps moisture well but mustn’t be too compacted or roots waste oxygen.
Peat pellets swell when soaked in water and get ready in 10 to 15 minutes. Fully moisten them with warm water, then drain well before adding seeds.
They’re affordable and good for beginners but tend to break apart when wet for too long. Use pellets mainly in smaller or slow-flow systems.
Keep rockwool moist but not soaking wet to avoid root rot and seed drowning.
Managing Light, Temperature, and Humidity for Seedlings
Seedlings grown hydroponically need steady temperatures between 70 and 80°F. Keep humidity near 70% to stop drying and disease. Use grow lights for 12 to 16 hours each day.
Keep lights at a safe distance. This helps seedlings grow strong and healthy.
Ideal Temperature for Hydroponic Seedlings
The best temperature for seed germination and seedling growth usually falls between 70 and 80°F. Staying in this range speeds up sprouting and keeps young plants healthy. Heat mats or climate control in your growing area can help maintain these temps.
Warm rooms need strong lights. Watch seedling moisture closely to prevent drying out.
Cooler than 70°F slows germination. Different crops vary somewhat, but this range suits many common hydroponic plants like lettuce.
Humidity Control and Dome Usage
Seedlings need humidity near 65 to 75 percent to avoid drying out and reduce disease risk. Using a clear humidity dome traps moisture and keeps air around seeds moist. This helps seeds sprout quicker.
Remove humidity domes once seedlings develop true leaves or start touching the dome. Usually, this takes 7 to 10 days. Opening or lifting the dome gradually helps seedlings adjust and lowers mold chances.
Lighting Duration and Intensity Recommendations
Hydroponic seedlings need at least 12 hours of light daily to grow well. Most grow lights run 14 to 16 hours, mimicking spring or summer daylight. Use timers to keep light consistent.
Keep grow lights about 6 to 12 inches above seedlings. Raise lights as plants grow to prevent burning or stretching. Strong light encourages sturdy, healthy stems without leggy seedlings.
Preparing and Pre-Treating Seeds for Faster Germination
Soaking seeds can speed up germination, but it’s not required for hydroponics. You soak seeds to soften their seed coat and jumpstart sprouting. Another way is using damp paper towels to pre-germinate seeds before planting.
Seed Soaking: When and How Long
Some seeds like beans, peas, and cucumbers benefit from soaking. Soaking helps them absorb water and break dormancy faster. Most other seeds don’t need pre-soaking for hydroponic growing.
Use plain room-temperature water at 68 to 72°F (20 to 22°C) for soaking. Soak hard-coated seeds for 4 to 12 hours, depending on size and type. Avoid soaking longer than 24 hours to prevent oxygen loss that can kill seeds.
For example, soak beans for 8 hours. Peas need 6 to 8 hours.
Cucumber seeds soak about 4 hours. Fine seeds like lettuce or herbs usually do better by skipping soaking altogether.
Paper Towel Germination Technique
Pre-germinating seeds on paper towels lets you see growth before planting. It’s cheap, fast, and works for many crops like lettuce and herbs. Seeds typically sprout in 2 to 5 days this way.
Follow these steps to use the paper towel method properly:
- Dampen a paper towel until it’s moist but not dripping wet.
- Place your seeds evenly spaced on one half of the towel.
- Fold the towel over the seeds to cover them completely.
- Put the folded towel inside a zip-lock plastic bag to keep moisture in.
- Seal the bag and place it somewhere warm, around 75 to 80°F (24 to 27°C).
- Check daily, making sure towel stays moist and look for sprouting roots.
- Plant seeds as soon as white roots appear, usually after 2-5 days.
Don’t let seeds dry out or sit too long after sprouting, or roots may get damaged.
Avoiding Seed Damage During Pre-Treatment
Soaking too long starves seeds of oxygen, which stops germination. It also risks seed rot or fungus. Limit soaking to no more than 24 hours, shorter for small or delicate seeds.
Handle seeds gently when transferring from towels to growing medium. Avoid touching roots directly, since they break easily. Keep paper towels evenly moist, not wet, to prevent mold growth.
Do not pre-germinate seeds for too long before planting. Plant within a few days once roots appear to avoid drying out or root entanglement. Use fresh seeds for the best results since old seeds can germinate slower regardless of pre-treatment.
Monitoring and Adjusting Nutrient, pH, and EC Levels
Strong seedling roots rely on a precise mix of nutrients, pH, and electrical conductivity (EC). Most hydroponic seeds thrive in a pH zone between 5.5 and 6.5. This range boosts nutrient uptake for healthy growth.
When seeds start sprouting, avoid using full-strength nutrient solutions. Seedlings only need a mild nutrient mix at first because strong formulas can stunt growth. Begin with a quarter to half-strength nutrient solution as soon as the first true leaves appear.
Monitor the EC level closely during this stage. An initial EC between 0.5 and 1.0 mS/cm is gentle enough for seedlings. Increase EC gradually as seedlings grow, moving toward 1.2 to 1.8 mS/cm for young plants ready to transplant.
Seeds in fresh coco coir might struggle since unbuffered coco pulls calcium and magnesium from roots. Use a buffered growing medium or add these nutrients to keep levels balanced. This prevents nutrient deficiencies and encourages healthy roots.
Common pH mistakes include letting levels drift above 7 or below 5, which blocks nutrient uptake. Use pH test strips or a digital meter for accuracy. When the pH rises too much, lower it by adding small doses of phosphoric or nitric acid carefully.
Check pH and EC daily, especially in small or warm systems where levels can change fast. Adjust nutrient solution by diluting with water or adding nutrients as needed. Keeping these levels steady supports steady seedling growth.
Don’t rush to full nutrient strength. Seedlings need time to develop roots first or they might stop growing.
When and How to Transplant Seedlings into Hydroponic Systems
Seedlings are ready to move into your hydroponic system. Look for roots growing out of the growing medium. This shows they can handle the new environment.
You also want to see 3 to 4 true leaves developing. Transplant carefully to avoid hurting roots and to help plants adjust with less shock.
Root and Leaf Stage Indicators
Watch the roots closely. Seedlings are ready when roots poke out from the plug or medium. The roots have enough length at this point.
They can absorb water and nutrients well. This is ideal for transplanting.
Check the leaves too. Three to four true leaves mean the seedling is growing well.
These leaves come after the tiny seed leaves. It shows the plant’s real growth stage.
These signs together tell you your plant can handle the move into hydroponics without stress.
Transplanting Step-by-Step
Follow these steps to reduce damage and transplant seedlings safely to your hydroponic system.
- Prepare your hydroponic system and fill net pots with the right growing medium.
- Water seedlings lightly to keep roots moist but not soggy before moving them.
- Loosen the growing medium around each seedling gently, avoiding root tugs.
- Lift the seedling carefully by the leaves or crown, not by the stem.
- Set seedlings into net pots, positioning roots so they spread naturally.
- Fill around roots with medium and press gently to secure the seedling.
- Place seedlings under the system’s lighting and keep humidity high to reduce shock.
- Gradually increase nutrient strength over the next week, matching recommended EC levels.
Handle seedlings with clean, steady hands to prevent root damage. Avoid transplanting on very hot or cold days.
System-Specific Transplant Considerations
Different hydroponic setups need slight changes in transplant care. For example, in NFT systems, roots float directly in nutrient flow. You’ll want roots to be healthy and fibrous before transplant.
In deep water culture or flood-and-drain, roots have more space and oxygen. Ensure roots aren’t crowded and growing evenly when you transplant.
Systems using grow cubes or plugs have easier transfers since seedlings sit inside a stable medium. This reduces risk of root breakage during planting.
Common Mistakes and How to Fix Them in Seed Starting
Damping off kills seedlings fast and is caused by fungi in damp conditions. Avoid it by using sterile growing mediums and clean containers. Keep air moving with fans and avoid overwatering to prevent fungal growth.
Overwatering suffocates roots, leading to weak or deformed seedlings. Underwatering causes drying and stunted growth. Water seedlings only when the top of the medium is dry.
This usually happens every one to two days. Checking this helps keep water balanced.
- Use sterile seed trays and fresh, well-draining mediums.
- Keep humidity around 50-70% but provide good airflow.
- Water gently, avoiding puddles or soggy mediums.
- Maintain a consistent temperature between 65°F and 75°F.
- Position grow lights 2 to 4 inches above seedlings for strong growth.
- Pre-soak seeds or use fresh seeds for better germination.
- Check pH levels of water and nutrient solution regularly, aiming for 5.5 to 6.5.
Poor germination often results from old seeds, poor soaking, or wrong temperatures. Use fresh seeds, soak them for at least 6 hours, and keep the temperature steady.
Weak seedlings often show when the light is too low or too far away. Keep lights close but not hot.
Seedlings that stretch and grow tall but thin usually need stronger light. Adjust light height to about 2-4 inches above the leaves.
Deformed seedlings could also mean nutrient imbalances. So check water quality and nutrient levels often.
Adjusting Seed Starting for Different Crops and Systems
Leafy greens and herbs need 12 to 16 hours of light daily. Their nutrient levels start at 0.5 to 0.8 EC during the first week. Slowly raise nutrients to 1.2 to 1.5 EC by transplant time.
Fruiting crops need stronger light because they grow bigger. They also need more nutrients to develop fruits.
Different hydroponic systems require changes in seed starting techniques. In deep water culture (DWC), keep roots moist in oxygen-rich water early on. Nutrient film technique (NFT) systems need good drainage and constant moisture but less standing water.
Aeroponics uses mist to deliver nutrients. So seeds should be in a medium that holds moisture without drowning roots.
Crop-specific seed treatments help improve germination. Herbs like basil benefit from soaking seeds for 4 to 6 hours before planting.
Fruiting plants like tomatoes prefer warmer temps near 75°F. This helps them sprout faster. Leafy greens usually germinate quickly in cooler conditions, about 65°F to 70°F.
Adjust lighting to match the plant type and system. Herbs and leafy greens thrive under 12 to 16 hours of moderate LED light.
Fruiting plants need stronger light, closer to 16 hours, to encourage flowering later. Using a timer ensures a consistent light schedule that prevents stress and supports steady growth.
Start seeds in a medium like rock wool or coconut coir, which suits most hydroponic setups. Check that seeds have good air flow but stay moist.
Seeds that sit too wet can rot, especially in NFT systems. Seedlings transplant better if roots grow clear through the medium before moving to your system.
Keep seed trays covered to hold moisture and warmth. Remove covers once sprouts appear. This lowers disease risk.
Step-by-Step Action Plan to Start Hydroponic Seedlings
Follow these simple steps to get your hydroponic seedlings growing strong. Keep an eye on each phase’s signs of success to stay on track.
- Before you start: Choose a clean, suitable growing medium like rockwool or coco coir. It should feel moist but not soggy.
- Day 1: Pre-treat your seeds with soaking or scarification if needed. Seeds should swell or split slightly after soaking.
- Days 2-3: Plant seeds about twice as deep as their size in the medium. You’ll see tiny sprouts within a few days if conditions are right.
- Week 1: Provide 14-16 hours of bright, indirect light and keep temperature around 70, 75°F. Seedlings show steady growth and leaf color.
- Week 1-2: Monitor humidity around 50-70% and reduce if you see mold. Healthy seedlings have firm stems and bright green leaves.
- After 1 week: Start a mild nutrient solution at 1/4 strength and adjust pH to 5.5-6.5. Seedlings should absorb nutrients without stress signs.
- After 2-3 weeks: Transplant seedlings into the hydroponic system once they have 2-3 true leaves. Roots should be white and well developed.
- Ongoing: Keep an eye out for nutrient burn or leggy growth. Fix these problems quickly by changing your light or nutrient levels. Act fast to keep your plants healthy.
Frequently Asked Questions
What Equipment Do I Need to Start Seedlings for Hydroponics?
You need seed trays or cubes, grow lights, a heating mat, and a pH meter. A humidity dome can help keep moisture during germination and improve seedling success.
Can I Use Regular Garden Soil to Start Hydroponic Seedlings?
No, regular garden soil is not suitable for hydroponics. Use inert growing mediums like rockwool or coco coir.
They drain water well and don’t hold harmful pathogens. This helps keep your seedlings healthy and safe.
How Often Should I Water Hydroponic Seedlings?
Keep the growing medium moist but not soaked, usually once or twice daily. Overwatering can drown roots because hydroponic mediums hold moisture differently than soil.
What Is the Best Temperature for Germinating Hydroponic Seeds?
Aim for 65 to 75°F for most seeds, with warmer temps speeding up germination. Heating mats help keep soil or cubes warm enough for faster sprouting.
Do I Need to Fertilize Seedlings Before Transplanting Them to Hydroponics?
Start seedlings in a very diluted nutrient solution (EC 0.5 to 0.8 mS/cm). Young roots can’t handle full-strength nutrients yet and may get damaged.
How Long Do Seedlings Usually Take to Grow Before Transplanting?
Most seedlings are ready in 2 to 3 weeks. You’ll see true leaves and strong roots by then.
That’s the right time to move them into your hydroponic system. Transplant gently to avoid damaging young roots and help them establish well.
Wrapping Up
Good seedlings start with careful prep and steady care. Take time to check your plants daily, especially early on. Your next step is setting up the transplant area before seedlings outgrow their starter trays.