How to Care for a Croton Plant: Essential Tips for Healthy Vibrant Foliage
Wondering how to care for a croton plant? Water it only when the top 1 to 2 inches of soil feel dry.
Use a pot with drainage holes and let water drain fully after watering. This helps prevent overwatering, which can rot roots quickly and cause yellow leaves.
Place your croton in bright light but protect it from harsh afternoon sun that can burn leaves. About 6 to 8 hours of sunlight daily works best, including bright indirect light. Sufficient light helps keep the leaves colorful and vibrant.
Maintain room temperatures between 60 and 85 degrees Fahrenheit to keep your croton comfortable. Avoid cold drafts, air conditioning vents, or sudden temperature swings. These changes often stress the plant and cause leaves to drop unexpectedly.
Key Takeaways
- Water croton thoroughly when top 1 to 2 inches of soil are dry.
- Place croton in a spot with 6 to 8 hours of bright light daily.
- Maintain indoor temperature between 60 and 85 degrees Fahrenheit for best results.
- Use a balanced liquid fertilizer every 2 to 4 weeks during growing season.
- Protect croton from cold drafts and keep it above 60 degrees Fahrenheit.
- Avoid letting croton sit in soggy soil by ensuring good drainage.
How to Water, Light, and Feed Your Croton Plant
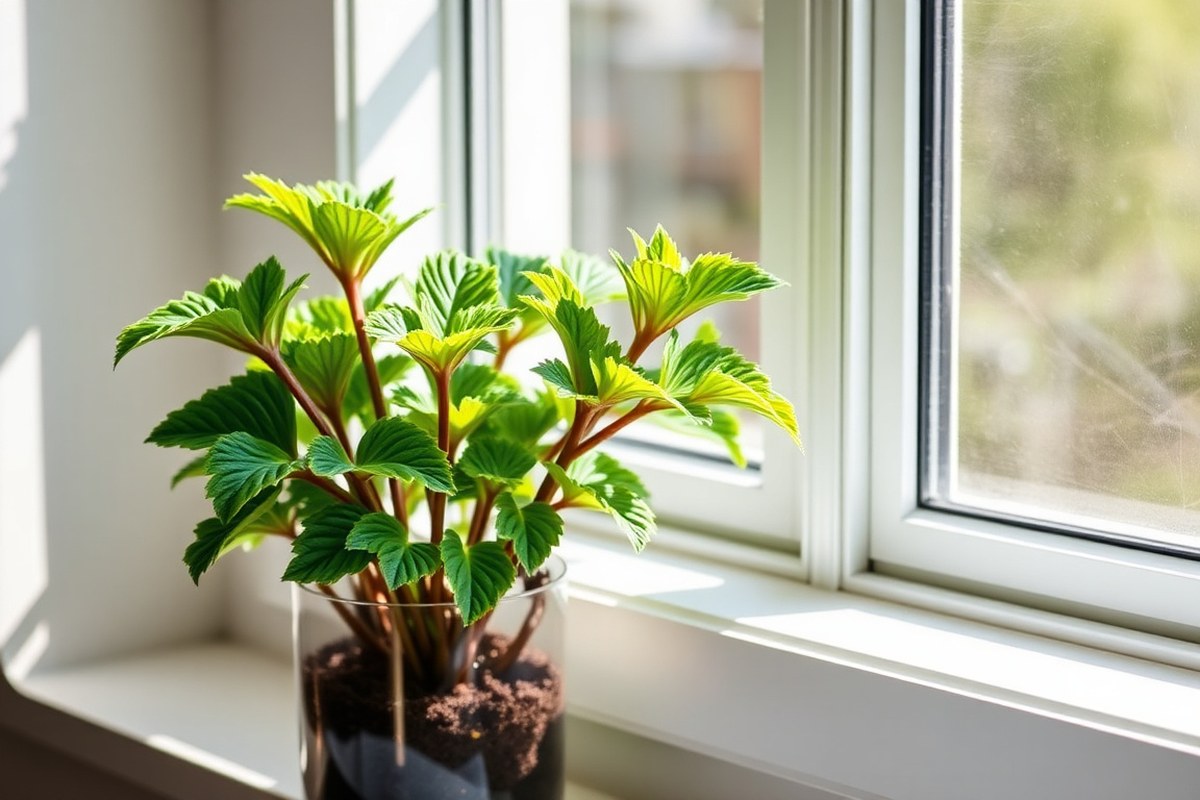
Water your croton plant when the top 1 to 2 inches of soil feel dry. You usually water once or twice a week. It depends on your home’s temperature and humidity.
Watch your plant to see what it needs. Water deeply until water comes out the drainage holes.
Then let the soil dry a bit. Wait before watering again.
Crotons need bright light to keep their leaves colorful. Put your plant by a sunny window. It needs 4 to 6 hours of light daily.
Sunlight can be direct or filtered. Too little light will dull the vibrant colors.
Harsh midday sun can scorch the leaves. So partial sun or morning sun works best.
Feeding your croton during the growing season helps it stay healthy. Use a balanced liquid fertilizer around every 2 to 4 weeks. The ratio should be close to 3:1:2.
Focus on nitrogen in the mix. Stop feeding in the winter when the plant grows slower to avoid overfeeding.
- Water when top 1-2 inches of soil are dry
- Let excess water drain completely
- Keep in bright, indirect or morning sun light
- Avoid harsh afternoon sun to prevent leaf burn
- Feed every 2-4 weeks with 3:1:2 NPK liquid fertilizer
- Skip fertilizing during winter months
- Maintain stable watering and light for vibrant leaves
Consistent care and the right light keep croton leaves bright and healthy. Watch for brown tips, which can mean watering or humidity issues.
Adjust your routine if colors fade or leaves drop. Your croton will reward you with stunning foliage.
What Temperature and Humidity Levels Are Ideal for Crotons?
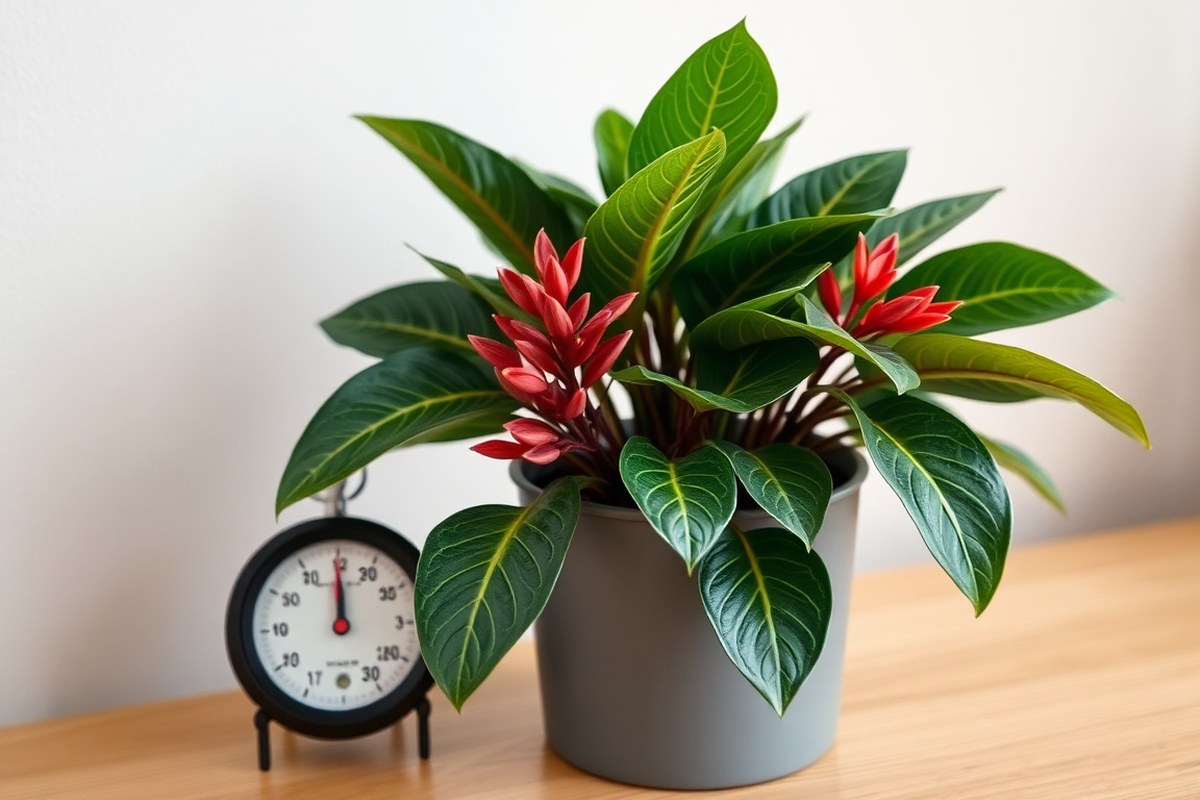
Crotons grow best in temperatures between 65 and 80 degrees Fahrenheit. Your indoor plant should stay above 60 degrees, as cooler temps can cause leaf drop. Avoid placing it near drafty windows or vents where sudden temperature changes happen.
Humidity is just as important. Crotons prefer humidity between 40 and 80 percent. This helps keep their leaves bright.
It also keeps them healthy. Levels below 40% often cause curling leaves. So keep the air moist around your plant.
To boost humidity, try a pebble tray. Fill a shallow tray with water and pebbles, then set your pot on top. Make sure the pot’s bottom doesn’t touch the water.
You can also mist the leaves daily using a spray bottle. Use a small humidifier near your croton to keep air moist. This works well in dry air.
During winter, indoor heating can dry out the air quickly. Check humidity more often and mist or run a humidifier as needed.
Your croton’s leaves curling or browning means dry or cold air. This usually causes leaf problems.
Keep your croton away from cold drafts and dry air to avoid leaf drop and curling.
Which Soil Mix and Pot Size Work Best for Croton Plants?
Crotons grow best in rich, well-draining soil with room for roots. Use a pot just 1 to 2 inches wider than their current one. Too large a pot causes soggy soil, which brings root rot.
Key Soil Ingredients for Croton Health
Choose a soil mix that drains well but stays moist. Crotons like soil that contains peat moss, pine bark, and perlite or coarse sand.
This mix holds moisture while letting excess water flow away. Avoid heavy garden soil or dense potting soil alone.
They can hold water too long. This may cause root rot.
| Soil Component | Role | Recommended % |
|---|---|---|
| Peat moss | Retains moisture, adds organic matter | 40-50% |
| Pine bark | Improves aeration and drainage | 30-40% |
| Perlite or Coarse sand | Prevents soil compaction, improve drainage | 10-20% |
Mix these components before potting. This balance helps roots breathe and keeps soil moist but not wet.
Choosing a Pot: Material and Size
Select a pot with drainage holes to prevent standing water. Plastic or terracotta pots work well for crotons.
Plastic pots retain moisture longer, which may suit dry homes. Terracotta dries faster but can be heavier and more fragile.
Pick a pot only 1 or 2 inches larger in diameter than the current one. Larger pots hold more water, increasing root rot risk.
Step-By-Step Repotting Process
Repot when roots circle the pot’s bottom or grow through drainage holes. This means the plant needs more space.
- Prepare the new pot with fresh soil mix filling one-third of its height.
- Gently remove the croton from its old pot, loosening root ball edges carefully.
- Inspect roots, trimming away any brown or mushy spots with sterilized scissors.
- Place the croton centrally in the new pot on top of the soil layer.
- Fill around the root ball with soil mix to about one inch below pot rim.
- Press soil lightly to remove air pockets but avoid compacting too much.
- Water the plant thoroughly until water flows from drainage holes.
Repotting takes about 20 to 30 minutes. Let the croton rest in stable, bright light.
Keep it away from direct sun. Do this for a few days after.
How to Identify and Manage Common Croton Pests
Mealybugs, spider mites, scales, and thrips are common pests on croton plants. These insects suck sap and cause leaf damage, leading to yellow spots and early leaf drop. You might also find caterpillars chewing on the leaves, which weakens the plant further.
Look closely to spot early signs. Mealybugs appear as small white cottony masses on stems or leaf joints. Spider mites are tiny insects.
They often appear as fine webbing. You can see tiny moving dots on leaf undersides. Yellowing veins or spots on leaves usually signal their presence.
Scales look like small brown bumps stuck to stems. Thrips cause silvery streaks on leaves.
Early detection means checking your croton weekly, especially during warm, dry months. Use a magnifying glass if needed to see spider mites or mealybugs. Use a soft cloth or gentle soapy water to wipe leaves.
This helps check for pests. It also removes some pests. This cleaning helps stop outbreaks before they spread.
Neem oil works well for both spider mites and mealybugs. Spray your croton with diluted neem oil every five to seven days until pests vanish. It’s organic, safe for indoor use, and creates a protective layer against reinfestation.
For heavier infestations, insecticidal soap is another effective option. But it requires repeated applications every week or so.
In severe cases, chemical miticides or insecticides are available at garden centers. But use these with care.
Follow the label instructions precisely to avoid harming your plant or indoor environment. These treatments usually cost between $10 and $20 per product and may need multiple applications.
Keeping humidity above 50 percent reduces spider mite problems because they thrive in dry conditions. You can also isolate infested plants immediately to avoid spreading pests to other houseplants. For thrips and caterpillars, handpicking or using a gentle insect spray often clears infestations quickly.
Watching for pest signs early and acting fast helps keep your croton healthy. Regular leaf checks and prompt treatment with neem oil or insecticidal soap usually solve infestations. Avoid letting pests build up, or you’ll risk losing leaves and weakening your plant over time.
When and How to Prune Croton Plants for Vigorous Growth
Pruning croton plants keeps them healthy and looking sharp. The best time to prune is in spring or early summer before new growth starts. Cutting back keeps your plant bushy.
It also helps colorful leaves grow. Big cuts can overwhelm the plant, so avoid them.
Tools Needed for Pruning Crotons Safely
Choose sharp pruning shears or scissors for clean cuts. Dull tools crush stems and cause damage. You’ll also want rubbing alcohol or a disinfectant to clean your tools before and after pruning.
Use gloves to protect your skin from croton sap, which can irritate. Have a small trash bag ready to collect trimmed leaves and stems. These basic tools keep the pruning neat and safe.
How to Make Clean Cuts and Protect the Plant
Start by removing any yellow, brown, or damaged leaves. Cut just above a leaf node or a set of leaves to encourage new growth there. Clean, angled cuts prevent water buildup and infection on the cut stem.
Take small sections off at a time to avoid shock. Don’t remove more than one-third of the plant’s foliage at once. Use disinfected shears and cut smoothly in one motion.
- Inspect branches for damaged or leggy growth.
- Clean your pruning shears with rubbing alcohol.
- Cut just above a healthy leaf node or stem joint.
- Remove less vibrant or overcrowded branches to improve airflow.
- Trim back long stems to maintain the plant’s shape.
- Dispose of cut material properly or use healthy stems for propagation.
- Wash your gloves and tools after pruning to avoid spreading disease.
Always sterilize your pruning tools before and after use to prevent infections.
Pruning Timing for Best Leaf Color and Growth
Spring or early summer is the best time to prune crotons. The plant uses warm months to recover and produce colorful new leaves. Avoid pruning in fall or winter, as the plant rests and may slow growth.
Check your croton regularly for crowded or leggy stems. Dull or greenish leaves mean your plant needs pruning.
This moves energy to brighter leaves. Pruning also keeps your croton compact in smaller spaces.
How to Propagate Croton Plants Successfully Indoors
Propagating croton plants with stem cuttings works best in spring or summer. Use healthy stems 12 cm long and about the thickness of a pencil. Rooting usually takes 3 to 6 weeks, depending on conditions.
Selecting Healthy Stem Cuttings
Choose a mature croton plant with strong, healthy leaves. Avoid stems with signs of damage or disease. Look for new growth with firm texture and bright color.
Wear gloves to protect yourself from croton sap. Cut 12-cm sections from the stem using clean, sharp scissors or pruners. Make sure each cutting has 3 to 5 leaves but remove the lower ones.
Rooting Mediums and Methods
Root croton cuttings in water, soil, or sphagnum moss. Bottom heat improves rooting success in summer. Use rooting hormone to boost root growth and reduce rot risk.
Soil should be light and well-draining, like a peat-based mix. Keep the medium moist but not soggy. Cover cuttings with plastic to keep humidity high and help roots develop.
Caring for Cuttings While They Root
Place cuttings in bright, indirect light away from direct sun. Maintain a temperature around 70 to 75°F for faster rooting. Check moisture daily and mist cuttings to keep humidity stable.
After 3 to 6 weeks, gently tug the cutting to test root development. Once roots grow to about 2 inches, it’s time to transplant. Use a small pot with soil that drains well.
Make sure the soil lets water pass easily. Avoid overwatering newly potted cuttings to prevent root rot.
Follow these steps for straightforward croton propagation:
- Wear gloves and prepare clean scissors or pruning shears.
- Select healthy stems around 12 cm long with 3 to 5 leaves.
- Cut just below a leaf node, removing lower leaves gently.
- Dip the cut end in rooting hormone powder or gel.
- Place the cutting in your prepared rooting medium (water, soil, or moss).
- Cover the cutting loosely with plastic to maintain humidity.
- Keep the environment warm (70, 75°F) and the medium moist.
- Wait 3 to 6 weeks, checking for roots before transplanting.
Why Is My Croton Dropping Leaves and How to Fix It?
Croton leaves drop mostly because the plant feels stressed or shocked. Sudden drafts, especially chilly air below 60°F, will make the leaves fall quickly. Moving your croton can shock it.
This often causes leaf loss. The leaves may fall off within just a few days.
Watering mistakes cause leaf drop too. While many plants need less water in winter, crotons prefer steady moisture year-round.
Letting the soil dry out too much will stress the plant. On the other hand, waterlogged soil can suffocate roots and trigger leaf loss.
Leaves turning mottled and fine webbing might mean spider mites. Check for these pests closely. They can harm your croton seriously.
These pests suck sap from leaves, leading to drops over time. Check closely under leaves and treat pests with insecticidal soap if you see webbing or speckles.
Crotons also dislike inconsistent watering and low light. A lack of bright, indirect sunlight weakens leaves and makes them fall. Make sure your croton receives enough light daily to keep it healthy.
To help your croton recover, start by moving it away from cold drafts or heating vents. Keep the room temperature steady above 65°F to avoid shock. Water when the top inch of soil feels dry but never allow it to sit soggy.
Boost humidity by misting leaves or placing a tray of water nearby. This helps crotons in dry indoor air feel less stressed. Regularly check for pests and clean leaves to keep infections and infestations away.
Finally, avoid sudden changes during the recovery phase. Keep light, temperature, and watering consistent. Leaf drop should slow in a few weeks, with new growth following as the plant stabilizes.
Safety Tips for Handling Croton Plants and Sap Exposure
The milky sap in croton plants is toxic and irritating to the skin. This sap often leaks from punctured stems or leaves and can stain your clothes. Handling crotons without protection risks a painful skin reaction and possible rashes.
Always wear gloves when pruning or handling your croton. Use thick, waterproof gloves to keep your skin safe from sap contact. Wearing long sleeves and old clothes can also protect your arms and avoid stains.
- Use sharp, sterilized pruning shears to avoid crushing stems
- Wear thick, waterproof gloves to prevent skin contact with sap
- Put on long sleeves and old clothing when handling croton plants
- Clean tools immediately after pruning to stop sap spread
- Dispose of cuttings carefully by sealing them in a plastic bag
- Wash hands with soap and water right after handling crotons
When sap touches your skin, wash it off with cool water and soap immediately. Avoid using hot water because it can open your pores and make irritation worse. Apply aloe vera or hydrocortisone cream to ease stinging or redness on your skin.
Remove sap-stained clothing carefully and wash them separately. For strong stains, soak clothes in cold water before washing. Keep pruning debris away from pets and children to stop accidental contact with the toxic sap.
Wear gloves every time you touch your croton, no exceptions, to avoid skin irritation.
Your First Two Weeks: A Step-by-Step Action Plan for Croton Care
Follow these steps to get your croton off to a healthy start indoors. Check each step carefully to see how your plant responds.
- Day 1: Place your croton near a bright window with filtered sunlight. Look for vivid leaf colors as a sign it’s happy.
- Day 2: Water the plant thoroughly until water drains out the bottom. The soil should feel moist but never soggy after draining.
- Day 3: Check the temperature around your croton. Keep it between 65-80°F. Watch for droopy or browning leaves as a warning.
- Day 5: Mist the leaves lightly to boost humidity. The leaves should look fresh, not dry or dusty.
- End of Week 1: Add a balanced liquid fertilizer at half strength to support growth. New leaf tips should start looking healthy and colorful.
- Week 2: Inspect your croton for pests like spider mites or scale. Catching pests early means less damage and easier treatment.
- After 2 Weeks: Adjust watering only if the soil feels dry below the surface. Your plant’s leaf drop should decrease by now.
Frequently Asked Questions
How Often Should I Rotate My Croton Plant?
Rotate your croton every few weeks to keep growth even. This prevents the plant from leaning toward light and helps maintain its colorful leaf pattern.
Can I Use Tap Water for Watering Crotons?
Tap water is usually fine if left to sit overnight. This lets chlorine evaporate, protecting your croton’s sensitive roots from chemical stress.
How Do I Clean Croton Leaves Without Damaging Them?
Wipe leaves gently with a damp cloth to remove dust. Avoid harsh sprays, which can harm the leaf surface and dull colors.
Is It Normal for Croton Leaves to Change Color Seasonally?
Yes, croton leaves often change colors with light and temperature shifts. This color change is part of their natural cycle and not a sign of trouble.
Can Croton Plants Survive in Low Light for a Short Period?
Croton can tolerate low light briefly but won’t thrive there. They need bright indirect light for best color and health.
What’s the Best Way to Repot a Croton Plant?
Choose a slightly larger pot with drainage holes and fresh soil. Repot in spring to avoid shock and promote root growth.
The Bottom Line
Taking these careful steps can help your croton thrive indoors. Watch your plant’s leaves to spot any problems early. Now, try moving your croton to its ideal light spot and enjoy the changes.