

How to Spread Mulch: A Complete Guide with Tips, Tools, and Best Practices
Spread mulch evenly in a 2- to 3-inch layer. This keeps plants healthy by holding moisture and protecting roots without suffocating them. Too thick a layer blocks water and air, which can harm plants.
Clear weeds and debris from your garden bed first. Remove old, compacted mulch if it’s over a year old to prevent mold. This also helps air circulate under the new mulch.
Keep mulch a few inches away from stems and trunks to prevent rot and pests. Wood mulch around trees should stay no deeper than 3 inches total, including old layers.
Water the mulch well after spreading to help it settle and lock in moisture. Mulching in spring or fall gives your plants the best protection during growing seasons.
Key Takeaways
- Start by cleaning the garden bed of weeds and old debris.
- Spread mulch evenly at 2 to 3 inches thick for most plants.
- Keep mulch 2 to 3 inches away from plant stems to avoid rot.
- Maintain a 6- to 12-inch gap between mulch and tree trunks.
- Remove old mulch if its depth exceeds 3 inches before adding more.
- Water mulch right after spreading to keep it moist and effective.
How to Spread Mulch Correctly to Protect Plants
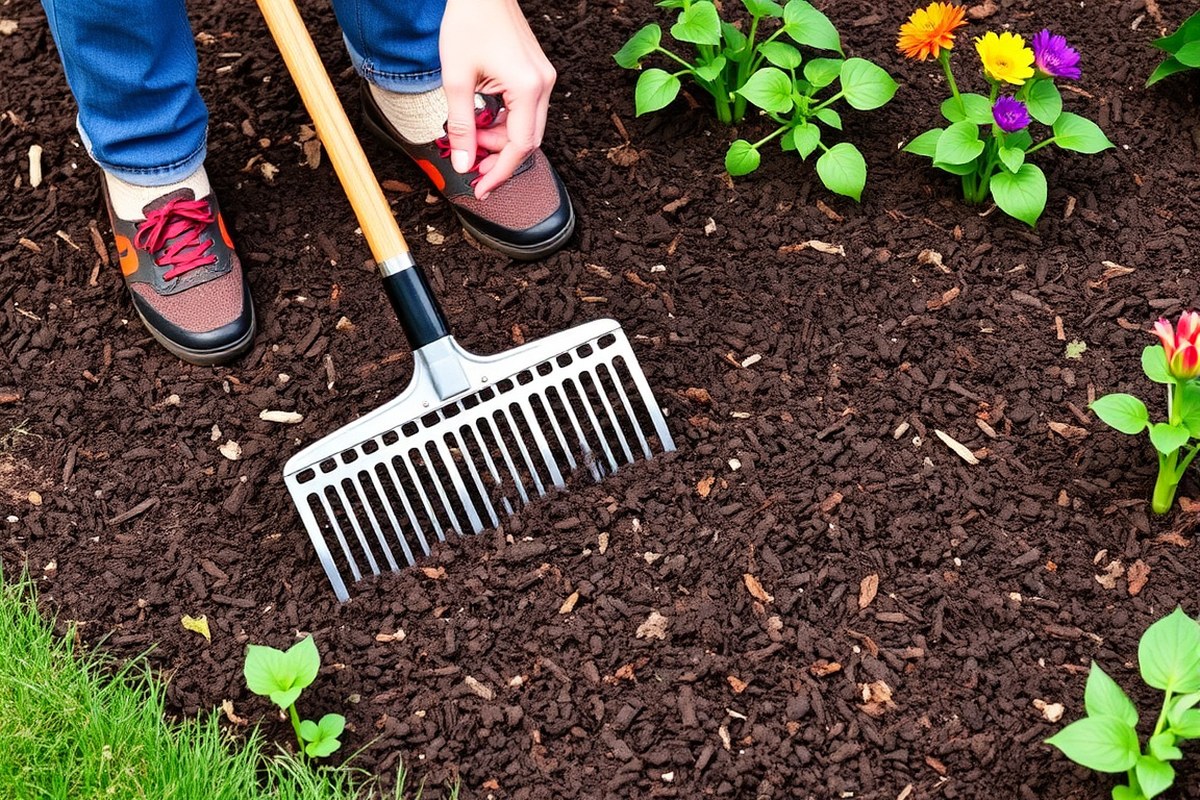
Spread mulch evenly across your garden beds to protect plants and save moisture. The mulch layer should be about 2 to 3 inches thick for established beds.
Thinner layers won’t hold moisture well. Thicker layers can block water and air from reaching roots.
Keep mulch a few inches away from plant stems and tree trunks. Leave 2 to 3 inches of bare soil around stems to prevent rot and pests. Keep mulch 6 to 12 inches away from tree trunks.
This stops moisture buildup near the bark. Moisture can cause the bark to rot.
Spreading mulch in thin, even layers works best. Apply in one or two layers to reach the right depth, not in piles. That avoids “mulch volcanoes,” which can damage plants by trapping moisture against stems.
You can follow these steps every time you mulch to protect your garden:
- Clear any old mulch, weeds, or debris from the bed surface.
- Measure the area to check how much mulch you need for 2 to 3 inches depth.
- Start spreading mulch from the far edge, working toward you for even coverage.
- Keep mulch 2 to 3 inches away from plant stems, leaving a small clear circle.
- Leave 6 to 12 inches of mulch-free space around tree trunks for airflow.
- Spread mulch in a thin first layer. Add more later if needed. Aim for a total depth of 2 to 3 inches.
- Rake mulch to smooth the surface and avoid clumps or piles.
- Water the mulch lightly to help it settle and start protecting the soil.
This careful spreading helps mulch hold soil moisture and suppress weeds. Thicker mulch suits new planting areas.
But keep closer to 2 inches for established plants. Proper spacing prevents rot and pests near stems and trunks.
How to Calculate the Amount of Mulch Needed

To figure out how much mulch you need, first measure the area you want to cover. Then use the right formula to find the volume in cubic yards. Finally, convert that to the number of bags or cubic yards you should buy.
Measuring Your Garden Bed Dimensions
Start by measuring the length and width of your garden bed in feet. Use a tape measure and write down these two numbers.
For irregular beds, break them into rectangles or circles. Measure each part separately.
Next, choose how deep you want your mulch layer. Most gardeners spread mulch 2 to 3 inches deep for good coverage. Remember to convert inches to feet by dividing the depth in inches by 12.
- Measure the length of your garden bed in feet and note it.
- Measure the width of the bed in feet and write it down.
- Decide on the desired depth of mulch in inches (usually 2 or 3 inches).
- Convert the depth from inches to feet by dividing by 12.
- For odd-shaped beds, divide the area into smaller sections. Measure each section accurately.
- Add the areas of all sections together to find total square footage.
Measure carefully; a slight error can mean buying too much or too little mulch.
Using the Volume Formula for Mulch Calculation
Multiply the bed’s length, width, and depth in feet. This gives the volume in cubic feet.
This gives the total cubic feet of mulch needed for your garden bed. For example, a 100-square-foot bed with a 3-inch depth needs 25 cubic feet of mulch.
Multiply length, width, and depth in inches. Then divide by 324 to get cubic yards.
It helps you directly calculate cubic yards without extra conversions. This formula saves time and helps when ordering bulk mulch from suppliers.
Converting Cubic Feet to Cubic Yards and Bags
Mulch is usually sold in cubic yards. So divide the cubic feet volume by 27.
One cubic yard equals 27 cubic feet. For example, 25 cubic feet ÷ 27 equals about 0.93 cubic yards.
Check the bag size listed in cubic feet when buying bagged mulch. Two-cubic-foot bags are common. Divide the total cubic feet needed by the bag size.
This gives the number of bags. A 100-square-foot bed at 3 inches deep needs about 13 bags of 2 cubic feet each.
Essential Tools for Mulch Spreading and Preparation
To spread mulch efficiently, gather a few key tools. You’ll need simple items for small beds and some extra gear for bigger areas. Tools make prepping beds, spreading evenly, and smoothing mulch easier and faster.
Basic Tools for All Mulching Jobs
A garden fork or shovel scoops mulch well. A small hand rake helps spread and smooth mulch evenly. For close work around plants, a hand trowel lets you place mulch precisely without damaging roots.
These tools help move mulch piles where you want them. They also spread mulch evenly in a 2 to 4 inch layer.
This thickness helps mulch work best in your garden. Small rakes also help avoid piling mulch near stems, which can trap moisture and cause rot.
Tools for Bed Preparation
Before spreading mulch, prepare the soil with a garden hoe or rake. This breaks up clumps, evens the surface, and removes weeds. A wheelbarrow speeds moving soil debris and mulch around your yard.
Use a watering can or hose to moisten soil first. Damp soil helps mulch settle and prevents wind blow-off after spreading. You can lay cardboard or newspaper for sheet mulching.
Use a utility knife and stapler to place it. This adds extra weed protection under your mulch.
Equipment for Large-Scale Mulching
Big yards or multiple beds need tools that save time and back strain. Consider a mulch spreader or hopper to throw mulch over wide areas evenly. These tools hold large loads and make spreading fast while avoiding uneven layers.
A sturdy wheelbarrow with good tires carries heavy mulch loads across long distances. For large jobs, rent a motorized leaf blower with reverse.
It helps push mulch into tight corners after spreading. This tool saves time and effort.
- Garden fork or shovel for scooping and spreading
- Small hand rake to level mulch
- Hand trowel for detailed work near plants
- Garden hoe or standard rake to prep soil
- Watering hose or can for moistening soil
- Wheelbarrow to move mulch and soil
- Mulch spreader for large areas
Adjust tools to your garden size and comfort to save time and avoid injury. Using the right tools helps mulch keep moisture in the soil.
It also stops weeds from growing and helps soil get better. Efficient equipment makes mulch work well.
Preparing Garden Beds for Mulching
Start by clearing your garden bed of old mulch and debris. Remove some mulch if it’s thicker than 3 inches.
Keep the total layer between 3 and 4 inches. Too much mulch blocks water and air, which harms roots and soil life.
Next, pull all weeds out completely since mulch won’t kill established ones. After that, water the soil deeply before spreading new mulch. Wet soil ensures water reaches plant roots quickly instead of slowly passing through dry mulch.
Level the bed using a rake to smooth the soil surface. A flat, even bed helps the mulch stay consistent in depth. Uneven beds cause patchy mulch coverage.
This lets weeds grow through. Plants might also dry out.
Follow these steps to prepare your garden bed for mulching:
- Remove excess old mulch if thicker than 3 inches to prevent suffocation.
- Pull all weeds from the bed so mulch can block new weed growth.
- Edge the bed clearly to stop grass from creeping into mulch.
- Water the soil deeply until it’s moist but not muddy.
- Rake the soil to create a level, smooth surface for mulch.
- Spread mulch evenly to a thickness of 2 to 3 inches.
- Keep mulch a few inches away from plant stems and trunks.
Water the soil first. It takes 10 to 15 minutes. Use a soaker hose or sprinkler.
Avoid piling mulch against stems, which may cause rot. A clean edge at the lawn border keeps mulch neat. It stops grass from growing into beds.
Cleaning the bed well beforehand makes mulch do its job better. Proper soil moisture and even layers help plants grow stronger and reduce weeds over time. Spending a little extra time on preparation pays off in healthier, neater garden beds.
Choosing the Best Mulch Type for Different Gardens
Choosing the right mulch type depends on your garden’s needs and plant types. Organic mulches come from natural materials and break down over time, enriching the soil. Inorganic mulches last longer since they don’t decompose, but they don’t add nutrients.
Organic mulches like wood chips or shredded bark break down at different rates. Wood chips last longer than leaves or grass clippings. For vegetable gardens and flower beds, organic mulch helps soil improve.
It breaks down and adds nutrients to the soil. You need to renew it every 1 to 3 years.
| Material Type | 2026 Bulk Cost (per yd³) | Decomposition Rate | Best Use Case | Drawbacks |
|---|---|---|---|---|
| Double-Shred Hardwood | $35 – $45 | Fast (6-12 months) | Garden beds, vegetable perimeters | Can mat down; prone to artillery fungus |
| Pine Bark (Large Nuggets) | $45 – $60 | Slow (2-3 years) | Acid-loving plants (azaleas, hydrangeas) | Floats away in heavy rain; acidic |
| Cedar / Cypress | $55 – $75 | Very Slow (3-4 years) | Front yard beds, pathways | Expensive; slow to break down |
For trees and established plants, bark or wood chips suit best because they last longer. Vegetable gardens and flower beds usually benefit from organic mulch at 2 to 3 inches deep. These layers keep moisture in and protect roots without suffocating them.
Inorganic mulches like gravel or rubber last much longer but don’t improve soil health. They work well in pathways or high-traffic areas where you want minimal upkeep. Their appearance can vary with rock type or color options.
Don’t spread organic mulch thicker than 4 inches. Too thick mulch blocks oxygen. This can cause root rot in plants.
Choosing mulch also means thinking about cost and garden style. Pine bark is great with acid-loving plants but it floats off in heavy rains.
Cedar and cypress have a nice look but cost more and last longest. Double-shred hardwood is affordable but breaks down fast, needing yearly refreshes for veggie beds.
Watering and Maintaining Mulch After Spreading
After spreading mulch, water it lightly within the first hour. Use about 1 inch of water to help it settle and avoid wind blowing it away. This watering also helps moisture reach the soil below, benefiting your plants.
Check your mulch layer every few weeks, especially after heavy rains or strong winds. Use a ruler or stick to confirm the depth stays between 2 and 4 inches. Below 2 inches, weeds may grow more easily and soil dries out faster.
Top off your mulch once or twice a year to maintain this thickness. Organic mulches break down over time, losing volume and nutrients that help plants. Add a fresh 1 to 2-inch layer of mulch every 12 to 24 months.
This keeps the bed healthy. It also helps your garden look neat.
Look for signs that mulch needs refreshing. You see lots of soil or bare spots. This means your mulch has broken down or washed away.
Mulch can also get compacted or hard over time. This blocks water and air from reaching the soil. That makes it harder for plants to grow.
To maintain mulch quality, lightly rake it before adding new material. This removes old debris and loosens the layer to prevent clumps.
Adding compost with mulch gives your soil more nutrients. These nutrients help your plants grow better and stronger.
Mulch near plants can stay moist longer with regular watering during dry spells. Aim to water the mulch every 7 to 14 days, depending on weather. Keep mulch near plant bases but not against stems or trunks.
Too much mulch touching plants can cause rot. Avoid piling mulch directly on stems or trunks.
Following a watering and maintenance schedule prevents weeds and helps plants thrive. Keep your mulch looking fresh for a tidy appearance and healthier soil. This ongoing care takes just minutes and saves work in the long run.
Common Mulching Mistakes and How to Fix Them
“Volcano mulching” happens when mulch is piled high and tight around a tree trunk. It looks like a volcano with mulch sloping up against the bark. This buildup stops water and air from reaching the roots, which harms the tree over time.
Your mulch shouldn’t form a volcano shape around the trunk. Use a hand trowel or air-spade to pull it back gently. This helps keep the trunk healthy.
Expose the root flare fully so the tree can breathe. This fix is called root collar excavation.
It takes 15 to 30 minutes for a small tree. It helps prevent serious damage.
Mulch that is too thick, usually over 3 inches, can suffocate roots and block water absorption. Mulching too close to stems or tree bases holds moisture. This can cause rot and disease.
Avoid piling mulch right against the plant. Keep mulch 2 to 3 inches away from the plant crown or trunk.
This stops moisture buildup and problems. Proper spacing protects your plants.
For small annuals and perennials, spread mulch 3 to 12 inches from the crown. Keep it only 1 to 2 inches deep to stop smothering the plant. This spacing lets plants grow without stress and keeps roots balanced.
When mulch starts to compact or mat, it stops draining properly and blocks oxygen. Rake or fluff up the mulch layer with a garden rake or your hands.
This light grooming breaks up the mats and improves air and water flow. You may need to do this every few months, especially after heavy rain.
Avoid piling acidic mulches or rocks near acid-loving plants like azaleas and hydrangeas. Rocks can change soil pH and harm these plants. Instead, use wood or bark mulch spread evenly and kept away from the plant stems.
Always spread mulch in thin, even layers from the bottom up. Use the rake’s teeth to distribute mulch gently across the soil. By doing this carefully, you avoid dense patches and mulch piles that can damage plants.
Spreading Mulch Safely Around Trees and Shrubs
Keep mulch a few inches from tree trunks and shrub bases to avoid rot. Spread mulch 2 to 4 inches deep and do not pile it directly against the trunk. These steps prevent pests, disease, and root suffocation.
Correct Mulch Spacing Near Tree Bases
Leave 3 to 5 inches of mulch space around young tree trunks and shrub bases. For mature trees, increase this gap to 8 to 12 inches to protect the root flare. This space stops moisture build-up that causes rotting and invites pests.
Spread the mulch so it does not touch the bark or base of shrubs. Mulch “volcanoes,” or piles against trunks, can damage trees long term by promoting decay. Use a rake to smooth mulch into a loose ring around the trunk.
Recommended Mulch Depths for Trees and Shrubs
Apply mulch 2 to 4 inches deep around trees and shrubs. This depth holds moisture, reduces weeds, and slowly feeds soil without suffocating roots.
Go closer to 2 inches for delicate flower beds. Near 4 inches for bigger trees.
Pile mulch in small piles then rake it into a sheet with clean edges. Avoid layers thicker than 4 inches to maintain air circulation and prevent fungal growth. A well-spread depth covers the root zone while letting water reach roots easily.
Use of Landscape Fabric or Barriers Under Mulch
Barriers like landscape fabric are usually not needed under mulch near trees and shrubs. These fabrics can trap moisture and limit air and water flow to roots. Organic mulch alone provides better soil health by breaking down naturally.
Choose organic materials like wood chips or shredded bark for mulch. They improve soil texture over time without blocking root growth. Avoid plastic or synthetic barriers in your garden beds.
Use them only when you want to stop certain weeds near trees. They help block specific weeds effectively where needed.
Keep mulch edges clean and avoid mulch against trunks to reduce rot and pests.
Step-by-Step Action Plan for Spreading Mulch
Follow this plan to spread mulch effectively and see your garden thrive quickly.
- Before you start: Measure your garden beds to calculate mulch needed. Check the depth matches 2 to 3 inches for best results.
- Day 1: Clear weeds and debris from beds before spreading mulch. Your soil should be clean and loose.
- Day 1 afternoon: Lay mulch around plants without piling it against stems or trunk. Keep 1 to 2 inches away for healthy growth.
- Day 2: Water the mulch lightly to help it settle and stay in place. Look for even dampness, not soggy soil.
- Week 2: Check mulch depth and redistribute if needed. It should stay around 2 to 3 inches thick.
- Month 1 and later: Remove any weeds you see. Add mulch if it has thinned or decomposed. Keep the coverage consistent.
Frequently Asked Questions
How Deep Should Mulch Be Spread Around Garden Plants?
Spread mulch evenly about 2 to 3 inches deep to protect plants. This depth keeps soil moist and reduces weeds without suffocating plant roots.
Can You Spread Mulch on Lawn Areas?
Avoid spreading more than half an inch of mulch directly on lawn areas. Thicker layers cause thatching and damage grass by blocking air and water.
Is It Okay to Add New Mulch over Old Mulch?
Yes, add a new layer if the old mulch is less than 2 inches deep. This refreshes the bed without disturbing roots or soil structure.
How Far Should Mulch Be Kept from Tree Trunks?
Keep mulch 6 to 12 inches away from tree trunks to prevent rot. Clear a circle around the trunk to allow airflow and avoid pests.
What Tools Help Spread Mulch Evenly?
Use a garden rake to spread mulch gently and evenly across the bed. The rake teeth help break up clumps and smooth the surface.
When Should You Water Mulch After Spreading?
Water the mulch right after spreading to settle it and reduce dust. Moist mulch also encourages microbial activity that helps feed your plants.
Key Points to Remember
Spreading mulch right protects your plants and keeps your garden looking tidy. Start by measuring your beds and clearing debris today. This small effort makes a big difference in your garden’s health.


