How to Construct a Raised Vegetable Garden: A Complete Step-by-Step Guide
Wondering how to construct a raised vegetable garden? Start by building a simple wooden frame. Make it 4 feet wide.
The length should be 8 feet. This size lets you reach inside easily without stepping on the soil. Keep the corners square to ensure a sturdy shape.
Choose a soil depth between 12 and 24 inches. This lets you grow most vegetables. Tomatoes and peppers need this depth.
You want deep enough soil for healthy roots but not so tall that watering gets hard. Add compost to improve drainage and fertility.
Use untreated wood like cedar for lasting strength. Pine costs less. It can last 3 to 7 years.
Assemble the frame quickly with screws and a drill before mixing soil. Drill pilot holes to avoid wood splitting.
Key Takeaways
- Build your raised bed frame no wider than 4 feet to reach all plants comfortably.
- Keep beds about 8 feet long for easy access from both sides.
- Choose soil depth between 12 and 24 inches for most vegetable crops.
- Use untreated cedar or redwood for longer-lasting raised beds.
- Mix soil with about 60% topsoil, 30% compost, and 10% peat moss.
- Assemble a 4×8 foot frame in 20 to 30 minutes with a drill.
How to Construct a Raised Vegetable Garden Step by Step
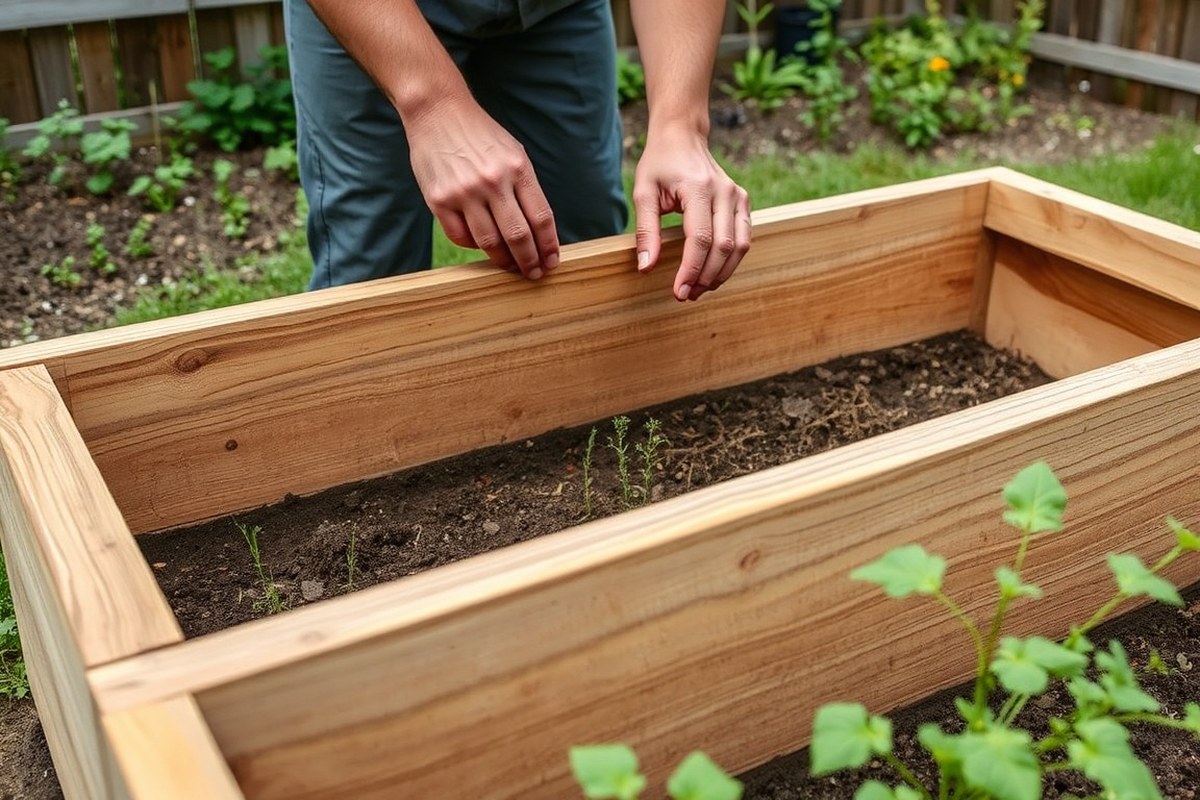
Start by choosing a flat spot and clearing away any grass or debris. Next, cut lumber to size and screw the frame together. Finally, fill the bed with a good soil mix.
Leave some space at the top. This prevents spills when watering or moving soil.
Preparing the Ground and Layout
Clear away grass, weeds, or rocks where you plan to build. This stops roots from growing up into your raised bed later.
Level the soil as well. A flat surface keeps the frame stable and makes planting easier.
Use a rake or shovel to smooth the ground out. Make sure the area matches your bed’s size before you start building. Small dips or bumps can cause uneven soil depth inside your bed.
Cutting and Assembling the Frame
Measure and mark your lumber before cutting for precise fits. Most raised beds use 2×6 boards cut to 8 feet. Use two shorter 4-foot boards for the ends.
This creates a sturdy frame. These sizes create a 4×8-foot bed that’s easy to reach from either side.
Use exterior-grade screws (3 inches long, galvanized or stainless) to hold pieces together firmly. Pre-drilling holes helps avoid splitting the wood. Optional 4×4 corner posts add strength, especially for taller beds.
Place the cut boards on the ground in the planned spot to double-check the fit. Then assemble the frame by screwing the boards together at corners. This usually takes 20 to 30 minutes.
Filling the Bed with Soil Mix
Line the bottom with landscape fabric to stop weeds but let water drain through. Fill the bed with a mix of garden soil, compost, and peat moss. This blend improves fertility and moisture retention for vegetables.
Leave 2 to 3 inches of space from the top edge. This helps prevent soil from spilling out when watering. It keeps your bed tidy.
Add soil gradually and level it out as you go. Filling a 4×8-foot bed 12 inches deep takes about a quarter cubic yard of soil mix.
- Clear vegetation and debris from your site
- Level the ground using a rake
- Measure and cut lumber to your bed’s dimensions
- Pre-drill and screw boards together to form the frame
- Optional: add corner posts for extra support
- Place landscape fabric at the bottom of the frame
- Fill the frame with a quality soil mix
- Level soil and leave space at the top to prevent overflow
Choosing the Best Materials for Durable Raised Beds

For raised vegetable garden beds, choose materials that last long and are safe for food. Cedar and redwood last over 15 years naturally and won’t harm your vegetables.
Treated lumber made after 2004 is safe but less common. Concrete blocks also last forever and provide extra planting spots.
Untreated vs Treated Lumber
Untreated wood like cedar and redwood resist rot naturally due to oils they contain. Cedar lasts 10 to 20 years, redwood 15 to 25 years, making them top choices. Douglas fir is cheaper but lasts only 3 to 7 years in most climates.
Modern treated lumber uses safer chemicals approved by the EPA. Post-2004 pressure-treated wood typically lasts 20 to 30 years. It’s usually safe to use in edible gardens.
Avoid older treated lumber. Harmful chemicals can come from old wood treatments.
Using untreated cedar or redwood gives natural durability without chemical risks. Treated lumber offers longer life and can be budget-friendly.
But check the treatment type beforehand. Avoid stained, painted, or unknown recycled wood for vegetable beds.
Concrete Blocks and Alternative Options
Concrete and cinder blocks don’t rot and can last indefinitely, making them very durable. They allow planting in the block holes, adding unique growing space. But these blocks cost more upfront and mean heavier work.
Concrete beds suit long-lasting, sturdy builds. They may heat up in direct sun, so choose shade or partial sun spots. Reclaimed bricks and blocks are budget-friendly but inspect for cracks and contaminants before use.
Other options like galvanized steel offer durability and a modern look. However, steel heats quickly and costs more than wood or blocks. Logs or raw lumber aren’t recommended because they rot faster and may leach unwanted substances.
Cost-Effective Materials for Beginners
Douglas fir or untreated pine are beginner-friendly options with low initial cost. Expect 3 to 7 years’ lifespan, enough time to learn and improve your gardening. Cedar costs more but saves money long-term thanks to durability.
Concrete blocks often cost medium range, balancing price and longevity. Using six 8-inch blocks for an 8-foot bed is a practical size to get started. Composite lumber is very durable but usually pricey, better if you plan long-term gardening.
| Material | Lifespan | Cost | Food Safe | Notes |
|---|---|---|---|---|
| Cedar | 10, 20 years | $$ | Yes | Natural rot resistance, popular choice |
| Redwood | 15, 25 years | $$$ | Yes | High durability, regional availability |
| Douglas Fir (untreated) | 3, 7 years | $ | Yes | Affordable, shorter lifespan |
| Pressure-Treated Lumber (post-2004) | 20, 30 years | $ | Yes* | Modern ACQ treatment, EPA approved |
| Cinder Blocks | Indefinite | Medium | Yes | Durable, blocks allow extra planting |
| Composite Lumber | 25+ years | $$$$ | Yes | Maintenance-free, made from recycled materials |
Your budget affects what material you choose. Think about how long you want the bed to last. These two things guide your material choice.
Cedar suits gardeners wanting durability without chemicals. Concrete works well for permanent, heavy-duty beds.
Check the label on treated lumber to confirm it uses safe ACQ treatment before buying.
How to Plan the Ideal Location and Layout for Raised Beds
Choose a raised bed location with plenty of sun and easy access. Leave enough space around beds for walking and equipment. Level or adapt the site if your ground slopes or is uneven.
Sunlight and Soil Considerations
Pick a spot that gets 6 to 8 hours of direct sunlight. This helps vegetables grow strong. Sunlight is key for a good vegetable garden.
Raised beds warm up 2 to 4 weeks earlier in spring. So full sun helps extend the season. Avoid areas shaded by trees or buildings most of the day.
The soil should drain well to avoid soggy roots and plant diseases. Sandy or loamy soil tends to work best under raised beds. Inspect the spot after a rain to see if water puddles or drains quickly.
- At least 6 to 8 hours of sunlight daily
- Away from large shade trees or tall structures
- Well-drained soil with no standing water
- Open area free from leaf litter or debris
- Close enough to a water source for irrigation
Sun and drainage are the top factors. Partial shade can work for leafy greens but limits most vegetable yields.
Spacing for Walkways and Wheelbarrow Access
Leave at least 18 inches between raised beds for comfortable walking and gardening. Wider paths up to 24 inches allow for wheelbarrows or garden carts. Narrow spaces make it tough to tend plants and haul soil.
Most raised beds are 4 feet wide and 6 to 8 feet long. This size lets you reach the center without stepping inside the bed.
Align beds with their long sides facing south if possible. It maximizes sun on rows.
- Bed width: usually 4 feet across for easy reach
- Bed length: 6 to 8 feet long is common
- Walkways: minimum 18 inches wide
- Paths: 24 inches or more for wheelbarrows
- Leave space for hose or drip irrigation lines
- Arrange beds for easy watering and harvesting
Good spacing helps avoid damage from stepping in beds. It also improves comfort while gardening.
Building on Uneven or Sloped Ground
Raised beds can work on slopes but need leveling or terracing for stability. Drive stakes through bottom boards to anchor beds on hills. This keeps frames solid against gravity and weather.
Terracing lets you step beds down the slope like stairs, preventing soil washout. Check levels with a carpenter’s level or a water level during building. Adjust soil and frame height as needed.
- Use garden stakes or rebar to fix frames in place
- Level frames using a carpenter’s or water level
- Create terraces for multiple beds on steep hills
- Build retaining walls if needed to hold soil
- Fill low spots with extra soil for even surface
Uneven sites require extra work but can yield productive gardens. Proper support avoids bed shifting or soil loss over time.
Deciding the Size and Depth for Your Raised Vegetable Beds
Picking the right width for your raised vegetable bed helps you reach plants easily. A common width is 4 feet. You can reach the center from either side.
This way, you won’t need to step into the bed. Cut the width to 2 feet if you can only reach one side.5 feet to avoid stretching too far and damaging plants.
Length depends on your available space. Try not to exceed 8 feet. This helps keep soil fresh and prevents compaction.
Beds longer than 8 feet are okay if you have enough room. But make sure you can still maintain them comfortably. Length also depends on your building materials.
Blocks often come in 16-inch lengths. Use this to plan your bed size.
Soil depth matters because roots need room to grow. Most veggies need at least 6 to 12 inches of soil. Plants like tomatoes, cucumbers, or peppers do best with 12 inches or more.
For shallow-rooted crops like lettuce, 6 inches can work. But deeper soil holds more water and nutrients.
A taller bed around 18 inches keeps moisture longer and protects roots from temperature swings. It costs more soil but gives more consistent results, especially during hot weather or dry spells. Loosen soil under the bed 8 to 12 inches deep.
Use a garden fork for this. It helps roots grow better.
Use the table below to pick size and depth. Consider garden space, plant types, and how you access the bed.
| Bed Dimension | Why Choose It | Recommended Soil Depth | Best For |
|---|---|---|---|
| 4 feet wide x 8 feet long | Easy access from both sides | 12 inches or more | Most vegetables like tomatoes, peppers |
| 2.5 feet wide x variable length | Access from one side only | 6 to 12 inches | Leafy greens, small root crops |
| 4 feet wide x 10 feet long | Extra growing space, with longer reach | 12 inches or more | Mixed crops requiring deep roots |
| Any width x 18+ inches tall | Better moisture retention, root protection | 18 inches or more | Warm season crops, vegetables needing stable moisture |
Comfort while working is key. So tailor the height and width to your own reach and mobility.
Wider beds may need stepping stones to avoid soil compaction. The right soil depth helps healthy roots develop and keeps plants productive throughout the season.
Preparing and Mixing Soil for Raised Vegetable Gardens
Use a soil mix with 60% topsoil, 30% compost, and 10% peat moss or coconut coir. This mix balances nutrients, drainage, and moisture retention for most vegetables.
Aim for about 8 inches of this soil blend inside your raised bed. This gives roots enough room to grow.
Add 2 to 3 inches of compost on top each spring. This replaces organic matter that gets lost over winter.
Compost boosts soil fertility and helps keep the soil loose. It also feeds your plants slowly during the growing season.
To prepare your soil, mix your ingredients thoroughly before filling the bed. Avoid packing the soil tightly because roots need air.
Poor drainage or flooding in your yard means raised beds work better. They help water flow freely and stop root rot.
Adding mulch like straw or shredded leaves on top helps retain moisture and keeps weeds down. Using a soaker hose or drip irrigation ensures even watering without soaking the soil. This approach supports steady growth and reduces disease risk.
Don’t fill raised beds directly with native soil alone. Mix in compost and peat moss for good texture and drainage.
Irrigation and Watering Tips for Raised Vegetable Gardens
Raised beds dry out faster than ground-level gardens, so watering right matters. Water deeply once a week. Give 1 to 2 inches each time.
This helps roots grow strong. This keeps soil evenly moist without drowning plants or wasting water.
Drip irrigation works best in raised beds. It delivers water directly to roots, cutting evaporation and runoff.
You can install soaker hoses or drip tape along your garden rows. Using a timer helps set consistent, automatic watering schedules.
Install drip tape by first laying it out over your soil surface between plant rows. Connect the drip tape to a garden hose or main water line using adapters. Use stakes to keep tape steady.
Cover it lightly with mulch. Mulch helps hold moisture in. Attach a timer to control watering duration and frequency automatically.
- Water once weekly with about 1, 2 inches of water
- Deep, infrequent watering encourages strong roots
- Drip systems save water and provide steady moisture
- Timers keep a regular schedule, especially when busy
- Mulch helps reduce evaporation on top of soil
Hand watering with a watering can is fine for small beds but less consistent. Raised beds need close monitoring during hot weather, as they lose water quickly. Adjust watering amounts if plants look dry or soil feels powdery.
Automated drip irrigation kits usually cost between $30 and $100, depending on bed size and features. They save time and protect plants by keeping moisture steady. Make sure to flush drip lines once a season to prevent clogs.
Recommended Vegetables and Crops to Grow in Raised Beds
Root vegetables like carrots, beets, and radishes grow great in raised beds. These crops benefit from loose, well-drained soil that raised beds provide. Leafy greens like spinach, lettuce, and kale grow well here.
The soil warms faster in spring, helping them thrive. This means they get a good start early on.
Tomatoes, peppers, and bush beans do well here too. Compact plants with moderate root needs fit best in beds about 12 inches deep. Avoid big root crops like sweet potatoes in the same bed.
Give sprawling vines like pumpkins their own space. They need more room and deeper soil to grow.
Planning crop rotation in raised beds keeps soil healthy and crops productive. Rotate plant families each season to avoid nutrient depletion and pest buildup. For example, plant leafy greens first, then legumes next.
Legumes fix nitrogen in the soil to help plants. Follow them with root crops to use other nutrients.
- Grow root vegetables, leafy greens, tomatoes, peppers, and beans.
- Avoid spreading vines and deep-root crops in small raised beds.
- Build beds about 12 inches deep for most plants.
- Rotate crops yearly by plant family to reduce pests.
- Space plants to allow air flow and easy access for harvesting.
- Use companion planting, like basil near tomatoes, to improve growth.
Spacing matters for healthy growth. Give most vegetables 6 to 12 inches between plants, depending on their size. Raised beds 3 to 4 feet wide work best for gardening.
You can reach the middle without stepping into the bed. This helps keep soil from getting packed down.
In larger gardens, designate different beds for heavy feeders, light feeders, and soil-resting crops. This system keeps your soil balanced longer and saves time during planting seasons. Planning this way avoids overcrowding and keeps your raised bed garden productive year after year.
Maintaining and Troubleshooting Raised Vegetable Gardens
Adding compost every season helps keep soil fertile and full of nutrients. Spread 1 to 2 inches of compost on the surface after each harvest. Mulching with organic materials like straw or shredded leaves also holds moisture and slows weed growth.
Pests can damage your raised bed crops quickly if you don’t act early. Use barriers like row covers and keep an eye out for holes or chewed leaves. Spot burrowing pests?
Put hardware cloth under your beds first. This stops moles and gophers from digging through.
Common mistakes are stepping inside beds and compacting soil. Not rotating crops every year also causes issues.
Compact soil hinders root growth and leads to poor drainage. Crop rotation helps prevent disease build-up and keeps your soil balanced.
- Check soil moisture weekly, water when top 1-2 inches dry
- Remove weeds promptly to reduce competition for nutrients
- Add compost or organic mulch each season
- Inspect plants every week for pests or signs of disease
- Rotate crops annually to prevent soil depletion
- Prune or thin plants to improve air circulation
- Use stakes or cages for support as plants grow
In cooler months, keep beds covered with mulch to protect soil life. Warm season needs frequent watering and pest control.
Over time, refreshed compost and careful watering maintain healthy yields. Avoid letting beds dry out or stay soggy, or plants will struggle and pests thrive.
Don’t step inside raised beds to prevent soil compaction and root damage.
Step-by-Step Action Plan for Your Raised Vegetable Garden
This plan helps you build and maintain your raised vegetable garden quickly and easily.
- Week 1: Choose your raised bed location with good sun and level ground. Check sunlight for 6, 8 hours daily.
- Week 1: Gather durable materials like cedar or composite lumber. Make sure wood is untreated for food safety.
- Week 2: Build the raised beds to the right size. Make them about 4 feet wide and 12 inches deep. Confirm stability and levelness.
- Week 2: Prepare and mix soil, combining topsoil, compost, and peat moss evenly. Soil should feel loose and crumbly.
- Week 3: Install drip irrigation or soaker hoses under mulch to water consistently. Check that water reaches all parts of the bed.
- Week 4: Plant recommended vegetables suited to your season in rows or blocks. Monitor plant health weekly for pests or wilting.
- Week 6: Add mulch to retain moisture and prevent weeds. Soil should stay moist but not soggy.
- Monthly: Maintain your garden by removing weeds, checking irrigation, and adding compost as needed. Healthy plants will keep growing strong.
Frequently Asked Questions
What Is the Best Way to Layout a Raised Bed Vegetable Garden?
The best layout is a narrow, rectangular shape you can reach easily from both sides. Aim for a 4×8-foot bed to avoid stepping inside. This layout helps you manage and harvest crops without compacting the soil.
What Vegetables Should Not Be Grown in a Raised Bed?
Root vegetables, like carrots, have deep roots. They may struggle if the soil is too shallow. Poor soil can also cause problems for them.
Also, avoid large crops like pumpkins that need tons of space. Raised beds work best for compact vegetables like lettuce, peppers, and herbs.
What Is the 5, 4, 3, 2:1 Gardening Method?
That method spaces plants to optimize sunlight, airflow, and access in raised beds. Plants are arranged in rows with specific spacing ratios to boost yield. It helps avoid overcrowding and reduces disease risks.
What Should You Put in the Bottom of a Raised Garden Bed?
Start with a layer of coarse material like wood chips or straw for good drainage. Avoid using landscape fabric unless you want to block weeds. Then add rich, loose soil mixed with compost for healthy roots.
How Do I Keep the Soil from Washing Out of Raised Beds?
Use sturdy boards and add a solid bottom barrier or edge to prevent soil loss. Mulching around the plants helps keep soil moist and reduces erosion. Avoid heavy watering that can wash soil away.
Can I Build a Raised Bed on Top of Existing Grass or Weeds?
Yes, but first remove or kill the grass to stop regrowth. Covering the area with cardboard or newspaper before building helps block weeds. This prevents competition and gives your vegetables a better start.
The Bottom Line
A well-built raised vegetable garden makes growing food easier and more rewarding. Start by picking the best spot and materials for your space. Next, build your beds and enjoy fresh veggies all season long.