How to Lay Brick Edging: Simple Steps for Durable and Neat Garden Borders
Wondering how to lay brick edging for a neat garden border? The key is preparing a firm, level base before placing your bricks. This helps your border stay straight and last for years without shifting or cracking.
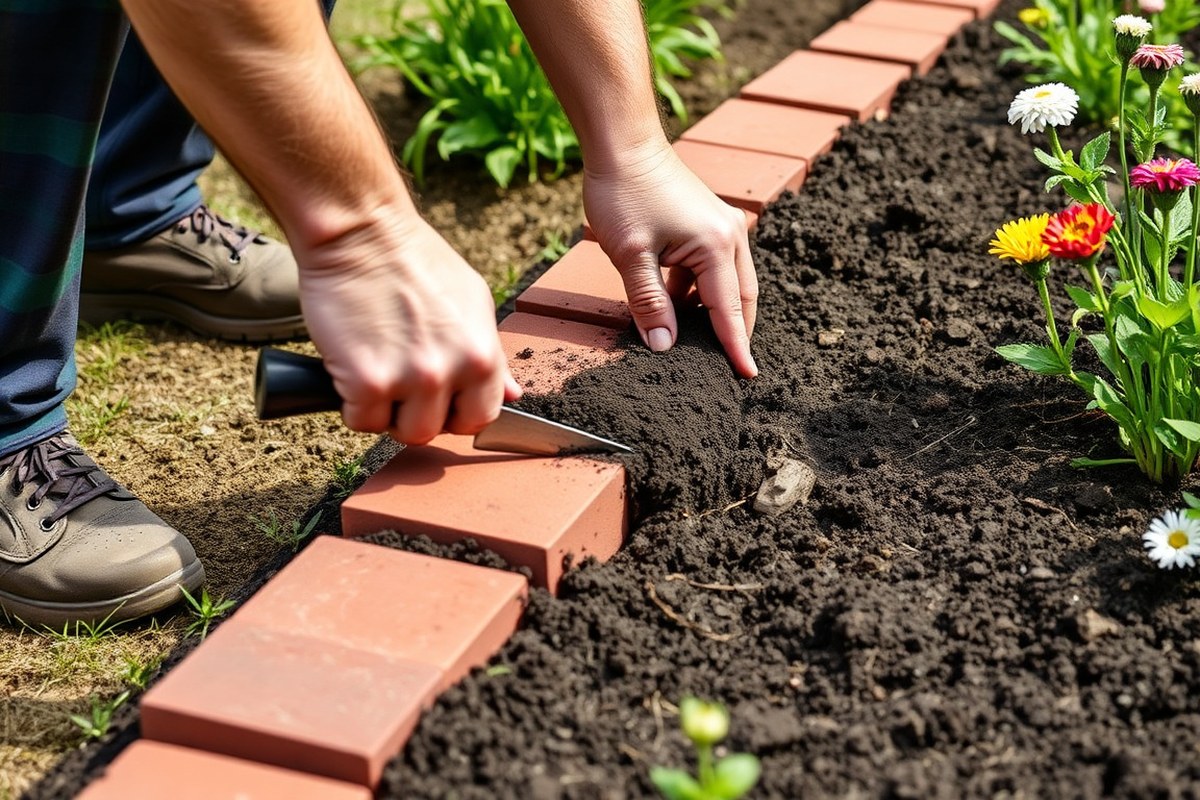
First, mark where your edging will go, usually about 24 inches from your flower bed’s edge. Dig the trench about 6 inches deep.
Make it 6 to 8 inches wide. This space fits the bricks and base materials well.
Use a base of compacted paver base or gravel first. Then add a layer of stone dust on top. This makes the support strong and steady.
It keeps the bricks stable and prevents sinking or unevenness over time. Taking time on this step saves future repairs.
Key Takeaways
- Measure your edging length in inches and divide by brick width to estimate brick count.
- Add 10% extra bricks to your order for cuts and mistakes.
- Dig a trench 4 to 6 inches deep to hold bricks, base, and stone dust.
- Compact paver base or gravel in the trench before placing bricks.
- Use standard-sized bricks (about 8 x 2.25 x 3.75 inches) for uniform edges.
- Mark your design line every 3 to 4 feet with stakes for accuracy.
How to Lay Brick Edging Step by Step
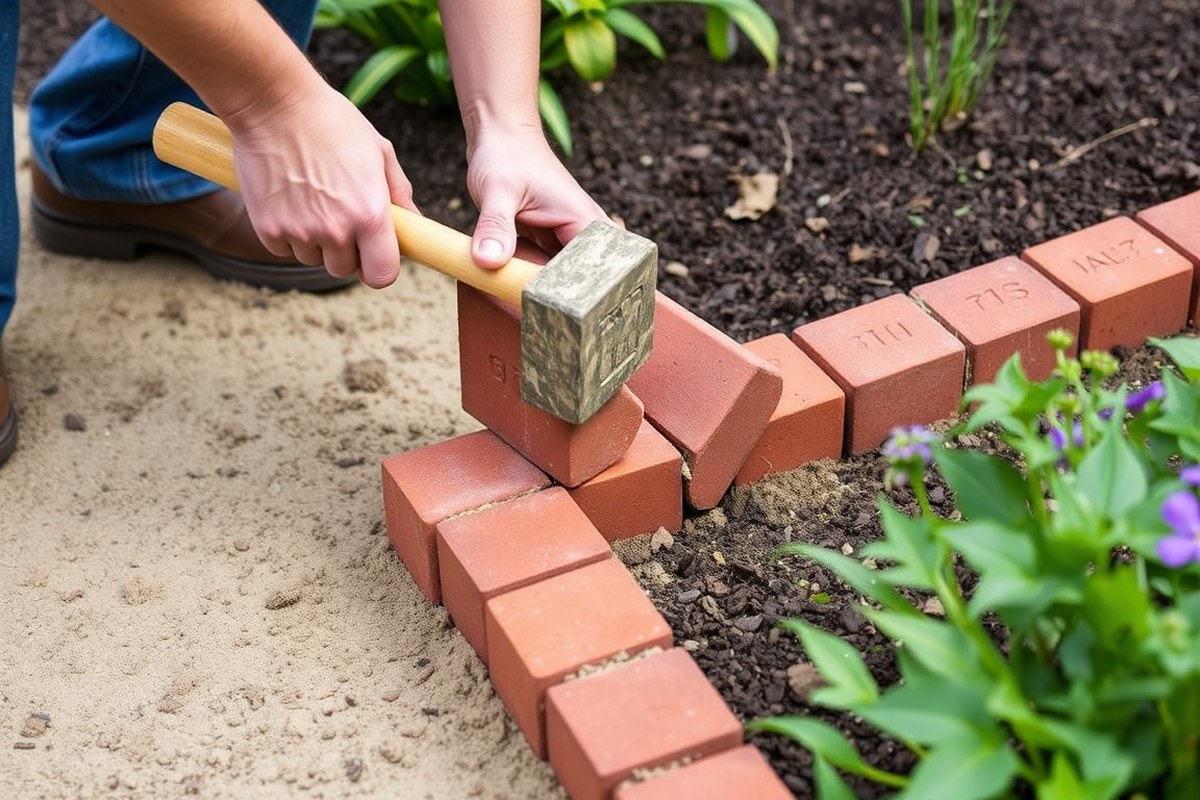
Laying brick edging takes careful steps to get neat, solid results. Begin with the right trench size to fit your bricks securely.
Keeping the edges level and aligned makes your garden look tidy and lasts longer. Filling gaps with sand or mortar finishes the job well.
Here’s how to lay your brick edging step by step:
- Mark and dig the trench. Dig a trench about 6 inches deep and twice as wide as your bricks. This space allows room for a gravel base and the bricks themselves.
- Add a solid base. Pour 2 to 3 inches of paver gravel or crushed stone in the trench. Compact it firmly to improve drainage and prevent settling.
- Place a layer of stone dust or sand. Spread about 1 inch of stone dust or paver sand over the gravel. Level and smooth it to create an even bedding for the bricks.
- Lay the bricks in place. Put bricks side-by-side in the trench on the prepared base. Use a rubber mallet to tap each brick carefully. Tap until the brick sits level. Make sure it is flush with the ground.
- Check alignment often. Stretch a string line along the edge to keep the bricks straight. Use a level to make sure they stay even side to side and front to back.
- Fill gaps with sand. Sweep sand or stone dust into the joints between bricks. This locks them in place and stops shifting over time.
- Compact and re-check your work. Tap the bricks again to set them firmly in place. Add or remove sand if some bricks settle unevenly.
- Finish by cleaning up. Brush away excess sand and step back to review your edging. Fix any loose bricks before the project is complete.
Essential Tools and Materials for Brick Edging
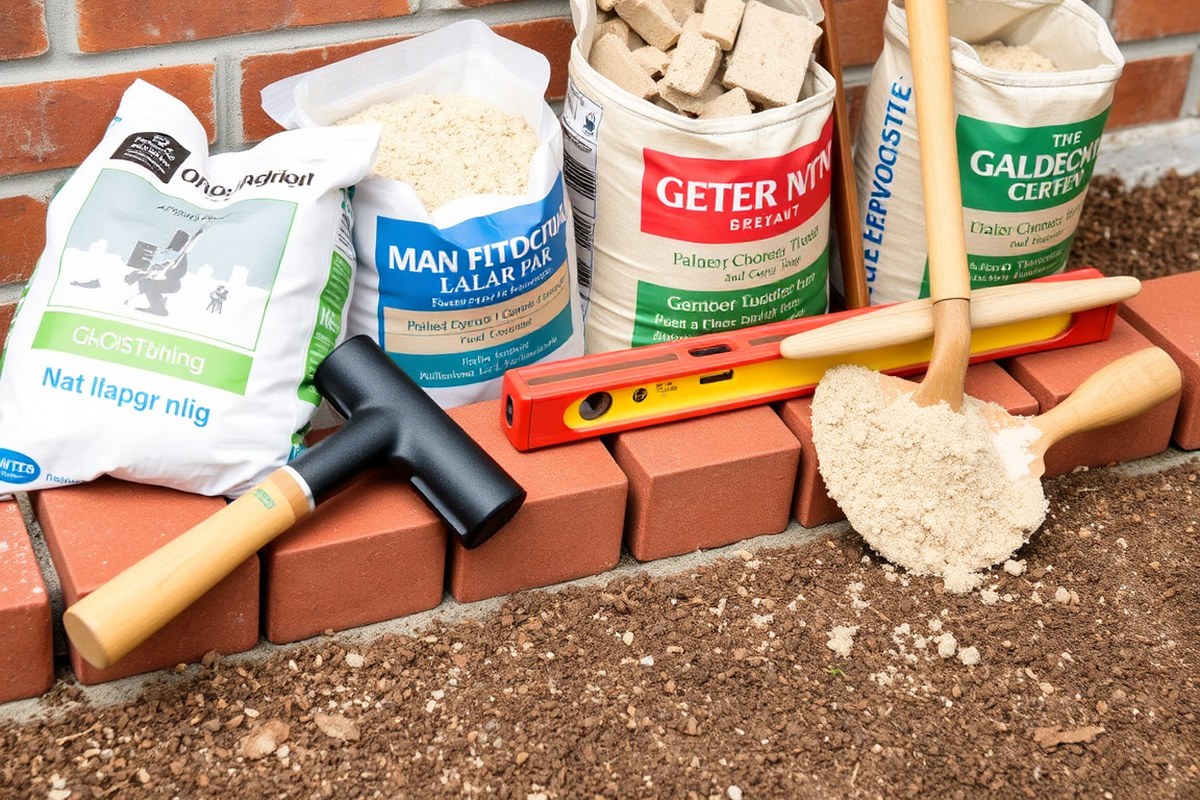
Start by gathering the right tools and materials for your brick edging. You need bricks, a paver base like crushed stone, and sand. The sand or mortar helps set the bricks in place.
These materials are essential for your project. Landscape fabric helps stop weeds and makes your edging last longer.
Buy enough bricks to cover your garden edge. Estimate about one brick per 8 to 12 inches of edging, depending on your layout. For a 10-foot border, get around 10 to 15 bricks to allow for cuts and fitting.
- New bricks ($0.50 to $1 each, plan for extra in case of breakage)
- Paver base or crushed stone ($5 per bag)
- Sand or mortar for setting bricks (sand costs around $5 per bag)
- Landscape fabric to prevent weeds ($10, 15 per roll)
- Basic tools: shovel, tamper, level, masonry trowel, rubber mallet (about $30, 40 total if buying all)
Calculate the trench depth to fit the brick height plus an extra inch for the base. This ensures a firm foundation. Dig down 6 inches below the topsoil for the base gravel.
Then add the gravel and tamp it firmly. This creates a solid foundation for the bricks.
Setting bricks on sand is common for edging and lets you adjust them easily. Mortar is more permanent but needs more skill and time to cure. Both provide solid results if you prepare the base correctly.
Buying material in bags is best. Use sand as needed for each brick to avoid waste.
Check your initial brick row often with a level and line string to avoid curves. Starting crooked means redoing the work later.
| Material | Approximate Cost | Quantity for 10 ft Edging |
|---|---|---|
| Bricks | $0.50, $1 each | 15 pieces |
| Paver base | $5 per bag | 1-2 bags |
| Sand | $5 per bag | 1 bag |
| Landscape fabric | $10, 15 per roll | 1 roll (optional) |
| Basic tools | $30, 40 total | Buy once |
Planning and Measuring Your Garden Edging Layout
Begin by clearly marking the path for your brick edging to fit your garden’s shape. Accurate measuring helps you order the right number of bricks.
It also creates a clean, neat border. You’ll need to plan straight lines or smooth curves depending on your garden design.
Marking Straight and Curved Edging Lines
Use stakes and a string to mark straight edges. Keep the string tight and level. This holds the line in place.
For curves, lay a garden hose or rope along the desired edging shape. Follow the hose to get smooth, flowing lines that look natural in your space.
After placing the hose or string, mark the ground on both sides. Use spray paint or flags for marking.
This lets you see the exact area for your bricks and helps when digging the trench. Check the layout from different angles to ensure it suits your garden’s flow.
Calculating Brick Quantity with Extras
Measure the total length of the marked edging line in inches for precise calculation. Divide the length by the brick length, usually about 8 inches.
This gives you the base number of bricks. Add 10% extra to cover cutting waste and any future replacements.
For example, if your edging length is 120 inches, divide by 8 inches per brick. That equals 15 bricks.
Add 10%, which is about 2 extra bricks, so order 17 bricks total. Keep the extra bricks for repairs or if mistakes happen during installation.
Don’t forget to verify brick size before calculating, as sizes vary slightly. Accurate measurement minimizes waste and avoids extra trips to buy bricks later. Keep a tape measure handy for quick rechecks along the way.
Planning Brick Orientation and Pattern
Decide if you want bricks laid lengthwise, widthwise, or even in a pattern like herringbone. Orientation affects the brick count and the overall look.
So choose a style that fits your garden theme. Test a small section by laying bricks out without mortar to visualize.
Align bricks with a string line for straight edges. Stagger bricks to make curves or break lines.
Plan for cutting bricks at corners or curves to avoid awkward gaps. Proper orientation makes the border more stable and visually pleasing.
Take note of brick height and thickness for a flush fit against your lawn or walkways. Adjust your trench depth accordingly to keep bricks stable and level. Planning these details before buying materials saves time and effort during planting and edging.
- Lay out a garden hose or string to trace your edging shape.
- Mark the edging line on the ground with spray paint or flags.
- Measure the total length of your marked line in inches.
- Divide this length by the brick length to get the brick count.
- Add 10% extra bricks to handle waste and future repairs.
- Decide on brick orientation and experiment with layout patterns.
- Mark straight or curved edges with stakes and a level string line.
- Double-check measurements and mark cuts needed for corners or curves.
Choosing the Right Base for Stable Brick Edging
Pick a base material based on durability and ground conditions. Gravel or crushed stone works best for lasting support under brick edging. A 2- to 4-inch layer of compacted gravel creates a strong base.
It keeps bricks level and stops shifting. This also prevents sinking over time.
Add a 1- to 2-inch layer of coarse sand on the gravel. This smooths the surface. It helps bricks settle evenly.
Use sand alone only in very stable soil where drainage isn’t a problem. Firmly tamp the sand layer with a rubber mallet or hand tamper.
Doing this avoids gaps in the future. It also prevents brick movement.
The entire base must be compacted in 2-inch lifts to ensure stability. Filling the trench too loosely causes bricks to tilt or crack over time. Dig a narrow trench deep enough for gravel, sand and burial.
The total depth should be about 4 to 6 inches. This holds the base layers and bricks.
Sometimes, a paver base mix of crushed stone and stone dust is a good alternative. It compacts tightly and creates a near-solid floor. Use paver base if your soil is loose or wet.
It drains water well. It also keeps the ground from settling. You’ll still add about a 1-inch sand layer on top for an even brick placement.
For instance, dig a trench about 6 inches deep and 4 to 6 inches wide. Pour 4 inches of gravel or paver base in, then work it down with a tamper. Next, spread 1 to 2 inches of paver sand and tamp it firmly.
Lay bricks on the sand bed. Tap each brick with a mallet. This gives a tight fit between bricks.
A poor base feels soft or uneven. Bricks will wobble or slowly sink if the base isn’t firm. Too much sand alone can wash away or compress unevenly.
Too little gravel lets water pool under bricks. Water causes freeze-thaw damage in cold climates. That ruins your brick edging over time.
Gravel or crushed stone costs about $15 to $30 per cubic yard. Prices depend on your local region. This factors into your project budget.
Sand costs about $10 to $20 per cubic yard. You only need a few inches deep. So material cost will be modest for a typical garden border.
Renting a hand tamper usually costs about $30 per day. Rent one if you don’t own a tamper. This tool helps compact your sand layer.
Mortar, Sand, or Gravel: Which Method to Set Your Bricks?
Mortar, sand, and gravel each offer different ways to set brick edging. Mortar creates a solid, permanent hold. Sand and gravel provide easier installation and drainage.
Choosing the best method depends on your garden’s needs. It also depends on how long you want the edging to last.
Mortar Setting: When and How
Use mortar when you want a strong, lasting brick edge that won’t shift. Apply a ½-inch layer of mortar beneath the bricks and between them using a trowel. Mixing the mortar according to the manufacturer’s instructions is key to good bonding.
This method is ideal for garden edges in high-traffic areas or places needing extra stability. Mortar also helps prevent weeds by sealing the gaps between bricks. Expect a longer setup time and a need to work carefully for a neat finish.
Using Sand or Gravel: Benefits and Limitations
Sand and gravel let you position bricks faster without waiting for mortar to dry. Level the sand base first. Then tamp it down well.
After that, lay bricks end to end or side by side. Adding gravel under and around each brick improves drainage and keeps bricks from settling unevenly.
Limit gravel amount by placing some with each brick rather than dumping it all first. Sand allows some shifting, which is better for curved edging or ground that moves seasonally. On the downside, bricks set in sand or gravel are less permanent and may need resetting.
| Method | Stability | Weed Control | Drainage | Ease of Installation | Recommended Use |
|---|---|---|---|---|---|
| Mortar | High | Good | Low | Moderate | Permanent, high-traffic edges |
| Sand | Moderate | Low | High | Easy | Flexible, curved edges |
| Gravel | Moderate | Low | Very High | Moderate | Drainage spots, loose soil |
Here’s a quick comparison to decide what suits your garden best. Consider how stable you need the edging and whether drainage or weed prevention is more important. Ease of installation might matter if you want a faster project.
Choosing the Best Method for Your Project
Pick mortar for a neat, permanent edge that stands up to wear and stops weeds. Sand fits well for DIY projects on curved or uneven ground where some movement is okay. Use gravel when your soil drains poorly or you want extra base support.
Applying mortar needs careful mixing and troweling for even coverage. Spread a half-inch layer on the base, place bricks, then fill cracks with more mortar. Level the sand or gravel base and tamp it down.
Lay each brick carefully. Add gravel under each brick too.
Adding gravel gradually with each brick prevents uneven settling and keeps edges level over time.
How to Cut and Shape Bricks for Curves and Corners
Cutting bricks to fit curves and corners is key for neat brick edging. Use the right tools and clear markings to get precise shapes. Follow safe cutting steps and test cuts for best results.
Choosing the Right Cutting Tools
Choose a saw made for cutting masonry work. Wet saws or angle grinders with diamond blades work well. These tools handle bricks easily.
These tools handle bricks smoothly and reduce dust. For small jobs, a brick chisel and hammer can work but need careful control.
A wet saw costs around $100 to $300 to rent or buy. Diamond blades last longer and make cleaner cuts. Using the proper tool speeds up work and helps your bricks fit tightly.
Marking Bricks for Accurate Cuts
Measure the curve or corner carefully on your layout. Write down the shape you need on each brick. This helps fit the bricks correctly.
Place the brick where it fits, then mark the cut lines with a masonry pencil. Mark where one brick overlaps the next for consistent gaps.
Center the brick over the gap before marking to avoid alignment errors. Use a straightedge or flexible curve ruler to guide your marks on curved sections. Accurate markings prevent wasted bricks and crooked edges.
Safe Techniques for Cutting Bricks
Always wear safety glasses, gloves, and a dust mask. Secure the brick firmly on a stable surface or clamp. Start with a shallow cut to test blade depth and see how the brick reacts.
Cut slowly and steadily to avoid cracking or breaking. For curves, make several small cuts instead of one deep cut. Work in a well-ventilated area or outside to avoid breathing dust.
Follow these steps to cut bricks for curves and corners:
- Measure the area around curves and corners carefully with a tape measure.
- Place the brick as it will lay and mark cut lines with a masonry pencil.
- Check your marks with a flexible curve ruler to match the curve’s shape.
- Use a wet saw or grinder with a diamond blade, adjusting for blade depth.
- Make a shallow test cut on scrap brick to confirm blade settings.
- Hold or clamp the brick securely before cutting along marked lines.
- Cut slowly, making multiple passes for curves to prevent damage.
- Dry fit the cut brick, then adjust cuts as needed for a tight fit.
Common Mistakes When Laying Brick Edging and How to Fix Them
Uneven bricks are a common problem that hurts how your edging looks and performs. This often happens when the base isn’t level or well compacted. Lift the bricks to fix this.
Add more paver base. Tap bricks down so they sit slightly higher than the others.
Poor base compaction lets bricks sink or shift over time. Use a hand tamper or plate compactor before laying bricks. Press the base firmly.
This helps keep bricks steady. This step reduces settling and keeps your edging stable for years.
Misalignment creates a crooked or wavy edge that looks sloppy. Check your line frequently with a string or straight edge as you place each brick. Adjust bricks right away to keep a clean, straight line or smooth curve.
- Lift and reset bricks that sit too low or high.
- Compact the base soil or paver base material well.
- Use a string line to guide straight edges.
- Add small shim layers of sand under bricks as needed.
- Brush joint sand between bricks to lock them in.
- Trim bricks carefully for neat corners and curves.
- Clear weeds and roots to prevent future shifting.
Loosen and lift bricks that shift or sink after setting. Add a little more base material, then compact before resetting the bricks.
You might spend an extra 10 to 15 minutes per section fixing this. But it keeps the edging solid.
When you spot uneven or misaligned bricks, it’s best to fix them fast. Correct alignment helps the bricks lock together better and stops weed growth along the edge. Keep checking as you go.
Try to keep the bottom edge of each brick consistent in height. This attention keeps your brick edging neat, stable, and long-lasting.
Maintaining and Protecting Your Brick Edging over Time
Checking your brick edging regularly helps it stay strong and neat. Walk along the edges every few months and look for loose or sinking bricks. When you find a loose brick, remove it carefully.
Clear out old sand or mortar. Reset the brick with fresh material. Let your repairs dry without any weight for 24 to 72 hours.
Avoid pressure during this time. This helps the repair to set properly.
Keeping weeds and grass away is key for neat brick edging. The bricks form a solid barrier. Trim any grass touching them regularly.
Pull weeds growing from the cracks between bricks. To stop new weeds, sweep sand or polymeric sand into gaps between bricks after cleaning.
This helps block weed seeds and keeps bricks steady. Avoid planting close to the bricks because roots can loosen them over time.
Cleaning your edging regularly keeps the bricks looking fresh and prevents dirt buildup. Use a stiff brush or a broom to clear away soil, leaves, and moss. For tough stains, rinse with water mixed with a mild soap or vinegar solution.
Avoid using harsh chemicals, since they can damage the bricks or hurt nearby plants. Aim to clean your edge at least twice a year, especially in spring and fall.
Don’t walk on new brick edging for 24 hours after repair. Avoid placing heavy objects on it. This gives it time to set well.
Keep the top of the brick edging about one inch above soil level. This avoids dirt sliding over the edges and makes mowing easier without hitting the bricks. When your edging sinks over time, add soil or sand at the base.
This supports and levels the bricks. Keep checking to maintain stability. Regularly clearing debris prevents soil buildup that leads to sinking or tilting.
Your brick edging can last many years with some upkeep. Regularly clear debris and fix loose bricks. This keeps your garden boundaries neat and tidy.
Step-by-Step Action Plan
Follow these steps to get your brick edging ready and installed quickly. Each phase includes a simple check so you know you’re on track.
- Day 1: Clear and mark your area. Remove grass and debris. Use stakes and string to outline the edge. Make sure the line looks even along your garden bed.
- Day 2: Dig the trench. Dig about 4 inches deep and as wide as your bricks. Check that the bottom is flat and level by using a small level or straight board.
- Day 3: Lay the base. Add 2 to 3 inches of gravel or sand. Compact the base tightly using a hand tamper. Walk along it; it should feel solid underfoot.
- Day 4: Set the bricks. Place bricks along the trench, keeping a slight downward slope away from your bed if possible. Tap each brick with a rubber mallet to set firmly.
- Day 5: Fill gaps. Spread sand or mortar between the bricks. Sweep excess material off the surface. Check that bricks don’t move when you press on them.
- After 1 week: Check and adjust. Look for any loose or uneven bricks. Re-tamp or add more joint filler where needed to keep the edging stable.
Frequently Asked Questions
How Long Does It Take to Lay Brick Edging for a Small Garden Bed?
It usually takes a few hours to complete a small garden bed. It depends on your prep, cutting, and placing bricks carefully to keep edges straight and neat.
Can I Lay Brick Edging Directly Onto Soil Without a Base?
Laying bricks directly on soil usually leads to shifting and uneven edges. A compacted base like sand or gravel holds your bricks firmly.
It also helps keep them level for a long time. This prevents shifting and uneven edges in your garden.
Is Mortar Necessary for All Types of Brick Edging Installations?
Mortar is not always needed; paver sand or gravel can set bricks firmly. Mortar helps in high-traffic areas or where you want a more permanent, solid barrier.
How Do I Prevent Bricks from Moving in Freeze-Thaw Conditions?
Use a stable base and compact it well before placing bricks to prevent shifting. Sealing bricks after installation can also reduce water absorption and frost damage.
What Is the Best Way to Cut Bricks for Tight Curves in Edging?
A small angle grinder or masonry saw works best for precise cuts on curves. Take your time measuring and cutting to avoid mistakes and keep the curve smooth and even.
Can I Reuse Leftover Bricks from Previous Projects for Edging?
Leftover bricks can be reused if they are still in good shape without cracks. Cleaning off old mortar helps them fit nicely and look uniform along your border.
Before You Go
Brick edging adds clean lines and durability to your garden. Start by marking your layout clearly today. Take each step carefully, and your brick border will last for years.