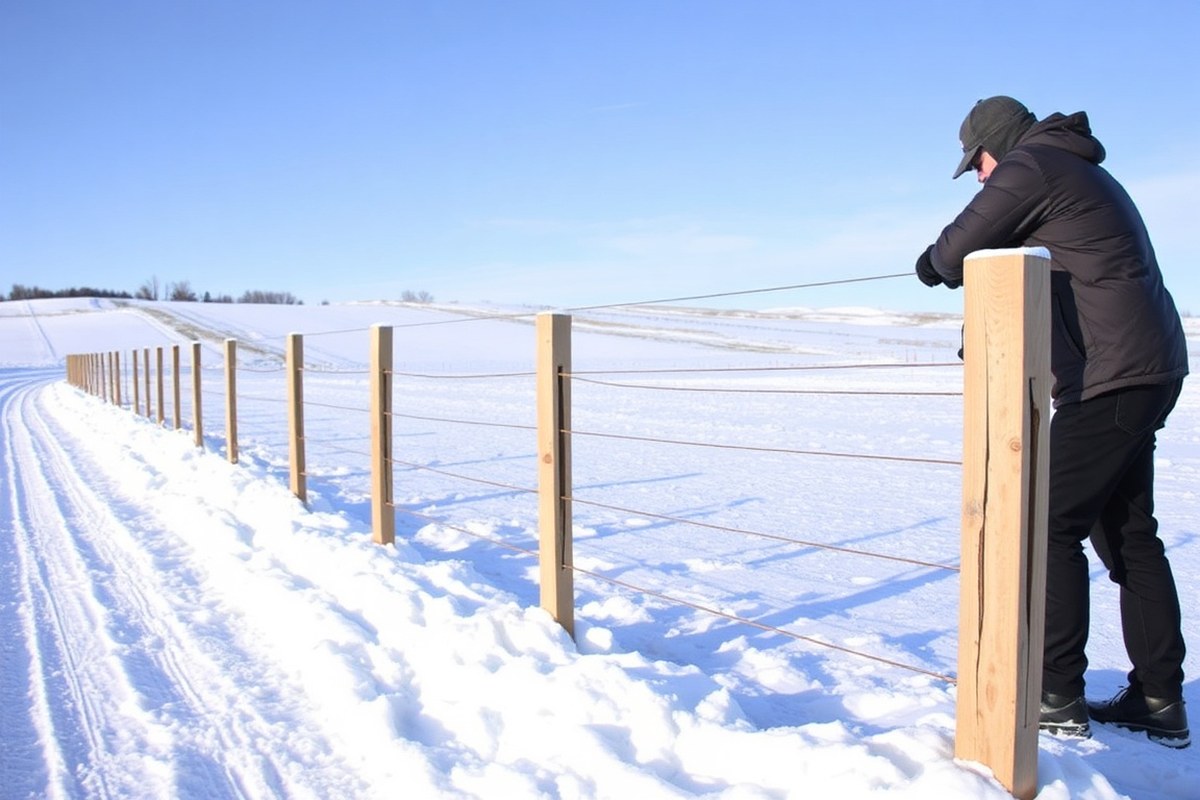
How to Put Up Snow Fence: A Complete Guide with Expert Tips
Putting up a snow fence helps stop heavy snow from piling up near your driveway. Use strong materials and place the fence in a good spot to protect your property. Pick a site at least 30 feet upwind to catch snow before it reaches your place.
Use wooden posts spaced no more than 8 feet apart to support a 4-foot-high fence. Leave about 6 inches between the fence bottom and the ground to prevent snow buildup. Angle the fence up to 25 degrees on uneven ground to keep it aligned properly.
Set the fence about 35 times its height away from the area on flat land. For a 4-foot fence, this means roughly 140 feet.
But adjust for your yard’s shape. Pay attention to wind direction, placing the fence parallel to the road to avoid unwanted snowdrifts.
Key Takeaways
- Pick a site at least 30 feet upwind from what you want to shield. This spot helps the fence catch snow before it reaches your property. Proper placement makes the fence effective.
- Space wooden posts no more than 8 feet apart for a 4-foot fence.
- Leave a 6-inch gap between ground and fence bottom to avoid snow buildup.
- Angle the fence layout up to 25 degrees on uneven terrain for best fit.
- Keep the fence about 35 times its height away from protected areas on flat ground.
- Install the fence parallel to roads when wind hits within 25 degrees of perpendicular.
How to Put Up a Snow Fence Step-by-Step

Start by clearing the area where the snow fence will stand. Remove rocks, debris, and any plants that can block posts or damage the fence. Having a smooth ground helps keep the fence steady and straight.
Set your posts into the ground facing the open area you want to shield from snow. Space the posts close enough, about every 6 to 8 feet, to hold the fence tight. For a 4-foot-tall wood fence, this spacing balances strength and cost.
Attach the snow fence material to each post firmly. Keep it about 12 inches above the ground. Check the fence often to ensure it stays secure.
This gap stops snow from piling under and making removal tough later. Keep the fence tight and level to prevent sagging or wind damage.
- Mark your fence line starting point and stake it.
- Dig holes for the posts at your marked spots, 2 feet deep.
- Set the posts firmly in the holes, using gravel for drainage.
- Level and check spacing between each post before filling with soil.
- Unroll the snow fence along the posts, keeping it taut.
- Secure the fence to posts with nails, staples, or ties every foot.
- Check the fence height stays about 12 inches above the ground.
- Tighten the fence by pulling and adding additional fastening if needed.
For uneven ground, you can angle the fence up to 25 degrees while keeping posts straight. Use longer posts where snow tends to pile deeper. Plastic fences need careful tying since they flex more under wind.
Installing in late fall before heavy snow gives the fence time to settle. You’ll see better snow control if the fence is stable, straight, and properly fastened. Loose fences tend to blow out or fail when drifting becomes intense.
Choosing the Right Materials and Tools for Snow Fence
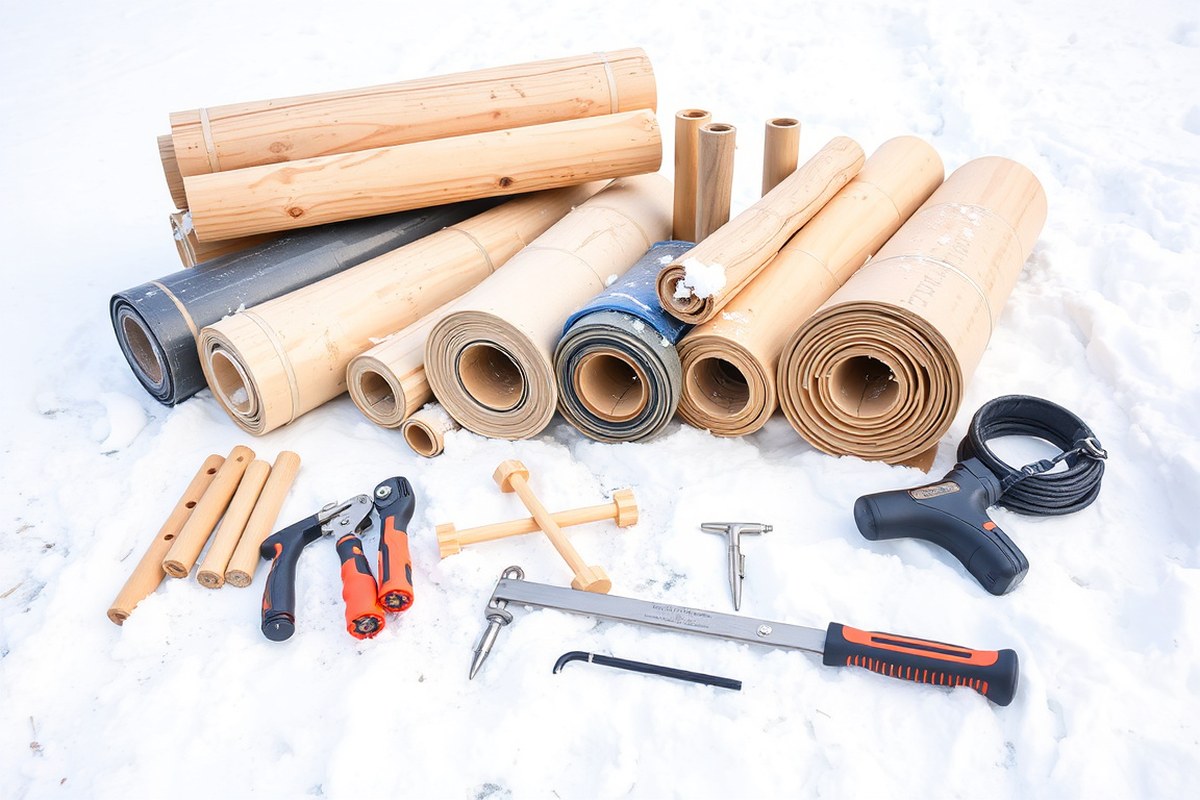
Snow fences come in plastic, metal, and wooden types. Plastic fences are heavy-duty and resist weathering well. Wooden slat fences offer a traditional look and stand up to strong winds.
Post choice depends on your fence material and location. Steel T-posts or sturdy wooden posts work best for wooden fences.
Space line posts about 10 feet apart for good stability. Lightweight posts only suit sheltered areas since wind can pressure the fence heavily.
Essential tools include a post driver or sledgehammer for driving posts into the ground. A tape measure helps keep even spacing. You’ll also need fasteners like locking clips or wire to attach the fence.
| Fence Type | Best Post Type | Post Spacing | Notes |
|---|---|---|---|
| Plastic fence | Steel T-post or wooden post | Up to 10 feet apart | Heavy-duty, resists weather well |
| Wooden slat fence | Sturdy wood or steel T-post | Up to 10 feet apart | Classic look, good for strong winds |
| Lightweight fence | Light posts | Closer spacing recommended | Only use in sheltered locations |
The posts should be buried deep enough to stay stable. A six-foot post usually needs 2.5 feet in firm soil.
Driving the post slightly away from the fence helps it resist wind pressure better. Check that each post does not wobble before attaching the fence material.
Lean end posts slightly away from the fence line to prevent wobbling under wind pressure.
Good preparation of materials and correct tools make installation easier. Choose fence types and posts that can handle your local wind and snow. Pick materials strong enough to last through tough weather.
This helps your fence stay upright and stable. Space the posts right and set them firmly in the ground.
This keeps the fence from leaning or breaking during the season. Good installation helps your fence last longer.
Where and How Far to Place Your Snow Fence for Best Results
Position your snow fence upwind, about 20 to 35 times its height away from roads. Make it nearly at a right angle to the usual wind direction.
This helps snow pile up safely. Adjust the fence for hills or uneven ground to block wind well and let snow gather.
Determining Prevailing Wind Direction
Find your area’s prevailing winter wind by checking local weather reports or observing snow patterns. Watch which way blowing snow generally moves during storms around your property. Watch for changes in wind during long storms.
This helps you avoid putting the fence where snow blows around the ends. Mark spots where drifting might happen.
You can also observe nearby trees or flags for wind direction clues on windy days. Trace where snow piles up in open spaces to confirm common wind paths. Aim to install the fence perpendicular to this dominant wind path for the best effect.
Calculating Optimal Fence Distance by Fence Height
Use the simple guide: place the fence 20 to 35 times its height upwind from what you want to protect. This rule works for most snow fences. It keeps snow from filling driveways.
For example, a 4-foot-tall fence should sit between 80 and 140 feet away from your driveway. This space lets snow form a stable drift away from roads.
It stops snow from piling up where it blocks traffic. That’s why distance matters.
Adjust distance depending on wind speed. Light winds let you place the fence closer, around 15 to 30 feet.
Strong winds need 30 to 60 feet or more. Expect steeper, heavier drifts farther from the fence with higher wind speeds.
Leave enough open space for the snow to settle without blocking your driveway. The fence slows the wind, making snow fall early. Snow drops before it hits your driveway or path.
The fence then keeps these spots clearer. Placing it too close risks snow piling right where you want to keep clear.
Adjusting for Uneven Terrain and Fence Angles
On slopes, tilt the fence to stay mostly across the wind direction. This stops wind from moving snow unevenly. It works better than a straight line.
This helps the fence catch snow efficiently even if the land tilts or curves. Avoid sharp bends that let wind slip around the fence ends.
Place the fence on higher ground when possible to block wind before it gains speed downhill. Lower ground spots might need longer fences. You may also need stronger fences to resist wind and heavy snow.
This keeps the fence standing firm. Adjust post depth and anchoring to match the terrain’s firmness and slope angle.
Check for obstacles like trees or buildings that can alter wind flow. In tricky spots, the fence may need a slight curve. Still, keep the main parts aligned with the wind direction.
This helps the fence block snow better. Leave enough space between the fence and protected areas.
This lets snow settle safely without blowing onto roads or driveways. Proper gaps improve snow control.
Post Spacing, Depth, and Installation Best Practices
Posts need to go at least 3.5 feet deep to stay solid in winter winds. Burying one-third of the post length in soil prevents the fence from leaning or falling. Using a post driver helps set posts firmly.
It prevents bending. T-posts with ground anchor plates get better grip.
Space the posts between 6 and 10 feet apart depending on your fence material. Wooden posts often require closer spacing, about 6 feet apart, to provide strong support. Metal T-posts can stand 10 feet apart.
Secure each section tightly. Use ties or staples to keep wind out.
End posts must withstand the strongest wind pressure. Set end posts close to their adjacent post, around 6 feet or less apart. Strengthen posts by placing fence fabric between the flat metal post side and a 1×2 wood slat.
This wraps the fabric securely. This keeps the fabric taut and the post firm.
- Push posts straight down into the ground. Use a post driver or sledgehammer to do this. Make sure posts are steady and vertical.
- Bury posts one-third of their total height, usually 3.5 feet or more.
- Place intermediate posts no more than 10 feet apart for metal fences, 6 feet for wood.
- Tighten wire connectors or galvanized ties at multiple points on each post.
- Use a wood slat to sandwich the fence fabric at end posts for extra strength.
- Check for a straight line with measuring tape or string before setting posts.
- Adjust depth and spacing based on local soil and wind conditions.
Driving posts too shallow causes wobbly fences that fail under snow pressure. Posts spaced too far apart let sections sag or flap wildly.
Adjust depth deeper in soft or sandy soil to improve hold. Consistent spacing and tight securing prevent gaps that wind can push through or lift.
How to Maintain and Inspect Your Snow Fence Through Winter
Check your snow fence tension every two weeks or after strong winds. Proper tension keeps the fence from sagging and losing effectiveness. Use your hands or a hand tool to feel the fence fabric.
Make sure it is tight but not too tight. The fabric should not sag or stretch too much.
Look for damage like torn slats, broken posts, or leaning sections. These signs mean the fence won’t block snow properly. Fix loose posts by resetting them firmly in the ground.
Replace any broken slats with matching materials. This keeps the fence sturdy and reliable.
Snow buildup can bury the fence, reducing its work. Clear snow about once a week, especially on the downwind side. Leave at least a 5-inch gap under the fence.
This stops snow from piling up against it. The gap helps prevent the fence from collapsing.
- Inspect fence tension biweekly and after storms
- Check for rips, warped or broken posts, and leaning panels
- Reset or replace damaged parts immediately
- Remove snow buildup near bottom, maintaining a 5-inch gap
- Use a shovel or snow blower carefully to avoid fence damage
- Record problems and repairs in a maintenance log
- Keep tools handy, like a mallet, replacement slats, and rope
Regular care ensures your snow fence stays effective all winter long. Tight fences catch snow easily and help prevent drifts on driveways or walkways. Damaged or loose fences let snow slip through or bury the fence itself.
Keep a close eye on fence tension after windy days. Loose fences fail fast during snowstorms.
Adjust your maintenance if you face heavier snow years or strong winds. Snow fences near buildings may need more frequent clearing to avoid damage. Repair issues quickly to avoid bigger problems later.
Acting fast prevents complete fence failures. It saves time and money in the long run.
When and How to Remove and Store Snow Fence After Winter
Remove your snow fence once most of the snow has melted in early spring. Taking it down too early risks missing late storms. Doing it around March or April usually works well, depending on local weather.
Disassembling Fence Components
Removing the fence carefully prevents damage and keeps materials reusable. Start by untightening or cutting any ties holding the fence to posts. Handle posts gently to avoid bending or breaking them.
Use gloves to protect your hands from sharp edges or splinters. Take your time removing nails or screws if your fence has any fasteners. Keep all hardware in a small container for easier reuse next season.
Cleaning and Drying Fence Material
Cleaning the fence prevents mold and dirt buildup that damages fabric or wood. Use a stiff brush to scrub off dried mud, snow residue, and leaves. Avoid soaking the fence; just remove visible grime.
Air-drying the material under the sun helps stop mildew and rot. Lay the fabric flat or hang it for a few hours until fully dry. Never store a wet fence, since trapped moisture causes decay.
Proper Rolling and Storage Techniques
Rolling the fence tightly avoids creases that weaken the material over time. Roll it like a sleeping bag, starting at one end and keeping it snug. Loose folds create stress points that lead to tears.
Store the rolled fence in a dry, covered spot like a garage or shed. Keep it off the ground to avoid moisture from seeping in. Protect the fence from pests by using sealed containers or bags.
- Wait until most snow melts and weather stabilizes in spring.
- Remove all ties, clips, or fasteners gently to avoid damage.
- Pull out posts carefully, shaking off dirt and debris.
- Brush off mud, grit, and any plant matter with a stiff brush.
- Air-dry the fence material fully in the sun for several hours.
- Roll the fence tightly to prevent permanent creases or folds.
- Place rolled material in a dry, covered area away from pests.
- Store hardware and posts together for easy reinstallation next winter.
Common Installation Mistakes and How to Avoid Them
Putting the snow fence too close makes snow pile up in front. This blocks snow from drifting behind as you want. Keep the fence farther away to catch snow better.
Too far away, and the snow won’t drift where you need it most. Place the fence about 30 to 50 feet from walkways.
This spot helps it catch snow before it reaches your area. Staying that far improves snow control effectively.
Posts set too shallow risk leaning or falling under snow weight and wind pressure. Drive posts at least 2 feet deep into the ground in most soils. For soft or sandy soil, go deeper or add concrete to improve stability.
Fasteners often weaken the fence when done wrong. Plastic ties that aren’t looped twice or pulled tight allow fabric to slip.
Staples driven straight in can loosen; angle them slightly downward for better grip. Wire ties need ends twisted flat with pliers to avoid snagging and fence damage.
- Check post depth with a ruler or tape measure; dig deeper if loose
- Space posts evenly to keep fabric taut and reduce sagging
- Loop plastic ties twice and pull tight around the mesh
- Drive galvanized staples at a 30-degree downward angle into wood
- Use pliers to flatten wire tie ends after twisting
- Keep fence 30-50 feet from the area you want to protect
When posts seem unstable after setting, loosen the soil around the base. Add gravel or tamp soil firmly to improve grip. Notice fabric slipping or flapping?
Tighten the fasteners right away. Add more tie points if the problem continues.
Snow fences are meant to make snow pile on the windward side, clearing your property. Incorrect placement or poor fastening ruins this effect and wastes effort. Spend time on setting post depth and location well.
Handle fasteners carefully during installation. These steps help your fence work all winter.
Alternatives and Advanced Snow Fence Strategies
You can use several fence rows, living windbreaks, or special materials. These options work well for tough snow and wind conditions. They provide alternatives to standard snow fences.
These options help control snow better in strong winds or heavy drifts. You can pick what fits your land, budget, and how harsh your winter gets.
Double or Multi-Row Snow Fence Systems
Use two or more fence rows when snow drifts are large. Strong winds also call for multiple rows. This helps control heavy snow more effectively.
Space the first fence about 30 feet upwind from the protected area. Place the second fence roughly 20 feet downwind from the first to catch more snow.
Multiple rows slow the wind in steps. This causes more snow to drop safely. It keeps snow away from your driveway or building.
The extra material cost runs about double for two fences. But it pays off when you avoid costly snow removal or damage.
Spacing fences at least 15 feet apart helps create better snow trapping zones.
Living Windbreaks and Natural Barriers
Planting rows of evergreen trees or shrubs can replace or supplement snow fences. Living windbreaks take years to grow fully. They help wildlife and reduce heat loss around buildings.
These benefits make them worth the wait. Choose hardy conifers adapted to your zone for best results.
Space trees 6 to 12 feet apart in one or two rows depending on species width. Water them regularly the first two years for strong roots. It can cost $200 to $600 per 50 feet for young plants plus ongoing care.
Living barriers need patience, you’ll see full snow control benefits only after 3 to 5 years.
Specialized Materials for Harsh Locations
Standard plastic snow fencing can crack and fade in cold, windy areas. Look for heavy-duty materials like UV-resistant mesh or wood slat fences that last longer. Metal mesh fences let some wind pass through without breaking.
Install fences with solid, treated wooden posts set 2 to 3 feet deep for stability. In extreme gusts, consider reinforcing posts with guy wires. These setups cost more upfront but reduce repairs and damage over time.
Use porous fences to slow wind gently. Avoid solid walls that cause unpredictable drift patterns.
Step-by-Step Action Plan for Your Snow Fence
Follow these clear steps to install and maintain your snow fence this season. Each step helps you control snow and protect your property effectively.
- Before installation: Gather all tools and materials listed in the article. Check for any damaged parts, so your fence lasts all winter.
- Day 1: Mark your fence line at the recommended distance from roads or buildings. Use stakes and string for a straight guide.
- Day 2: Dig post holes to the right depth, typically 2 to 3 feet. Make sure each hole is firm and vertical after you place the post.
- Day 3: Fasten the fence to the posts securely, checking for even tension across the material. It should stay stable in windy conditions.
- First week: Inspect the fence daily after snow or strong winds. Fix any loose connections or leaning posts immediately.
- Mid-winter: Clear any heavy snow buildup near posts to prevent damage. Check for signs of wear or tears in the fence fabric.
- After winter: Remove the fence carefully, keeping your posts for next year. Store your fence in a dry place to avoid mold or rot.
- Spring prep: Repair or replace damaged parts before storage for next winter. Label and write notes on your fence gear for easy start next season.
Frequently Asked Questions
Can I Put Up a Snow Fence on Uneven Ground?
Yes, you can angle the snow fence up to 25 degrees to fit the land. This helps maintain its effectiveness in managing snow drift without extra materials or rework.
How Tall Should a Snow Fence Be for a Home Driveway?
A typical snow fence is 4 feet tall for most residential needs. It provides enough barrier to catch snow without being too costly or bulky.
What Kind of Posts Work Best for Snow Fences?
Steel T-posts or sturdy wood posts are ideal for line posts. Space them no more than 8 to 10 feet apart for steady support against snow pressure.
Can I Reuse Snow Fence Materials Each Winter?
Yes, removing and storing your fence carefully allows reuse in later seasons. Avoid damage during removal by unfastening gently and storing in a dry place.
Is There a Best Time to Install Snow Fences Before Winter?
Put up the fence before the first heavy snow or when temperatures start to drop consistently. This timing ensures it catches snow from the very start.
How Do I Prevent Snow Piles from Blocking My Fence?
Leave an open area of 25 times the fence height downwind. This space lets snow drift safely without burying the fence or causing damage.
Before You Go
A well-installed snow fence keeps your property safer and reduces snow drifting. Check your fence regularly to fix small issues fast. Now, pick a good day to start your fence setup and protect your space this winter.