
How to Take Care of Tulips in Soil: A Complete Guide with Proven Tips
Knowing how to take care of tulips in soil starts with picking the right spot. Tulips need soil that drains well and plenty of sunlight, at least six hours daily. Without proper soil and light, they won’t grow strong and healthy.
Next, prepare your soil by loosening it at least 12 inches deep. This helps roots spread easily and bulbs settle firmly.
Your soil is heavy clay. Add organic matter to improve drainage and texture.
Plant bulbs 6 to 8 inches deep for most tulips. Small species need 4 to 5 inches.
Planting at this depth protects bulbs from animals and temperature swings. Also, timing is key, plant when the soil cools below 60 degrees but before it freezes.
Key Takeaways
- Tulips grow best in well-drained soil with 6+ hours of sunlight daily.
- Loosen soil to at least 12 inches deep before planting tulip bulbs.
- Improve clay-heavy soil by mixing in organic matter before planting.
- Plant tulip bulbs 6-8 inches deep; small tulips only 4-5 inches deep.
- Plant bulbs after soil temperature drops below 60°F but before freezing.
- Spacing bulbs properly helps prevent animal damage and encourages growth.
How to Prepare and Improve Soil for Tulip Planting

Start by checking your soil’s texture and drainage before planting tulip bulbs. Tulips like sandy or loamy soils. These types drain water well.
They help keep bulbs from rotting. Clay soil tends to hold water and can suffocate tulip roots. So it needs extra care.
Fix clay soil by mixing in organic matter like compost or coarse sand. Mix amendments into about 10 to 12 inches of soil. This breaks up heavy clay.
It makes soil easier for roots to grow. This improves drainage and root growth, letting tulips grow stronger and bloom better.
Here’s a simple checklist for soil preparation before planting tulips:
- Clear the area of weeds and rocks
- Test soil pH and adjust it if needed to 6.0, 7.0
- Add compost or aged manure to improve soil texture
- Mix in sand if your clay soil is dense
- Loosen the soil to a depth of 10, 12 inches
- Rake the soil smooth and level after amendments
- Lightly water the area before planting
Your soil might need organic matter when sandy. It helps hold moisture better. This keeps tulip bulbs healthy.
Sandy soils drain quickly. So extra organic material keeps roots from drying out too fast. Loamy soil usually needs just a little compost to stay loose and fertile.
Improving soil drainage is key for tulips. You can check by digging a hole 12 inches deep and filling it with water. Water draining in 30 to 60 minutes means good drainage.
This prevents bulb rot. Fast drainage suits tulips well. Water sitting too long shows poor drainage.
Add coarse sand or organic matter. This improves water flow and bulb health.
What Is the Ideal Soil Type and pH for Tulips?
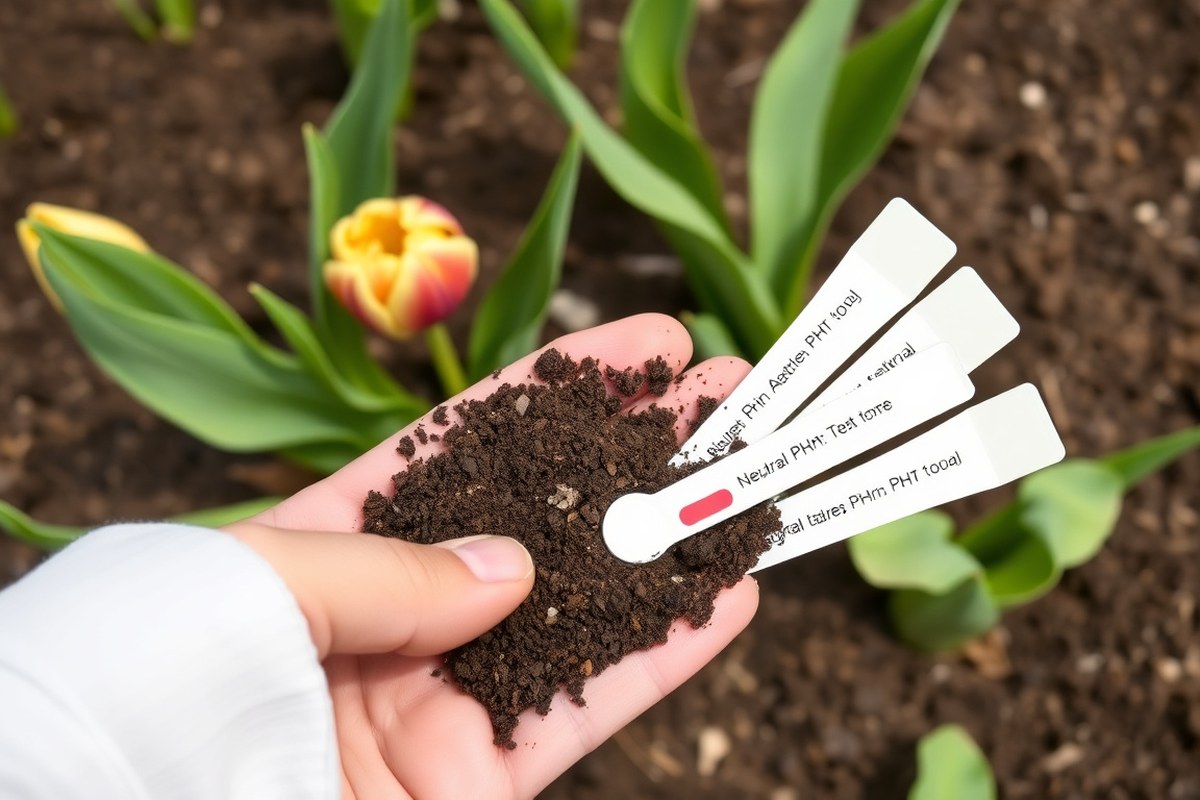
Tulips like soil pH between 6.0 and 7.0 for best growth. Testing soil pH is easy with a simple kit you can buy. You change pH by adding products to make soil more acidic or alkaline.
Why Soil pH Matters for Tulips
Soil pH affects how well tulips absorb nutrients and develop roots. Soil that’s too acidic or too alkaline makes tulip bulbs grow poorly. Staying in the 6.0 to 7.0 range helps bulbs take up food from the soil efficiently.
Outside this range, nutrients like phosphorus and iron become less available. This can stunt growth or cause pale leaves. Soil that is too acidic or alkaline can also increase disease risks.
How to Test Tulip Soil pH Yourself
Soil pH test kits are affordable and easy to find at garden centers or online. They usually cost between $10 and $20 for kits with several tests. Take some soil samples and mix them with water in a container.
Use test strips or powder that changes color to check pH. Read the color and compare it to the chart to find pH.
Compare the color to the provided chart to find your soil’s pH number. Testing soil at a depth of 4 to 6 inches works best for tulips. Test in several spots to get an average reading.
Materials to Adjust Soil pH Safely
| Material | Purpose | How to Apply | Approximate Cost |
|---|---|---|---|
| Garden Lime (calcitic or dolomitic) | Raises pH (makes soil less acidic) | Spread 5 to 10 pounds of fertilizer over 100 square feet in fall or early spring. Work the fertilizer into the top 6 inches of soil. This helps nutrients reach tulip roots for better growth. | $3 – $6 per 5 lbs |
| Sulfur | Lowers pH (makes soil more acidic) | Apply 1 to 3 lbs per 100 sq ft months before planting; work well into soil. | $5 – $8 per 5 lbs |
| Aluminum Sulfate | Lowers pH quickly but riskier | Use carefully; apply 0.5 to 1 lb per 100 sq ft; add to moist soil. | $6 – $10 per 5 lbs |
| Peat Moss | Lowers pH naturally | Mix into sandy or loamy soil; adds organic matter too. | $4 – $7 per bag (1-3 cu ft) |
Best Timing and Method for pH Changes
Adjust soil pH several weeks before planting tulips for best results. Lime takes at least two months to raise pH effectively. Sulfur moves slower and can take three to six months.
Work amendments into the soil deeply, about 4 to 6 inches, for uniform change. After applying, water soil so materials start reacting. Avoid making big pH changes at once to reduce plant stress.
Common Mistakes and What to Watch For
Applying too much lime or sulfur can harm tulip bulbs by shocking root systems. Poorly adjusted soil pH either burns bulbs or leaves nutrients locked up. Overly wet soil after adding amendments can slow adjustment.
Check soil pH again after one to two months to see if adjustments worked. Some soils need repeat applications or mixing in organic matter for lasting balance.
Test your soil early each season to catch pH issues before planting tulips.
How Deep and How Far Apart Should I Plant Tulip Bulbs?
Plant tulip bulbs about 6 to 8 inches deep and 4 to 6 inches apart. Larger bulbs go deeper, while smaller species need less depth. Position bulbs carefully with the pointed side up to ensure healthy growth.
Planting Depth for Large Bulbs
Plant large tulip bulbs 6 to 8 inches deep. This depth means measuring from the soil surface to the base of the bulb. Planting bulbs this deep protects them from frost and keeps rodents away.
Bulbs planted too shallow may dry out or have weak roots. Planting at the proper depth also helps tulips produce strong stems and big flowers. Press the soil firmly above the bulbs to keep moisture in and prevent air pockets.
Planting Depth for Small Species
Small species tulip bulbs only need to be 4 to 5 inches deep. This is half the depth required for large bulbs. Since these bulbs are smaller, shallower planting matches their size and growth needs.
A good rule is to plant bulbs three times as deep as their height. This formula keeps smaller bulbs safe without burying them too deep. Bulbs planted too shallow might dry out or fail to bloom fully.
Spacing Recommendations for Group Plantings
Space tulip bulbs 4 to 6 inches apart for group plantings. About 5 inches apart gives a full, lush look in beds or borders. For smaller bulbs, 4 to 5 inches apart is enough to reduce crowding.
Bulbs placed too close can cause leaves and stems to crowd. This condition slows growth and raises disease risk. Leaving space also lets air circulate, helping bulbs dry and reducing rot.
Plant bulbs in groups of ten or more for natural clusters. Keeping about 5 inches between bulb centers works well. Grouping attracts attention and creates a strong display of colour.
Positioning Tips to Avoid Disease
Place bulbs with the pointed tip facing up to encourage upward growth. The bulb’s roots will grow downward smoothly. Planting sideways or upside-down can cause weak or no flowering.
Loosen soil 2 to 3 inches deeper than bulb depth. This loosens the soil and helps roots spread freely. Well-drained soil also reduces root rot and other fungal problems.
Plant tulips on raised beds if possible. This keeps soil drier by allowing excess water to drain away. Dry soil lowers chances of disease and keeps bulbs healthy.
Follow these step-by-step instructions to plant tulip bulbs perfectly:
- Choose healthy bulbs and measure their height.
- Dig holes about three times the bulb height deep.
- Space holes 4 to 6 inches apart for proper growth.
- Place each bulb with the pointed end facing up.
- Plant large bulbs 6 to 8 inches deep. Small bulbs go 4 to 5 inches deep.
- Fill holes with loose, well-drained soil and firm it gently.
- Water the soil lightly after planting to settle it.
- Add mulch to retain moisture and protect bulbs from frost.
When Is the Best Time to Plant Tulips in Soil?
Plant tulip bulbs in the fall, around six to eight weeks before freezing. This helps bulbs grow roots before winter. Plant when soil is 55 to 60 degrees Fahrenheit (13 to 15 degrees Celsius).
Most tulip-growing areas fall within USDA hardiness zones 3 to 8. In these zones, plant bulbs after the first frost. Do it before the soil freezes.
Hard soil makes planting difficult. Say the first hard frost arrives on November 15.
Plant tulips in early October. This timing helps bulbs settle properly.
You may plant if the ground is not frozen solid. Early freezing doesn’t stop planting. Just check the soil’s firmness first.
Using mulch can help keep soil temperatures steady and protect bulbs. Mulch also prevents soil from thawing and refreezing repeatedly, which can damage the bulbs.
Tulips need 12 to 16 weeks of cold in the soil. This chilling helps them bloom well in spring. Without enough chill, blooms may be weak.
Planting too late means bulbs might not get enough cold time to prepare. Planting too early in warm soil could cause bulbs to sprout too soon or rot.
Start planting about six weeks before the first frost. This timing helps bulbs build roots. It also avoids damage from early freezes.
Check soil temperature with a soil thermometer or probe in the garden bed. Once it consistently drops below 60°F but stays above freezing, it is time to plant.
Heavy clay or hard freezing soil needs a raised bed. Raised beds improve drainage and protect bulbs. This avoids soggy or frozen soil problems.
Raised beds warm a bit faster in the fall. They keep bulbs from sitting in wet or frozen ground.
This helps bulbs survive winter better. This method can improve your planting success in colder or wetter gardens.
How to Water Tulips Planted in Soil Correctly
Tulips need careful watering to grow well and avoid rot. Right after planting in fall, water the soil moderately once to settle the bulbs.
This usually means about 1 inch of water. That amount wets soil 6 to 8 inches deep.
Water tulips about once a week during spring growth. Only do this when rainfall is below 1 inch. The soil should stay moist but never soggy.
Stop watering when leaves yellow and die back. Tulips need drier soil then.
Drainage matters a lot for tulips. Soil that holds too much water can cause bulbs to rot.
Plant tulips in well-draining soil to control moisture. Avoid low spots where rainwater pools.
- Water new bulbs only once after planting in fall
- During growth, water weekly if rain is less than 1 inch
- Let the top 2-3 inches of soil dry before watering again
- Avoid watering in winter when bulbs are dormant
- Plant tulips in raised beds or sandy soil for better drainage
- Use mulch sparingly to avoid trapping too much moisture
Never water tulip bulbs in winter; excess moisture leads to rot and disease.
Check soil moisture by sticking a finger 2 or 3 inches in the dirt. Give them water when the soil feels dry.
Keep tulip soil moist but not soaked. This helps bulbs grow strong and flower well.
What Fertilizers Work Best for Tulips and When to Apply Them
Add fertilizer when planting tulips to boost early growth. Use a slow-release bulb fertilizer or bone meal directly in the hole and nearby soil. This feeds bulbs gradually and encourages strong roots and blooms.
The best fertilizer formula for tulips has more phosphorus to support blooms. Look for a 5-10-5 or 5-10-10 granular fertilizer.
The middle number, phosphorus, helps build flower power. Apply it lightly around bulbs when planting and mix into the soil.
Fertilizing your tulips continues after planting. Apply a balanced liquid or granular fertilizer in early spring when green tips appear. Use fertilizer again in fall once flowers fade to help bulbs store energy.
At planting, sprinkle 1 to 2 tablespoons of bone meal or slow-release fertilizer in each bulb hole. This provides nutrients for establishment. Avoid overdoing it to prevent damage.
Mix it well without touching the bulb. Spread about half a cup of 5-10-5 or 5-10-10 fertilizer per 10 square feet around the bed. This feeds the soil evenly.
Water it well after spreading. Water after to start nutrient absorption.
Spring feeding needs about 1 tablespoon of balanced liquid fertilizer per square foot. Use a 10-10-10 or 20-20-20 formula for easy absorption. Repeat once more in early fall with the same dosage to support next season’s bloom cycle.
Skipping fertilizer or adding too much can cause weak growth or burned roots. Use recommended amounts exactly. Soil with enough nutrients won’t need extra phosphorus or nitrogen.
Excess fertilizer can hurt your bulbs’ growth and health. Always test your soil first to avoid problems. A soil test helps avoid guesswork.
Gardeners in acidic soil (pH below 6.0) should test before fertilizing. Applying garden lime adjusts pH upward and maximizes fertilizer effectiveness. Use lime according to package directions before planting if your garden soil is too sour.
How to Care for Tulips After They Bloom in Soil
After your tulips bloom, keep their leaves growing while removing spent flowers. The leaves help bulbs store nutrients for next year’s growth.
Managing soil after bloom gets bulbs ready to bloom next spring. It helps bulbs store energy for the coming season.
Managing Tulip Foliage
Leave the tulip leaves alone after flowers fade, even if they look yellow or messy. The leaves keep photosynthesizing, feeding the bulb so it can build energy for next season.
Only remove the leaves once they turn completely brown and dry. Cutting the foliage too early stops nutrient storage, weakening next year’s bloom.
Keep soil moist but not wet while the leaves are still green. This helps the bulbs absorb nutrients efficiently before dormancy.
Deadheading Flowers Correctly
Cut off the flower stems just above the leaves as soon as blooms wilt. Removing faded flowers stops the plant from wasting energy on seed production.
Don’t pull or cut the leaves when deadheading. Only cut the flower stalks to keep the photosynthesis process going strong.
This step helps move energy into the bulb. It makes sure bulbs store enough nutrients for next year.
Soil Maintenance Post-Bloom
After leaves die back, add compost or a balanced fertilizer. This refreshes soil nutrients for the next spring. This replenishes what the tulips used while growing and flowering.
Avoid dense planting to prevent crowding, which makes bulbs smaller and flowers fewer each year. Dig up and space bulbs every three years to keep them healthy.
Keep soil loose and well-drained to avoid bulb rot, especially after wet winters. You can mulch lightly to protect bulbs but don’t smother the soil.
When to Dig Up and Store Bulbs
Dig up bulbs only after the foliage has fully dried and turned brown. This usually happens six to eight weeks after flowering ends.
Carefully clean soil off the bulbs and let them dry in a cool, shaded spot. Avoid washing bulbs with water to prevent rot during storage.
Store dried bulbs in paper bags in a cool, dry place until fall planting. This keeps them healthy and ready to bloom again next spring.
How to Prevent Diseases and Pests in Tulip Soil
Tulip bulbs commonly suffer from fungal diseases like bulb rot and gray mold. These fungi thrive in wet, poorly drained soil. Pests like aphids also attack tulip leaves and weaken the bulbs over time.
Preventing diseases starts with good soil drainage. A deep, infrequent watering keeps bulbs healthy better than light, frequent sprays.
Bulbs sitting in cold, soggy soil often develop rot. So you should improve drainage before planting.
- Check soil moisture regularly but avoid overwatering
- Use balanced, slow-release bulb fertilizer gently scratched into soil surface
- Remove and destroy any diseased plants immediately
- Inspect plants often for aphids and other pests
- Plant tulip bulbs in well-draining, improve beds if needed
- Rotate planting locations each year to reduce fungal buildup
- Apply fungicides only as a last resort, following package instructions
Inspect soil for bulb rot signs like soft or discolored bulbs during planting. Infected soil may need treatment with fungicides. Solarization works, too.
Cover soil with clear plastic for weeks on hot days. These steps reduce fungal spores and pest eggs.
Use slow-release fertilizer around bulbs to feed roots. This avoids too much leaf growth.
Pests like aphids prefer large leafy growth. Regularly monitoring your planting lets you catch problems before they destroy large numbers of bulbs.
Don’t water tulips lightly every day; soaking deeply once a week is healthier.
Step-by-Step Action Plan for Tulip Soil Care
Follow this plan to grow strong, colorful tulips in your garden. Each step helps you track progress and fix problems early.
- Before planting: Test your soil pH. Aim for 6.0 to 7.0 to keep tulips happy and thriving.
- Week 1: Mix compost or well-rotted manure into your soil. Look for loose, crumbly texture and good drainage.
- Week 2: Plant bulbs 6 to 8 inches deep and 4 to 6 inches apart. Check bulbs are firm and facing pointy side up.
- After planting: Water bulbs thoroughly once. Soil should feel moist but not soaked.
- Month 1: Apply balanced fertilizer after shoots reach 2 inches tall. Yellowing leaves may mean you need more feed.
- During growth: Water when the top 1 inch of soil dries. Avoid overhead watering to prevent leaf diseases.
- After blooming: Cut flower heads but leave leaves to yellow naturally. Look for signs of pests or wilting leaves.
- End of season: Remove dead leaves and mulch soil. Healthy soil looks dark and soft, ready for next planting.
Frequently Asked Questions
Can Tulips Grow Well in Sandy Soil?
Tulips can grow in sandy soil if it drains well. Sandy soil dries quickly, so keep it moist by watering regularly.
How Often Should I Deadhead Tulips in the Soil?
You should deadhead tulips after they fully bloom and start to fade. This prevents the plant from using energy on seed production.
Should I Mulch Around Tulips After Planting?
Yes, mulch helps protect tulip bulbs and retain soil moisture. Apply a layer of organic mulch about 2 inches thick after planting.
Can Tulip Bulbs Rot If Soil Is Too Wet?
Yes, overly wet soil can cause bulbs to rot and fail. Ensure the soil drains well and don’t let it stay soggy.
Is It Necessary to Lift Tulip Bulbs Every Year?
Not always; you can leave bulbs in well-draining soil for several years. Lift them only if the soil is poor or bulbs are crowded.
How Does Winter Soil Temperature Affect Tulip Bulbs?
Tulip bulbs need cold soil, ideally below 55°F, to bloom well. This chilling period triggers proper growth and flowering in spring.
Key Points to Remember
Good soil care gives your tulips the best chance for bright blooms year after year. Start by checking your soil pH today to set a strong foundation. Keep watching how your plants grow and adjust soil care as you go.


