How to Trim a Rubber Tree: Easy Steps for Healthy Growth and Perfect Shape
Knowing how to trim a rubber tree helps keep it healthy and looking great. The key is to remove no more than 20, 30% of its foliage at one time. Trimming like this prevents stress and encourages fresh growth.
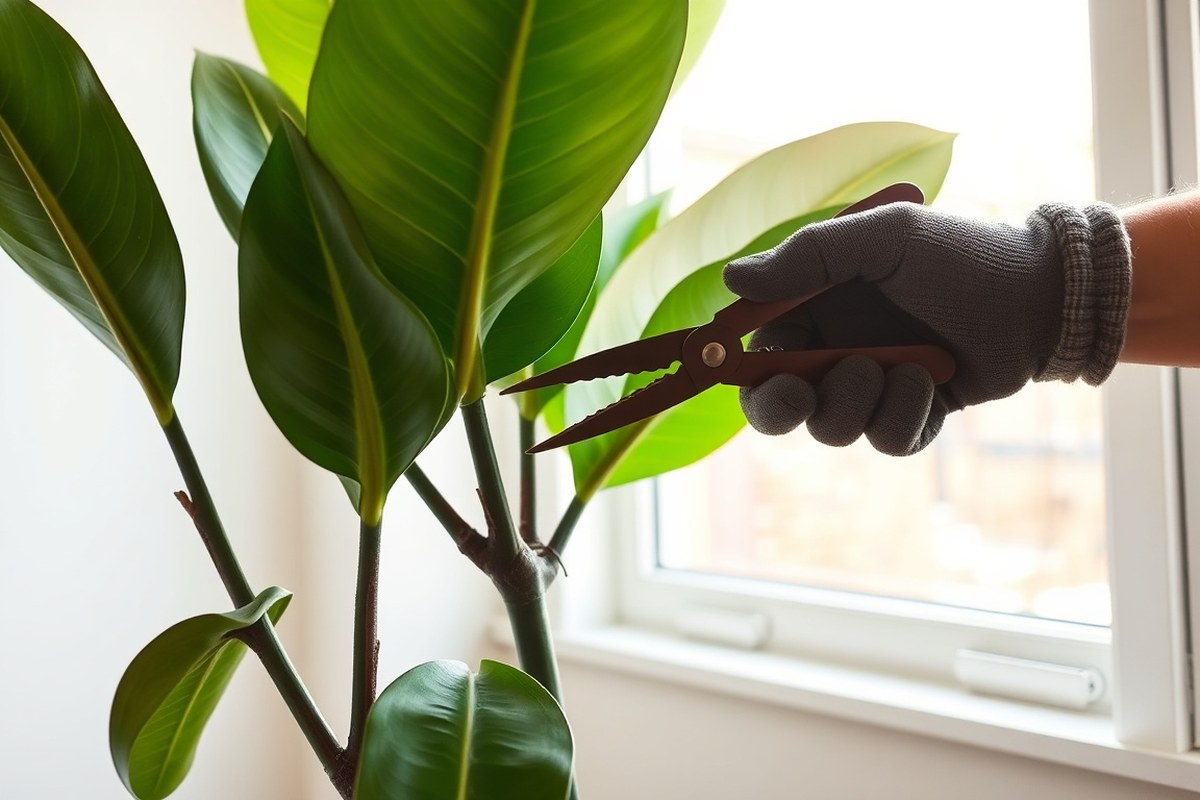
Start with sharp shears and wear gloves to protect your hands from the sap. Clean your tools with rubbing alcohol before cutting to avoid spreading plant diseases. Always pick healthy stems for trimming to support new shoots.
Rubber trees respond best to light trimming every 6 to 12 months. Check your plant every 2 or 3 weeks after trimming. Look for any problems early.
This helps you keep your plant healthy. Regular care helps your tree grow strong and maintain its shape.
Key Takeaways
- Trim no more than 30% of the rubber tree’s leaves at once to avoid stress.
- Use sharp shears and gloves to protect from sap and make clean cuts.
- Disinfect tools with 70% isopropyl alcohol before trimming to prevent infection.
- Choose healthy stems that are 4 to 6 inches long with at least one leaf.
- Check your rubber tree every 2 to 3 weeks after pruning for problems.
- Trim rubber trees lightly every 6 to 12 months to encourage steady growth.
When and How Often to Trim Your Rubber Tree

Trim your rubber tree during its active growing season, which runs from spring to early summer. This timing helps the plant heal faster and encourages bushier growth. Avoid trimming in winter because the tree grows slowly then, making it harder to recover.
You should prune major branches every one to two years to control size and shape. Light trims can happen as needed if you see overgrown or unhealthy parts.
Regular pruning stops your tree from growing too big or uneven. It helps keep the plant healthy and looking good.
Trimming too often can stress your rubber tree and slow its growth. Pruning too little lets the plant grow wild and uncontrolled.
This can lead to weak or damaged branches over time. Sticking to the recommended season and frequency keeps your tree strong and well-formed.
Essential Tools and Safety Tips for Trimming

Sharp, clean tools are key to safely trimming your rubber tree. You’ll need pruning shears or garden scissors for thin stems.
Bypass pruners for thicker branches. Protect your skin from the sap and disinfect tools to avoid spreading disease.
Choosing the Right Tools for Rubber Tree Trimming
Use precision pruning shears or garden scissors for branches less than ¼ inch thick. For thicker stems, bypass pruners offer better control and cleaner cuts.
Avoid using dull tools. They can crush the stems instead of cutting cleanly, causing stress to the plant.
Expect to pay around $15 to $30 for quality pruning shears. Bypass pruners cost closer to $25 to $50. Investing in sharp, durable tools saves effort and keeps your rubber tree healthier over time.
Handling Rubber Tree Sap Safely
Rubber trees release a milky white sap when cut. This sap can irritate your skin and is toxic if eaten by kids or pets. Wearing gardening gloves helps prevent skin irritation during trimming sessions.
Keep a damp cloth or paper towel nearby to wipe off any sap quickly. Wash sap off your skin with warm, soapy water right away. This helps reduce irritation and sticky residue.
How and When to Sterilize Your Tools
Clean your pruning tools before and after each trimming session. This stops any bacteria or fungus from spreading to your rubber tree or other plants. Use rubbing alcohol or a solution of one part bleach to nine parts water.
Dip or wipe the blades with disinfectant. Then air dry them. Or dry with a clean cloth.
Sterilize tools more often if you notice any plant disease. Regular cleaning keeps your rubber tree safe from infections.
Safety Precautions Around Kids and Pets
Rubber tree sap is toxic if ingested. So keep cuttings and tools out of reach.
Trim your rubber tree in a space where children and pets can’t wander in. Collect trimmed branches in a bag right away to prevent accidental contact.
Store pruning tools locked away after use. Remind family members not to touch fresh cuts or sap. This reduces risk of irritation or poisoning in your home.
Essential Safety Checklist for Trimming
- Wear gardening gloves to protect skin from sap irritation.
- Use sharp pruning shears or bypass pruners for clean cuts.
- Disinfect tools with rubbing alcohol before and after cutting.
- Wipe off sap immediately with a damp cloth.
- Trim in a workspace free of pets and children.
- Store tools and cuttings securely after finishing.
- Wash hands thoroughly after trimming your plant.
Wear gloves and keep a damp cloth nearby to handle the sticky sap safely.
Step-by-Step Guide to Trimming a Rubber Tree
Trimming your rubber tree is simple if you follow the right steps. You should remove only 20 to 30% of the foliage.
Always cut just above a leaf node. Clean, sharp tools help avoid ragged wounds and promote healthy new growth.
Preparing Your Rubber Tree and Work Area
Pick a bright spot with good airflow for your trimming session. Lay down newspaper or a tarp to catch fallen leaves and sap drops. Wear gloves to protect your skin from sticky sap and potential irritation.
Use sharp pruning shears that are clean and disinfected. Wipe the blades with isopropyl alcohol before you start and between cuts. This stops infections and helps keep cuts clean and smooth.
Making Precise Cuts to Encourage Growth
Look over your rubber tree for long leggy branches or uneven growth. Focus on trimming those parts to shape the plant evenly. Avoid cutting more than 30% of the leaves or branches at once to prevent shock.
Cut branches just above a leaf node with a clean, straight slice. This encourages new shoots to emerge close to the cut. For thin areas, prune slightly below the sparse patch so new growth thickens the space.
- Examine the plant for unruly or damaged branches.
- Disinfect and sharpen your pruning shears.
- Cut no more than 20, 30% of foliage at a time.
- Make straight cuts just above a leaf node.
- Remove leggy stems to encourage bushier growth.
- Prune thin spots below to fill them out.
- Collect the trimmed branches and leaves for disposal.
Cleaning Up and Managing Sap After Cutting
Rubber trees release sap that can gum up your tools and irritate skin. Keep a damp cloth handy to wipe the pruning blades often during your work. Clean the tools thoroughly with alcohol when you finish trimming.
Use gloves or wash your hands after handling sap. It can cause redness or itching on sensitive skin. Throw away trimmed branches and leaves to keep your space tidy and prevent pests.
Shaping Your Rubber Tree to Control Size and Appearance
Trimming your rubber tree shapes its overall look and controls its size. Start by deciding how tall you want the plant to be.
Cut the main stem or tall branches just above a healthy leaf node. This will encourage new growth.
To make your rubber tree bushier, prune back long stems. Cutting right above a leaf node triggers growth of multiple new shoots there. These shoots fill in the plant and create a fuller appearance over time.
Leggy or crooked trees need selective trimming on one side. Remove the longer branches causing imbalance.
This directs the plant’s energy to shorter or straighter limbs. It helps create a cleaner shape.
To keep your tree short, cut branches back more aggressively. Limit trimming to about one-third of the plant’s height during a session. This prevents stress and keeps the plant healthy while controlling its size.
Watch out for uneven growth when shaping the tree. Cut branches at varying lengths if needed, but keep the plant balanced. An uneven trim can cause the tree to lean or grow awkwardly.
Regular trims every few months keep your plant neat and promote better growth. Avoid heavy pruning in winter when the plant grows slowly. Late spring or early summer is best for shaping cuts.
Handling Common Issues During and After Trimming
Leaf drop after trimming happens because the plant feels stressed. When you cut branches, the rubber tree redirects energy and may drop leaves to conserve water. This response is normal.
You can reduce it by trimming only during spring. Trim when the plant grows actively. Avoid pruning in fall and winter since the plant heals slower then and stress increases.
White sap leaking from cut stems is natural for rubber trees. The sap protects the plant by sealing wounds and stopping infection. It looks sticky and weird.
Usually, it isn’t harmful. Watch for large amounts or if it lasts weeks. Wipe sap off gently with a damp cloth.
But don’t peel or injure the bark. You can dust pruning cuts with cinnamon powder.
This helps dry and seal the wound. It reduces sap flow and infection risk.
Stress from pruning can slow growth. Too many or heavy cuts cause stunted leaves. Avoid pruning too much at once.
Use sharp, clean tools for neat cuts. Never remove more than 20-30% of foliage at once. Small trims are better.
This helps the plant recover faster. After trimming, place your rubber tree in bright, indirect light. Avoid cold drafts and sudden temperature changes.
Water moderately. Let the top inch of soil dry out before watering again. This prevents shock from over or underwatering.
Signs of infection include dark, soft spots on cut stems. Watch for foul smells or fungus growth. These mean poor healing.
Remove infected areas immediately with clean tools. This helps stop the infection from spreading further. Applying a small amount of fungicide can also help if infection persists.
Keep air flowing around the plant and avoid overwatering to minimize fungal risks. Remember, healthy rubber tree wounds dry within 1 to 2 weeks when cared for correctly.
Don’t prune your rubber tree if it shows repotting shock. Avoid pruning during pest problems or after recent leaf drop. This worsens stress and slows recovery.
Propagating Rubber Tree Cuttings from Pruning
You can use healthy cuttings from your rubber tree pruning to grow new plants. The best cuttings are about 6 inches long with 2 or 3 leaves. Taking the right cuttings and rooting them correctly helps multiply your plants easily.
Selecting Healthy Cuttings with Nodes
Choose young, healthy stems for propagation. They should be firm and free of damage or disease. Each cutting needs at least one node, where leaves or buds grow, because roots develop there.
Look for cuttings around 6 inches long with 2 to 3 leaves. Avoid woody or old stems; soft but not too soft stems root best. Cutting during a pruning session lets you pick fresh growth suitable for rooting.
Rooting Methods: Water vs Soil
You can root rubber tree cuttings in water or in moist soil. Water allows you to watch root growth easily. Soil gives roots a natural setting but requires careful moisture control.
In water, place the cutting in a clear container so nodes stay under water. Change the water every few days to keep it fresh. In soil, use well-draining potting mix and keep it lightly moist but not soggy.
Both methods take about 3 to 6 weeks to root. Rooting success depends on cutting health, temperature around 70°F, and indirect light. Avoid direct sunlight, which can stress the cuttings.
Caring for New Cuttings Until Established
Keep the cutting in warm, bright indirect light while roots develop. Maintain humidity by covering the cutting with a plastic bag or clear dome. This reduces moisture loss and helps roots form.
Check the cuttings regularly. Remove any leaves that turn yellow or rotten. Once roots reach 2 to 3 inches long, transplant water-rooted cuttings into pots with soil.
After potting, water gently and keep the soil evenly moist for the first weeks. Avoid fertilizing until the cutting shows new growth. Healthy roots and fresh leaves mean your new rubber tree is on its way.
- Cut a 6-inch stem with 2 to 3 leaves and at least one node.
- Remove the lower leaves to avoid rot if rooting in soil or water.
- Place the cutting in water or moist, well-draining soil.
- Keep cuttings in warm, indirect light and maintain humidity.
- Change water every few days or water soil lightly when dry.
- Watch for roots, usually forming in 3 to 6 weeks.
- Transplant cuttings into pots with soil when roots reach 2 to 3 inches.
- Water gently and wait for new growth before fertilizing.
Post-Pruning Care to Help Your Rubber Tree Thrive
After trimming, keep your rubber tree in bright, indirect light. Avoid moving it to a darker spot during recovery. This helps the plant heal and grow new leaves without stress.
Water moderately and stick to your usual routine. Too much water can cause root rot, while too little slows recovery. Check the soil’s top inch; water when it feels dry but not completely dry.
Don’t add fertilizer right after pruning. Your rubber tree needs time to recover its strength first. Wait about three months or until you see new growth before resuming feeding.
Keep the temperature steady, ideally between 65°F and 75°F. Avoid sudden drafts or temperature drops that might stress your plant. Consistency helps the tree bounce back faster.
Watch for bright green leaves and firm stems as signs of good recovery. New growth usually appears within a few weeks. If leaves turn yellow or wilt, check watering practices or light exposure.
Differences Between Indoor and Outdoor Rubber Tree Pruning
Indoor rubber trees need more frequent trimming than outdoor ones. They grow slower because of limited light and space. Trimming indoors helps control size and shape better.
Outdoor rubber trees grow faster and taller. Pruning outdoor trees usually focuses on removing dead branches and managing size. Weather can cause damage, so trimming may include repair work.
| Aspect | Indoor Rubber Tree | Outdoor Rubber Tree |
|---|---|---|
| Growth Rate | Slow due to limited light | Faster with full sun exposure |
| Trimming Frequency | Every 3 to 6 months to control size | Once or twice a year, mainly for maintenance |
| Common Challenges | Limited space and light indoors | Weather damage and pests outside |
| Pruning Goals | Shape and size control | Health, size, and damage repair |
| Tools | Small shears or scissors | Pruning saws or loppers for thicker branches |
| Disinfecting Tools | Necessary to prevent indoor disease spread | Also important, especially after damage repair |
Trim your indoor rubber tree during spring or early summer. This timing encourages healthy new growth. Use sharp shears and wear gloves to protect your hands from sticky sap.
Outdoor pruning should avoid cold, wet weather to prevent infections. Cut away damaged limbs to keep the tree strong. After pruning, disinfect tools to stop disease from spreading between plants.
Always disinfect your pruning tools between cuts to avoid spreading disease.
Indoor trimming focuses more on shaping since space is limited. Outdoor trees need more attention to removing dead or damaged parts. Both environments require clean cuts and proper tool care.
Step-by-Step Action Plan for Trimming Your Rubber Tree
Follow this plan to trim your rubber tree safely and boost its growth. Check each step to see progress.
- Before you start: Gather pruning shears and gloves. Make sure tools are clean to avoid spreading disease.
- Day 1: Remove any dead or yellow leaves. Your tree looks healthier and cleaner right away.
- Day 2: Cut back leggy branches by a few inches. The tree should begin to fill out with new growth soon.
- Week 1: Shape your tree by trimming uneven branches. The overall form looks balanced and neat.
- Week 2: Use cuttings to propagate new plants. Place them in water and wait for roots to appear.
- After 3 weeks: Check for signs of stress like drooping leaves. Adjust watering or light if needed.
- Month 1: Apply a balanced houseplant fertilizer to support new growth. Watch for fresh leaves and stronger stems.
Frequently Asked Questions
How Do I Know If My Rubber Tree Needs Trimming?
Check if your rubber tree looks overgrown or sparse. Also trim to remove dead or damaged leaves to keep it healthy.
Can I Trim the Rubber Tree If It Is Not Actively Growing?
It’s best to wait until spring or early summer for trimming. Trimming during dormancy risks stressing the plant.
What Happens If I Trim More Than 30% of the Rubber Tree at Once?
Removing too much foliage at once can shock your rubber tree. Trim gradually to avoid harming it.
Is It Normal for Rubber Tree Leaves to Fall After Trimming?
Some leaf drop is normal after pruning but should stop soon. Ensure good care to help recovery.
What’s the Best Way to Cut Stems Without Causing Damage?
Use sharp, clean scissors or pruning shears for clean cuts. Avoid tearing to help faster healing.
Can I Use Rubber Tree Cuttings for Propagation After Trimming?
Yes, healthy cuttings root well if kept moist and warm. It’s a good way to grow new plants.
Key Points to Remember
Trimming your rubber tree helps keep it healthy and looking great. Take your time and watch your plant respond. Start your trimming today to enjoy a fuller, happier tree.