What Can Be Put in a Composter: A Complete Guide to Compostable Materials
What can be put in a composter depends on the materials’ balance and type. You can add most fruit and vegetable scraps, coffee grounds, dried leaves, and shredded paper. Avoid meat, dairy, and greasy items since they cause odor and pests.
Mix fresh grass clippings, which are rich in nitrogen. Add dried leaves or cardboard, which provide carbon.
Mixing green and brown materials works best for compost. Follow a ratio of about two-thirds brown to one-third green for healthy composting.
Chop your materials into smaller pieces before adding them to speed breakdown. Stir your compost pile every one to two weeks.
Keep it moist like a wrung-out sponge. This helps with airflow and bacteria activity.
Key Takeaways
- Put fruit and vegetable scraps, coffee grounds, and dried leaves in your composter.
- Avoid meat, dairy, oily foods, pet waste, and treated wood in home composts.
- Mix two-thirds brown materials with one-third green materials for best results.
- Cut scraps into smaller pieces to help them break down faster.
- Turn the compost pile every 1-2 weeks to add oxygen and speed decomposition.
- Keep your compost moist but not soggy, like a wrung-out sponge.
What Materials Can You Put in a Composter?

You can put many common kitchen and yard wastes in a composter. Think of materials as greens, browns, or optional extras. Greens provide nitrogen, browns offer carbon, and optional bits add helpful fibers or minerals.
Greens include fruit and vegetable scraps, coffee grounds, and tea bags without staples or synthetic meshes. Browns are dried leaves, shredded newspaper, and non-glossy cardboard. Optional materials like crushed eggshells or some dryer lint also work well.
- Fruit and vegetable scraps
- Coffee grounds and paper filters
- Tea bags without staples or plastic mesh
- Dried leaves and grass clippings
- Shredded newspaper and plain cardboard
- Crushed eggshells
- Dryer lint from natural fibers only
You can tell if an item is compostable by checking if it’s organic. Compostable items break down naturally in the soil. This is how you quickly decide.
Avoid anything with plastic, metal, grease, or chemicals. Paper or cardboard must be uncoated and free of glossy finishes or glue.
Kitchen scraps like coffee grounds add nitrogen and fine texture. Tea bags usually compost safely if made with unbleached paper and no metal staples. Dryer lint should come from natural fabrics like cotton towels only.
Synthetic fibers do not break down well in compost. So, avoid lint from synthetic clothes.
Crushed eggshells provide calcium but take longer to break down when whole. You can speed this up by crushing them before adding.
Avoid meat, fish, dairy, oily foods, pet waste, and treated wood. These materials can attract pests or harm the composting process.
Why You Should Balance ‘Green’ and ‘Brown’ Compost Materials

You need a good balance of green and brown materials for composting. Greens are rich in nitrogen, while browns provide carbon. Both are important because microbes use nitrogen to grow and carbon for energy.
Too much green material leads to smelly compost. Too many browns slow down decomposition and make the pile dry. Aim for a mix of about two-thirds brown material to one-third green by volume.
Below is a table showing common green and brown materials with their carbon-nitrogen (C/N) ratios. These ratios affect how quickly materials break down and the heat generated.
| Material | Indicative C/N Ratio | Role in Mix |
|---|---|---|
| Fresh grass clippings | 15 to 25 | Nitrogen (Green) |
| Fruit and vegetable peelings | 15 to 25 | Nitrogen (Green) |
| Coffee grounds | ~20 | Nitrogen (Green) |
| Dead leaves | 40 to 80 | Carbon (Brown) |
| Straw | 80 to 100 | Carbon (Brown) |
| Brown cardboard, unprinted paper | 150 to 400 | Carbon (Brown) |
| Wood chip, untreated sawdust | 200 to 500 | Carbon (Brown) |
Mixing materials with different C/N ratios helps the pile heat up and break down faster. Usually, the target ratio is close to 25:1 to 30:1 carbon to nitrogen by mass. You’ll get better results if you chop materials into smaller pieces.
Turn the pile every 1 to 2 weeks. Keep it damp. It should feel like a wrung-out sponge.
You might need to adjust your mix seasonally. In spring, you’ll often have plenty of green grass clippings. Add more dry browns like straw or shredded cardboard to keep balance.
In fall, dry leaves are plentiful but greens may be scarce. Add kitchen scraps or coffee grounds to boost nitrogen.
Check your compost’s smell often; a strong ammonia odor means too much green material.
Which Kitchen and Food Scraps Are Suitable or Unsuitable for Compost?
Kitchen scraps like fruit and vegetable peels make great compost. Avoid meat, dairy, and oily foods because they cause bad smells and pests. Moldy fruits and bread are safe, but bones and shells need care.
Safe Vegetable and Fruit Scraps
Vegetable and fruit scraps break down quickly in compost bins. Items like banana peels, apple cores, and potato skins add moisture and nutrients. Even moldy vegetables and bread are fine and speed up decomposition.
You can add fruit and veggie scraps as you collect them. Keep a small container on the counter for easy tossing.
- Banana peels and apple cores
- Carrot tops and potato peels
- Wilted lettuce and leafy greens
- Moldy bread and fruit scraps
- Vegetable trimmings and onion skins
These scraps add nitrogen to your compost and help good microbes thrive. Keep pieces small to help them break down faster.
Materials to Avoid from the Kitchen
Meat, fish, dairy, and oily foods should not go into your compost. They rot without oxygen and cause foul odors. Pests like rats and flies are attracted to these items.
Avoid pet waste too. It contains pathogens that home composting can’t safely break down. Stay away from bones because they take years to decompose and might attract wildlife.
Bread crusts alone are okay, but avoid large amounts. Excess bread can cause mold problems and slow the composting process due to its density.
Tips for Handling Problematic Food Waste
Cooked foods and leftovers generally cause trouble in compost bins. They can smell bad and attract pests if added directly. Wrap these scraps in newspaper or bury them deep under leaves to reduce risks.
Keep a small sealed container in your fridge for scraps you want to compost later. This helps prevent smells and flies in your kitchen.
- Wrap leftovers in newspaper before composting
- Bury scraps under a layer of brown materials
- Store scraps in a fridge container until compost day
- Chop larger scraps to speed breakdown
- Avoid oils and greasy plate scrapings
This careful handling keeps your compost healthy and more efficient. It prevents smells and pests, making the process simpler and cleaner.
Which Garden and Yard Wastes Are Best for Composting?
Garden waste like leaves, small branches, and pruning scraps work great in compost. Grass clippings add valuable green material but should come only from lawns free of herbicides. Mix fresh grass clippings with dry leaves or straw to stop clumps that slow decomposition.
Diseased plants and pet waste should not go in your composter. They carry germs that survive and spread in your garden. Avoid treated plants or anything with chemical residues, too, because these harm beneficial microbes in compost.
Weeds without seed heads can be composted safely. Those with seeds risk sprouting in your compost pile and later your garden. Pull weeds before they flower.
You can also add them to a hot compost. It should reach 140°F (60°C) for days to kill seeds.
- Garden materials to add: leaves, small twigs, grass clippings (no herbicides)
- Prunings and dead plant parts without disease
- Weeds without seeds or immature weeds
- Avoid diseased plants and pet waste
- Skip fresh black walnut leaves due to toxins
- Do not add weeds with seeds unless in hot compost
- Keep treated lawn clippings out or cure before composting
Seasonal garden waste peaks in fall with lots of leaves. Collect leaves and dry them before mixing with green scraps. This layering keeps moisture balanced and gut-friendly for microbes.
In spring and summer, prune plants and collect grass clippings. Mix dry materials often. This stops piles from smelling bad.
Pruning helps if kept in small pieces for faster breakdown. Long branches or thick stems take months or more unless chipped. Turn the pile every 10 to 15 days, so oxygen gets to all parts.
This prevents wet, smelly spots in your compost. It also speeds up decomposing. You get rich, crumbly soil for your garden and lawn.
Can Paper, Cardboard, and Other Household Items Go in a Composter?
Many types of paper, cardboard, and some household items can be composted. You need to prepare these items correctly before adding them. Proper preparation helps them break down faster in your composter.
Avoid plastics, greasy or coated papers, and non-compostable packaging to keep your compost healthy. Small pieces and mixing help speed the breakdown process and prevent clumping.
Paper and Cardboard Types
Plain paper like printer paper, newspaper, and paper towels work well in compost. Cut them into small strips or squares before adding them to your pile. Cardboard breaks down best when you tear it into smaller pieces.
It should not contain heavy inks or plastic coatings. These can slow down composting or leave residue.
Paper plates, napkins, and tea bags made of plant fibers, cotton, or hemp also compost well. Avoid glossy magazines or paper with colored ink that does not fade easily. Avoid anything with plastic laminates or shiny surfaces, as those won’t break down well at home.
| Item | Compostability | Caveats and Tips |
|---|---|---|
| Plain paper (printer, newspaper) | Yes | Cut into small pieces; mix with green materials |
| Paper towels, napkins | Yes | Use unbleached, avoid greasy or chemical-heavy types |
| Cardboard (plain, no plastic) | Yes | Tear into strips; remove tape and labels |
| Glossy or coated paper | No | Contains chemicals or plastics; avoid home compost |
| Tea bags (paper, silk, hemp, cotton) | Yes | Remove staples; avoid plastic mesh bags |
By shredding or tearing paper and cardboard, you speed up composting. Mixing often prevents clumps and odors. Avoid heavily printed, coated, or synthetic papers that remain intact longer.
Composting Household Fibers and Textiles
Dryer lint is mostly safe for compost since it contains natural fibers. Add it in small amounts and sprinkle it evenly over the top of your compost pile. Avoid lint from synthetic fabrics or anything with plastic-based fibers.
Cotton, hemp, linen, and wool scraps also compost well. Cut large pieces into smaller ones to help microbes break them down faster. Avoid dyed or chemically treated fabrics to keep your compost clean.
Too much dryer lint can make the pile too dense and slow decomposition.
Bioplastics and Compostable Packaging Explained
Many compostable packages meet industrial composting standards like EN 13432. These require temperatures near 140°F (60°C) for several weeks. Your home compost pile usually can’t reach these conditions.
These conditions are hard to reach in home composters. So these items often do not break down fully.
Bioplastics labeled as compostable often don’t break down well at home. They can leave plastic bits or residues in your finished compost. This can harm the quality of your garden soil.
Avoid compostable plastics, packaging, and cutlery unless you have access to industrial compost facilities. Stick to natural fibers and paper products instead.
How Long Do Materials Take to Break Down in Compost?
Some compost materials take weeks to break down, and others take years. Nut shells and fruit pits decompose slowly, often requiring 2 to 5 years.
For example, avocado pits can take over 6 months to start breaking down. But complete decomposition may stretch beyond that.
Chopping or shredding materials makes a big difference. Smaller pieces have more surface area for microbes to work on. This speeds up the breakdown process and helps your compost mature faster.
Factors like moisture, temperature, and oxygen affect how fast materials decompose. Keeping compost moist but not soggy is essential.
Oxygen feeds beneficial microbes. So regularly turning or mixing your pile avoids smelly, slow-acidic conditions.
| Material | Typical Breakdown Time |
|---|---|
| Fruit and vegetable scraps | 2 to 8 weeks |
| Tea leaves | 3 to 4 weeks |
| Nut shells | 2 to 5 years |
| Avocado pits | 6+ months |
| Bones | 2 to 5 years or more |
| Shredded leaves | 6 to 12 months |
| Grass clippings | 2 to 6 weeks |
For faster compost, chop kitchen scraps before adding them. Tear or shred leaves and paper to help them break down sooner. Mixing moist green materials with dry brown materials keeps the pile balanced and active.
Using moist tea leaves also speeds decomposition by feeding microbes nitrogen and moisture. Avoid adding items like meat or oily foods, which attract pests and slow the process. Keeping your compost aerated and turning it every few weeks prevents smelly, slow breakdown.
How to Prepare and Add Materials for Healthy Composting
Preparing materials before adding them to your composter speeds up breakdown and keeps the pile healthy. You should chop or shred food scraps to about 1 to 2 inches for quicker rotting. Mix and turn the compost pile every two weeks.
This helps air flow inside the pile. It also keeps moisture balanced, stopping bad smells and slow composting.
Chopping and Shredding Materials
Chop food scraps like vegetable peels, fruit cores, and coffee grounds into small pieces. Cutting them into 1- or 2-inch chunks helps microbes work faster. Larger pieces take months or even years to fully decompose.
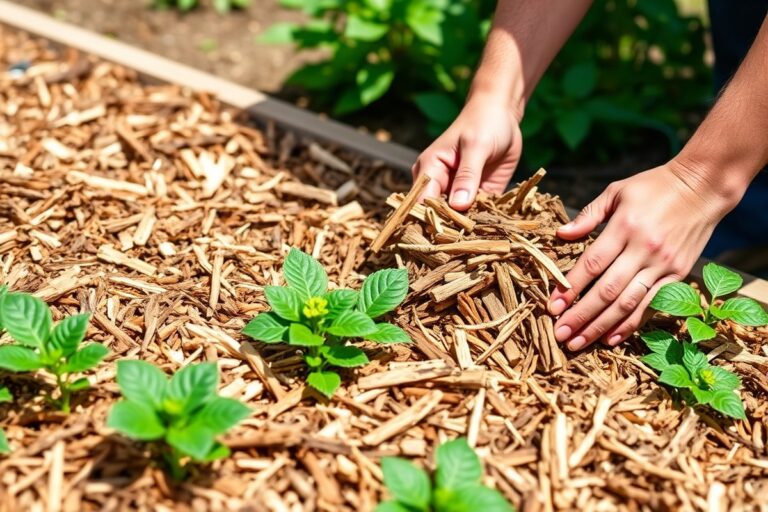
Garden waste such as leaves and small branches should be shredded or broken down. A garden shredder works well if you have many woody materials. This step improves airflow and reduces clumps that trap moisture.
Layering Greens and Browns
Create layers of green (nitrogen-rich) and brown (carbon-rich) materials to keep the compost balanced. Greens include fresh food scraps and grass clippings.
Browns are dried leaves, shredded paper, or small twigs. Thin, alternating layers about 2 to 3 inches thick help the pile heat evenly.
Add a handful of bulky brown material with every green input. This stops the pile from getting too wet or compacted. Too many greens cause a soggy, smelly mess that slows decomposition.
Mixing and Moisture Management
Turn your compost pile every 14 days, mixing the layers to add oxygen and prevent compaction. Good airflow keeps microbes active and helps materials break down faster. Use a pitchfork or compost aerator tool to reach all areas.
Check moisture by squeezing a handful of compost. It should feel like a damp sponge, not dripping wet or dry.
Add more dry browns and turn the pile when it gets too wet. Sprinkle water evenly and mix the pile if it becomes too dry.
Follow these steps to prep and add materials in your compost:
- Chop food scraps into 1- to 2-inch pieces for faster decay.
- Shred or break down garden waste, especially woody stems.
- Layer green and brown materials evenly in 2- to 3-inch thicknesses.
- Add a handful of bulky browns whenever you add fresh greens.
- Mix the pile thoroughly every 14 days to aerate and distribute moisture.
- Check moisture regularly; adjust with dry browns or water as needed.
- Add more browns and turn the pile to add oxygen when it smells bad.
Items to Avoid Putting in Your Home Composter and Why
Some materials don’t belong in your home composter. They cause bad smells, pests, or health risks. Avoid adding these to keep your compost healthy.
Meat, dairy, and oily foods often attract rodents and flies. These items also rot slowly and create odors that can ruin your compost pile.
Avoid pet waste and diseased plants too. Pet waste carries pathogens that home compost bins don’t get hot enough to kill.
Diseased plants might spread fungi or bacteria to your garden. These risks make composting those materials unsafe for home use.
Not all compostable bags work well at home. Bags made from polymers or “silk” mesh don’t break down in typical garden bins.
Only bags labeled for cold, home compost use should go in. Otherwise, they leave plastic pieces behind.
- Meat, fish, bones, and dairy products
- Oily or greasy foods
- Pet waste and cat litter
- Diseased or insect-infested plants
- Plastic, synthetic, or non-certified compostable bags
- Large quantities of bread or grains (can cause smells)
- Charcoal or ashes from treated wood
Meat or dairy scraps need a commercial composter that gets very hot. Normal home bins don’t reach enough heat for safe composting. Use a special bin for these scraps.
Home compost systems don’t reach those temperatures. Instead, throw leftovers in your trash or feed them to pets if safe. For pet waste, seal it in a plastic bag and place it in the trash.
Diseased plants are best burned or put in yard waste bins if allowed. Some local garbage services take these separately.
Check local rules before disposal to avoid spreading diseases. Avoid putting any untreated pet waste in your garden soil or compost.
Make sure to use only certified home-compostable bags, or remove all packaging before composting. Non-certified bags don’t break down and contaminate your compost.
Differences Between Home and Industrial Composting Acceptable Materials
Some materials break down only under high heat found at industrial composting sites. Home composting usually stays below 140°F. Industrial composters reach 130°F to 160°F, which speeds up breakdown of tougher items.
Bioplastics and certified compostable items often need industrial heat and moisture. At home, they might sit in the compost for months without fully breaking down. This build-up can slow your compost or attract pests.
Turning or mixing your compost affects how fast materials decay. Industrial sites mix waste often to keep oxygen high and evenly distribute heat. At home, you can aerate by stirring the pile every few weeks.
This helps but isn’t as fast or steady as machines. Industrial methods work quicker and more evenly than stirring by hand.
| Material | Home Composting | Industrial Composting |
|---|---|---|
| Raw fruit and vegetable scraps | Yes, easy and quick to break down | Yes, no problem |
| Meat and dairy | No, attracts pests, slow breakdown | Yes, high heat kills pathogens |
| Bioplastics and certified compostables | Usually no, needs high temp and moisture | Yes, designed for industrial conditions |
| Paper and cardboard (non-coated) | Yes, if shredded and in moderation | Yes, no issue |
| Yard waste (leaves, grass clippings) | Yes, common home compost | Yes, common feedstock |
Sort your waste by what your compost system can handle. Keep bioplastics and meat scraps out of your home pile. Save those for drop-off sites or pick a bin that collects food waste for industrial composting.
Avoid adding too many slow-to-break items at home. They can stall your compost and cause smells. Shredding materials and turning your pile every two weeks keeps air flowing and speeds decay.
Step-by-Step Action Plan for Starting Your Home Composter
Follow these clear steps to build healthy compost from your kitchen and yard waste. Check progress by how well materials break down and smell.
- Before You Start: Set up your bin in a shady, dry spot. This helps keep moisture balanced.
- Day 1: Add a layer of brown materials like dry leaves or shredded cardboard. It should be about 3 inches thick for good airflow.
- Day 2: Add a thin layer of green materials such as fruit scraps or grass clippings. Limit to one part green for every three parts brown.
- Week 1: Turn the pile gently with a garden fork. This mixes air in and speeds up breakdown.
- Week 2: Check moisture by squeezing a handful of compost. It should feel like a damp sponge, not dripping.
- Week 3: Add kitchen scraps and garden waste regularly, keeping green-to-brown balance. Avoid adding meat or dairy.
- Every 2 Weeks: Turn the compost again to keep air flowing and prevent odor.
- After 6-8 Weeks: Look for dark, crumbly soil-like compost. That means you’re ready to use it in your garden.
Frequently Asked Questions
What Can You Put in a Worm Composter That You Can’t in a Regular Compost Bin?
Worm composters take small amounts of kitchen scraps. They like fruit and vegetable peelings.
Avoid adding large sticks or any meat. Worms don’t eat tough materials. So keep it soft and dice scraps for faster results.
Can You Compost Greasy or Oily Food Scraps at Home?
Avoid greasy or oily foods in home composters as they attract pests and slow decomposition. Instead, toss these in the trash or use a specialized compost system designed for fats.
How Do Seasonal Changes Affect What You Should Put in a Home Composter?
Seasonal temperature changes affect how fast compost breaks down. Add more brown materials in cold months.
This helps balance moisture and slows the process. This helps keep your compost healthy year-round despite cooler weather.
Is It Okay to Compost Pet Hair or Fur?
Yes, pet hair can go in your composter because it adds nitrogen. However, add it in small amounts mixed with browns to prevent clumping and odors.
Can You Compost Citrus Peels and How Should They Be Prepared?
Citrus peels are okay in compost but only a little. Their acidity can damage the helpful microbes.
Use them sparingly. Cut them into small pieces to speed up breakdown and mix well with neutral materials.
Will Adding Wood Ash Affect My Compost?
Wood ash can be added in small amounts because it raises pH and adds minerals. Use it sparingly to avoid making the compost too alkaline, which can slow decomposition.
Wrapping Up
Good compost needs the right balance and care. Start small, watch your materials break down, and adjust as needed. Your garden will thank you when you add your homemade compost.