
What Does Yellowing Leaves Mean? A Complete Guide to Causes and Fixes
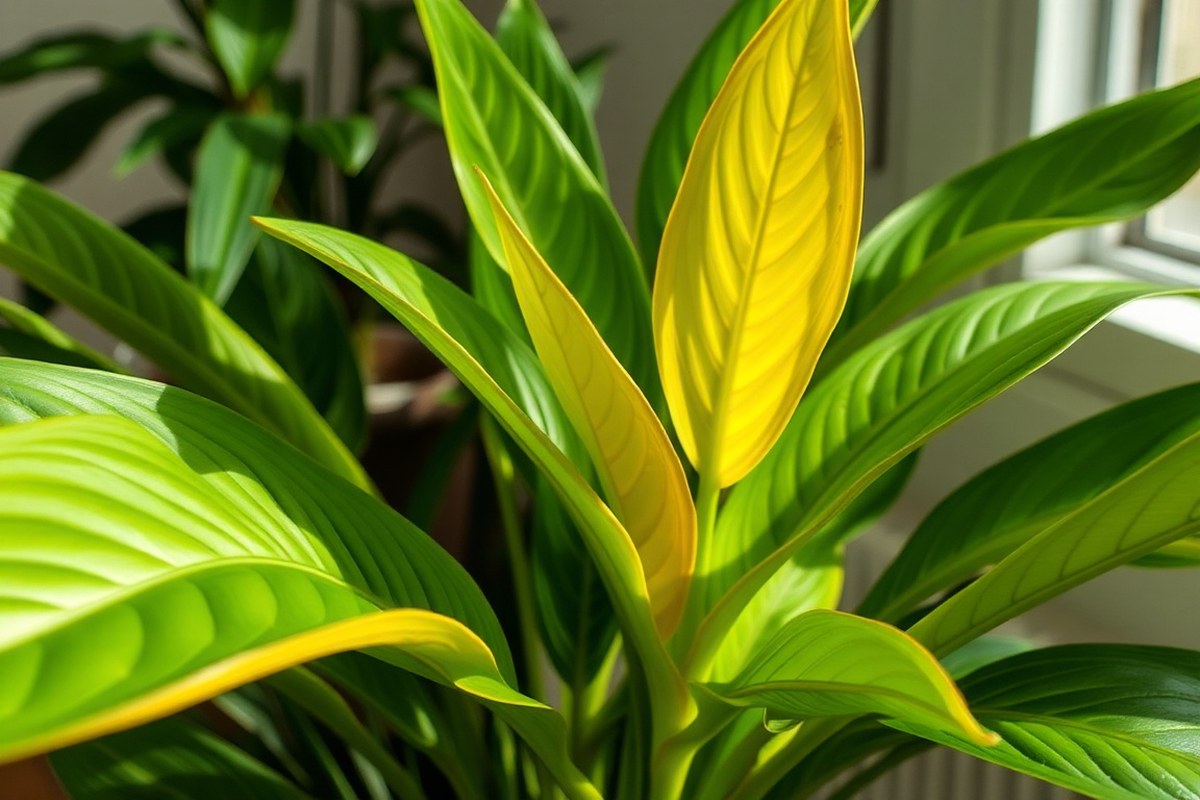
What does yellowing leaves mean on your plants? It usually signals a problem like nutrient shortages, water issues, or light stress. Quickly spotting yellow leaves helps you save your plant before more damage occurs.
Yellow leaves often come from too much or too little water. You should check soil moisture by sticking your finger two inches deep before watering. This helps avoid overwatering, which causes roots to rot and leaves to yellow.
Light is another key factor to watch. Plants in low light may turn yellow.
So adding a full-spectrum LED grow light can help. Also, avoid cold spots below 50°F, which chill tropical plants and turn leaves yellow.
Key Takeaways
- Check soil moisture before watering to prevent overwatering or underwatering.
- Use filtered or rested tap water to avoid chlorine damage to leaves.
- Keep humidity above 45% to stop leaves from yellowing and drying out.
- Add a full-spectrum grow light for your plants. They need this if they get less than six hours of natural light daily. This helps them grow better indoors.
- Remove no more than 30% of yellow leaves at one time to reduce stress.
- Protect tropical plants from temperatures under 50°F to avoid chilling damage.
What Does Yellowing Leaves Mean in Plants?

Chlorosis means a plant’s leaves turn yellow because they lack chlorophyll. Chlorophyll is the green pigment that helps plants make food from sunlight. When leaves yellow, the plant struggles to produce energy, which can slow growth and weaken it.
Leaf yellowing doesn’t always mean something is wrong. Older leaves naturally yellow and fall off as part of the plant’s life cycle. This normal aging starts at the bottom leaves of your plant.
Older leaves lose color slowly. New growth stays green and healthy.
Yellowing that happens quickly or spreads to new leaves usually signals distress. That can come from problems like poor light, bad watering habits, nutrient shortages, or pests.
Watch which leaves turn yellow and how quickly it happens. This helps you know if your plant needs care.
How Nutrient Deficiencies Cause Leaves to Turn Yellow
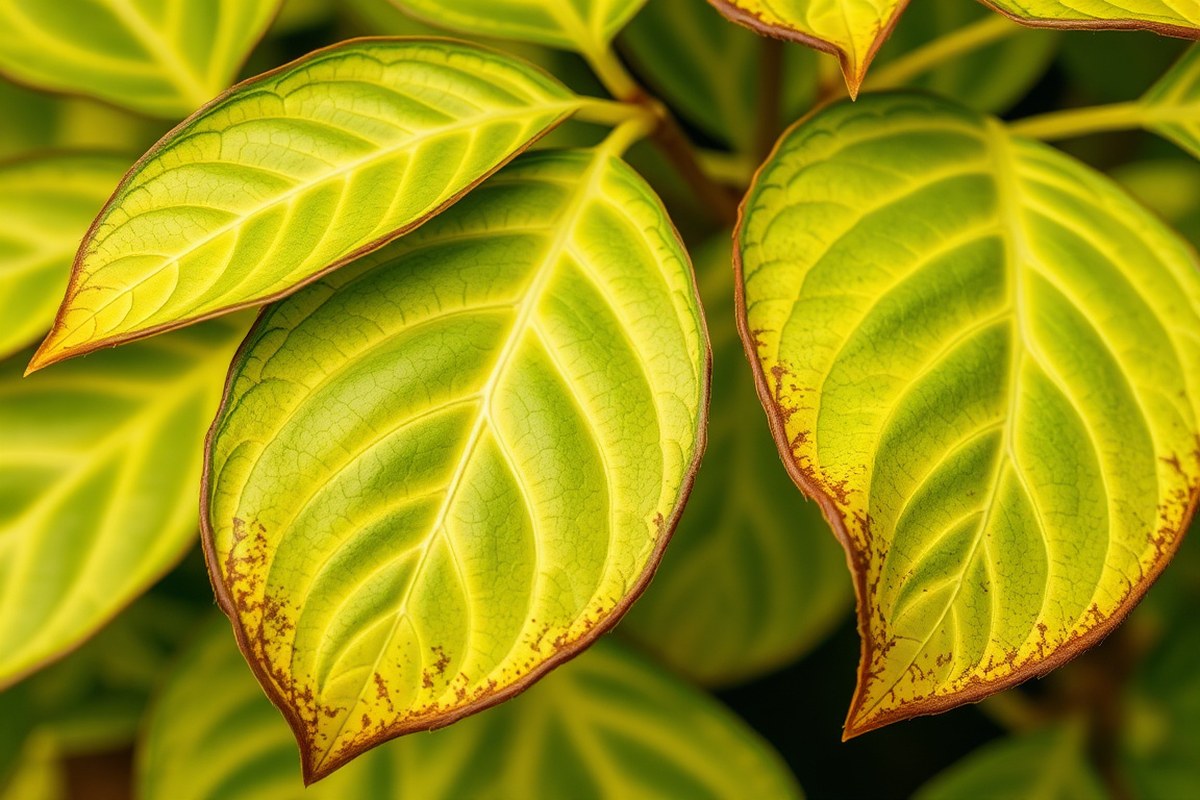
Yellow leaves often signal a lack of key nutrients like nitrogen, iron, magnesium, or potassium. Nitrogen deficiency causes older leaves to turn uniformly yellow from the bottom up. Iron deficiency shows as yellowing between green veins on new growth.
It happens mostly with a high soil pH above 7. This stops the plant from getting enough iron.0.
Magnesium deficiency creates a marbled look with yellowing between veins on older leaves. This differs from iron deficiency by affecting lower leaves instead of new ones. Potassium shortage shows as yellow or brown edges on leaf tips.
These edges look scorched or singed, like they are burnt. The whole leaf margin is affected. Calcium problems cause new leaves to be misshapen and crispy.
Soil pH strongly affects how well plants absorb these nutrients. Iron, for example, becomes less available when pH rises above 7.0. You can test soil pH with kits costing about $10 to $20, found at garden centers.
Lowering soil pH below 7 helps plants absorb nutrients better. Use sulfur or acidifying fertilizers to reduce pH. This improves iron uptake and overall nutrient use.
Applying a balanced fertilizer with nitrogen helps if many older leaves are yellow. For iron deficiency, treat with chelated iron products applied to soil or sprayed on leaves.
Epsom salt dissolved in water can address magnesium issues by spraying or watering every two weeks. Potassium is replenished through potassium-rich fertilizers, usually sold as potassium sulfate or potassium chloride.
Look closely at which leaves yellow and their patterns. Nitrogen loss causes uniform yellowing on lower leaves. Iron deficiency means green veins with yellow in new leaves.
Magnesium shortage causes striped yellowing on older leaves. Potassium affects leaf edges, turning them brown and crispy.
| Yellow Leaf Pattern | Most Likely Cause | First Action |
|---|---|---|
| Lower leaves, uniform yellow | Nitrogen deficiency | Apply balanced fertilizer |
| Interveinal yellow on new growth | Iron deficiency / high pH | Test pH, apply iron chelate |
| Interveinal yellow on older leaves | Magnesium deficiency | Apply Epsom salt solution |
| Brown, scorched edges | Potassium deficiency | Add potassium fertilizer |
Test soil pH before adding nutrients. Wrong pH can block nutrient uptake even when fertilizing.
Watering Issues: Overwatering and Underwatering Explained
Yellow leaves often show a watering problem. Too much water drowns the roots, blocking oxygen.
This makes them turn bright yellow fast. Overwatering also causes root rot, which stops roots from taking in water and nutrients.
Underwatering can cause yellow leaves too. Leaves curl and the edges turn yellow or brown. The soil gets dry and hard, so it can’t hold water well.
When the plant lacks water too long, leaves drop to save moisture. This is common in drought-stressed plants.
To avoid these problems, check soil moisture before watering. Use your finger or a moisture meter to test the soil 1 to 2 inches deep. When soil feels dry, give the plant some water.
When the soil is wet or soggy, hold off on watering. Dry soil may repel water. So water slowly or soak the pot’s bottom in water for 30 to 60 minutes.
Follow this simple watering process to help your plant:
- Feel the soil 1 to 2 inches deep to check moisture.
- Water only if soil feels dry, not damp or wet.
- Water slowly to let moisture soak evenly into the soil.
- For very dry soil, soak the pot’s base in water for 30 to 60 minutes.
- Let excess water drain completely from the pot to avoid waterlogging.
- Adjust watering frequency based on your plant’s needs and seasons.
- Keep an eye on leaf color and soil moisture regularly.
This method saves plants from drowning roots or drying out. Plants in compacted or poorly draining soil need extra care. They dry unevenly and can stay too wet longer.
Fleshy-leaved plants like money plants and cacti are more likely to yellow with too much water. Water quality also matters. Tap water with chlorine or salts causes leaf tips to yellow or brown over time.
When you notice yellow leaves, check watering first. Adjust your routine step by step to help roots recover.
Good watering habits take time and attention. But your plant will show health by bright green leaves and steady growth.
How Light and Environmental Stress Cause Yellow Leaves
Plants need the right kind of light to keep their leaves green. Too little light stops chlorophyll from forming, making leaves turn pale yellow starting at the bottom.
This yellowing moves up the plant if the light stays weak. You might see smaller leaves and stunted growth too.
On the flip side, too much direct sunlight can scorch leaves. Sun scorch causes yellow or white bleached spots on leaves. These spots often appear on leaves facing the sun.
You may see crispy brown patches too. This damage hurts leaf tissues, so those spots won’t recover. It’s common when plants sit near south or west windows with strong afternoon sun.
Temperature also affects leaf color. Your plant might be too hot or cold if it turns whitish yellow. Brown edges can show up with this color change.
Avoid placing temperature-sensitive plants near heating vents, air conditioners, or drafty doors. Sudden cold snaps outdoors can cause stress too, making leaves yellow and drop prematurely.
Humidity matters because dry air stresses plants. Low humidity dries out leaf tissues, leading to dull yellow leaves or leaf tips turning brown.
Tropical plants especially need at least 40% humidity to stay healthy. Rooms with heaters or air conditioning often get too dry in winter.
- Keep plants in bright, indirect light; avoid dark corners.
- Move plants away from direct noon sunlight to prevent scorch.
- Maintain room temperatures between 65°F and 75°F for most plants.
- Don’t place sensitive plants near vents, doors, or drafty windows.
- Use a humidifier or mist plants daily if indoor air is dry.
- Check plants daily for signs of yellowing and adjust conditions.
- Gradually introduce plants to new light or temperature conditions.
Small daily efforts can prevent stress yellowing. Adjust lighting slowly to help your plant adapt. Avoid sudden moves to different rooms with sharp light or temperature changes.
Using a digital thermometer and hygrometer helps track indoor conditions accurately. Humidity can cost $20-$50 for basic humidifiers, a small investment to keep leaves green.
Pests and Diseases That Cause Yellow Leaves
Yellow leaves often point to pests or diseases damaging your plants. Identifying these early can save your plants from serious harm. Look closely for spots, patterns, or tiny insects that cause the yellowing.
Common Insect Pests That Yellow Leaves
Spider mites, aphids, and mealybugs are common sap-sucking pests. They feed on plant juices, causing tiny yellow or white dots known as stippling. This damage can spread, making entire leaves turn yellow and weak.
Spider mites are tiny and thrive in dry air. Aphids often cluster on new growth, and mealybugs look like small cottony masses. Check leaf undersides and stems for these signs.
Fungal and Bacterial Leaf Diseases
Fungal infections like cercospora leaf spot cause yellow areas with dark brown or black centers. Bacterial leaf spot often shows water-soaked, greasy spots with diffuse edges. These spots spread fast and cause blotches that merge.
Yellow leaves with irregular yellow spots or leaf deformities are common fungal or bacterial signs. Viral infections also cause yellowing patterns but usually differ from spots.
Brown-centered yellow spots on tomatoes often mean early blight or septoria leaf spot. Look for one-sided yellowing with wilting in fusarium or verticillium wilt cases.
| Feature | Fungal Leaf Spot | Bacterial Infection |
|---|---|---|
| Appearance | Defined rings or “target” patterns | Water-soaked, greasy-looking spots |
| Progression | Spreads slowly over days/weeks | Can spread rapidly within hours |
| Texture | Usually dry or powdery | Often slimy or mushy |
| Edges | Clearly defined borders | Diffuse, “bleeding” edges |
Knowing the difference helps decide what treatment to use. Removing affected leaves also stops spread and protects healthy parts.
Treatment and Prevention Strategies
Check leaves daily for yellow spots, insects, or sticky residues. Early detection means you can act before problems spread. Use a magnifying glass to spot tiny spider mites or aphids.
For fungal diseases, apply copper fungicide at the first signs of leaf spots. This slows the disease and protects good leaves. Removing affected leaves and disposing of them safely helps stop spread.
Control pests with insecticidal soap or neem oil sprayed directly on insects. Avoid overwatering, which can worsen fungal infections, and keep plants spaced for good air flow.
Remove yellow or spotted leaves quickly to prevent disease from spreading through your plant.
Distinguishing Natural Aging from Problematic Yellowing
Yellowing on a few older leaves often signals normal aging, not a problem. Check if new leaves look healthy and the plant grows well. This helps you tell natural yellowing apart from signs of stress or disease.
Signs of Seasonal or Natural Leaf Drop
The oldest leaves near the plant’s base tend to yellow first as part of aging. Usually, only one or two leaves turn yellow at a time while others stay green. This happens because the plant moves nutrients to new growth, leaving old leaves to die off.
Deciduous plants also drop yellow leaves in autumn as a normal seasonal change. These leaves typically turn yellow evenly and fall off without curling or spots. The rest of the plant stays healthy and keeps growing.
Look for these natural yellowing clues:
- Yellowing on one or two lower leaves only
- Old leaves gradually falling off
- New leaves bright green and healthy
- Plant growing normally with no wilting or stunting
- Yellow leaves without brown spots or curled edges
- Stable light and temperature conditions
This pattern means the plant is healthy and simply aging old leaves.
When New Growth Is Healthy vs Stunted
Healthy new leaves should be a rich green and grow steadily. This shows your plant is getting enough nutrients, water, and light. If new leaves look pale, yellowed, or smaller than usual, it signals stress.
Stunted or yellowing new growth often points to nutrient shortages or light issues. For example, nitrogen deficiency shows as yellowing only on old leaves.
But poor light causes pale new leaves and weak stems. Watch for leaf deformities or yellow patches on fresh leaves.
Signs that new growth is unhealthy include:
- Pale or yellow color on top leaves
- Leaves smaller or thinner than before
- Slowed or no new leaf production
- Elongated, weak stems reaching for light
- Unusual curling or leaf spots
These symptoms suggest a problem rather than normal aging.
How and When to Prune Yellow Leaves
Removing yellow leaves helps redirect the plant’s energy to healthy parts. Pick leaves that are fully yellow or wilted first. Avoid cutting green edges, since these leaves still support the plant.
Cut leaves close to the base using clean scissors or pruners. This prevents damage and reduces infection risk. Only remove leaves if the plant looks otherwise healthy and new growth is good.
Keep in mind:
- Remove yellow leaves gently without tearing
- Use sterilized tools to prevent disease
- Leave yellow leaves if the plant shows overall stress
- Dispose of fallen leaves to avoid pests
- Trim during active growth for faster healing
- Don’t over-prune; keep some older leaves until new growth strengthens
Pruning helps the plant focus on fresh growth and keeps it looking tidy.
Root and Soil Problems That Lead to Yellow Leaves
Yellow leaves scattered across the plant often point to root issues. Root rot happens when soil stays too wet, and roots can’t get enough oxygen.
These roots begin to die, which causes leaves to turn yellow and feel soft or limp. You might also notice a bad smell from the soil if root rot has started.
Compacted roots cause yellow leaves differently. When roots have no room to grow, they can’t take in enough water or nutrients. This problem usually happens when plants stay in small pots.
It also occurs in heavy soils that don’t drain well. Both cause trouble for the roots. Signs include yellowing lower leaves and slow growth as the plant struggles to stay healthy.
Poor drainage makes root rot worse. Soil that holds too much water keeps roots wet for too long. Clay-heavy or compacted soil contributes to this problem.
You can check by digging gently near the roots. After watering, the soil should feel loose within a day.
It should also dry out in one or two days. This helps roots stay healthy.
Fix yellowing caused by root and soil problems by repotting with fresh, well-draining soil. Choose a container slightly larger than the last to give roots room to grow.
Use potting mixes with ingredients like peat, perlite, or bark chips to improve drainage. This change may cause some leaves to yellow temporarily as the plant adjusts.
Another step is loosening compacted soil around the plant if repotting isn’t an option. Gently loosening the soil improves air flow and water movement to the roots.
Avoid watering until the top inch of soil feels dry, making sure the pot drains well. Overhauling the soil health like this helps roots heal and stops leaf yellowing.
Check the roots for a tight ball with little soil. If you see this, your plant is root-bound. Carefully loosen tangled roots during repotting to help new growth.
Keep the plant in indirect light after repotting. Water it moderately for a few weeks while it heals.
This helps the plant recover well. Healthy roots mean green, firm leaves again.
Practical Steps to Stop and Prevent Yellow Leaves
Yellowing leaves need quick care to stop further damage. Fix watering, feeding, light, and humidity first. Use a routine and tools to keep plants healthy.
Assessing and Improving Watering Practices
Yellow leaves often mean your plant is thirsty or drowning. Before watering, stick your finger 2 inches into the soil. If it feels dry, water gently until it drains out the bottom.
Overwatering blocks oxygen to roots, causing yellowing. Underwatering causes leaf edges to crisp and turn yellow or brown. Follow this step-by-step watering routine to help your plant recover:
- Check soil moisture every 3 to 5 days using your finger or a moisture meter.
- Water only when the top 2 inches are dry to touch.
- Use room temperature water to avoid shocking roots.
- Water slowly, allowing it to soak evenly without pooling on top.
- Empty excess water from trays after 15 minutes to prevent soggy roots.
- Adjust watering frequency if your plant’s environment changes (season or heating).
A quick finger test beats guessing, never water on a strict schedule alone.
Adjusting Nutrition and Soil pH
Yellow leaves can mean your plant needs nutrients or its soil wrong. Fertilize monthly during growing season using a balanced, water-soluble fertilizer. Avoid overfeeding, which stresses roots.
Repotting into fresh, well-draining soil helps root health and nutrient uptake. This is important if roots crowd the pot or the soil gets compacted. Try these steps to improve feeding and soil health:
- Stop fertilizing if yellowing worsens, then restart with half-strength fertilizer after two weeks.
- Test soil pH with a kit; many plants prefer 6.0 to 7.0 pH.
- Repot your plant into a container 1 to 2 inches larger, with fresh soil.
- Remove old yellow leaves by cutting them at the base.
Don’t expect yellow leaves to turn green again, prune and focus on new growth.
Optimizing Light and Humidity Levels
Lighting impacts plant health more than people think. Yellow leaves hint at too little or too much light. Make sure your plant gets the light it needs, usually bright but indirect.
Humidity matters especially for tropical plants. Dry air can dry leaves, causing yellow tips. Use a humidifier or place a tray of water near your plant to boost humidity.
Follow this plan to set up better light and humidity:
- Move plants closer to windows if leaves pale or yellow. But out of harsh, direct sun.
- Rotate pots weekly to keep growth even and prevent leaf yellowing on one side.
- Use a humidity gauge to monitor moisture; aim for 40 to 60% humidity indoors.
- Group plants together to raise humidity naturally around them.
Too much sun can burn leaves; yellow spots might be sunburn, not nutrient issues.
Monitoring for Pests and Diseases
Check leaves and stems often for pests or fungal spots. Insects like spider mites can cause yellow patches. Early detection lets you catch problems before damage spreads.
Remove any infected leaves and treat pests with insecticidal soap or neem oil as directed. Clean tools between plants to avoid spreading diseases. Here’s how to watch for and handle pests and diseases:
- Inspect your plant once a week under leaves and around stems.
- Use a magnifying glass to spot tiny bugs or eggs.
- Apply natural pesticides only on calm, dry days to avoid harming the plant.
- Isolate affected plants until pests are completely gone.
Ignoring pests lets them multiply quickly; regular checks save your plant health.
Step-by-Step Action Plan to Fix Yellow Leaves
Follow these steps to spot and solve yellow leaf problems quickly. Watch your plant closely after each change.
- Day 1: Check soil moisture with your finger. Water only if dry an inch deep. Avoid overwatering to stop root stress.
- Day 3: Inspect leaves closely for pests like spider mites or aphids. Treat with insecticidal soap if you see them.
- Week 1: Look at light conditions. Move your plant to brighter or shadier spot based on its needs. Yellowing should slow soon.
- Week 2: Test soil pH and nutrient levels if you can. Apply balanced fertilizer if needed. Growth and leaf color should improve.
- Week 3: Trim yellow leaves gently with clean scissors. It help the plant focus on healthy growth.
- Month 1: Repot if roots are crowded or soil is poor. Use fresh potting mix suited for your plant type.
- Month 2: Keep monitoring water, light, and pests regularly. Healthy green leaves indicate your plant feels better.
Frequently Asked Questions
Can Yellowing Leaves Recover If the Cause Is Treated?
Yes, yellowing leaves can turn green again if you fix the problem early. Acting quickly helps the plant regain health before permanent damage occurs.
Does Soil pH Affect Leaf Yellowing in Houseplants?
Yes, soil pH impacts nutrient uptake and can cause yellow leaves. Test your soil pH and adjust it to fit your plant’s needs to prevent deficiencies.
Can Cold Drafts Cause Leaves to Yellow on Indoor Plants?
Cold drafts can stress plants, leading to yellowing leaves. Keep plants away from drafty windows or vents to avoid temperature shock.
Is It Normal for New Leaves to Turn Yellow on Some Plants?
Some plants naturally have pale new leaves that turn green as they mature. Check your plant type to see if this matches its normal growth pattern.
Can Too Much Fertilizing Cause Leaves to Turn Yellow?
Yes, over-fertilizing can burn roots and cause yellowing leaves. Follow recommended feeding schedules and amounts for your plant.
How Does Humidity Affect Yellow Leaf Development?
Low humidity can dry out leaves, causing yellow tips or edges. Increase humidity with a tray of water or a humidifier near your plants.
Before You Go
Yellow leaves often mean your plant needs attention but can recover. Start with simple checks on water and light. A few small fixes can keep your plant healthy and green again.


