How to Use Sphagnum Moss: A Complete Guide for Successful Plant Care
How to use sphagnum moss is a common question in plant care. The best way is to soak dry moss for about 30 minutes until it’s fully wet. This makes the moss soft and ready to hold water for your plants.
Sphagnum moss holds a lot of water, up to 18 times its dry weight. That is why it keeps roots moist without drowning them. Always squeeze out excess water before using it to avoid soggy conditions.
Mixing sphagnum moss with other materials helps it last longer and improves soil drainage. For most plants, only use 20 to 30 percent moss in your potting mix. This balance keeps moisture steady and lets air reach the roots.
Key Takeaways
- Soak sphagnum moss for 30 minutes before use to fully hydrate it.
- Squeeze moss to remove extra water to prevent root rot.
- Use sphagnum moss in soil mixes at 20-30% for balanced moisture.
- Pure sphagnum moss breaks down, so replace it every 12 to 18 months.
- Soaking moss in a hydrogen peroxide solution helps kill pathogens.
- Sphagnum moss’s natural acidity suits acid-loving plants but not all species.
How to Prepare Sphagnum Moss for Plant Use
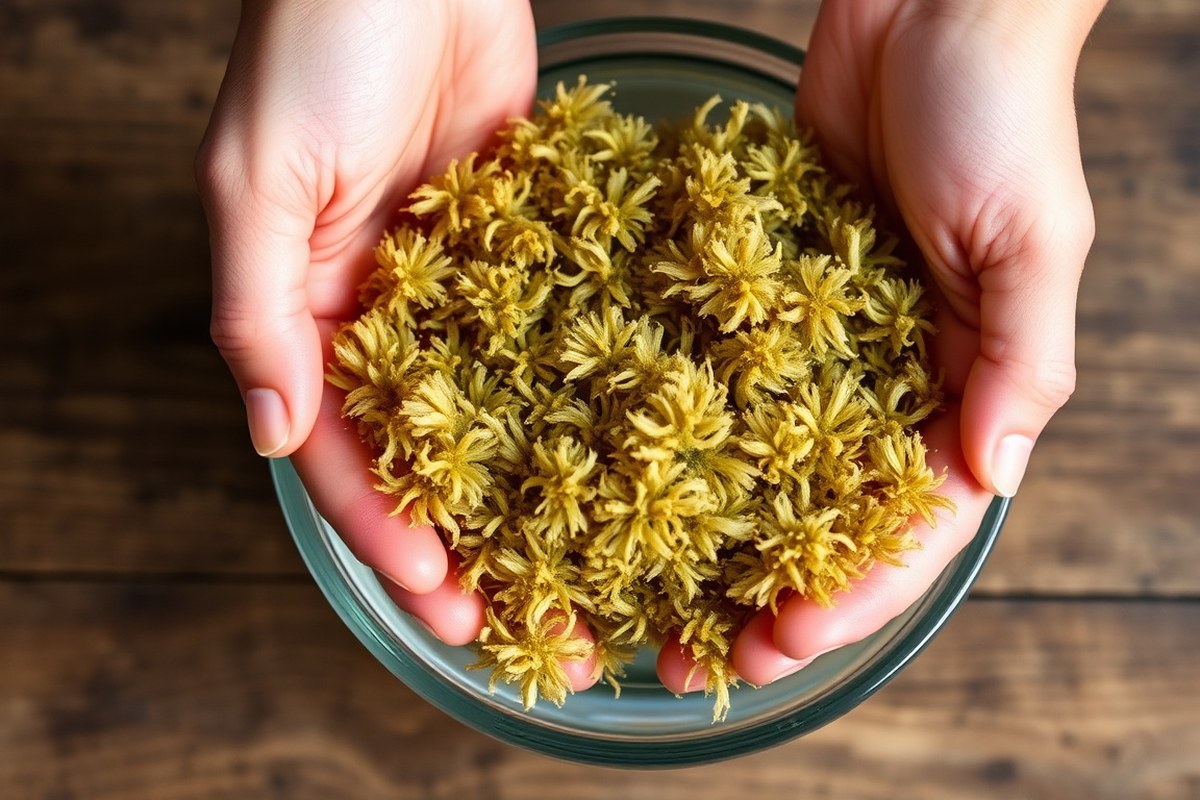
Sphagnum moss arrives dry and fluffy but needs prepping to work well. Soaking it fully helps the fibers hold more water without crushing the air space inside. Using distilled water prevents mineral build-up that can harm sensitive plant roots.
After soaking, squeeze the moss gently so it stays moist but not dripping wet. The goal is a damp sponge feel.
Fluff it up to keep the fibers separate and airy to avoid root suffocation. These steps set the stage for healthy root growth and consistent moisture levels.
- Place the dry sphagnum moss in a clean bowl or bucket.
- Pour distilled, reverse osmosis, or rainwater over it until fully submerged.
- Let it soak for about 30 minutes to absorb maximum moisture.
- Lift the moss out and gently squeeze to remove excess water.
- Break up any clumps by hand, fluffing the fibers lightly.
- Inspect for debris or insects; rinse again if needed before use.
- Apply the prepared moss immediately around roots or in your mix.
Sterilizing moss can protect vulnerable plants from pathogens, especially when reusing old moss. Soak it in boiling water for 10 minutes.
You can also microwave damp moss for 2 minutes. Let it cool before fluffing and using.
Compacted moss traps moisture but blocks oxygen, causing root rot. Fluffing keeps the fibers loose, promoting airflow and balanced moisture. This approach works well for orchids, cuttings, terrariums, and moisture-loving houseplants.
Differences Between Sphagnum Moss and Peat Moss

Sphagnum moss and peat moss come from the same plant genus. They look different and have different uses in gardening. Sphagnum moss has long, visible strands and a springy texture.
Peat moss is the decomposed, fine material found deeper in bogs. This difference affects how each holds water and aerates soil.
Sphagnum moss soaks up to 20 times its weight in water. It keeps cuttings damp without making them too wet. Peat moss holds water too, but it’s finer and packs down easily.
| Feature | Sphagnum Moss | Peat Moss |
|---|---|---|
| Texture | Long, fibrous strands, springy | Fine, crumbly, decomposed material |
| Moisture Retention | Holds up to 20x its dry weight | Good but compacts easily |
| Use in Propagation | Excellent for rooting cuttings | Not ideal, can suffocate roots |
| Soil Aeration | Maintains air spaces well | Tends to compact, reducing aeration |
| Common Applications | Orchids, terrariums, propagation | Soil amendment, acidity adjustment |
You want sphagnum moss when roots need air and moisture without sogginess. It excels for orchids and tropical plants that like airy but damp mediums.
Peat moss helps if you want to make soil more acidic. It improves heavy clay or sandy soil texture too.
Always use clean, live sphagnum moss for propagation. Dried moss won’t support root growth well.
Sphagnum moss stays loose and breathable around roots, preventing rot while holding moisture. Peat moss is dense and acidic, which can slow root development. You usually mix sphagnum moss into potting soil.
This helps keep moisture and air in the soil. It’s great for sensitive plants like aroids.
Using Sphagnum Moss for Propagating Plants
Sphagnum moss holds water well. It helps roots breathe. It works great for rooting cuttings and air layering.
It keeps the right moisture without drowning the plant. You only need a few basic steps to set it up for healthy root growth.
Preparing Cuttings and Stem Selection
Pick young, healthy stems for propagation. Avoid woody or flowering parts, as they root slower or not at all. Cuttings with two or more nodes work best because roots form near these points.
Trim below a node using clean, sharp scissors to prevent infection. Remove leaves on the lower half to stop rot and focus energy on root development. Larger leaves can be cut in half to reduce moisture loss.
Setting Up Moss for Rooting Environments
Use clean, moist sphagnum moss for your setup. The moss should be damp but not soaking wet to avoid stem rot. You can buy preserved sphagnum, which is ready to use immediately.
For air layering, wrap a handful of moist moss around the wounded branch area. Secure with plastic wrap or foil to hold moisture, leaving some space for airflow. For cuttings, pack moist moss into a small container or propagation tray.
Follow these steps to get your moss ready:
- Moisten dry sphagnum moss until damp but not dripping.
- Lightly squeeze to remove excess water without drying it out.
- Wrap moss around the cut or wounded stem for air layering.
- Place cuttings into a container filled with moss, covering the base.
- Secure moss and cuttings with a plastic bag or humidity dome.
Maintaining Moisture and Monitoring Growth
Check the moss daily to keep it moist but not soggy. Dry moss stops root growth, while too wet moss causes rot. Use misting spray or add a little water if needed.
Best results appear in 3 to 6 weeks, depending on plant species and temperature. Roots will look white and firm inside the moss. Remove the plastic covering gradually once roots form.
Air layering roots can be checked by gently peeling back a corner of the wrapping. Cut below the new roots to plant your new shrub or tree when roots are visible. Keep everything clean to avoid mold or pests during the process.
How to Incorporate Sphagnum Moss into Potting Mixes
Sphagnum moss adds valuable moisture retention and aeration to potting mixes. A common blend starts with one part sphagnum moss to two parts potting soil. This mix suits many indoor plants that like soil a bit moist but still well-drained.
For plants needing faster drainage, swap the soil for perlite or pumice. Use equal parts sphagnum moss and perlite or pumice with no extra soil.
This prevents soggy roots and improves airflow around them. Too much moss alone can hold excess moisture, risking root rot.
| Plant Type | Soil Mix Ratio (Sphagnum Moss : Other Media) | Notes |
|---|---|---|
| General Houseplants (e.g., Pothos, Snake Plant) | 1 : 2 potting soil | Supports moisture retention and basic aeration |
| Tropical Aroids (Philodendrons, Monsteras, Anthuriums) | 1 : 1 potting soil | Keeps mix moist but breathable for sensitive roots |
| Plants Needing Fast Drainage (Succulents, Cacti) | 1 : 1 perlite or pumice | Prevents waterlogging; no soil needed |
| Orchids and Epiphytes | Mostly sphagnum moss alone | Replicates natural airy, moisture-retentive habitat |
| Propagation Mix | Mostly sphagnum moss with minimal soil | Maintains humidity and oxygen for new roots |
Sphagnum moss works best when balanced. It’s a sponge that holds about 18 times its weight in water.
Mix it thoughtfully to avoid soggy soil that can suffocate roots. Adding too much moss can cause anaerobic conditions, which harm plant health.
Tropical plants like Monsteras need steady moisture. Mixing moss and soil equally works well. This 1:1 mix keeps moisture consistent for them.
Use more perlite or pumice with moss when you want good drainage, such as for succulents. Orchids do well in mostly moss since they naturally grow on trees.
Keep an eye on how the soil feels and drains. Adjust your ratios over time.
Using sphagnum moss improves aeration and moisture balance only if not overused. Your plant’s needs and watering habits decide how much moss is appropriate.
Using Sphagnum Moss to Support Orchids and Epiphytes
Sphagnum moss is ideal for orchids and epiphytes because it retains moisture without suffocating roots. You prepare the moss by fully rehydrating it with clean water before potting. These plants do well with steady humidity around their roots.
Avoid leaving the moss soggy for too long. Keep the moss moist but not waterlogged.
Potting and Wrapping Orchid Roots
Start by soaking dry sphagnum moss in water until it feels soft and plump. Gently squeeze out excess water so the moss is moist but not dripping wet. Wrap moss loosely around the orchid’s roots.
This forms a cushion that holds moisture. It also supports the plant’s base firmly.
Use a basket pot or a container with plenty of drainage holes. This setup mimics the orchid’s natural airy environment and prevents water from pooling. For epiphytes, moss works well inside hollow logs or on boards.
This keeps roots open to air but humid all the time. It mimics their natural growing spots.
Watering Tips to Avoid Over-Saturation
Water orchids planted in sphagnum moss when the top layer feels dry to the touch. Soak the moss thoroughly but allow it to dry slightly between watering to prevent root rot. Mist the moss daily to maintain humidity without waterlogging the roots.
Good airflow around the pot helps dry the moss evenly. Avoid standing water at the pot’s bottom as it can cause fungal problems. During cooler months or lower light, reduce watering frequency to match slower growth and evaporation.
Check moss moisture by feeling it with your fingers, you want dampness, not wet sogginess.
When and How to Repot with Fresh Moss
Repot orchids every 12 to 18 months or when moss breaks down and compacts, reducing airflow. Use fresh sphagnum moss to refresh moisture-retention and keep roots healthy. Remove old moss carefully, trimming dead roots before repotting.
Repot during active growth phases, typically spring or early summer, for faster recovery. Sterilize moss if you use it for sensitive species or after disease issues. Proper repotting boosts root oxygen and prevents the common problem of poor drainage in old moss.
Creating and Maintaining Moss Poles for Climbing Plants
Sphagnum moss poles support climbing plants like Monstera and Philodendron by providing moisture and stability. Building a moss pole means wrapping a strong frame with damp moss. The moss helps roots grow up the pole.
This setup encourages aerial root growth on your plants. Keeping the moss moist but not soggy prevents mold and helps your plants thrive.
Gathering Supplies and Setting Up the Pole
Create a frame for the moss pole using natural or synthetic supports that resist rotting. Bamboo stakes or PVC pipes work well due to their strength and durability. Choose unmilled sphagnum moss so it holds moisture and lets roots attach easily.
Keep in mind the size of your plant and how tall the pole should be. You’ll also need twine or garden ties to secure the moss on the frame. Have a spray bottle filled with water ready to keep the moss damp during assembly.
- Select a durable stake or pipe at least as tall as your plant.
- Soak the unmilled sphagnum moss in water for 10, 15 minutes until damp.
- Squeeze excess water from the moss so it’s moist, not dripping wet.
- Wrap the moss evenly around the frame, covering it completely.
- Secure the moss with twine or garden ties spaced every 4, 6 inches.
- Trim any loose moss to keep a neat appearance.
- Set the finished pole in your plant’s pot or next to it.
Attaching and Moistening the Moss
Place the pole close enough for climbing plants to wrap their aerial roots around it. You can gently tie young stems to the pole if they don’t cling on their own. This encourages the plants to grow upward while staying stable.
Mist the moss thoroughly after installation to start providing moisture immediately. The moss holds water well, creating a humid mini-environment for your plants’ roots. Avoid heavy watering that leaves the moss soggy and invites mold.
Ongoing Care and Monitoring Moisture
Check your moss pole’s moisture regularly by touch, moist moss feels damp but not wet. Mist the moss every few days or when it starts feeling dry. Indoor humidity and temperature affect how fast the moss dries out.
Watch for mold growth caused by excess moisture or poor air circulation. Reduce watering and improve airflow if mold appears.
Adding a balanced fertilizer to the plant helps aerial roots grow healthy. But don’t overdo it to avoid root burn.
Common Mistakes When Using Sphagnum Moss and How to Fix Them
Sphagnum moss holds a lot of water, but too much wetness harms roots. When moss stays soaking wet, roots lose oxygen and might rot fast. Avoid packing moss tightly, which traps water and suffocates roots.
Using dry moss straight from the bag is another common mistake. Dry moss pulls moisture away from roots instead of giving it. Always soak and fluff the moss before use to restore its structure and water-absorbing ability.
Pressing wet moss tightly against stems or plant crowns causes rot and fungal problems. Leave space between moss and stem to allow air flow. Choosing the right sphagnum moss is important.
Coarser moss works best for orchids and epiphytes. Finer moss suits seed starting.
- Soak moss for 15-30 minutes before use, then fluff it gently.
- Loosen moss around roots; avoid packing it densely.
- Keep moss moist but not dripping wet.
- Leave a small gap between moss and plant stems.
- Store unused moss in a breathable container to prevent mold.
- Choose moss type based on your plant’s needs.
Mold and compaction happen if moss stays wet too long or is compressed. Lightly fluff moss weekly to keep it airy.
Replace moss that smells bad or looks slimy. Avoid drenching moss every day; a light watering schedule keeps moisture balanced.
Root rot risks rise when moss lacks airflow or is soaked nonstop. Sphagnum moss works like a sponge, releasing moisture slowly, not flooding roots.
Watch how much moss you use. Too much volume traps extra water and slows drying.
When and How to Replace or Reuse Sphagnum Moss
Sphagnum moss usually lasts between 12 and 18 months in pots or propagation setups. Its lifespan depends on how wet it stays and the plant’s needs. Moss in constantly moist conditions breaks down faster and loses its structure sooner.
You can reuse sphagnum moss if it looks healthy and clean. First, soak the moss in distilled or rainwater to rinse away debris and leftover salts.
Let it dry somewhat before using it again. Avoid moss that feels slimy, smells bad, or has visible mold.
Check moss often for sour or musty smells. Look for browning or mushy fibers. Also, watch for mold or fungus growth.
When moss crumbles or loses springiness, replace it. Using degraded moss can harm roots by holding too much water or encouraging rot.
Start with soaking and inspecting moss. Trim dead or brown bits. Rinse with clean water and let it dry.
Most fibers look firm and green? You can reuse it.
Moss stays wet too long or breaks down fast? Replace it.
Keep moss well-aerated and avoid overwatering to extend its life and prevent decay.
Reusing moss often saves money but requires careful cleaning. For orchid mounts or fine propagation, fresh sphagnum gives better root contact and moisture control. Reusing moss?
Balance its quality against cost and plant health. Old moss can work for seed starting or less demanding uses.
Your First Week Using Sphagnum Moss: A Step-by-Step Plan
Start using sphagnum moss with these clear steps. Each step helps you see if the moss supports your plants well.
- Day 1: Soak the dry sphagnum moss in water for 30 minutes. Check that it feels moist but not dripping.
- Day 2: Use the soaked moss to wrap plant cuttings for propagation. Watch for root growth after 1 to 2 weeks.
- Day 3: Mix some sphagnum moss with potting soil for epiphytes. Keep soil damp and observe plant health over two weeks.
- Day 4: Build or install a moss pole for climbing plants using damp moss. Check vines start attaching and growing upward in one month.
- Week 2: Monitor moss moisture daily, mist when it feels dry. Healthy moss stays lightly damp, never soggy or brown.
- Week 3: Look for signs to replace moss, like darkening or bad smell. Replace with fresh moss to avoid root problems.
- Week 4: Consider reusing old sphagnum moss by rinsing it. Let it dry completely before the next use to prevent mold.
Frequently Asked Questions
Can I Use Sphagnum Moss Directly from Nature for My Plants?
It’s best not to use wild sphagnum moss directly. It may contain pests or diseases that harm your plants. Always use sterilized or store-bought moss for safety.
How Often Should I Water Plants Potted in Sphagnum Moss?
Watering depends on plant type but generally once the moss starts drying. The moss holds moisture well, so check its dampness by touch. Avoid overwatering as sphagnum moss drains slowly.
Can Sphagnum Moss Change Soil pH over Time?
Sphagnum moss has a natural acidity with about a 4.2 pH level. Using it can slowly make the soil more acidic over time. Grow acid-loving plants with it or add lime to raise pH for other plants.
How Do I Store Unused Sphagnum Moss?
Keep unused moss dry and in a breathable container to prevent mold. Avoid sealed plastic bags unless completely dry. Store it in a cool, dark place for longer shelf life.
Is Sphagnum Moss Biodegradable in My Garden?
Yes, sphagnum moss breaks down naturally when added to soil. It releases organic matter slowly, improving soil structure. This process can take months, depending on moisture and temperature.
Does Sphagnum Moss Attract Pests to Indoor Plants?
Sphagnum moss itself rarely attracts pests but damp conditions can. Keep moss moist but not soggy. Monitor plants regularly for pests like fungus gnats and treat promptly if found.
Final Thoughts
Sphagnum moss holds water and air well, making it great for many plants. Try a small batch first, like with a moss pole or cuttings. You’ll see how easy it is to improve plant care with this simple material.