How to Use Coco Coir: A Complete Guide for Healthier Plants and Better Growth
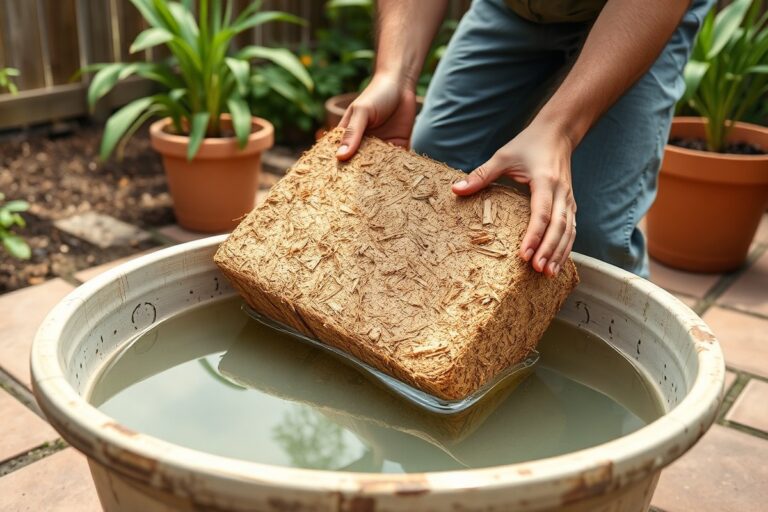
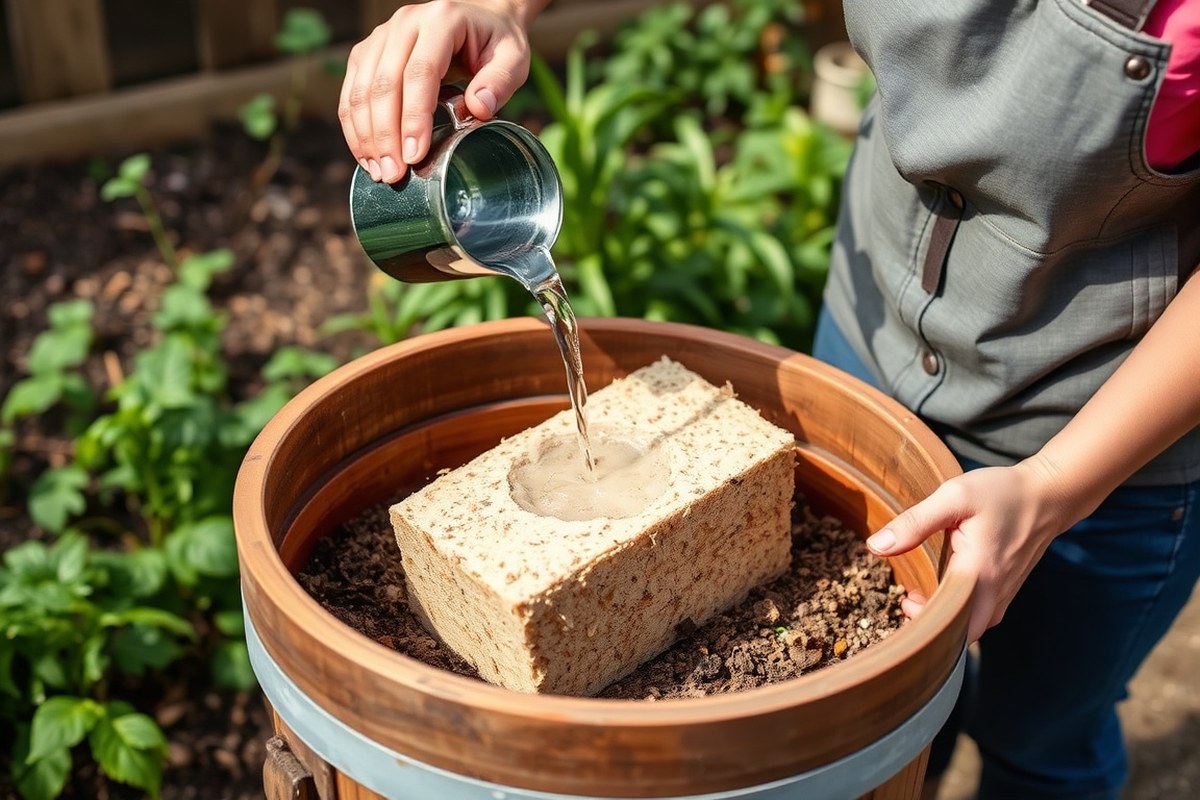
How to use coco coir is a common question for healthier plant growth. Start by soaking the coco coir brick in water for 15 to 30 minutes. This lets the coir absorb moisture and expand fully before use.
Coco coir is an inert, organic medium that doesn’t contain nutrients. You’ll need to adjust the pH between 5.5 and 6.5 for the best plant uptake. Use pH up or down solutions to keep your plants happy.
Mix coco coir with your garden soil or potting mix for structure and moisture retention. A good start is 30% coco coir with 70% soil. It provides the right balance of water holding and airflow for most houseplants and garden crops.
Key Takeaways
- Soak coco coir bricks in water, allowing 15 to 30 minutes for expansion.
- Adjust growing medium pH to 5.5, 6.5 to match coco coir’s ideal range.
- Mix 30% coco coir with 70% garden soil for balanced moisture and structure.
- Flush coco coir every 4, 6 weeks with pH-adjusted water to prevent salt buildup.
- Use 50% coco coir mixes for moisture retention and soil structure improvement.
- For delicate roots, choose 70% coco coir for a fine, fluffy texture.
How to Properly Prepare and Hydrate Coco Coir

Coco coir comes compressed in bricks or blocks and needs soaking before use. Hydrating coir lets it expand 5 to 7 times its original size. You’ll need warm water around 70 to 80°F for the best absorption.
Rinsing coco coir is important to remove salts left from processing. Rinse after the initial soak, then drain well. Salt buildup can harm plants and slow growth, so don’t skip this step.
You can tell coco coir is ready when it looks fluffy. It should feel moist but not soggy.
The moisture should be even throughout. Depending on the brick size, hydration takes about 15 to 30 minutes.
- Place the coco coir brick in a large bucket or container.
- Use warm water based on brick size. For a 650g brick, add 4 to 5 liters of water. Mix well to break it up.
- Let the brick soak for about 15 to 20 minutes until it fully expands and softens.
- Break apart the coir gently with your hands to loosen it evenly.
- Rinse the coir two to three times with clean water. Use pH-adjusted water around pH 6. Drain the coir well after each rinse.
- Check the moisture, coir should be damp but not dripping wet before use.
- Notice salts or dust after rinsing? Flush with more water. Drain again to remove residues.
Before hydration, adding about six parts water per one part coir by volume typically works well. This ratio expands the brick to about 8 to 10 liters of loose material. Waiting at least 15 minutes lets the coir absorb water fully and become pliable.
Flush your coco coir every 4 to 6 weeks after use. Use two to three times the pot volume of plain water.
This removes salt buildup effectively. That keeps the growing medium fresh and protects your plants.
Choosing the Best Coco Coir Mixes for Different Plants

Choosing the right coco coir mix depends on your plants’ needs. Seedlings prefer higher coco coir content for moisture. Succulents need more drainage components like sand and perlite.
Hydroponics calls for almost pure coir with liquid nutrients added. Adjusting these ratios helps your plants thrive in coco coir.
Seed Starting Mix Components and Benefits
Seedlings need a mix that holds moisture but doesn’t drown delicate roots. Use about 70% fine coco peat and 30% perlite for good drainage. Avoid adding compost or worm castings because seedlings get their nutrients later.
Adding 10 to 20 percent vermiculite keeps the surface moist, improving seed germination. The high coco coir percentage supports steady moisture without overwatering. This mix helps seeds sprout quicker and grow strong roots.
Succulent and Cactus Friendly Coco Coir Recipes
Succulents need a well-draining mix with lots of air pockets. Mix 20 to 30 percent coco coir in the soil blend.
Use 50 percent perlite and 20 to 30 percent coarse sand. This lets water drain fast, preventing root rot common with succulents.
Using mostly perlite and sand reduces moisture holding compared to other mixes. The small coco coir portion helps retain minimal moisture and supports root growth. You want this mix dry between waterings for healthiest plants.
Hydroponic and Aroid Plant Mix Variations
Hydroponic grows perform well with 80% coco peat and 20% perlite. No soil or other additives are used since nutrients come from liquid solutions. Coco coir’s moisture retention and aeration make it ideal as a hydroponic medium.
Aroids like monstera and philodendron need a balance of moisture and air. Use 40% coco coir, 30% perlite, 20% bark, and 10% worm castings. Bark adds chunky texture for aeration; worm castings boost nutrients.
Basic Indoor Planting Mix with Perlite
A standard indoor mix blends 50% coco coir, 30% perlite, and 20% worm castings or compost. This suits pothos, ferns, and peace lilies well. The coir keeps moisture steady while perlite prevents soggy roots, and castings add nutrients.
This mix is versatile and affordable. Perlite improves airflow around roots, stopping rot while coir holds enough water. Using compost or castings adds natural feeding over time.
Mix Adjustments for Fruiting Vegetables
You can use coco coir alone for vegetables but adding some perlite helps drainage. Aim for at least 20% perlite mixed with 80% coco coir. This supports root growth and prevents waterlogging during heavy feeding.
Adding worm castings or compost boosts nutrients essential for fruiting crops. Avoid pure coir only for heavier feeders or outdoor beds. Good aeration and steady moisture produce bigger harvests.
| Mix Type | Coco Coir % | Perlite % | Other Components | Best For |
|---|---|---|---|---|
| Seed Starting | 70% | 30% | None or 10-20% vermiculite | Seedlings, cuttings |
| Succulent/Cactus | 20, 30% | 50% | 20-30% coarse sand | Succulents, cacti, aloe |
| Aroid Mix | 40% | 30% | 20% bark, 10% worm castings | Monstera, philodendron |
| Hydroponic | 80% | 20% | None (liquid nutrients) | Hydro grows, herbs |
| All-Purpose Indoor | 50% | 30% | 20% worm castings or compost | Pothos, ferns, peace lily |
| Vegetables (Fruiting) | 80% | 20% | Optional worm castings/compost | Tomatoes, peppers, cucumbers |
Use these mixes as starting points. You can tweak the ratios depending on your plant’s specific needs. Adding coir fibers can improve soil structure and aeration across most mixes.
For seedlings, avoid adding compost or castings until after transplanting to prevent burning fragile roots.
Adjusting pH and Nutrients When Growing in Coco Coir
Keep an eye on coco coir’s pH to help plant nutrients work. Aim to keep the pH between 5.5 and 6.5 for healthy plants. Coco coir itself has no nutrients, so feed your plants regularly.
Typical pH Range and Why It Matters
Coco coir usually has a natural pH around 5.8 to 6.2. This range is slightly more acidic than typical soil and perfect for most plants. Staying in this target window helps plants absorb nutrients better.
PH outside 5.5 to 6.5 often causes nutrient lockout. Plants may show signs of deficiencies even with regular feeding. Testing pH regularly stops this problem early.
Using pH Up and Down Solutions Correctly
Use commercial pH up or down solutions to adjust coco coir pH carefully. Add these solutions to your watering or nutrient mix before applying it. Test your pH after each adjustment to avoid overcorrecting.
Adjust pH in small steps, changing it by 0.1 to 0.2 at a time. For example, if the pH is 6.8, gradually bring it down to 6.0 using pH down solution mixed in water. Avoid changing pH more than once per watering to keep it stable.
Nutrient Deficiencies Common in Coco Coir
Coco coir naturally lacks essential nutrients like nitrogen, phosphorus, and potassium. Your plants will need a balanced nutrient solution containing these elements. Calcium and magnesium are also important to add to avoid deficiencies.
Watch for yellowing leaves or slow growth as signs of nutrient problems. Deficiencies happen quickly if you forget to feed plants often. Use a fertilizer designed for coco coir or hydroponics to supply proper nutrients.
Recommended Fertilizer Types and Timing
Use water-soluble fertilizers made for coco coir or hydroponic systems. These fertilizers quickly deliver nutrients your plants need. A balanced N-P-K ratio and added calcium and magnesium work well.
Start fertilizing seedlings after their first true leaves appear, about two weeks after planting. Feed plants every watering or every other watering, depending on their growth stage. Increase feeding frequency during flower or fruit development.
How and When to Flush Coco Coir Medium
Flushing with plain water every few weeks removes salt buildup from fertilizer use. Salt buildup can harm roots and block nutrient uptake. Use plenty of water until runoff pH is stable and clear.
Flush more often if you see leaf burn or nutrient deficiencies despite regular feeding. Pick water with a neutral pH near 7. This stops changes to coco coir’s pH range.
Using the right water keeps your plants happy. Flushing also refreshes the growing medium for reuse.
When and How to Water Plants Using Coco Coir
Coco coir soaks up a lot of water, about 9 to 10 times its weight. It stays moist longer than normal soil but lets water drain well.
This helps prevent waterlogged roots and means you water less. Your climate and plant type still affect when you should water.
For indoor plants in moderate climates, watering every 5 to 7 days often works well. Outdoor plants in hot, dry areas may need water every 2 to 3 days. Cooler, humid climates might only need watering once a week or less.
Check the top inch of coco coir. When the coir feels dry, give your plants some water.
Coco coir looks dry on the surface even if it still holds moisture below. Over-watering shows with yellowing leaves or mushy stems.
Under-watering makes leaves wilt and get crispy edges. Using your finger to test moisture just below the surface helps avoid both problems.
This material keeps roots aerated while holding moisture, preventing compacted soil and root rot. Indoor plants benefit because coco coir buffers moisture swings, so roots get air too. Outdoor plants see water stay available longer, reducing watering frequency during heat spikes.
Indoor and outdoor plants in coco coir need slightly different water amounts. Inside, less water and more time between watering usually work because room temperature is stable.
Outside, sun, wind, and temperature changes dry coir faster. So you watch plants and water more often as needed.
To monitor watering well, press coco coir gently. Plants need watering if the coir crumbles and feels dry to touch. Hold off watering when the coir is cold and soggy.
Wait for it to dry. Using a moisture meter can help in tricky spots, especially indoor pots without natural drainage.
Watering coco coir requires a balance, not done exactly like soil. It holds moisture better but lets air flow. Water your plants deeply but less often.
Watch the leaves for signs. Change how often you water by season and conditions. This keeps roots healthy and plants thriving.
Using Coco Coir for Seed Starting and Container Gardening
Coco coir is a great choice for starting seeds and container gardening. It provides excellent drainage and aeration, which seedlings need. You can fill containers with coco coir fibers.
Plant seeds or transplants in it. You can also line baskets with coco coir for support.
Selecting Containers Suitable for Coco Coir
Choose pots or trays sized for seedlings or small plants. Most coco coir pots come in these sizes. Containers with good drainage holes work best for coco coir.
It holds moisture well but can’t stay soggy. You can also find biodegradable pots made from coco coir itself, perfect for young plants.
Plastic, ceramic, and clay pots all work with coco coir. But lightweight plastic is easier to move. For hydroponics, coconut coir pots fit nicely in grow systems.
Use hanging baskets you can line with coco fiber. This helps keep moisture balanced in the basket.
Filling and Compacting Coco Coir Correctly
Before filling, hydrate coco coir bricks or discs fully with water until fluffy. For best growth, mix equal parts rehydrated coir and perlite for air space and drainage. Avoid packing coir too tightly, which can reduce airflow to roots.
Follow these steps to fill your containers:
- Rehydrate coco coir as directed, usually soaking for 8 to 12 hours.
- Mix hydrated coir with perlite about 50/50 by volume.
- Fill containers loosely with the mixture, leaving 0.5 to 1 inch from the top.
- Lightly press down to remove large air pockets but keep it fluffy.
- Add a thin layer of compost if extra nutrients are needed.
Don’t over-compact coco coir; roots grow better with good airflow.
Planting Seeds and Transplants in Coir Medium
Coco coir alone supports seedling growth well, thanks to its moisture retention and air balance. Plant seeds at the depth recommended per species, usually two times the seed diameter. For transplants, dig a small hole and gently firm coir around roots without squeezing.
Seedlings respond well to coir’s steady moisture but avoid keeping it soggy. Fertilize lightly after sprouts appear since coir itself has few nutrients. Mixing compost with coir can supply natural nutrients and improve results.
Lining Hanging Baskets Using Coco Fiber
Start by placing a layer of coco fiber inside the basket. This lining holds moisture without letting it pool in the bottom. Add your growing medium on top, typically a 50/50 coir and perlite mix, for good drainage.
Press the fiber gently into place, covering the basket sides and bottom. This method prevents soil loss and balances moisture well. The fibers also provide some air space important for roots in hanging baskets.
Using Coco Coir Pots and Poles for Support
Coco coir pots are sized mainly for seedlings and small transplants. They allow roots to grow through the pot walls, making transplanting easier and less stressful. These pots work well for starting plants before moving them to larger containers.
Coco coir poles wrapped with fibers support vines and shrubs that need climbing structures. Insert poles near the plant base to guide growth upward. This natural support method blends well with coco coir gardening and keeps plants stable.
Common Mistakes When Using Coco Coir and How to Fix Them
Salt buildup happens because coco coir holds onto minerals from water and fertilizers. This buildup changes the pH and blocks nutrient absorption. Signs include yellowing leaves, slow growth, and plants wilting despite watering.
Poor drainage or compaction makes roots struggle for air and water, leading to root rot. Roots may look dark, slimy, or stunted.
Coco coir naturally drains well. But over time it can compress, especially if you reuse it without loosening it.
You can reuse coco coir safely but only after cleaning. Remove old roots and debris from the coir. Soak it in clean water mixed with a little bleach.
Use about 1 tablespoon of bleach per gallon and soak for 10 minutes. Rinse well to avoid leftover bleach, drain, and dry before reuse.
- Flush coco coir with pH-balanced water every 3, 4 weeks to avoid salt buildup.
- Check plant leaves and growth regularly for nutrient deficiency signs.
- Mix coco coir with perlite or coarse sand to improve aeration if compacted.
- Aerate the medium by loosening it gently with your fingers or a tool.
- Replace or refresh coco coir every 2, 3 growing cycles to maintain good texture.
- Ensure containers have drainage holes and raise pots slightly to avoid waterlogging.
To flush salt from the coir, pour water until it runs clear through drainage holes. Use water with a pH around 6, which fits coco coir’s natural 5.8 to 6.7 range. This flush resets the medium and reduces nutrient lockout.
For better drainage, add chunky materials like perlite or orchid bark to the coco coir. Also, avoid packing the coir too tightly.
Coco coir should feel light and fluffy. It needs loosening or fresh mix when it crushes easily.
Types and Forms of Coco Coir Available for Gardening
Coco coir comes in three main forms: peat, fiber, and chips. Coco peat is soft and fluffy, ideal for seed starting and indoor pots. Fiber is coarse and stringy, perfect for mixing into soil or using in hanging baskets.
Coco coir chips keep their shape and last longer. They work well for mulching flower beds. They’re also good for vegetable gardens.
You’ll often find coco coir in dehydrated bricks or loose form. Bricks are compressed for easy storage. But you must soak them in water before planting.
Coco coir sheets or mats are another choice. They’re mostly for erosion control or fixing lawns.
You don’t usually plant directly in them. Preparing a mat for planting needs careful placement and soil support before adding plants.
Organic or chemical-free coco coir usually says so on the label. It’s often pre-washed to have low salt and EC. This helps protect your plants.
Look for “washed” or “fertilizer-free” tags on the product. These show it has low salt content. High salt can hurt your plants.
Choosing the right coco coir depends on your intended use, space, and plant type. Brick forms save space and stay fresh longer but need hydration. Loose coir is ready to use but bulky.
Fibrous coir suits draining mixes; peat retains moisture well. Chips help prevent weeds and water evaporation as mulch.
| Type | Texture | Common Forms | Best Use Cases | Special Notes |
|---|---|---|---|---|
| Coco Peat | Soft, fine | Loose, bricks (650g to 5kg) | Seed starting, indoor pots, soil mixes | Absorbs 9× its weight in water; pre-washed options exist |
| Coco Fiber | Coarse, stringy | Loose, mats | Soil aeration, hanging baskets, grow bags | Dense fibers improve drainage and airflow |
| Coco Chips | Chunky, firm | Loose | Mulching flower and veggie beds | Long-lasting; controls weeds and reduces evaporation |
| Bricks | Compressed peat or fiber | 650g, 5kg sizes | Long-term storage, small indoor plants | Must be soaked and expanded before use |
| Coco Mats/Sheets | Firm, layered | Pre-formed mats | Erosion control, lawn repair, landscaping | Not suitable for direct planting without soil support |
Use a 650g peat brick to start a small indoor garden. It’s a good size for beginners. It helps you grow plants easily.
Soak it with about 4 to 5 liters of water to expand fully. For outdoor vegetable beds, spread a 2-3 inch layer of coco chips as mulch. This will control weeds and keep soil moisture steady.
Loose coir works well if you need to mix it right away. However, it takes much more storage space and dries out faster.
Bricks keep fresh much longer and cost around $8 to $15 depending on size. You can store unused coir for months if kept dry and cool.
How to Reuse and Maintain Coco Coir for Long-Term Use
Coco coir can be reused safely for up to two or three growing cycles. Rinsing and cleaning it between uses helps remove salts and leftover nutrients. This maintains its ability to hold moisture and support healthy roots.
You need to clean your coco coir thoroughly before reusing it. Doing this stops the buildup of salts, bacteria, and fungi that hurt your plants. Proper drying prevents mold and keeps the coir fresh for the next season.
Look out for signs that show the coir is worn out. If it smells sour, stays soggy, or breaks apart easily, it is time to replace it.
Also, check if your plants stop growing well despite good care. These all mean the coir is losing its strength.
Prevent nutrient depletion by rinsing the coir with fresh water before each use. Using proper nutrient mixes tailored for coco coir also helps. Store the clean coir dry and out of direct sunlight to keep it usable longer.
Follow these steps to clean and reuse coco coir safely:
- Remove old roots and plant debris by hand from the coir.
- Rinse the coir thoroughly with fresh water to wash away salts.
- Soak the coir in clean water for 1 to 2 hours to flush out nutrients.
- Drain the water completely and spread the coir out to dry in shade.
- Test the pH if possible. Rinse again if the pH goes outside 5.8 to 6.2.
- Mix in fresh coco coir or perlite if the texture feels compacted.
- Store the dried coir in a breathable bag, away from moisture and sunlight.
Always dry coco coir completely before storing to avoid mold growth and rotting.
Step-by-Step Action Plan for Using Coco Coir
Follow this plan to get your coco coir ready and growing plants successfully. Each step shows you what to do and how to check it’s working well.
- Before you start: Rinse and soak the coco coir in water to remove salts. The coir should feel damp but crumbly, never soggy.
- Week 1: Mix your prepared coir with perlite or vermiculite for better drainage. The mix should hold moisture without dripping water.
- After mixing: Test and adjust the pH to between 5.5 and 6.5. Use a pH meter or test kit to confirm this range.
- Planting day: Start seeds or transplant seedlings into the coir mix. Seedlings should show steady growth within 1-2 weeks.
- Week 2 and beyond: Water your plants with nutrient solutions designed for coco coir. Check leaves for healthy color and no signs of nutrient burn.
- Every 4 weeks: Flush the coco coir with fresh water to prevent salt buildup. You’ll know it worked if the coir doesn’t smell sour or look white on top.
- After harvest: Remove old roots and rinse the coir to reuse it. It should look clean and break apart easily ready for new planting.
Frequently Asked Questions
Can Coco Coir Be Used Alone Without Adding Soil?
Yes, coco coir can be used alone as a growing medium. Since it has no nutrients, you must supply fertilizers regularly for healthy plant growth.
How Long Does It Take for a Coco Coir Brick to Expand Fully?
It usually takes 15 to 30 minutes for a coco coir brick to expand fully. This varies by brand, so check instructions for best results.
What Makes Coco Coir Better for Water Absorption Than Soil?
Coco coir has natural fibers that hold water better than many soils. Its 100% organic structure absorbs moisture evenly and releases it gradually.
Can Coco Coir Be Composted After Use?
Yes, coco coir can be composted as it is biodegradable. Breaking it into small pieces speeds the composting process and adds organic matter to soil.
Does Coco Coir Attract Pests or Diseases?
Coco coir is naturally resistant to pests and diseases due to its neutral pH. Proper watering and cleanliness still help avoid fungus or mold growth.
Can Coco Coir Support Hydroponic Gardening Setups?
Yes, coco coir is well suited for hydroponics. Its water retention and aeration supply roots with good moisture and oxygen.
The Bottom Line
Coco coir helps your plants grow strong with the right prep and care. Try preparing a small batch before expanding to bigger gardening projects. Starting simple helps you see quick results with less guesswork.