How to Install Landscape Bricks: A Complete Guide for Durable Results
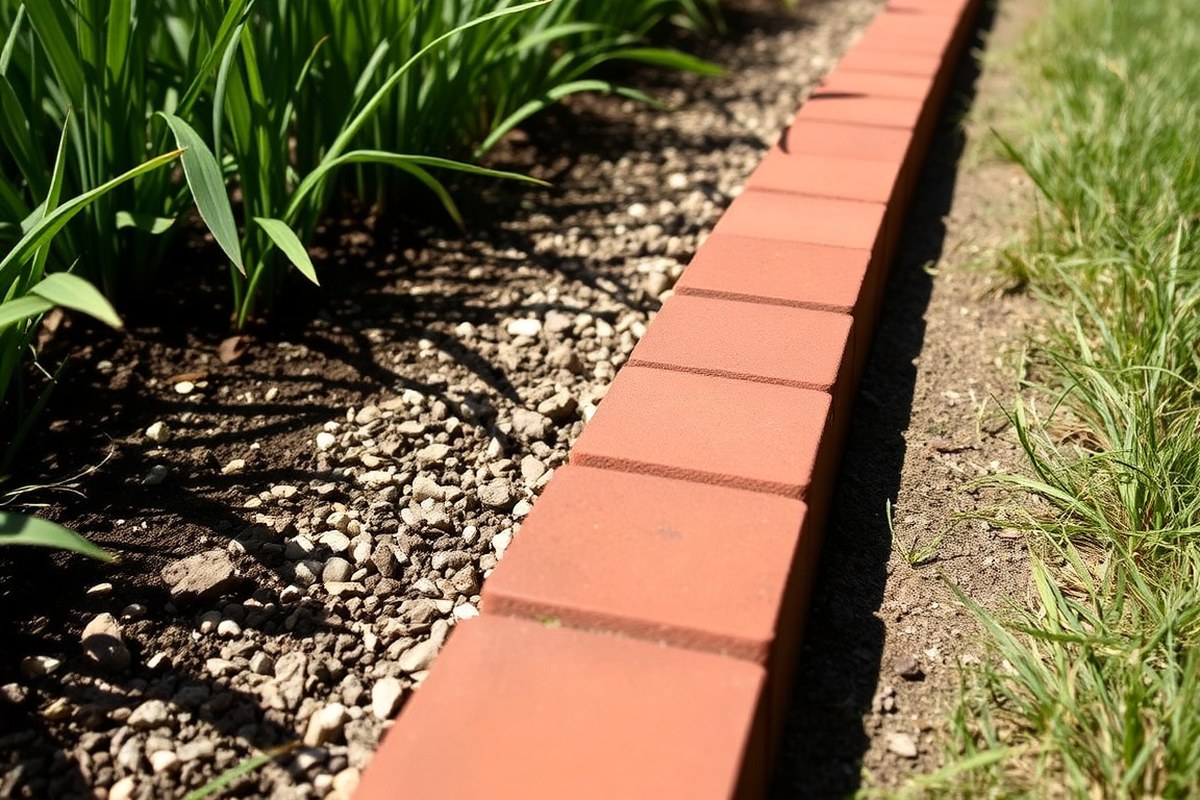
Learning how to install landscape bricks starts with a solid base. Dig your trench about 9¼ inches deep. Make it 4 to 8 inches wide.
The width depends on your brick layout. Compacted gravel going at least 4 inches deep creates firm, stable support for the bricks.
Drainage is key for lasting brickwork. Shape the ground with a slight slope to avoid water pooling.
Use gravel to help with drainage behind your bricks. Secure each brick row tightly with anchoring spikes every foot to keep everything steady.
Choosing the right thickness matters too. Standard clay brick pavers usually measure 2.25 inches thick.
So your trench depth must fit that plus gravel and sand layers. Dig carefully to match these layers for durable results that won’t shift or crack over time.
Key Takeaways
- Dig your trench 9¼ inches deep to fit bricks and base materials.
- Use 4 inches of compacted gravel for standard soil, more for clay.
- Lay anchoring spikes every 12 inches to stabilize brick rows.
- Shape the ground to direct water away, preventing drainage problems.
- Match trench width to brick layout: 4 inches for standing bricks, 8 if angled.
- Standard bricks are 2.25 inches thick; account for this in your trench depth.
How to Install Landscape Bricks Step-by-Step

Installing landscape bricks right starts with a solid base. Lay each brick carefully. Finish with proper drainage to avoid water problems.
Make sure the bricks stay level and stable by working in steps. Use the right tools.
Pack the base firmly to keep bricks in place. Taking your time here helps keep your bricks from shifting or tilting later.
Preparing the Trench and Base
Draw the boundary for the brick placement. Excavate a trench about 12 inches across and 4 to 6 inches down. This size secures the bricks along with their foundation properly.
Put in a 4-inch layer of 3/4-inch crushed gravel first. Compact it firmly with a hand tamper to avoid sinking.
Next, add a 1-inch layer of concrete sand on top. Level and smooth this sand so your bricks will rest evenly.
- Mark the area with a string line for straight edges.
- Dig the trench to the right depth and width.
- Compact the soil base at the trench bottom with a tamper.
- Pour in crushed gravel, then compact it well.
- Spread and level a layer of sand on the gravel.
Laying and Aligning Bricks
Place the first brick at one end of the trench. Use a rubber mallet to tap it lightly into the sand. Check its level with a carpenter’s level, adjusting the sand under it if needed.
Keep laying bricks, keeping a 1/8 to 1/4-inch gap between each. This gap helps lock the bricks with joint sand later. Place a few bricks, then check the whole line’s level.
Adjust as needed to keep it flat and straight. Do this often for best results.
- Lay the first brick carefully at the start of the trench.
- Tap bricks gently into the sand with a rubber mallet.
- Check the brick’s level front to back and side to side.
- Maintain consistent spacing between bricks for stability.
- Use the string line to keep bricks straight along the trench.
Backfilling and Finishing Touches
Pour crushed gravel behind your brick line for drainage. This gravel should be at least 12 inches wide behind the bricks. Backfill soil beyond the gravel, packing it firmly to prevent soil movement.
Sweep polymeric joint sand into the spaces between bricks. Mist the sand lightly with water to activate the binding agent. Clean off any residue from the brick faces to avoid a white haze.
- Add a wide band of crushed gravel behind the bricks.
- Backfill soil beyond the gravel, compacting it gently.
- Fill the brick gaps with polymeric joint sand.
- Lightly spray water on the joint sand to harden it.
- Clean brick surfaces to remove polymer residue.
Tools, Materials, and Brick Types Needed
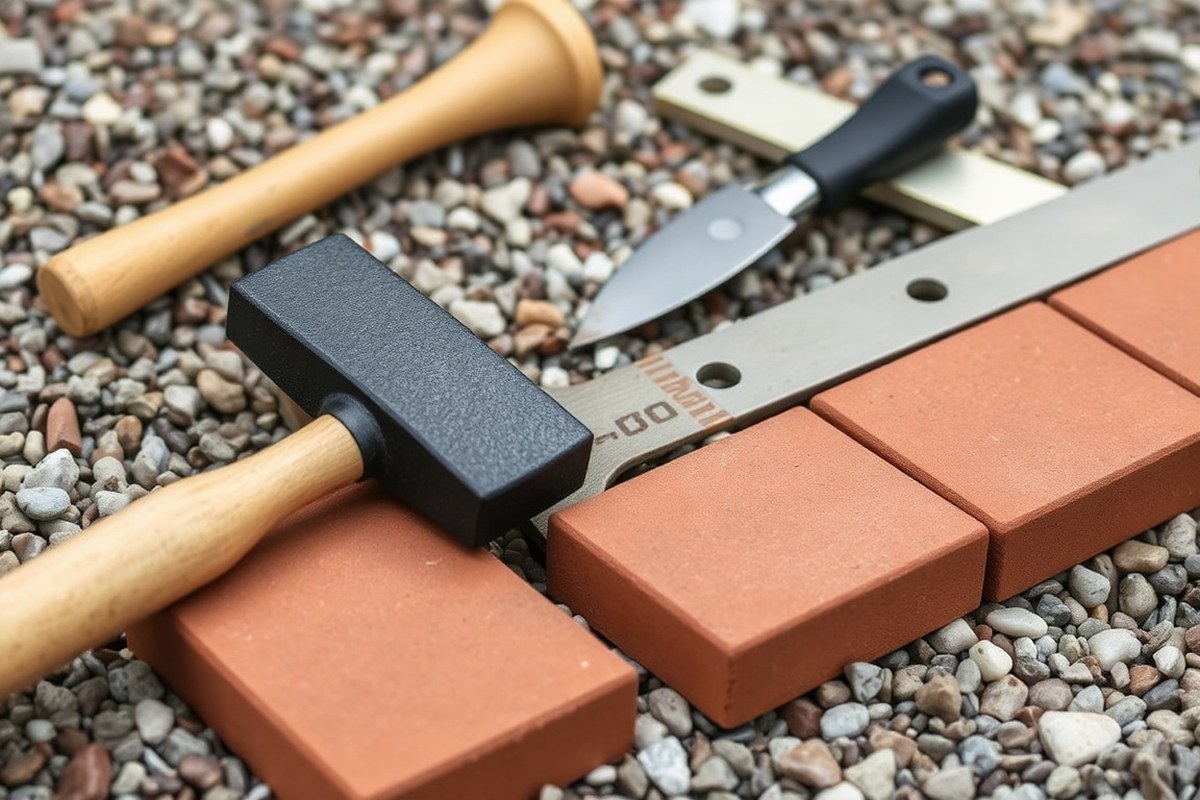
Start with bricks rated for ground contact, such as fired clay or concrete. These bricks handle outdoor conditions without crumbling or fading. Standard clay brick pavers usually measure about 2.25 inches thick, which works well for stable edging.
Your base should be firm and level to support the bricks and prevent shifting. You can use basic sand as a bedding layer. But always lock the bricks in place with polymeric sand for stronger joints.
Avoid soft or organic materials behind the bricks. These create gaps over time as they break down.
- Fired clay or concrete bricks (2.25-inch thickness preferred)
- Basic sand for bedding layer
- Polymeric sand for joint filling
- Metal or wooden stakes to hold bricks in place
- Masonry pencil for marking cuts
- Rubber mallet to adjust bricks gently
- Level and tape measure for alignment
Metal stakes keep the bricks tight against edging and prevent movement. Use a rubber mallet to tap bricks into place without cracking them. Mark cuts precisely with a masonry pencil to fit bricks cleanly at edges.
| Material | Purpose | Cost Range |
|---|---|---|
| Fired Clay Bricks | Durable edging with classic look | $0.50, $1.50 per brick |
| Concrete Bricks | Strong, weather-resistant, affordable | $0.30, $1.00 per brick |
| Basic Sand | Bedding layer for leveling | $3, $5 per 50 lbs |
| Polymeric Sand | Locks bricks and prevents weed growth | $15, $20 per 50 lbs |
Never use organic material such as mulch or compost as backfill behind bricks. It decomposes and causes gaps over time.
Preparing the Ground and Base for Stable Bricks
Start by digging a trench about 8 inches deep. This depth lets you add the right base materials and compact them well for stability. The trench should be 14 inches wide for plastic or aluminum edging.
This width works best behind your bricks. It gives enough space for the edging to fit well.
Make sure the trench follows a slight slope away from buildings or other structures. Aim for about a quarter inch slope for every foot of length. This helps with drainage and prevents water damage to your bricks and foundation.
Next, add a 3-inch layer of gravel at the bottom. Gravel helps water drain and stops the bricks from sinking or shifting. Spread the gravel evenly before compacting it using a vibrating plate compactor or hand tamper.
After compacting gravel, add a 2-inch layer of coarse sand on top. Bedding sand creates a smooth and level bed for bricks. It helps adjust to small ground shifts.
This keeps bricks stable over time. Compact this layer as well. But be gentle to keep the sand loose enough for slight adjustments.
The type of soil affects your base preparation. Clay soil holds water and expands, so extra drainage is needed. Gravel layers and proper slope become even more important in wet or freeze-thaw climates.
The National Concrete Masonry Association advises 95% compaction for the base. This firmly packs the soil and gravel mix. It helps prevent settling and frost heave.
Weather matters, too. In areas with freeze-thaw cycles, a flexible sand base prevents brick cracking. The sand moves with the ground changes.
This keeps your bricks safe during winter. Avoid cement or mortar bases because they don’t allow the ground to move slightly. Choose bricks rated for your climate to prevent cracking or fading.
Compact each layer thoroughly before adding the next. Compacting after each backfill creates uniform support, so your bricks stay straight and stable. Without proper compaction, you might see bricks wander off line or sink unevenly over time.
Getting a solid base takes time and some hard work. Usually, it takes a few hours to cover 100 square feet. Don’t rush this step if you want good results.
Gravel and sand usually cost between $1 and $3 per square foot. Price depends on quality and where you buy it.
Planning ahead helps keep your budget on track. This upfront work saves you repairs and uneven bricks later on.
Ensuring Proper Drainage Behind Landscape Bricks
Water buildup behind bricks can cause cracks and push the bricks outward. To keep water flowing away, you need drainage pipes installed below the bricks. Lay two 1-inch pipes made of galvanized steel or aluminum.
Place them parallel about 3 feet apart. Set the pipes right on the compacted gravel base.
Weep holes in the brick wall help water escape. Space these holes every 4 feet along the wall’s base. They stop water pressure and prevent soil from pushing the bricks around.
After setting the pipes, cover them with ASTM C33 sand. Mound the sand slightly above the pipes to let water drain freely into them. Avoid compacting this sand too much so water flows easily downward.
Cap stones on top help keep rain out of the bricks themselves. They stop water from seeping behind, which could weaken the wall.
Also, you can place a plastic or aluminum landscaping edge behind the bricks. This helps hold them in place discreetly and keeps soil from shifting.
Backfill the area behind with soil or mulch, based on your landscaping plan. Mulch preserves moisture balance and looks neat in flower beds.
Poor soil drainage means adding gravel before soil can help. Gravel improves water flow and stops pooling.
Inspect the wall after storms for signs of damage or clogged weep holes. Clear any blockage so water doesn’t build up again. Repoint mortar joints if you see cracks to prevent water from seeping through.
Proper drainage keeps water away from your home’s foundation. Standing water causes hydrostatic pressure, leading to basement leaks and foundation problems. Plan well and install drainage pipes and weep holes to protect your investment.
Cutting and Fitting Bricks for a Perfect Finish
Cutting bricks precisely helps fit curves, corners, and tight spots well. Use the right tools and follow safe steps to avoid breaks and chips. Plan cuts at the end of your project to prevent rework.
Choosing the Right Cutting Tools
A wet saw with a 10-inch diamond blade is best for most brick-cutting jobs. You can rent one for about $65 a day. Renting saves money when you don’t use it often.
It helps avoid buying expensive tools you rarely need. It cuts clean and suppresses silica dust with water, making it safer than dry cutting.
An angle grinder with a diamond blade suits small jobs. It handles quick cuts but chips may happen more. Use it carefully for neat edges.
For simple snaps or wedges, a 3-pound masonry hammer works well after scoring deeply. Choose the tool that fits your project size and complexity.
Don’t buy a wet saw unless you plan many brick or tile projects; rent instead.
Step-by-Step Brick Cutting Process
Mark your bricks clearly before cutting. Use a pencil and a speed square for straight lines to keep your cuts accurate. Always measure where the brick should end to avoid mistakes.
Hold the brick tightly on a flat, steady surface. Place anchoring spikes every 12 inches to keep it still. Slowly push the brick into the blade while water cools and reduces dust.
- Measure where the cut is needed.
- Mark the cut line clearly with a pencil and speed square.
- Set the brick on a firm cutting surface.
- Secure the brick with spikes or clamps.
- Turn on the wet saw and slowly feed the brick into the blade.
- For curves, score deeply, then snap the brick over a 2×4 with a hammer.
- Wear safety glasses and gloves for protection.
Cut bricks near the project’s end to avoid recutting if plans change.
Handling and Finishing Cut Edges
After cutting, check edges for chips or uneven spots. Use a brick hammer or masonry chisel to clean rough edges gently. This step helps bricks fit snugly, especially in curves.
Sanding sharp or rough edges smooths the surface and prevents injuries during installation. Clean any dust or debris from cut edges with a brush so polymeric sand bonds well. Proper finishing makes your brick work look neat and professional.
Handle bricks carefully after cutting to avoid breaks; store them flat and dry.
Common Mistakes and How to Avoid Them
Poor base preparation is one of the biggest mistakes when installing landscape bricks. Without a compacted, level base, bricks can shift and crack under weight.
Spend time spreading and firmly compacting gravel or sand to create a stable foundation. This upfront work prevents costly repairs later.
Inadequate drainage also causes problems. Water trapped beneath bricks can freeze and push them upward during cold months.
Always build a slope that directs water away from your bricks. Adding drainage pipes or gravel layers below helps keep water moving properly.
Misaligned bricks are a common issue, too. The way you lay bricks sets how they stay. Using patterns like herringbone distributes weight evenly and stops shifting.
Check alignment often using a level and straight edge. Small adjustments now save big headaches later.
- Compact the base with a plate compactor until solid and flat.
- Maintain a 1-inch fall every 8 feet for proper water runoff.
- Arrange bricks tightly with a small gap for sand to lock them.
- Use landscape stakes to keep edging straight and supported.
- Pass over bricks and avoid those chipped or stained face up.
- Add reinforcement if your wall exceeds 3 feet in height.
Uneven or tilting bricks happen when the base settles poorly or sand fills wash out. Spot-fix by lifting the affected bricks, adding or removing base material, and re-leveling. Avoid using rushing water which can erode base material, use a small amount carefully.
Bricks last decades if installed correctly with no cracking or moving. Take your time to follow base prep, drainage, and alignment tips. The extra effort can keep your outdoor space stable, safe, and looking sharp for years.
When to DIY and When to Hire a Professional
Build low walls under 3 feet tall yourself if the land is flat. You also need some experience in landscaping or masonry. These projects usually won’t require permits and have fewer safety risks.
Check local rules before you start. Many places make you get a permit for walls taller than 4 feet. Missing a permit can lead to fines or having to tear down your work.
Steep or tall walls need extra care. The higher your wall goes over 3 feet, the stronger the base must be. You should think about hiring a pro or even a structural engineer for these cases.
Working on steep land adds risk because bricks might slip or fall. A professional knows the right drain and soil support to keep the wall stable. DIY without these skills can cause unsafe big collapses.
Here’s a quick rule. Your wall is under 3 feet tall, on mostly flat ground. You have some hands-on skill.
You can build it yourself. Otherwise, try to hire a pro early.
Your checklist before starting DIY: check wall height and slope. Confirm if your local area needs permits.
Make sure you feel comfortable with masonry. Also, consider what is involved in digging, levelling, and using heavy tools.
Costs matter too. DIY saves labor charges but may take longer.
Professionals charge about $20 to $35 per square foot for brick walls, including materials. Hiring them means less risk and usually better long-term results.
Maintaining and Preserving Landscape Brick Installations
Keeping your landscape bricks in good shape takes regular cleaning, sealing, and occasional repairs. These steps protect bricks from stains, weather damage, and shifting joints. With simple tools and some effort, you can maintain a neat and durable brick installation year-round.
Regular Cleaning and Debris Removal
Dirt, leaves, and moss build up on bricks quickly, especially in shady or damp areas. Sweeping your bricks often with a stiff broom clears debris that traps moisture and causes stains. For thorough cleaning, use a garden hose with moderate pressure.
Rinse bricks gently to avoid damaging the joints. Avoid high pressure that might harm your bricks.
A mild detergent mixed in warm water helps remove tougher stains without harming the bricks. Avoid harsh chemicals or pressure washers, which can erode brick surfaces or loosen joint sand.
- Sweep loose dirt and leaves weekly or after storms.
- Rinse bricks monthly to wash away grime.
- Scrub stubborn stains gently with dish soap and a stiff brush.
- Avoid chemicals with bleach or acids to protect brick color.
- Clean moss and algae with a vinegar solution, testing a small spot first.
Use a gentle stream of water and soft brushes to avoid damaging your brick work.
Checking and Reapplying Joint Sand
Joint sand keeps bricks locked in place and prevents weeds from growing. Over time, it can wash out or break down, so regular checks are essential. Look for cracks or gaps in the joints that signal it’s time to add new sand.
Polymeric sand works best for repairs because it binds when wet, resisting erosion and pests. Here’s how to refresh your joints:
- Sweep away loose debris from joints.
- Spread a layer of dry polymeric sand diagonally across joints.
- Use a broom to pack sand firmly into gaps.
- Sweep away excess sand from the surface.
- Tamp the bricks lightly to settle the sand snugly.
- Spray bricks evenly with water to activate the binding agents.
- Allow at least 24 hours to dry before foot traffic.
Keep polymeric sand slightly below the brick surface by about 1/8 inch.
Sealing and Weatherproofing Bricks
Sealers protect bricks from moisture absorption, fading, and stains. Applying a breathable sealant every two to three years extends the lifespan of your layout. Pick a sealer made for outdoor bricks and pavers.
It should allow water vapor out but block liquid water. This helps protect bricks without trapping moisture.
Apply sealant after cleaning and drying your bricks thoroughly, preferably in mild, dry weather. Apply the sealer evenly using a brush or roller.
Follow the product instructions carefully. Avoid build-up or making the surface slippery by spreading it right.
- Choose a penetrating or film-forming sealer suited for bricks.
- Seal bricks during dry weather, above 50°F (10°C).
- Apply at least two coats for better protection.
- Let each coat dry fully before applying the next.
- Re-seal your bricks every 2 to 3 years or as needed.
- Test a small area first to check appearance and slip resistance.
- Use sealants to prevent mold, stains, and freeze-thaw damage.
Never seal bricks when rain or frost is expected within 24 hours.
Step-by-Step Action Plan to Install Landscape Bricks
This plan will guide you through installing landscape bricks efficiently. Follow these steps to ensure a strong, lasting result.
- Day 1: Gather Tools and Materials, Collect bricks, sand, gravel, and tools. Check everything matches your project size.
- Day 2: Mark and Clear the Area, Outline the layout then remove grass and debris. The space should be level and ready.
- Day 3: Prepare the Base, Spread gravel and compact it firmly. Use a level to confirm the surface is flat.
- Day 4: Add Sand Layer, Spread a 1-inch sand layer over gravel. Smooth and gently dampen sand to hold shape.
- Day 5: Lay and Fit Bricks. Arrange bricks in your chosen pattern. Cut bricks to fit as needed. Check each brick sits snugly and evenly.
- Day 6: Fill Joints and Compact, Brush sand over the bricks to fill gaps. Carefully tamp the bricks to set them in place.
- After 1 Week: Inspect and Touch Up. Walk around the area. Check for loose bricks or low spots. Add sand or re-tamp as required.
Frequently Asked Questions
How Do I Install Metal Landscape Edging with Bricks?
Lay the metal edging on the gravel behind your bricks. Press it firmly against the back of the bricks for a neat look and solid hold. This keeps your edging low-maintenance and well-hidden.
Can I Reuse Old Bricks for Landscape Edging?
Yes, you can reuse old bricks if they are not cracked or crumbling. Clean them well and check their shape. Old bricks may add character, but weak ones risk shifting over time.
What Is the Best Way to Prevent Bricks from Moving Once Installed?
Use a compacted gravel base and firm edge restraints behind your bricks. This setup stops bricks from shifting and keeps your landscape tidy. Avoid loose topsoil under edge spikes to prevent creeping edges.
How Do I Ensure Landscape Bricks Don’t Cause Soil Erosion?
Build your landscape brick wall with proper drainage and solid footing. Include drainage pipes to redirect water and slope the ground slightly. Poor drainage causes soil to wash away and damages the wall.
How Thick Should the Base Layer Under Landscape Bricks Be?
The base should be at least four inches of compacted gravel. A thicker base helps stabilize the bricks and prevents sinking. The exact depth may vary with brick type and use area.
What Pattern Options Exist for Laying Landscape Bricks?
You can arrange bricks in classic lines or decorative patterns. Patterns like herringbone or basket weave add style and strength. Choose the look that fits your yard’s design and practical needs.
Key Points to Remember
Landscape brick installation gives your yard a clean, attractive look. Take your time following each step carefully. Start by choosing your bricks and sketching your layout today.