How to Install Metal Edging for Landscaping a Complete Step-by-Step Guide
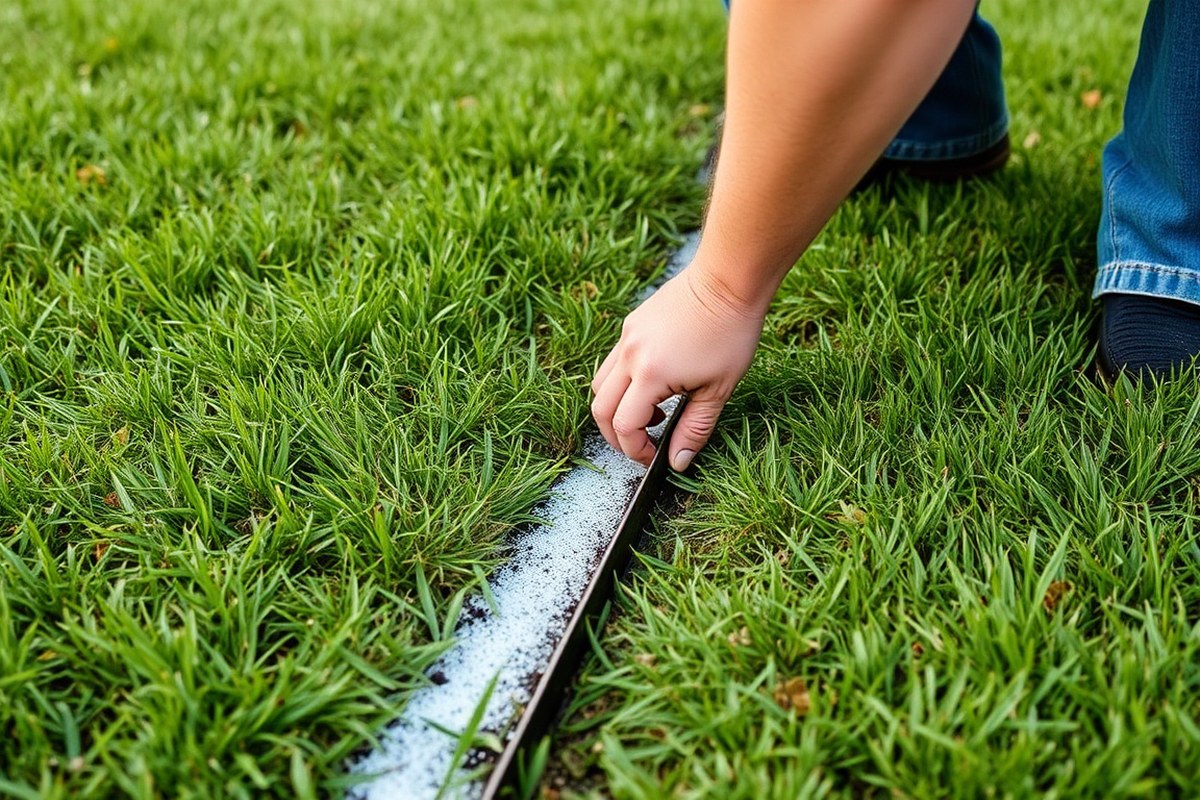
Figuring out how to install metal edging for landscaping is easier than you think. First, dig a trench about half the edging’s width deep. Then set the metal strip and secure it with stakes every 18 to 30 inches.
Use edging that rises 1 to 2 inches above the soil surface. This height helps stop grass from growing over it. It creates a clear barrier around your garden beds.
Plan your layout carefully and measure twice to avoid waste. Starting with a clear trench will help the edging sit firmly and last a long time.
Metal edging can last 20 to 30 years. So taking your time now saves work later. Choose steel or aluminum edging panels for durability.
They mostly come in 10-foot lengths. Typical heights run between 2 and 4 inches.
Key Takeaways
- Create a trench to set the edging into the ground. Dig it 4 to 6 inches deep. Make the trench as wide as the edging strip.
- Leave 1 to 2 inches of edging above ground for a clear border.
- Secure edging with stakes spaced every 18 to 30 inches for stability.
- Measure your landscape carefully before cutting any metal panels.
- Use a spade or edging tool to create a straight, clean edge line.
- Drill holes if your metal edging does not come pre-drilled for stakes.
Choosing the Right Metal Edging for Your Landscape

Metal edging comes in several types, each suited for different landscaping needs. Steel and aluminum are the main options.
Steel is tough and rust-resistant if galvanized. Aluminum bends easily and suits curved beds.
Gauge refers to the metal thickness. Lower gauge means thicker metal.
Thicker edging stands up better in high-traffic areas or steep slopes. Thinner metal works well for flower beds and light borders.
Common styles vary from 2 to 6 inches tall above ground. Shorter edging defines flower beds or separates lawn from paths. Taller edging works better for driveways or heavy mulch beds.
| Product / Type | Height Range (Above Ground) | Best For |
|---|---|---|
| Standard Steel (14, 16 gauge) | 2, 4 inches | Flower beds, lawn borders |
| Colmet Steel Edging | 2 inches | Shallow mulch, lawn-path edges |
| Core Edge (black metal) | 3, 4 inches | Deep mulch beds, modern designs |
| Edge Right (clamp system) | 3, 4 inches | DIY tool-free connections |
| Heavy-Gauge Steel (10, 12 gauge) | 4, 6 inches | Driveways, high traffic, slopes |
| Aluminum Edging | 2, 4 inches | Curved beds, lightweight flexibility |
Choose galvanized steel for durability in busy or wet areas. It handles wear and resists rust well.
Pick aluminum if your beds curve a lot. It’s easier to bend and install.
Thicker gauges cost more but last longer where stress is heavy. For simple flower beds, standard gauge steel or aluminum works fine. Use the 10, 12 gauge steel where you need strong edging for driveways or slopes.
Planning and Measuring Your Edging Layout
Measure the total length of your garden beds before ordering or cutting metal edging. Add about 10% extra length to cover curves and cuts around corners. Mark the layout clearly with string or a garden hose.
This helps you see the shape before you install. It makes planning easier.
Measuring Your Garden Beds
Start by removing any plants or debris from the edge of your garden bed. Use a tape measure to get the length of the edge. Measure where you want to install the metal edging.
Write down this number. Add 10% extra length for beds with curves or odd shapes.
This gives you enough material to cut and bend. It prevents running short.
Measure around corners or bends carefully, following the curve if possible. Write down these measurements carefully. You’ll need them when cutting the metal edging.
Keep the notes handy during installation. Double-check all numbers before you buy or cut the edging.
Marking Straight Edging Lines
Use wooden stakes and a string line to mark the straight edges of your layout. Hammer the stakes into the ground at each end of the section. Tie a string tightly between them to create a clear guide for your edging.
For longer edges, put stakes every 18 to 30 inches. This keeps the string line straight and stable. It helps keep your layout accurate.
This setup lets you see the exact shape and length of your border. Mark the ground with chalk along the string to show where your edging will go.
Planning for Curves and Corners
Curves and corners need extra attention when planning your edging layout. Use a garden hose to lay out curves smoothly.
You can easily adjust it until the shape looks right. Adding stakes every 12 to 18 inches along curves helps keep the edging steady later.
Plan for mitered cuts at sharp corners. This means cutting the metal pieces at an angle so they fit neatly together. Keep in mind that tight curves might require more extra material than gentle curves.
Tools for Accurate Layout
A tape measure is key to taking all your length measurements. Wooden stakes help hold strings or hoses in place during marking. Use a string line or garden hose to mark straight sections.
Outline curved sections clearly with the hose. This shows the bed shape well.
Tape, chalk, and a hammer are helpful for marking and securing the layout. Carry gloves while handling stakes and edging to protect your hands. These simple tools cost around $10 to $20 at most home centers.
- Clear the edge of your garden bed, removing plants or debris.
- Measure the length along the edge with a tape measure.
- Add 10% extra length for curves and cutting waste.
- Place wooden stakes at each end of the planned edging line.
- Run a string line or garden hose between stakes to mark the edge.
- Mark the ground along the string with chalk for visual guidance.
- For curves, adjust the garden hose shape and add extra stakes.
- Note lengths and angles for corners that need mitered cuts.
Double-check your measurements before ordering or cutting any metal edging. Miscounts can waste money and time.
Preparing the Ground and Digging the Trench
Prepare the ground by clearing all grass, weeds, and loose debris. Dig a trench about 2 to 4 inches deep and a bit wider than your edging. Make sure the ground is even and free from rocks before setting the edging.
Ideal Trench Dimensions
Dig your trench deep enough for the edging. Bury about one-third to half its height. This helps the edging stay firm in the ground.
For example, a 6-inch edging should have 2 to 3 inches hidden underground. Make the trench 2 to 3 inches wider than the edging.
This space helps you place it easily. It also makes backfilling simpler.
Set the trench depth so the edging’s top is level. It should match the soil or lawn height exactly.
Burying the edging too deep hides it from view. Too shallow placement can let the edging shift or tip.
Clearing Grass and Debris
Start by removing grass and any existing soil from the marked area. Clearing the trench path removes roots and debris.
This prevents roots from pushing the edging up later. Use a shovel or rake to pull out rocks, roots, and clumps of soil.
Keep the trench base level and free of debris. Leaving rocks or roots in the trench makes the edging unstable.
It can wobble or move over time. A smooth trench gives a steadier, longer-lasting installation.
Dealing with Rocky or Uneven Soil
Rocky or uneven ground needs extra attention before digging. Remove large stones and level the area using a hand tamper or by adding soil. This helps the edging sit firmly and look straight.
On slopes or uneven ground, dig small terraces. These steps help hold the edging steady in place.
Water very hard soil a day before digging. This makes trenching easier.
Using Landscape Fabric for Weed Control
Put landscape fabric in the trench before the edging. It stops weeds from growing along the border.
The fabric should cover the trench’s bottom and sides but allow water to drain. This reduces maintenance and keeps the area tidy.
Choose a durable, permeable fabric designed for gardens. Avoid plastic sheets because they block water and can cause drainage problems. Secure the fabric with landscape staples to keep it in place during installation.
Follow these steps for digging your trench and preparing the ground:
- Mark the edging path with stakes or spray paint.
- Remove grass, weeds, and debris along the marked line.
- Dig a trench 2 to 4 inches deep and 2 to 3 inches wider than the edging.
- Clear rocks, roots, and clumps from the trench bottom and sides.
- Level and smooth the trench base using a rake or hand tamper.
- Optionally, lay landscape fabric inside the trench for weed control.
- Adjust the trench depth to make the edging top flush with the surface.
Cutting and Shaping Metal Edging for Installation
Cutting and shaping metal edging for landscaping needs the right tools and techniques to work safely. You can cut most metal edging with tin snips. They are easy to handle for thin strips.
Tin snips work well for narrow metal strips. To form curves, bend the metal gently using your hands.
You can also use a block of wood or a bending tool. Avoid sharp kinks while shaping.
Selecting the Right Cutting Tools
Tin snips are best because most metal edging is thin. They make cutting easier than other tools. Use tin snips for quick, smooth cuts.
Use a hacksaw or electric saw for thicker edging. These tools make cleaner cuts but need more effort.
They work better on wide or thick metal. Always wear safety goggles and gloves to protect from sharp edges and metal shards.
Have these tools ready before you start:
- Tin snips: easy for 4-6 inch wide edging panels
- Hacksaw or metal-cutting saw: for thickness over 0.05 inches
- Measuring tape and marker: to mark cut lines accurately
- Gloves and safety glasses: to protect your hands and eyes
Cutting Straight Sections
Cutting straight sections involves measuring carefully and using the right tool for clean cuts. Mark your cut line clearly with a permanent marker. Clamping the metal to a workbench helps keep it steady and prevents slipping.
Follow these steps to cut the edging:
- Measure the length you need and mark the cut clearly.
- Secure the edging on a stable surface or workbench.
- Put on safety gloves and glasses to prevent injury.
- Use tin snips or your chosen saw to cut slowly along the mark.
- Smooth sharp edges with a metal file or sandpaper.
Bending and Forming Curves
Most metal edging bends easily if you handle it gently and evenly. Place a block of wood on top of the edging. This helps form smooth curves without sharp bends.
It protects the metal while shaping. Avoid tight bends that can cause the metal to crack or spring back harshly.
Support the inside of the curve when bending edging. Gently pull or push it to shape as needed.
Use steady pressure to avoid damage. Let the metal rest briefly after bending to relax any stress and maintain the curve.
Preparing Ends and Overlaps
You should allow extra length on your cuts for overlapping joints. Usually, an overlap of 2 to 4 inches is enough to join two pieces securely. Overlaps keep straight lines firm and curves tight, preventing gaps.
Trim ends cleanly before joining to avoid rough edges that catch soil or plants. Connect sections using stakes inside the curve for support.
For straight runs, place stakes every 4 to 5 feet. This keeps the edging aligned during install.
Positioning and Securing the Edging in Place
Metal edging should stick up about 1 to 2 inches above the ground. This height keeps the edging visible and helps contain soil or mulch. For strips taller than 4 inches, dig the trench slightly shallower.
Leave about half an inch of the edging above ground. This helps the edging stand slightly proud.
Stakes hold the edging firmly in place, so space them evenly along the strip. Place stakes about every 18 to 24 inches for good stability. Your edging has pre-drilled holes.
Insert stakes at a 45-degree angle through each hole. Tap them in with a rubber mallet.
Connecting strips requires overlapping them by about 1 to 2 inches. Slide the end of one strip behind the other so they fit snugly. Place a wooden stake behind the overlap for extra strength.
Then screw both pieces together using the recommended screws. This keeps the edging secure.
Here is a step-by-step way to position and secure metal edging:
- Set the edging strips into the trench following your planned layout.
- Make sure the edging sticks up about 1 to 2 inches above the soil.
- Overlap connecting strips by 1 to 2 inches to join pieces tightly.
- Insert stakes through pre-drilled holes at 18 to 24 inch intervals.
- Use a rubber mallet to tap the stakes firmly into the ground.
- Place wooden stakes behind overlaps, then fasten the edging to them.
- Check alignment with a level and adjust as needed for straight lines.
Do not skip stakes at overlaps, this prevents shifting or bending later.
Backfilling and Finishing Around the Edging
After setting your metal edging, filling the trench properly keeps it firm and neat. Use the dirt you removed to backfill around the edging. Pack the soil firmly to keep the edging from moving.
Don’t press so hard that the soil turns rock solid. Aim for firm but not compacted soil.
Adding mulch or gravel after backfilling adds a clean look and helps soil stay put. Mulch also keeps moisture in and stops weeds next to plants. Gravel fits well around walkways or tree rings and helps with drainage.
On sloped ground, putting a 1-inch gravel layer at the trench bottom before backfilling improves drainage. It stops the edging from sliding downhill over time. Clean off any dirt from the edging to keep its edges sharp and clear.
These steps guide you through secure backfilling and finishing surface details for great edging results:
- Fill the trench with soil or gravel. Use soil for most spots; add gravel first on slopes for drainage.
- Firmly press down the soil. Compact soil around the edging by hand to hold it steady.
- Remove excess dirt from metal edging. Brush or wipe dirt away so the edging stays visible and tidy.
- Spread mulch or gravel inside the garden bed. Keep the top level with or just below the edging’s top edge.
- Check for gaps or loose spots. Refill and press soil or gravel tight to stop erosion or movement.
- On walkways, consider filling cracks with sand. This prevents debris buildup where edging meets paths.
- Water lightly after backfilling mulch. This settles materials and helps mulch hold moisture.
Filling a simple bed edge usually takes 20 to 30 minutes. That time is needed to backfill and finish properly. Make sure to work evenly for a clean edge.
Proper backfilling protects slopes and keeps your lawn or garden bed neat. Skipping compaction risks edging shifting after rain or over time. Loose soil means more repairs and re-digging later.
Handling Curves, Corners, and Slopes Effectively
Bending metal edging around curves and corners takes care and the right method. Too sharp a bend can kink or damage the edging. Using stakes helps hold the shape while you work, especially on curves and slopes.
On tight curves, bend the edging gently by hand or with a bending tool. Do it slowly to avoid sharp kinks.
Stakes should go inside the curve near bends. They hold the shape and keep the edging firm against the ground.
At corners, overlap the ends of edging panels by a few inches. Drive a stake through the overlap inside the edging. This secures the connection and keeps corners straight and stable.
For slopes, set the edging slightly above ground on the downhill side. This prevents soil from washing out.
Use extra stakes here, spaced closer together, about every 12 inches. That strong hold stops the edging from sliding downhill over time.
Follow these steps to handle curves, corners, and slopes properly:
- Mark the curve or corner line on the ground with spray paint or string.
- Bend the metal edging slowly along the marked line by hand or with a bending tool.
- Place a stake inside the curve or at the corner overlap to hold the shape.
- Overlap the edging ends by 3 to 6 inches at corners. Then, secure them with a stake through the overlap. Make sure the stake holds the edging tight.
- For sloped areas, position the edging so the lower edge is just above the soil level.
- Drive stakes every 12 inches near curves and slopes for better support.
- Adjust the shape as needed by moving stakes before final backfill.
Bending edging gently over several feet creates smooth curves. Overlapping panels at corners gives a neat joint and strong hold. You’ll need more stakes on slopes or sharp curves to keep the metal from shifting.
Skipping stakes inside curves can cause problems later. The edging might pull out or lose shape after some rain. That weakens your garden’s neat look.
Bending the edging correctly takes some time. Placing stakes properly also requires care. Usually, both tasks take about 30 to 60 minutes per corner or curved bed.
Stakes cost around $1 to $3 each, depending on type. Using metal or heavy-duty plastic stakes works best for firm support. Plastic stakes can break if hammered too hard.
Common Mistakes and How to Avoid Them
One common mistake is not smoothing sharp edges after cutting metal edging. Sharp edges can cause injuries and catch on clothes or gloves. Use a file to sand down any rough parts right after cutting.
Uneven installation often happens when the trench is too shallow or the edging isn’t well secured. Dig the trench deep enough so the edging sits firmly, about 3 to 4 inches deep. Secure it with stakes or spikes every 12 to 18 inches to stop movement or leaning.
When edging moves or leans later, the supports are likely too far apart or the soil wasn’t packed tightly. Drive stakes closer, about every foot, and pack the soil firmly as you backfill. This keeps the edging stable against lawn mowers and foot traffic.
| Mistake | Effect | Fix |
|---|---|---|
| Sharp Edges after Cutting | Injury risk | File edges smooth |
| Shallow Trench | Edging moves or leans | Dig trench 3, 4 inches deep |
| Long Gaps Between Stakes | Edging shifts over time | Place stakes every 12 inches |
| Loose Backfill Soil | Loss of edging stability | Tightly pack soil when backfilling |
| Ignoring Curves or Corners | Edges bend or break | Cut and shape metal carefully |
Look out for these warning signs. When edging leaks soil or tilts away from the bed, it probably needs more support. Rust spots or dents can signal early wear but steel edging resists damage well.
Always wear gloves and file sharp metal edges immediately to avoid cuts during and after installation.
A few pro tips can save time and effort. Mark the edging line clearly before digging to keep it straight.
Check stakes visually every few weeks and tighten loose spots. Clean metal edges before backfilling for a better fit.
Metal edging is low maintenance, but careful installation means it lasts longer. Spacing stakes properly and smoothing edges reduce future fixes and injuries. Make these small efforts upfront to enjoy a sharp, solid border around your landscaping.
Step-by-Step Action Plan for Installing Metal Edging
Follow this plan to install metal edging smoothly and get clean borders. Each step helps track your progress and ensures lasting results.
- Day 1: Mark your edging line with spray paint or a garden hose. Check that the line follows your desired shape and is smooth.
- Day 2: Dig a trench along the marked line about 4 inches deep and wide. The ground should be firm and level inside the trench.
- Day 3: Cut your metal edging to fit using a hacksaw or metal snips. Make sure each piece matches your trench length.
- Day 4: Place the edging into the trench with the top edge slightly above ground level. Press firmly so the edging stands straight.
- Day 5: Secure the edging with metal stakes, spacing them every 12 to 18 inches. Test the edging by gently pushing to confirm stability.
- Day 6: Backfill the trench with soil, packing it tight around the edging. Level the soil with a rake and water lightly to settle it.
- After 1 Week: Inspect the edging for any shifting or gaps. Tap stakes deeper if any part feels loose or wobbly.
Frequently Asked Questions
How Deep Should I Dig the Trench for Metal Edging?
Dig the trench about 4 to 6 inches deep to secure the edging firmly. This depth keeps the metal steady and helps prevent it from shifting over time.
Can I Install Metal Edging on a Slope?
Yes, you can install metal edging on slopes by stepping it down in short sections. This prevents gaps and keeps clean lines even on uneven ground.
What Tools Do I Need to Cut Metal Edging?
Use a hacksaw, tin snips, or an angle grinder for cutting metal edging. Make sure to wear gloves and eye protection when cutting metal.
How Do I Prevent Metal Edging from Rusting?
Choose rust-resistant metals like aluminum or galvanized steel to avoid rust. Applying a protective coating helps maintain appearance longer.
Can I Install Metal Edging Without a Trench?
Digging a trench gives more stability for edging installation. Some thin metals can also be pressed directly into the soil.
This works if you want a quicker setup. However, this may cause shifting and isn’t recommended for long term.
How Do I Handle Corners When Installing Metal Edging?
Bend the metal gradually using a bending tool or by hand in small steps. This avoids sharp kinks and keeps the edges smooth for a neat look.
Wrapping Up
Your metal edging will hold firm and look neat with careful setup and maintenance. Start by marking your border line clearly today. This small step sets you up for success in your landscaping project.