How to Install Landscape Timbers on a Slope: A Complete Guide with Proven Tips
Wondering how to install landscape timbers on a slope? Start by digging a trench for the first row to hold the timbers firmly. For shallow slopes under 10 degrees, dig about 8 inches deep.
Start digging on the higher side. This helps the timbers anchor well.
Next, position the first timber carefully to set the alignment and level. This timber is the base for all others. So double-check it is straight and secure before moving on.
Use 4-inch wood screws to fasten timbers together temporarily. Drill holes every 4 feet through the timbers.
These holes hold long-term anchors. Anchors keep timbers stable on the slope.
Key Takeaways
- Dig trenches 8 inches deep for slopes under 10 degrees for proper timber support.
- Position the first timber carefully to create a level base for the slope.
- Use 4-inch screws to temporarily fasten timbers before final anchoring.
- Drill holes spaced 4 feet apart through timbers for secure anchoring rods.
- Keep timber width at 4 feet or less for easier access and maintenance.
- Remove roots and organic matter before installing timbers to prevent movement.
How to Install Landscape Timbers Securely on a Slope
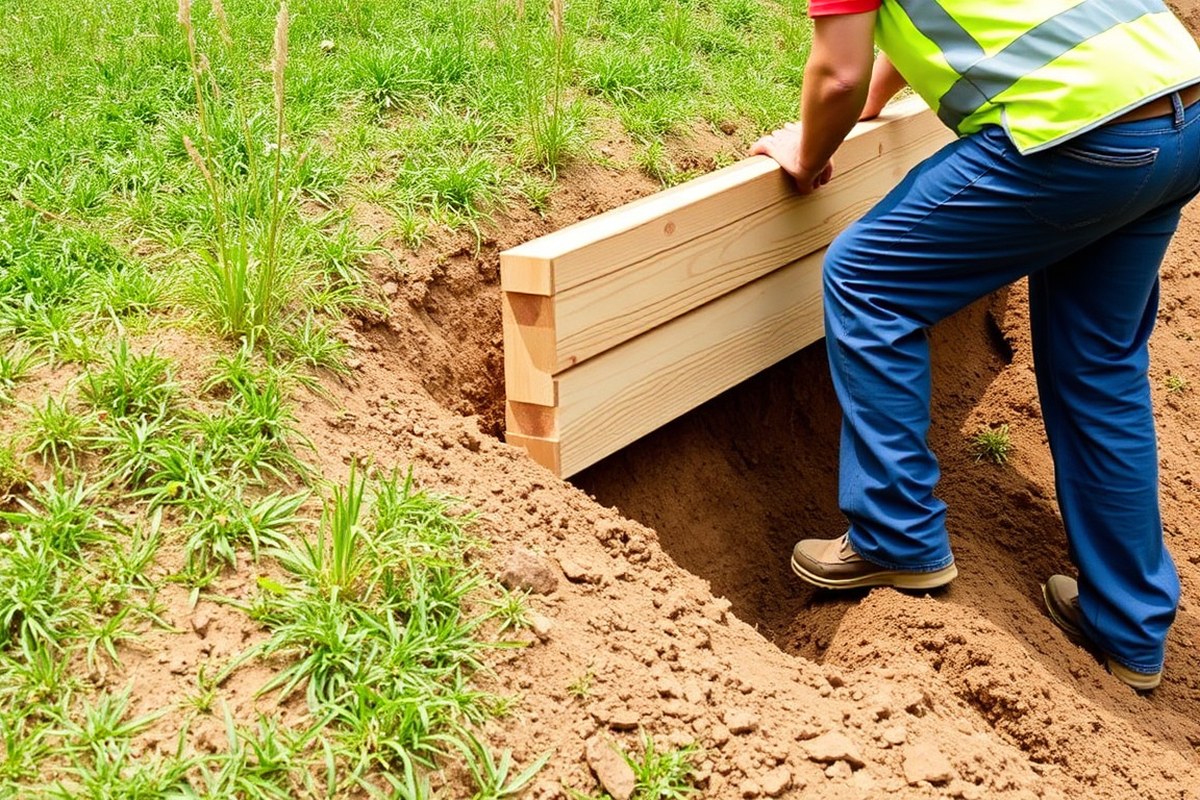
Start by marking where you want to place the first timber. Dig a trench deep enough to hold it steady against the slope. The trench depth depends on how steep the slope is.
For slopes under 10 degrees, dig about 8 inches deep. Steeper slopes need deeper trenches for stability. Steeper slopes may require trenches deeper than 8 inches to ensure stability.
Clear away roots, rocks, and loose soil from the trench. This gives the timber a firm base to rest on.
Use a level to check that each timber sits flat and even, especially across uneven ground. The first timber sets the line and level for the rest of your installation.
Secure each timber to prevent shifting as soil settles or erodes. Drive stakes or long metal spikes through the timber into the ground.
Position stakes every 2 to 3 feet behind the timber for the best hold. For extra strength, use rebar pounded directly through stacked timbers if building a retaining wall.
- Clear the slope area of plants and debris where timbers will sit.
- Mark a straight line along the slope’s base for timber placement.
- Dig a trench 8 to 12 inches deep, adjusting for slope steepness.
- Check the trench is level side to side before placing timbers in it.
- Set the first timber in the trench and level it front to back.
- Drive stakes or spikes every 2 to 3 feet behind the timber for anchoring.
- Repeat the process for each additional timber, stacking and securing as needed.
Be sure the trench width matches your timber thickness for a snug fit. This prevents wobbling or leaning over time. Avoid placing timbers directly on soft ground without a trench, which can cause shifting and collapse.
Leveling is important on uneven slopes. Dig deeper on the high side to create a flat base for the timber. Each timber should sit firmly in its trench.
Use a carpenter’s level to check if it is even. Make sure the timber doesn’t rock or tilt.
Choosing the Best Materials and Tools for Sloped Timber Installation

Softwoods like pine and fir are common for landscape timbers. They naturally resist decay when treated but may contain chemicals harmful to plants or animals.
Choose timbers treated with copper azole (CA) or alkaline copper quaternary (ACQ) for safer, long-lasting protection. Avoid older chromated copper arsenate (CCA) treated woods due to toxicity concerns.
Using treated wood is necessary to prevent rot and insect damage on slopes. Untreated wood will break down much faster. Use landscape timbers that are at least 4×4 inches thick.
These provide better stability. They last longer when holding back soil.
| Wood Type | Treatment | Durability | Safety for Plants | Approx. Cost per 8ft Timber |
|---|---|---|---|---|
| Pine | ACQ or CA treated | High | Safe for most plants | $12 – $18 |
| Fir | ACQ treated | Moderate to high | Safe | $10 – $16 |
| Untreated Softwood | None | Low (rot prone) | Safe but short-lived | $6 – $10 |
| CCA Treated Wood | CCA (older) | Very high | Potentially toxic | $5 – $10 |
For fasteners, use 4-inch galvanized wood screws. They hold timbers tightly and resist rust.
Drill pilot holes about every 2 feet into the timber to avoid splitting. To temporarily secure timbers during placement, screwing them together is quick and reliable.
Anchors like rebar stakes are pretty common. Use 12-inch galvanized spikes or 2-foot rebar rods. Drive them through the timber into the soil.
This keeps the timber firmly in place. Landscape spikes and metal stakes also work as alternatives. For some slopes, metal T-posts or wooden stakes can provide extra support.
You will need a shovel and heavy gloves. Also get a handsaw or circular saw, a drill with a spade bit, a hammer or sledgehammer. Don’t forget a level and tape measure.
A hand tamper helps compact the soil beneath the timbers for a stable base. Bringing these tools will save you time and trouble.
Double-check that timber treatments do not harm nearby plants or pets before installation.
Preparing and Leveling the Ground Before Timber Installation
Start by clearing the slope of all plants, roots, and debris. Then dig out the area to form a level base for the timbers. Adding a gravel layer helps with drainage and stops timber decay.
Clearing Vegetation and Organic Matter
Remove grass, weeds, and roots from the timber installation zone. Pull them out by hand or use a shovel to cut through tough roots. Clear any rocks or loose soil that could affect the timber’s foundation.
Organic material left beneath the timbers can trap moisture. This leads to faster wood rotting and unstable walls. Clearing everything ensures a solid, dry base for your timbers.
Leveling and Grading the Slope Surface
Dig a trench where each timber will sit, making the trench level across the slope. Use a carpenter’s level to check each spot as you go. Fill low spots with soil and remove high spots until the area is flat and even.
You want the base to prevent water pooling behind the timbers. A slight slope away from the wall can prevent pressure buildup. Shims can help if small height adjustments are needed before placing the wood.
Adding Gravel or a Drainage Layer
Lay a layer of landscape fabric over the cleared and leveled ground first. This stops weeds from growing up through your timbers. Add 1 to 2 inches of coarse gravel or sand on top.
This should go over the fabric. It helps keep everything stable.
This gravel layer aids water flow away from the wood and prevents soil erosion. It also keeps timbers from sitting directly on wet soil, which extends their lifespan. Spread and compact the gravel evenly before placing the timbers.
Follow these steps to prepare the ground properly:
- Pull out all plants, weeds, and roots along the slope area.
- Remove rocks and loosen any hard-packed soil in that zone.
- Dig trenches along the timber lines, aiming for a level base.
- Use a level and shovel to adjust the soil until flat and even.
- Roll out landscape fabric on the cleared trenches to block weeds.
- Spread 1-2 inches of coarse gravel or sand evenly on the fabric.
- Compact the gravel to create a stable, draining base for timbers.
Cutting and Joining Landscape Timbers on Uneven Slopes
Measuring landscape timbers on uneven slopes needs careful attention. Use a tape measure to follow the ground’s contour closely. Mark each timber where it meets the slope to get an accurate fit.
Cutting timbers requires a steady hand and the right tool. A circular saw with a carbide-tipped blade works best for clean, straight cuts. Cut slowly along the marked line to avoid splintering the wood.
Joints must be staggered like bricks to add strength. This means the end of one timber should not line up with the one below it. Overlapping joints lock the timbers together and stop shifting over time.
Fasteners need to hold timbers firmly, especially at cut ends. Use galvanized spikes or 2-foot rebar driven through the timber into the ground. This prevents movement and keeps everything stable.
Follow these steps to measure, cut, and join timbers well on a slope:
- Trace the slope on each timber by placing it on the ground. Mark where it touches the surface.
- Use a level along the timber to note uneven spots needing cuts.
- Set your circular saw to the right depth to cut through the entire timber thickness.
- Cut along your marked line slowly for clean edges without splinters.
- Lay the first row of timbers at the base of the slope. Overlap the joints by 4 to 6 inches for strength.
- Place the second row with staggered joints, so no two ends line up vertically.
- Drive galvanized spikes or rebar through each timber’s end into the soil for security.
Anchoring and Securing Landscape Timbers for Stability on Slopes
To stop landscape timbers from shifting, use strong anchors. Rebar, spikes, stakes, or deadman anchors work well. These keep timbers steady on slopes.
Each method suits different timber heights and slope steepness. Deadman anchors work best for steep slopes or tall timbers.
They tie timbers deep into the slope. This gives extra hold and stability.
Using Rebar and Landscape Spikes
Rebar stakes and galvanized spikes hold timbers firmly in place. Drive them through wood into the soil. This keeps timbers from moving.
These corrosion-resistant metals resist rust and last outdoors. Drill holes about every 4 feet through your timbers.
This spaces anchors evenly along the length. Even spacing gives the best grip.
Rebar works best on slopes under 30 degrees with timber heights below 2 feet. Drive spikes or heavy-duty screws at least 12 inches deep. Make sure they go into undisturbed soil.
This helps keep anchors secure. They fix timbers in place and reduce shifting or tilting on mild slopes.
Installing Deadman Anchors for Added Support
Deadman anchors brace timbers against soil pressure on steep slopes or for tall walls. This method uses a buried timber or metal piece behind. It goes perpendicular to the slope and connects with rod or cable.
This holds the main timbers in place. It pushes soil weight back and stops the wall from moving forward.
Follow these steps to install deadman anchors:
- Dig a trench 2 to 3 feet deep behind the timber wall. Make it wide enough to bury the deadman anchor. This anchors the wall firmly.
- Place a sturdy timber or concrete block (the deadman) horizontally in this trench.
- Attach a rebar, steel rod, or heavy cable to the deadman. Connect it to the back of the timber wall. This ties the archor securely.
- Tighten the connection and backfill the trench with soil, compacting it firmly.
- Repeat deadman anchors every 4 to 6 feet along the slope for consistent support.
Deadman anchors add extra strength, especially on slopes steeper than 30 degrees. Skipping them risks wall failure.
Spacing and Positioning Stakes and Fasteners
Space stakes or spikes about every 4 feet apart. Keep solid contact with both timber and soil. This helps the wall stay strong.
Place them through the center of each timber so the load spreads evenly. For corners, intersections, and joints, use extra spikes or rebar to stop any shifting.
On steep slopes or tall timbers, space anchors 2 to 3 feet. Add extra anchors closer together. This improves stability and strength.
Putting a few timbers perpendicular inside the slope also helps lock everything in place. This cross-bracing stops timbers from warping or moving downhill over time.
| Anchoring Method | Slope Steepness | Timber Height | Typical Spacing | Use Case |
|---|---|---|---|---|
| Rebar Stakes | Up to 30° | Up to 2 ft | 4 ft apart | Standard for mild slopes and short walls |
| Galvanized Spikes or Screws | Up to 30° | Up to 2 ft | 4 ft apart | Fastening timbers securely against soil shifting |
| Deadman Anchors | 30° and steeper | Above 2 ft | 4 to 6 ft apart | Reinforces tall walls and steep slopes |
| Additional Stakes/Perpendicular Timbers | All slopes | All heights | Every 2 to 4 ft near corners and joints | Extra stability and locking of timber layout |
Managing Drainage and Soil Erosion Behind Timber Walls on Slopes
Water drainage behind landscape timber retaining walls prevents pressure buildup and soil damage. Install a perforated pipe at the wall’s base. Surround it with gravel.
This helps water flow away from the slope. Backfill soil gradually in layers, compacting gently as you go to avoid gaps where water pools.
Using landscape fabric behind the wall keeps soil from washing out while letting water through. Choose a non-woven fabric that lets water pass but stops soil movement. Put a few inches of mulch over the fabric.
This stops erosion. It also keeps the fabric from moving.
- Dig a 4 to 6-inch deep trench for the first timber row.
- Place perforated drainage pipe at base, wrapped in landscape fabric.
- Add at least 6 inches of gravel behind the pipe for good flow.
- Lay non-woven landscape fabric over gravel before adding soil.
- Backfill soil gradually and compact after each layer.
- Cover exposed fabric with mulch to control surface erosion.
- Install wooden stakes (“deadmen”) tied to timbers for extra hold.
Keeping drainage clear prevents water from pooling and damaging your wall. Check drainage pipes each spring and after heavy rain, removing debris or soil blocking flow.
Inspect mulch layers yearly and refresh with new material if washout exposes fabric or soil. Regular maintenance stops erosion before repairs become costly.
Planning Tiered or Terraced Garden Beds with Landscape Timbers
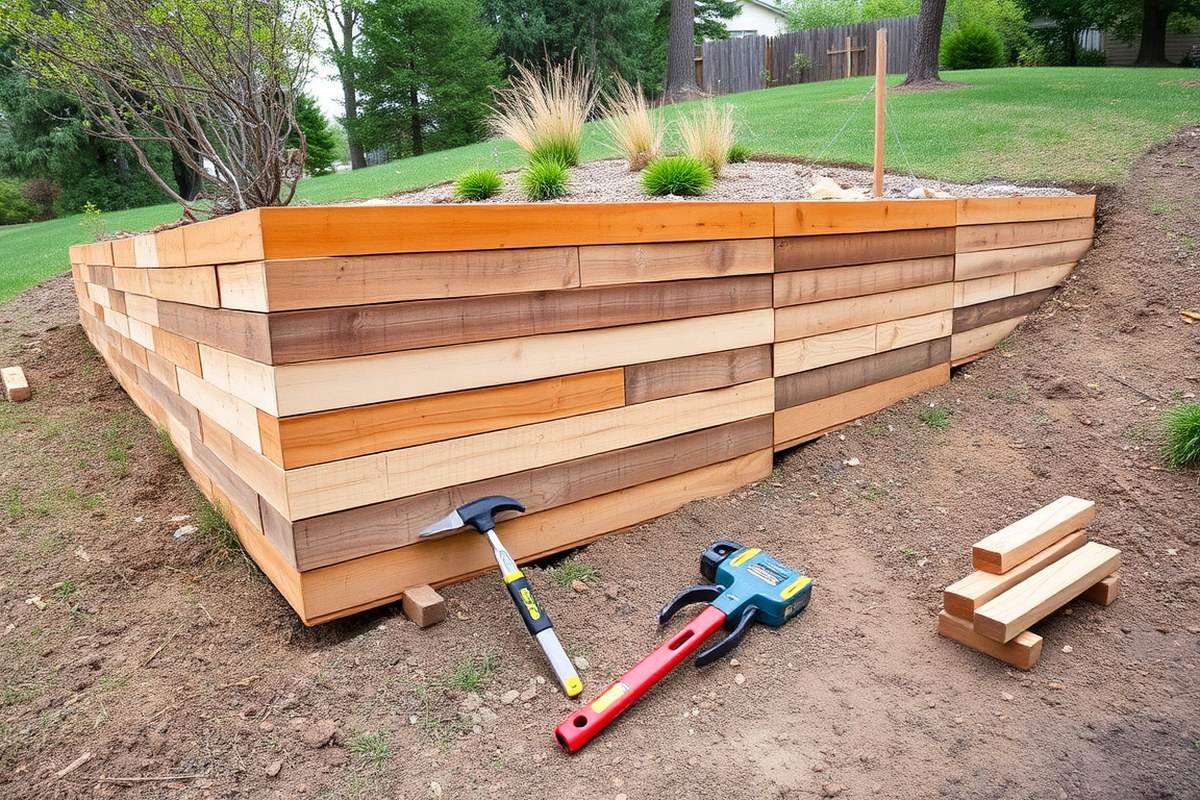
Planning terraces with landscape timbers means breaking a slope into flat steps. This improves garden usability and helps stop erosion. You can build tiers on slopes by spacing timbers evenly.
Secure each timber firmly for safety. This works even on steep slopes.
Designing the Terrace Layout
Decide how many tiers you need by measuring your slope height and length. Keep each tier no wider than 4 feet for easy garden access and maintenance. Plan tiers at about 12 to 18 inches tall to control soil pressure well.
Mark the tier lines across your slope with string or spray paint. Check that each tier will be level and allow for good drainage. Steeper slopes may need more, shorter tiers to reduce soil push against timbers.
Building the First Tier Foundation
The first tier supports all others, so set it firmly on solid ground. Clear away grass and loose soil before digging a shallow trench for your first timber row. The trench should be about 6 inches deep to hold the timbers steady.
Set the timbers in a trench, checking with a level. Pack soil tightly around them and tamp it down. Consider adding gravel behind for better drainage.
Stacking and Securing Additional Rows
Stack more timber rows on top of the first to form terraces. Each row should overlap joints below by at least 12 inches for stability. Use long spikes or rebar driven through the timbers to stop shifting.
Keep the height of each timber row under 18 inches to avoid too much soil weight. Space the tiers 3 to 4 feet apart vertically to create usable flat space. Small hand tools or rented equipment can help work on steeper slopes, no heavy machinery required.
- Measure your slope height and length carefully to estimate tiers.
- Mark level lines every 12 to 18 inches of vertical rise for tiers.
- Clear and dig a 6-inch trench for the first timber row.
- Place and level timbers in the trench, backfilling tightly.
- Stack next timber rows, overlapping joints by 12 inches.
- Drive spikes or rebar through stacked timbers for security.
- Space tiers 3 to 4 feet apart vertically for garden use.
- Work carefully on steep slopes using hand tools or small equipment.
Common Mistakes and Maintenance Tips for Timber Installations on Slopes
One big mistake is not securing timbers firmly to the slope. Timbers can shift downhill if anchors or rebar stakes are missing. Another issue is failing to drill pilot holes before screwing or nailing.
This often causes timbers to split and weakens the whole structure. Make pilot holes with a sharp drill bit sized for your screws or nails.
Fix shifted timbers by removing loose ones, resetting the base, and leveling the ground again. Add more stakes or anchor bolts to keep timbers from moving. Backfill soil tightly around timbers to prevent gaps that let dirt wash away.
Check behind the wall for new erosion or pooling water. These issues can cause timbers to become unstable over time. Keep an eye on these spots regularly.
- Wear gloves to avoid splinters and sharp nails during maintenance
- Inspect fasteners twice a year, tightening or replacing rusted ones
- Look for cracks, splits, or rot in the wood, especially near soil contact
- Clear debris and weeds around timbers to prevent moisture buildup
- Apply a weatherproof sealant every 2 to 3 years for protection
- Ensure proper drainage continues by checking grading and drainage holes
- Tighten or replace loose or corroded anchor stakes promptly
Regular inspection helps spot problems early. Check your timbers and fasteners at spring and fall. Rusty nails or screws can crumble and cause instability.
Replace them with galvanized or stainless-steel fasteners to prevent rust. Rot often starts where wood touches wet soil, so watch those spots closely. Cleaning and applying a sealant reduces moisture damage and extends life.
Never skip drilling pilot holes near timber ends; splitting ruins wood strength fast.
Maintenance takes only a few hours twice a year but doubles the lifespan of your timbers. Proper upkeep avoids costly repairs or replacements in Georgia’s hot and humid climate. Safe, stable timber walls hold back soil and keep your slope looking neat for years.
Step-by-Step Action Plan for Installing Landscape Timbers on a Slope
Follow this plan to get your landscape timbers set up securely and attractively. Each step includes what to do and how to check your work.
- Before you start: Clear and level the slope area where you’ll place your timbers. The ground should be firm and mostly flat. Check by pressing your foot or a board; it shouldn’t shift or sink.
- Day 1: Lay out your timbers to plan the shape. Check the height you want for your wall. Adjust pieces to fit your garden bed design. Adjust their positions to fit the slope’s curve. Confirm the layout looks even and matches your garden design.
- Day 1, afternoon: Cut the timbers to the lengths you need. Use a saw for straight cuts. Make angled cuts for corners if needed. Fit cut pieces together dry before attaching. Make sure joints line up snugly with minimal gaps.
- Day 2: Start anchoring timbers with heavy-duty spikes or rebar. Drive each spike through the timber into the ground. Make sure they are secure. The timbers should not wobble. Test stability by pushing gently but firmly on the timber.
- Day 2, afternoon: Backfill soil behind the first timber layer. Pack soil tightly to reduce any movement. Check if the soil stays firm. Slope the soil slightly away from the wall to manage drainage. Check that water runs off smoothly instead of pooling.
- Day 3: Add additional timber layers if creating tiers, repeating anchoring and backfilling for each. Use a level on every level to keep timbers straight and steady. Adjust as needed to prevent leaning.
- After 2 weeks: Inspect your installation for any soil settling or timber shifting. Tighten or add stakes if parts seem loose. Look for areas where water collects and adjust soil accordingly.
Frequently Asked Questions
Should You Put Gravel Under Landscape Timbers?
Putting gravel under landscape timbers helps drainage and keeps wood dry. This reduces rot and extends the lifespan of your timbers on a slope.
How Do I Anchor Landscape Timbers to the Ground?
You can anchor landscape timbers using rebar, metal spikes, or landscape stakes. Pound these through the timbers into the soil to keep them stable and secure.
What Can I Use to Hold Landscape Timbers in Place?
Landscape spikes, rebar, or metal stakes hold timbers firmly in soft or uneven ground. These prevent shifting caused by soil movement on slopes.
How Long Will Landscape Timbers Last on the Ground?
Landscape timbers can last several years, depending on wood type and moisture. Pressure-treated wood holds up better, especially if drainage is good.
How Do I Install Landscape Timbers on a Slope Without Them Shifting?
Dig a trench to set the timbers securely and use rebar to anchor them. Level each timber as you work up the slope for solid support.
Can I Paint or Stain Landscape Timbers on a Slope?
Yes, painting or staining helps protect the timbers from weather and insects. Apply it before installation for best results and easier coverage on slopes.
Final Thoughts
Landscape timbers on slopes need solid preparation and steady anchoring for safety. Start by leveling the ground and cutting the timbers carefully. Your next step is to anchor the first row firmly and build up from there.