How to Care for Gladiolus: Complete Steps for Stunning Blooms All Season
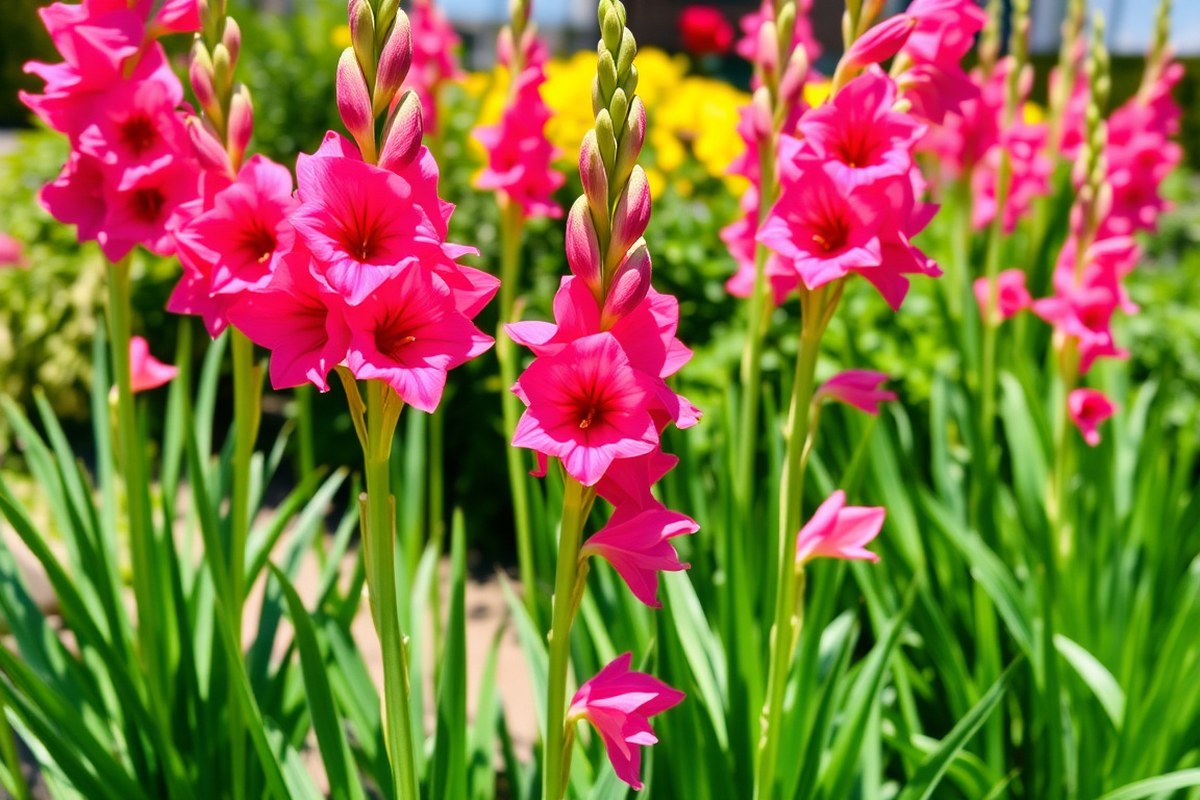
Knowing how to care for gladiolus helps you grow tall, colorful spikes. Start with planting healthy corms in full sun for strong roots and blooms.
Space the corms 6 to 10 inches apart in the soil. Plant them 2 to 6 inches deep, depending on the size of the corms.
Keep gladiolus watered during the growing season, but avoid soggy soil. Feeding them with a balanced fertilizer every few weeks supports steady growth and bright flowers. You’ll need to stake taller varieties to prevent the spikes from bending or breaking.
Gladiolus usually bloom about 8 to 10 weeks after planting. Trimming faded flowers allows the plant to focus energy on new growth.
Change the water often to keep the blooms fresh longer. Trim the stems if you cut the flowers for arrangements.
Key Takeaways
- Plant gladiolus corms about 2 weeks before the last frost date.
- Choose a sunny location with at least 6 to 8 hours of direct sun daily.
- Water regularly but ensure good drainage to prevent rot.
- Stake spikes as they grow taller than 3 feet for support.
- Feed plants every 2 to 3 weeks with a balanced fertilizer.
- Cut spent flower spikes to encourage more blooms.
How to Plant Gladiolus Corms for Best Growth

Plant gladiolus corms in a sunny spot with well-drained soil. Space them 6 to 10 inches apart. Plant bulbs 2 to 6 inches deep.
Depth depends on size. Plant them after the last frost chance passes. This is usually two weeks before your last frost date.
Choosing the Ideal Location and Soil
Pick a site that gets at least 6 to 8 hours of sun daily. Full sun builds strong stems and helps flowers bloom fully. Avoid spots where water pools or that have heavy clay soil to prevent rot.
The soil should be well-drained and have a neutral pH close to 7. Sandy loam or well-decomposed loam works best for gladiolus roots. Poor drainage invites diseases and makes corms prone to rotting.
Planting Depth and Spacing by Corm Size
Plant corms deeply to anchor tall gladiolus stems and prevent flopping. Large corms need to go 4 to 6 inches deep. Small ones can be planted as shallow as 2 inches, but not less.
Space corms about 6 inches apart. Rows should be 12 inches apart to allow enough room for growth and airflow. Crowded spacing can cause disease and stunt growth.
| Aspect | What To Do | Why It Matters |
|---|---|---|
| Sun | Full sun, 6, 8 hours daily | Builds sturdy stems and strong bloom spikes |
| Soil | Well-drained loam, pH near neutral | Prevents rot and supports fast root growth |
| Planting Depth | Large corms 4, 6 inches deep | Anchors tall growth and reduces flop |
| Spacing | 6 inches apart; rows 12 inches apart | Improves airflow and ease of staking |
Timing Planting for Your Climate Zone
Plant gladiolus corms as soon as soil is workable in spring. Timing is usually two weeks before your area’s last frost date. Planting too early risks frost damage to new growth.
Warm soil encourages quick root development, which leads to stronger plants. You can start some corms indoors in early spring to get earlier blooms. Transplant them after frost passes.
Preparing the Soil Bed for Planting
Loosen soil to about 12 inches deep before planting gladiolus corms. Well-aerated soil helps roots establish and grow strong. Remove rocks, weeds, and debris for a smooth planting bed.
Mix in well-rotted compost or organic matter to improve soil fertility and drainage. This addition feeds the plants and keeps the soil loose. Avoid fresh manure that may burn young roots.
Follow these steps to prepare your bed and plant gladiolus corms:
- Choose a sunny spot with well-drained soil.
- Loosen soil 12 inches deep using a fork or spade.
- Remove weeds, stones, and debris from the soil.
- Mix 2 to 3 inches of well-rotted compost into the soil.
- Space planting holes 6 inches apart in rows 12 inches wide.
- Plant corms pointy side up at the proper depth (2 to 6 inches).
- Cover corms with soil and gently firm down to remove air pockets.
- Water the bed lightly to settle the soil around the corms.
Watering and Feeding Gladiolus Throughout Growing Season

Gladiolus plants need about 1 inch (2.5 cm) of water weekly. Deep watering once a week encourages roots to grow strong. Water the soil thoroughly until it feels moist but never soggy.
Early in the season, keep soil evenly moist but avoid standing water. Overwatering can cause corm rot and yellow leaves. Signs of too much water include wilting despite wet soil or mushy stems.
During dry spells, check soil moisture twice a week. Adjust watering by feel: soil should be damp 1 to 2 inches deep. In hot, windy areas, gladiolus may need extra water to stay hydrated.
Use a slow-release granular fertilizer once every two to three weeks. Alternatively, a liquid fertilizer at half strength works well. Feed the plants from planting through blooming to support strong stems and vibrant flowers.
Pinch off faded blooms to help the plant grow new buds. This stops energy going to old flowers. It helps the plant stay healthy.
Watch for these signs of nutrient problems:
- Pale or yellow leaves indicate nitrogen deficiency.
- Slow or stunted growth suggests lack of nutrients.
- Leaf edges turning brown can mean potassium shortage.
- Leaf spots or weird colors may signal disease, not nutrition.
- Too much fertilizer shows as burnt leaf tips or white crust on soil.
Apply fertilizer evenly around the plant base. Water immediately after feeding to prevent root burn. Avoid cutting gladiolus leaves; they feed the corms for next year’s growth.
Remove weeds regularly so gladiolus gets enough water and nutrients. See stunted or misshapen plants?
Remove them quickly to stop virus spread. Keeping the soil moist but well-drained helps keep your gladiolus healthy all season.
How to Stake and Support Gladiolus Stems Properly
Yes, gladiolus plants usually need staking, especially tall varieties. Staking keeps their flower spikes upright and prevents bending or breaking. Start staking when shoots reach about 8 inches tall.
Use soft ties. They protect the plants from damage.
When to Start Staking Gladiolus
Begin staking gladiolus when the shoots grow to around 8 inches tall. At this stage, the stems are still flexible but need support to grow straight. Waiting too long can cause the spikes to bend or snap, which is harder to fix.
After inserting a stake early, you can add more ties as the spike grows taller. Start with one tie low down, then add others higher up to keep everything stable. This timing helps gladiolus develop strong and straight stems.
Types of Stakes and Ties for Gladiolus
Bamboo stakes are the most popular choice because they are lightweight and strong. Stakes cost just a few dollars each. They come in different lengths.
Choose one that fits your gladiolus height. Choose stakes about as tall as your expected plant height, usually 4 to 5 feet.
Use soft garden ties, fabric strips, or flexible twine to attach the spikes to the stakes. Avoid wire or anything sharp that can cut the stems. Keep ties loose enough to allow some movement but snug enough to support the plant.
You can also use flower rings or cages for extra support. These work well if you have many gladiolus close together. They prevent stems from bumping into each other and breaking during windy days.
Adjusting Support as Spikes Grow Taller
As the gladiolus flower spikes grow, check ties every week or after windy weather. Add a new tie higher on the stem when the spike reaches that height. This prevents drooping and distributes support evenly.
Loosen older ties slightly if they start squeezing the stem. The stem needs space to expand as it thickens.
Don’t wait at the end of the season to stake. Early and ongoing support leads to better flower display.
Follow these steps for proper staking:
- When shoots are about 8 inches tall, slide a bamboo stake. Place it 6 inches away from the shoot in soil.
- Tie the stem loosely to the stake with a soft loop near the stake base.
- Check growth weekly and add additional ties as the spike rises.
- Loosen ties if they press too tightly on the stem.
- Add flower rings or cages if multiple spikes grow close together.
- Remove stakes after blooms fade and plants start to die back.
Understanding Gladiolus Bloom Time and Extending Flowering
Gladiolus usually bloom about 8 to 10 weeks after planting the corms. Flowers usually bloom about 70 to 90 days after the leaves appear. The countdown starts when shoots first show above the soil.
You’ll want to watch for this growth to track bloom time. The spikes grow tall, around 2 to 3 feet, with flowers opening from bottom to top.
Plant corms in intervals every 10 days or so to stretch the flowering season. This staggered planting means you won’t have all your gladiolus blooming at once. Instead, you’ll see steady blooms from spring through midsummer, giving you fresh flowers for weeks.
Harvest cut flowers when the bottom blossoms of the spike start to open. Use a sharp tool to slice the stem at an angle early in the morning. Put the cut flowers right into water to keep them fresh longer for your vase.
Don’t cut the foliage after the flowers fade. Leaves keep feeding the corm, helping it store energy for the next bloom cycle. Removing foliage too soon can weaken your plants and reduce future flowering.
Propagating Gladiolus from Cormlets Step-by-Step
Propagating gladiolus from cormlets lets you grow new plants without buying fresh corms. The small cormlets form around the main corm during growing season. You can harvest them, store properly, then plant to get flowers in about two years.
Harvesting and Sorting Cormlets
After flowering, dig up the gladiolus corm carefully to see cormlets at the base. These cormlets look like small bulblets clinging to the parent corm. Gently separate each cormlet by hand without breaking their protective skins.
Remove loose soil and damaged or rotten cormlets. Choose firm and plump cormlets for propagation. Sorting your cormlets ensures you only plant healthy ones that can grow strong shoots later.
- Dig up the gladiolus corm once foliage dies back in fall.
- Brush off soil gently to expose cormlets attached at the base.
- Pick off each cormlet by hand, avoiding damage.
- Discard soft, shriveled, or moldy cormlets.
- Rinse good cormlets in cool water to clean them.
- Pat dry all cormlets before storing.
Dry your cormlets well before storing to prevent mold growth.
Storing Cormlets Before Planting
Store cormlets in a cool, dry place with good air circulation. Temperatures of 40-50°F work best. Hang them in mesh bags or use breathable containers to avoid moisture buildup.
Keep the cormlets off the floor to reduce pest risks. A basement shelf or garage corner often works well. Check periodically for soft spots or mold; remove any affected cormlets immediately.
Planting Cormlets and Growing Tips
Plant cormlets outdoors in spring after the last frost in a rich, loose soil bed. Space them about 4 inches apart and plant them 2 inches deep. Add compost to soil if it looks poor.
Cormlets need about two years to mature enough to produce flowers. You can stagger planting times across seasons to extend bloom periods. Group cormlets near tall shrubs to help support developing stalks naturally.
- Choose a sunny spot with fertile, well-drained soil.
- Mix compost or well-rotted manure into the soil bed.
- Plant cormlets point-up about 2 inches deep, spaced 4 inches apart.
- Water gently but keep soil moist until young shoots appear.
- Thin weak or crowded shoots early for healthier growth.
- Watch growth each season; expect flowering after the second year.
Planting in groups helps gladiolus grow upright without needing additional stakes.
Winter Care: Digging, Storing and Protecting Gladiolus
Gladiolus corms need careful winter care in colder areas. In USDA zones 5 and 6, dig up the corms before the first frost. Most gladiolus varieties aren’t hardy enough to survive freezing ground winter without damage.
Leaving corms in the ground works only for hardier types. Some varieties survive winters as cold as Zone 4, like Gladiolus byzantinus. Those can stay in the soil if covered with a thick mulch layer for winter.
After you dig up the corms, curing and storing them properly is important. Curing helps dry the corms, preventing rot and disease during storage. Store them in cool, dry places at 40 to 50°F in breathable bags or trays.
- Choose the time: Dig gladiolus corms after the first light frost when leaves turn black.
- Lift carefully: Use a garden fork or trowel to avoid damaging corms below the soil.
- Clean the corms: Gently brush off dirt; don’t wash with water to avoid mold.
- Cure the corms: Put corms in a warm, dry spot. Keep them airy and away from direct sun. Let them sit like this for 2 to 3 weeks.
- Optional pest treatment: Dip corms quickly in boiling water to kill pests before storing.
- Store properly: Use paper bags or mesh trays for storage. Keep corms in cool, dry spots. Maintain temperatures at 40 to 50°F (4 to 10°C).
- Check occasionally: Remove any soft or mouldy corms during winter storage to prevent spread.
In USDA zones 7 to 10, you can leave gladiolus corms planted outdoors. They are hardy enough and often multiply naturally. Just add some mulch over the crowns to protect from occasional cold snaps.
In colder zones, this lifting and storage method might take several hours in the fall. Still, it saves your gladiolus plants and ensures strong blooms next year. Forgetting to lift corms in time usually leads to rotting or frost damage.
Common Pests, Diseases, and How to Solve Them
Thrips and aphids are common pests that bother gladiolus plants. Thrips cause silver streaks on leaves and flowers, damaging blooms. To control thrips, you can dip corms in boiling water for 2 minutes before storing.
This kills any pests hiding inside. Buying new corms each year also reduces thrip problems.
Aphids, mealybugs, and spider mites often gather under leaves. They suck plant juices and cause leaves to curl or yellow. Spray plants with insecticidal soap or neem oil, making sure to cover leaf undersides.
Repeat every 7 to 10 days until pests disappear. Removing infested leaves helps stop spread.
Diseases like rust and botrytis can harm gladiolus. Rust shows as orange spots on leaves and flowers. Botrytis causes gray mold and leaf spots.
Remove infected leaves right away. Good air flow around plants cuts disease risks. Avoid overhead watering to keep leaves dry.
Corm rot happens when soil holds too much water for too long. It smells bad and makes corms soft or mushy. Plant gladiolus in well-draining soil to avoid this.
Water pooling after rain means you should add sand or organic matter. This helps the soil drain better.
Water only when top inch of soil feels dry. Avoid overwatering especially in cool weather.
Look for yellow leaves or wilting that can mean fusarium disease or stress from poor drainage. Wilted plants with yellowing may have root rot. Pull out these plants and discard corms safely.
Using fresh, firm corms each year helps prevent disease buildup in soil. Let corms dry for a few days before storing.
This helps harden them. It reduces chances of pests and diseases.
Growing Gladiolus in Containers and Small Spaces
Yes, you can grow gladiolus in containers. Use a pot deep enough to hold the corms. Make sure it is tall enough for the stems.
Choose a container at least 12 inches deep and wide to give roots room to grow. Choose a pot that is heavy or stable.
This stops it from tipping over. It needs to support the tall flower spikes.
Use a sandy loam soil mix with good drainage to mimic their native South African conditions. Mix in slow-release fertilizer before planting.
Container soil loses nutrients faster. So add liquid fertilizer every few weeks during the growing season.
Some gladiolus varieties with shorter, sturdier stems suit container growing better. Visit local garden centers for advice. They can suggest types good for pots.
They also know what fits your climate well. Growing a mix of early, mid, and late-season blooming varieties lets you enjoy flowers longer.
- Choose a container at least 12 inches deep and wide
- Use sandy loam soil with added slow-release fertilizer
- Water regularly but avoid soggy soil to prevent rot
- Fertilize every 3 to 4 weeks during growing season
- Pick shorter gladiolus varieties for better container growth
- Place pots in full sun for best flower production
- Support tall stems if needed with stakes or cages
Watering needs can change fast in pots, so check soil moisture often. Water when the soil surface feels dry but avoid standing water. Poor drainage or wet soil can cause corms to rot.
Use pots with drainage holes to keep roots from sitting in water and fattening rot risk.
Good results show as strong, upright flower spikes and steady blooming without wilting. Watch for yellowing leaves or small spots that may indicate disease. Plants growing in containers may need more care but offer flexible placement options.
Gladiolus Care: Step-by-Step Action Plan
Follow these simple steps to grow strong gladiolus with vibrant blooms.
- Before planting: Choose well-drained soil with full sun exposure. Healthy soil helps gladiolus thrive.
- Planting day: Plant corms 4 inches deep and 6 inches apart. Check they stay moist but not soggy.
- First two weeks: Water regularly, about 1 inch per week. Soil should feel damp, not wet.
- After shoots appear: Begin feeding with balanced fertilizer every two weeks. Look for steady, green growth.
- When stems reach 12 inches: Stake plants using soft ties. Secure stems gently to avoid breakage.
- During bloom: Deadhead spent flowers to extend blooming time. Healthy plants keep producing flowers longer.
- After flowering: Let leaves dry naturally before digging corms for storage. The leaves help feed the corm for next year.
- Late fall: Store corms in a cool, dry place around 50°F. Check them monthly to avoid rot or shriveling.
Frequently Asked Questions
Can You Grow Gladiolus Indoors?
Yes, you can grow gladiolus indoors in pots with enough light. Place them near a sunny window.
They need at least six hours of sun. This helps them grow healthy and strong.
How Often Should You Prune Gladiolus Plants?
Prune gladiolus to remove spent flowers and dead leaves. This helps the plant focus energy on new blooms and keeps it tidy. Do this regularly during the growing season.
What Soil Type Works Best for Gladiolus?
Gladiolus grow well in loose, well-draining soil with good fertility. Adding compost can improve soil texture and nutrients, helping the corms develop strong roots.
Can Gladiolus Tolerate Partial Shade?
Gladiolus need full sun to bloom well, though they can survive in partial shade. Less sun means fewer flowers and weak stems.
Aim for six hours of sun daily. More sun helps plants grow better.
How Tall Do Dwarf Gladiolus Varieties Grow?
Dwarf gladiolus, like Nanus, typically reach 2 to 3 feet tall. They are great for smaller gardens or containers and still produce attractive blooms.
Should You Remove Gladiolus Leaves After Flowering?
Leave gladiolus leaves until they yellow and die back naturally. They feed the corms for next year’s growth. So cutting them too soon weakens the plant.
Before You Go
Proper care gives your gladiolus the best chance for bright, long-lasting flowers. Start by planting corms in rich soil with enough water and sun. Watch your gladiolus grow and enjoy their colorful spikes all season long.