How to Root Ivy Cuttings: 8 Expert Steps for Fast, Healthy Roots
Knowing how to root ivy helps you grow healthy new plants fast. Take a 4- to 6-inch cutting from a strong stem with at least two leaves. You can root ivy cuttings in water or soil.
Roots usually form in two to four weeks. Wait for roots to grow before moving on.
Use temperatures between 60 and 75 degrees Fahrenheit for the best results. Keep the cutting’s environment humid but avoid overwatering to prevent rot. Change water every 3 to 4 days if you choose water propagation.
Move the cutting to moist soil when roots are 1 to 2 inches long. The roots should have fine branches. This helps the plant grow strong.
Water the soil an hour before transplanting, it stops root shock. Avoid fertilizers for the first few weeks to give roots a good start.
Key Takeaways
- Choose ivy cuttings between 4 and 6 inches long with two or more leaves.
- Keep cuttings at 60, 75°F for faster, healthier root growth.
- Root ivy in water by changing water every 3 to 4 days to avoid bacteria.
- Wait 2 to 4 weeks for roots to develop before transplanting to soil.
- Water soil thoroughly an hour before moving ivy cuttings to prevent shock.
- Don’t fertilize cuttings during the first 3 to 4 weeks after rooting.
1. How to Root Ivy Cuttings Step-by-Step
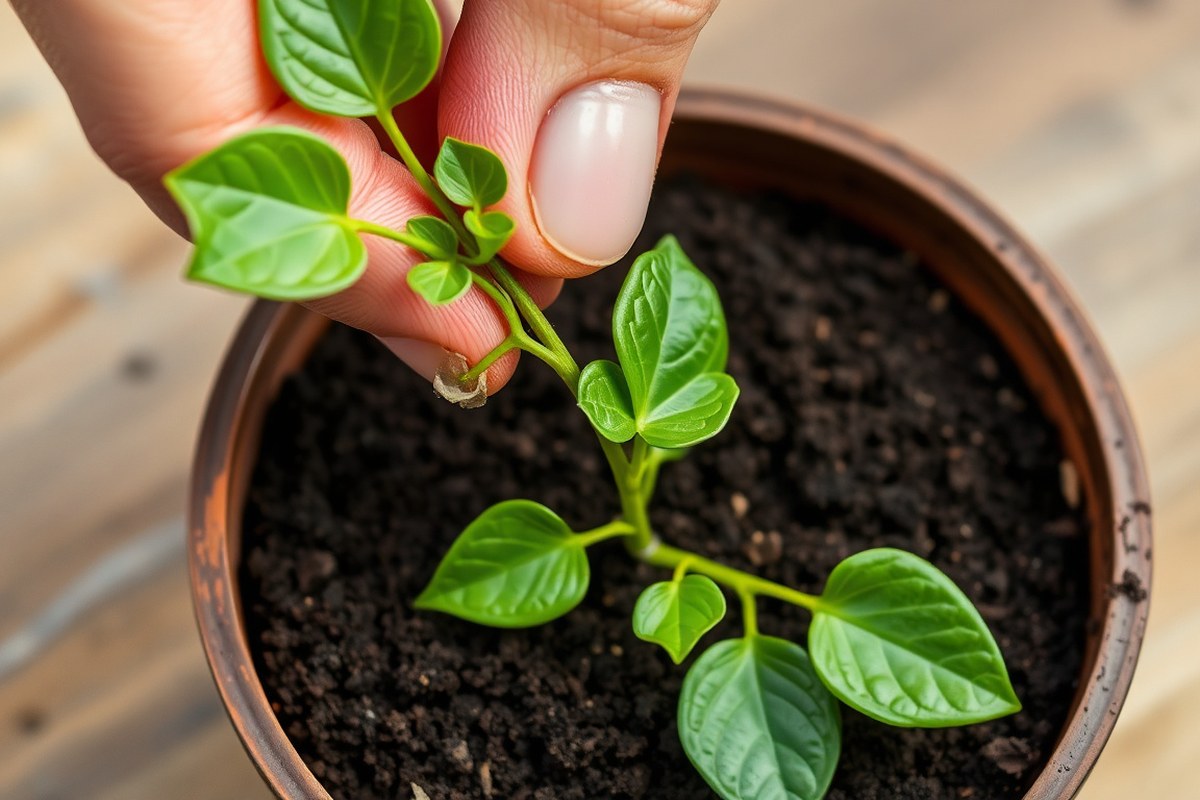
Take healthy stem pieces for rooting ivy cuttings in soil. Plant them in moist, well-draining soil. Keep the cuttings warm and humid.
Remove leaves from the lower stem to make the right environment. Make sure the nodes stay buried in the soil.
This helps roots grow. This encourages root growth within a few weeks under indirect light and regular watering.
Choosing the Right Ivy Cutting
Pick a stem that is healthy, mature, and free of damage. Cuttings should be 4 to 6 inches long for best rooting.
Include 2 or 3 leaf nodes on each cutting. This helps the cutting grow roots.
Each cutting needs at least two healthy leaves at the top. Avoid stems that are too old and woody or too young and soft.
Preparing Cuttings Before Planting
Remove leaves from the bottom one-third of the stem. This bare section will go into the soil and start growing roots.
Optionally, dip the cut end into rooting hormone powder or gel. This helps speed root formation and increases success.
Planting Cuttings in Potting Medium
Use a pot with well-draining potting mix that is moist but not soggy. Make a hole about 1 inch deep for the cutting.
Insert the cutting so the bottom leaf node is below the soil surface. Cover and create a humid environment with a clear plastic bag.
Put the pot in a place with indirect light. Water lightly every few days. Keep the soil moist but not soggy.
Follow these steps to root your ivy cuttings in soil:
- Cut a 4- to 6-inch section of a healthy ivy stem just below a leaf node.
- Remove leaves from the lower 1 to 2 nodes. Leave 2 or 3 leaf nodes at the top. This prepares the cutting for planting.
- Optional: Dip the cut end into rooting hormone to encourage root growth.
- Fill a pot with moist, well-draining potting mix suitable for houseplants.
- Make a hole about 1 inch deep in the soil for the cutting.
- Insert the cutting so the stripped part is buried and the leaves stay above soil.
- Cover the pot with a clear plastic bag or humidity dome to keep moisture in.
- Put the pot in bright but indirect sunlight and water the soil lightly every few days.
2. Optimal Conditions for Rooting Ivy Cuttings Indoors
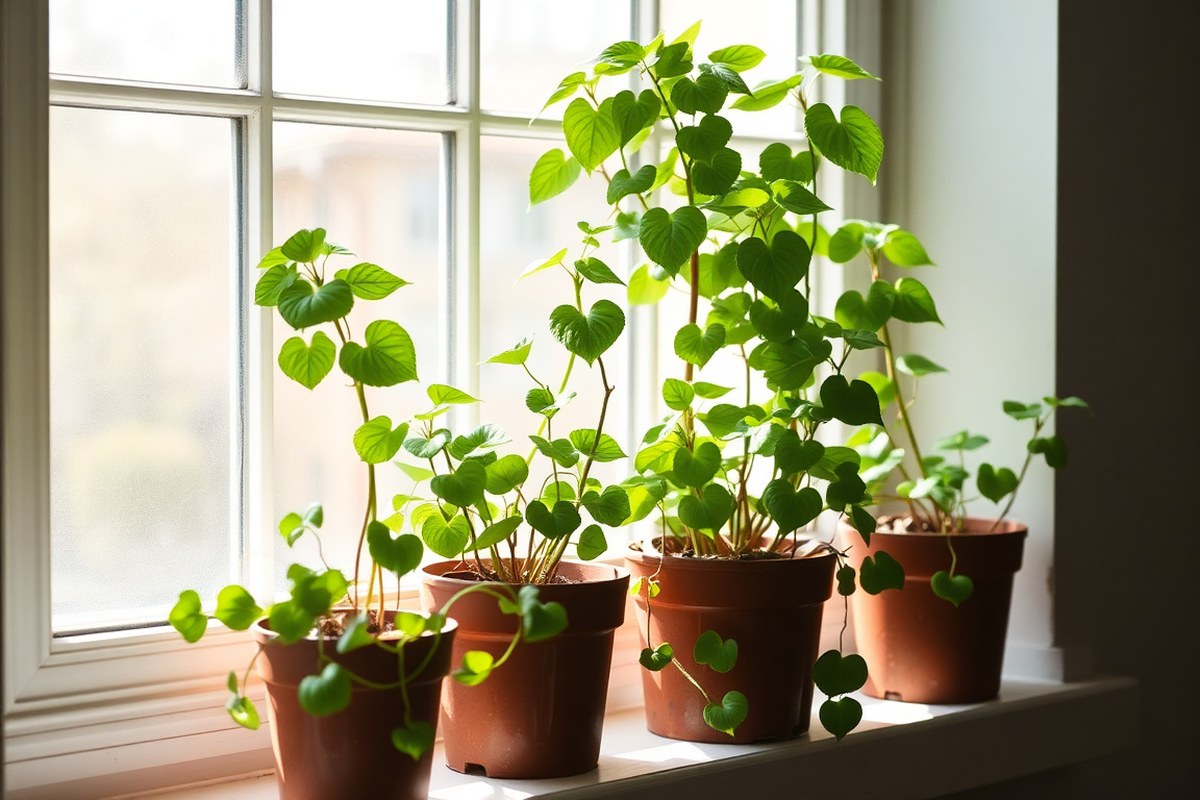
Ivy cuttings root best in temperatures between 60°F and 75°F. This range keeps them active without stressing the plant. Avoid placing cuttings near heaters or cold drafts, which can slow rooting or cause shock.
Indirect, bright light helps ivy cuttings root successfully. Too much direct sunlight can dry out the cuttings and kill new roots. Place the plant near a north-facing window.
Use filtered light through a curtain. It keeps the light steady and gentle for your ivy.
Humidity is key for rooting ivy indoors because it stops cuttings from losing too much water. Use a clear plastic bag or a humidity dome over your pot or tray. Make sure to open it once daily for a few minutes to stop mold from growing.
You can increase humidity by placing the container on a tray filled with water and pebbles. The water evaporates and creates a moist air pocket around the cuttings. You need pebbles and a plastic tray from a home store.
This setup costs just a few dollars. It offers an easy way to keep humidity up.
Rooting ivy indoors usually gets better results than outdoors because you control temperature and humidity. Outdoor air can be too dry, cold, or windy, which harms rooting. Keep cuttings inside, especially in cooler months or in dry climates.
Rooting inside also means you can watch your cuttings closely and adjust watering. Cuttings need light watering just enough to keep the soil or medium slightly damp. Overwatering leads to root rot, one of the most common issues with ivy propagation.
Keep the plastic cover vented daily to prevent mold, which can kill your ivy cuttings.
3. Soil vs. Water Propagation: Which Is Best for Ivy?
Rooting ivy cuttings in water lets you watch roots grow, which is great for beginners. It often takes 2 to 4 weeks for roots to appear. This happens on reliable cultivars like ‘Baltica’ and ‘Gold Child’.
Wait patiently for the roots to show. You keep the cutting in a jar or vial filled with water during this time.
Soil propagation skips the water stage and lets cuttings root right where they’ll grow. This saves time and stress because you don’t have to move the plant later. Plant the cutting in a well-draining mix.
Use two parts coarse perlite, one part coco coir, and one part peat-free seed-starting mix. This helps keep the soil loose and moist.
Water propagation is simple and fun for watching root growth. But rooted cuttings lack tiny root hairs needed for soil. These root hairs absorb moisture.
So your new ivy needs a transition in a soilless medium before going into potting soil. Meanwhile, soil propagation builds these roots naturally from the start.
| Factor | Water Propagation | Soil Propagation |
|---|---|---|
| Ease for Beginners | Very easy, watch roots develop | Requires potting mix, more skill |
| Time to Root | 2 to 4 weeks | 2 to 4 weeks |
| Need for Transplant | Yes, transfer to soilless medium then soil | No, roots directly in final pot |
| Root Health | Needs extra root hairs development post-transfer | Root hairs develop naturally in soil |
| Equipment Needed | Jar or vial with water, optional rooting hormone | Well-draining mix, pot with drainage, humidity cover |
| Visual Appeal | See roots grow in clear water | No visibility of root development |
You transplant water-rooted ivy once roots reach about 1 to 2 inches long. Carefully move the cutting to a soilless medium like coconut coir before planting in soil. This step helps the plant grow tiny root hairs needed to absorb water from soil.
Soil propagation suits those who want fewer steps and faster planting in the final pot. Water propagation works well if you want to watch roots grow. It’s good for beginners learning to propagate ivy.
You see the roots develop clearly in water. Both methods work well with healthy, disease-free cuttings taken during warm months around 65°F to 75°F.
4. Signs Ivy Cuttings Are Rooting Successfully
You can spot rooting success when fine white roots start growing from the cuttings. These roots often appear within 7 to 14 days if conditions stay right. Change the water every 3 to 4 days to keep bacteria away and help roots develop.
Watch the roots until they reach 1 to 2 inches long. At that point, you’ll see small lateral branches, not just straight threads.
This branching means the roots can absorb water and nutrients better. So it’s time to move the cutting to moist potting soil.
New shoots usually appear 7 to 10 days after rooting. This happens when roots fill about two-thirds of the pot. You’ll notice new growth starting soon after.
These shoots show the plant is healthy and ready for more growth. Choose a pot slightly larger than the root ball.
It should be 4 to 5 inches wide. Make sure the pot has drainage holes to prevent water buildup.
5. Common Problems with Rooting Ivy and How to Fix Them
Yellowing or browning of ivy cuttings means stress. It happens from too much water or not enough light. Watch the environment closely to avoid this stress.
Overwatered cuttings may drown, causing roots to rot and leaves to yellow. Brown tips often show when leaves dry out or get sunburned from too much direct light.
Lack of roots happens when the cutting is too old. It also happens if the cutting is damaged or in bad spots. Keep cuttings fresh and in good conditions.
Cuttings without at least 0.75 inches of new roots won’t carry nutrients well. Using stem sections with some adventitious roots speeds up rooting and improves success.
Pests like spider mites and aphids can attack weak cuttings. They stunt growth and spread diseases. Fungal diseases show up in soil that’s too wet or still air.
They cause mushy stems and leaf spots on cuttings. Good airflow and proper watering prevent these issues.
- Check soil moisture often; keep soil damp but not soggy.
- Place cuttings where they get bright, indirect light, not direct sun.
- Use clean scissors for cuttings to avoid introducing infections.
- Trim off yellow or brown leaves to divert energy to healthy parts.
- Isolate new cuttings from other plants to prevent pest spread.
- Spray with mild insecticidal soap if pests appear, following label rules.
- Improve air flow around cuttings to reduce fungal risks.
Always label your cuttings with the date and type to track their progress.
Yellow leaves need light checks and watering adjustments quickly. Brown spots get worse if the air is dry or the cutting bakes in the sun. Clear signs of root rot include foul smells and mushy stems.
Remove affected parts immediately. Keep your cutting area clean and tools sterile to limit disease chance. Regularly check for tiny bugs hiding under leaves and on stems.
Patience matters. Roots shorter than 0.75 inches often fall off or stop growing. So wait until roots are thicker before potting.
Using rooting hormone can also help. But remember, it won’t fix bad care or pests on its own. Catching problems early helps you fix them fast.
It gives your ivy a better chance to grow strong roots. Early action keeps leaves bright and healthy.
6. Using Rooting Hormones to Boost Ivy Propagation
Using rooting hormone on ivy cuttings speeds up root growth and makes success more likely. The hormone contains plant auxins that stimulate roots to form. While ivy can root on its own, rooting hormone improves results, especially for beginners.
Types of Rooting Hormones to Use
Rooting hormone comes as powder, gel, or liquid forms. Powder is easiest to use and stays on the cutting well. Gels spread evenly but can be messier, and liquids require more careful dipping.
Look for products with 0.1% indole-3-butyric acid (IBA). This concentration is proven to give fast and uniform root growth for ivy. Higher or lower levels may not improve rooting as much.
How to Apply Rooting Hormone Correctly
Start with a healthy ivy cutting about 4 to 6 inches long. Make a small hole in your potting mix to avoid scraping off the hormone. Dip the cut end lightly in the hormone powder and tap off excess.
Insert the cutting into the hole and gently firm the soil around it. Try not to rub the hormone off during planting. Place cuttings upright and keep soil moist but not wet.
Expected Rooting Success with Hormone
Studies show rooting hormone at 0.1% IBA increases success rates by at least 15%. Ivy cuttings root faster and more uniformly with hormone than without. You may see roots in about 3 to 4 weeks instead of longer.
Without rooting hormone, success rates can drop to near 65% under less ideal light. Using hormone helps reduce failures and speeds up propagation time, especially in beginner gardeners.
7. Caring for New Ivy Plants After Rooting
Water new ivy plants when the top inch of soil feels dry. Overwatering can rot roots, so check soil moisture often. Keep humidity around 40 to 50 percent to help the young ivy thrive.
Wait 3 to 4 weeks before you use any fertilizer. Feeding too soon stresses roots still settling in.
After that, pick a balanced water-soluble fertilizer. Use half strength every four to six weeks.
Pinching off the tips of growing stems encourages fuller growth and more branches. Do this gently using clean fingers or scissors once you see healthy new growth. It helps your plant fill out well instead of getting leggy.
- Water only when top 1 inch of soil is dry
- Maintain 40, 50% humidity around the plant
- Delay fertilizing for 3 to 4 weeks after transplant
- Use half-strength fertilizer every 4 to 6 weeks after initial period
- Pinch new stem tips to promote branching
- Keep plant in bright, indirect light during early growth
Keep your ivy in bright, indirect light to avoid scorching leaves. Watch for pests like aphids, especially indoors. Healthy, glossy leaves and new branches show your care is working well.
8. Seasonal and Variety Considerations for Ivy Propagation
Ivy can root indoors year-round. But spring to early summer gives the fastest, healthiest results.
Certain ivy varieties root easier, especially when grown in warm, moist conditions. Timing and variety choice improve your success and cut down waiting time for new roots.
Best Time of Year to Take Ivy Cuttings
Spring and early summer are the best times for ivy cuttings. The plant grows actively then. This helps the cuttings root faster.
In this growth phase, the ivy stores energy, making roots appear faster and stronger. Late autumn and winter are less ideal for ivy cuttings.
The plant slows down. Cuttings may root very slowly in these months.
Temperature and humidity during the warmer months encourage root development. Keep daytime temperatures between 65 and 75°F for ivy cuttings.
Mist the cuttings or cover them to keep humidity steady. Avoid direct sunlight to prevent leaf burn, but keep the light bright and indirect.
Varieties That Root Well from Cuttings
English Ivy (Hedera helix) is tough and easy to grow from cuttings. You can take cuttings anytime with the right conditions. Varieties like H. Algeriensis ‘Ravensholst’ and hybrids like ‘Baltica’ root quickly and reliably.
They are great choices for easy Ivy propagation. These types usually have vigorous growth and glossy leaves that reflect healthy stems.
Stick with varieties that grow quickly during spring and summer. Their cuttings tend to root within two to four weeks indoors with proper moisture. Shrubbier types may take a bit longer to produce roots compared to fast-growing vine forms.
Adjusting Your Technique by Season
During cooler months, bring your ivy cuttings indoors under grow lights to mimic warmer days. Keep the temperature steady between 65°F and 70°F to avoid slow rooting. Adding a small humidifier or enclosing cuttings in plastic bags helps maintain moisture levels indoors.
In spring and summer, you can root cuttings outdoors or inside near a bright window. Reduce watering slightly in late fall and winter to avoid rotting. Be patient with ivy cuttings during the off-season months.
The process may take twice as long. Proper care helps them still succeed.
Place cuttings in bright, indirect light to help them grow. Keep the soil moist to avoid failure. Don’t let it dry out.
Step-by-Step Action Plan to Root Your Ivy Cuttings
Follow these steps to root ivy cuttings quickly and successfully. You’ll see roots starting in just a couple weeks.
- Before you start: Choose healthy ivy stems with at least 3 leaves. Cut a 4-inch section just below a leaf node.
- Day 1: Dip the cutting’s cut end into rooting hormone powder. This boosts root growth but isn’t mandatory.
- Day 1 (continued): Plant the cutting either in moist potting soil or a jar of water. Make sure one or two nodes are buried or submerged.
- Day 3-7: Keep the soil damp or change the water every few days. Put the cutting in bright, indirect light, not direct sun.
- Day 10-14: Check for small roots. Soil cuttings show tiny white roots at the buried nodes. Water cuttings get visible root hairs in water.
- Week 3: Check if soil roots are about 1 inch long. If yes, transplant the ivy to a regular pot. Use well-draining soil for best results. For water roots, pot immediately to avoid rot.
- After transplant: Water sparingly, let soil dry slightly between watering. Watch for new leaf growth as a sign of strong establishment.
- Weeks 4+: Feed the ivy lightly with diluted fertilizer. Do this every 4 to 6 weeks. It helps keep the growth healthy.
Frequently Asked Questions
What Is the Best Time of Year to Take Ivy Cuttings for Rooting?
The best time is spring or early summer when ivy grows fastest. Cuttings root more quickly in warmer weather, mostly between 60 and 75°F.
How Long Does It Take for Ivy Cuttings to Develop Roots?
Ivy cuttings usually root in 2 to 4 weeks, depending on conditions. Some varieties take longer, around 4 to 6 weeks. But the roots grow stronger then.
Do I Need to Trim the Leaves Before Rooting Ivy Cuttings?
Yes, trim the leaves so only a few remain near the cutting’s top. This reduces water loss and helps the cutting focus on root growth.
Can I Root Ivy Cuttings from Overgrown or Leggy Plants?
Yes, leggy stems still root well if they have healthy nodes. Cuttings should be 4 to 6 inches long to ensure enough nutrients.
Should I Cover Ivy Cuttings with Plastic to Keep Humidity?
Covering with plastic helps keep humidity high and prevents drying out. Remove the cover for a short time daily to avoid mold.
How Often Should I Water Ivy Cuttings During Rooting?
Keep the soil moist but not soggy. Water when the surface feels dry, usually every few days depending on indoor conditions.
Final Thoughts
Rooting ivy cuttings works well with patience and proper care. Start with healthy stems and good humidity.
Try rooting in soil for easier transplanting. Watch your new ivy thrive with regular gentle care.