How to Layer a Raised Garden Bed for Healthy Growth: A Complete Guide
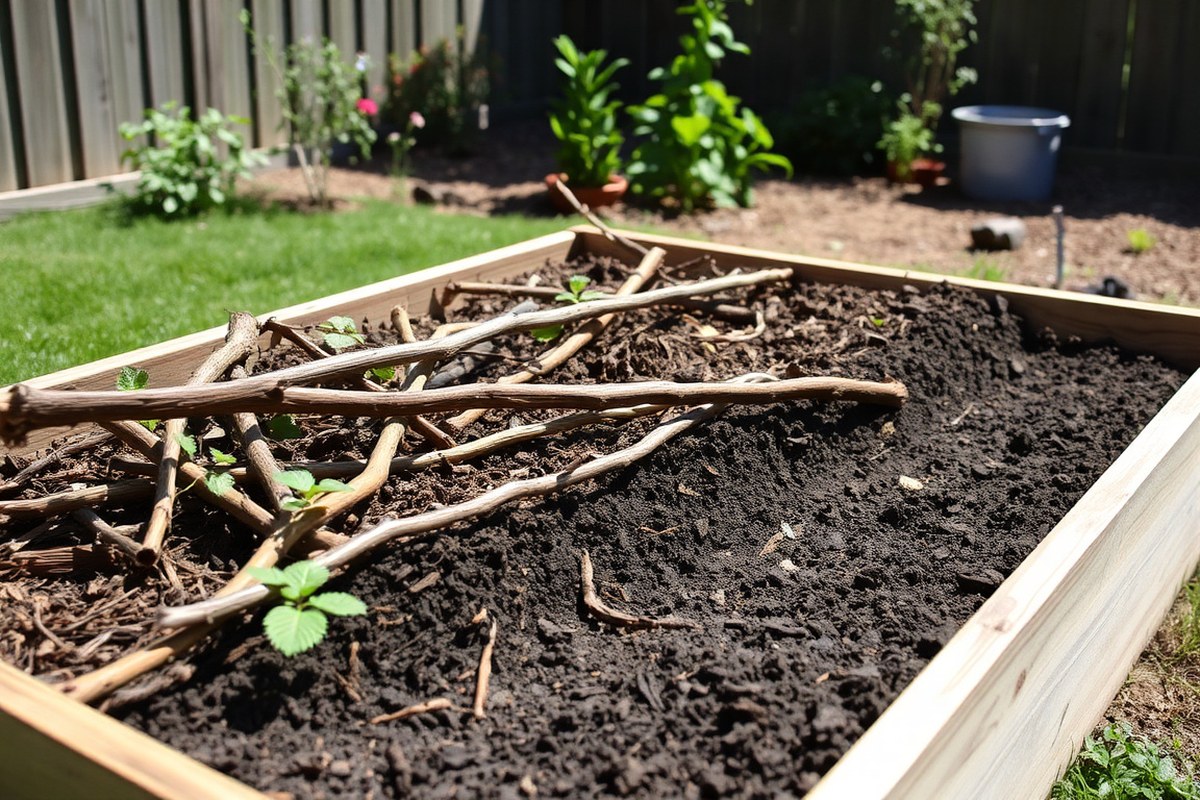
Learning how to layer a raised garden bed is key for healthy plants. The best way is to fill the bottom with bulky, compostable material. Then, add rich organic soil on top for roots to grow strong.
Coarse branches or straw work well at the bottom of your bed. They stop soil from compacting and help water drain out.
Then add 12 to 18 inches of organic matter. On top, put 6 to 8 inches of good soil mix for plants.
Skip the layering if your bed is under 2 feet tall. Fill it entirely with good soil instead. Keep your raised bed no wider than 4 to 5 feet.
This size lets you reach all the plants easily. Narrow beds make planting and weeding simpler.
Key Takeaways
- Raised beds less than 2 feet deep need only quality soil. Skip layered soil and fill the bed completely with good soil.
- Start layering with coarse material like branches or straw for drainage and airflow.
- Add 12 to 18 inches of organic topsoil or compost in the middle layer.
- Top off with 6 to 8 inches of well-draining raised bed soil mix for planting.
- Keep raised beds no wider than 4 to 5 feet for easy access.
- Fill garden beds in 6-inch increments to avoid settling and gaps.
How to Layer a Raised Garden Bed Properly for Best Results
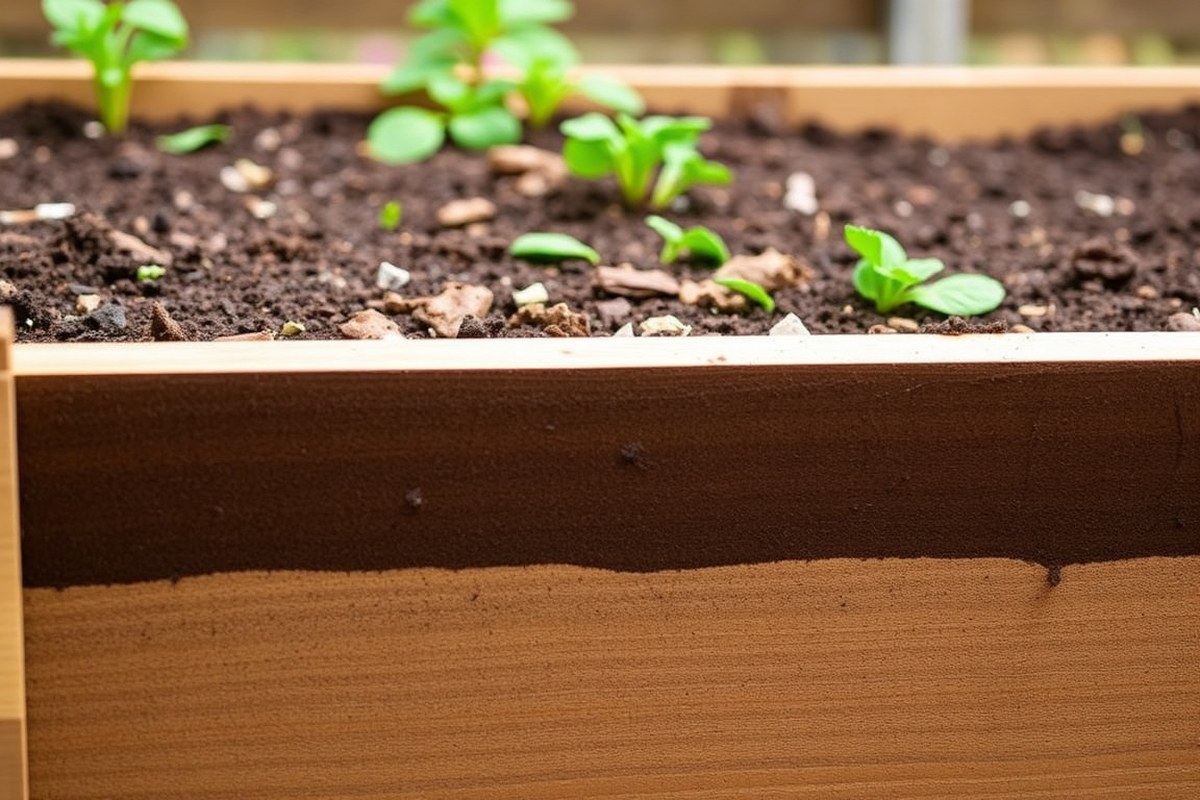
Layering a raised garden bed helps with drainage, soil nutrition, and root health. Different materials go into each layer to support plant growth. The bottom improves drainage, middle feeds plants, and top supports roots directly.
Here’s a step-by-step process to layer your raised garden bed effectively. Adjust layer depth based on the bed height. Beds under 12 inches can skip complex layers and focus on good soil mix.
- Add drainage material: Put 2 to 4 inches of rocks, gravel, or coarse sand at the bottom. This helps water drain well and prevents soggy soil. This stops water from pooling and keeps roots from rotting.
- Layer organic matter: Spread 3 to 5 inches of dried leaves, grass clippings, or pine needles on top. This layer adds nutrients and improves soil structure. These break down over time, feeding soil microbes and enriching the bed naturally.
- Include compost mix: Add 4 to 6 inches of quality compost mixed with topsoil over the organic matter. Nutrients from compost help plants grow strong. This layer provides nutrients and holds moisture well.
- Finish with soil mix: Cover with 6 to 8 inches of loose, rich garden soil or raised bed soil mix. This is where your plants will root. This is where most roots grow and plants draw nutrients directly.
- Lightly water each layer: Moistening layers as you build helps microbes start breaking down organic matter. It also prevents the layers from drying out and settling too much.
- Leave space if tall: For deeper beds, add more layers or increase soil mix depth. Keep drainage material only at the bottom for best results. Beds 24 inches or higher benefit from thicker soil layers.
This layering method creates air pockets for roots and improves water flow. It avoids compacted soil that can suffocate plants. Well-layered beds hold nutrients longer and help plants grow stronger and healthier.
Choosing the Right Materials for Each Layer
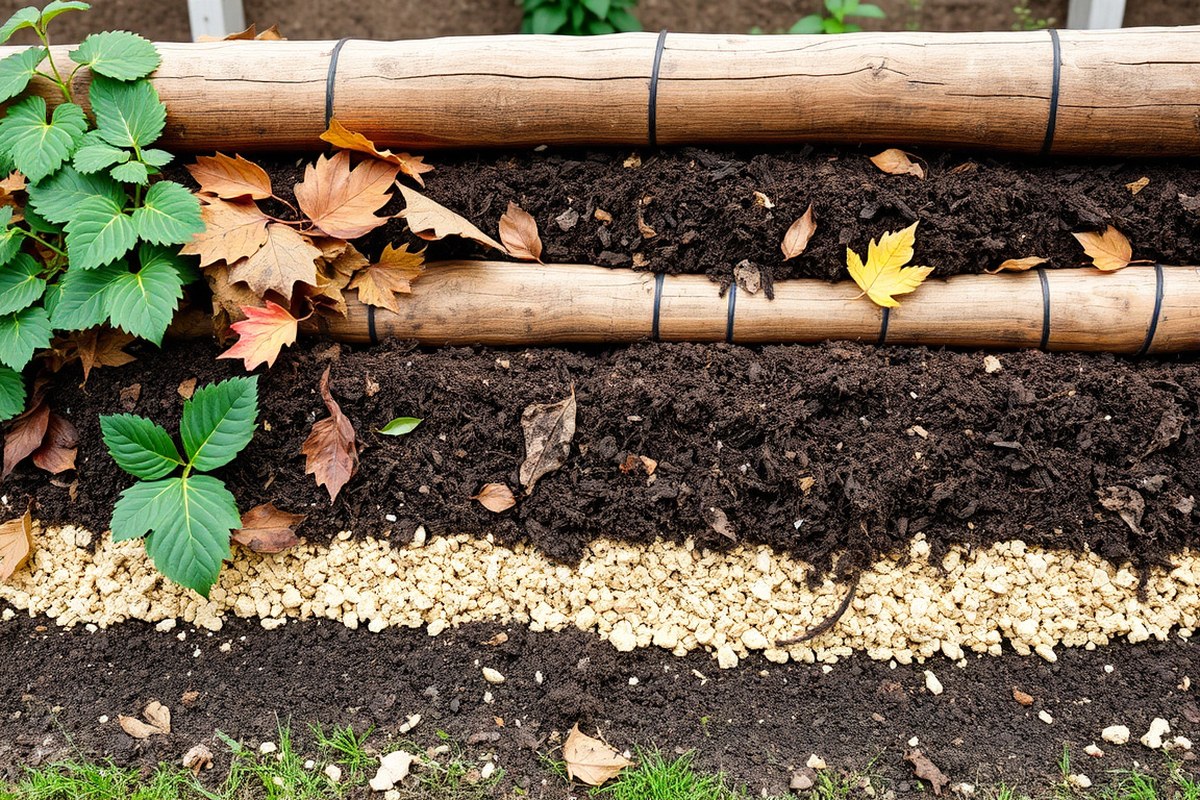
The base layer should start with plain cardboard or unwaxed paper. This blocks grass and many weeds while allowing water to drain well. Avoid using plastic since it traps water and blocks air, which harms roots and soil life.
Next, build a bulk layer with twigs, small branches, or coarse straw. These materials improve drainage and aeration by creating air channels. They can take several months to years to break down depending on size and type.
For the middle layer, add brown materials like dried leaves, straw, or wood chips. They feed fungi and balance moisture in the bed.
Mix in green materials such as grass clippings and compostable kitchen scraps in thin layers. This adds nitrogen and speeds decomposition.
- Base: Cardboard or unwaxed paper to stop weeds
- Bulk air layer: Twigs, sticks, coarse straw for drainage
- Carbon-rich brown layer: Dry leaves, straw, wood chips
- Nitrogen-rich green layer: Grass clippings, kitchen scraps, coffee grounds
- Top layer: 8 to 10 inches of quality garden soil or compost
- Avoid: Plastic liners or treated wood in contact with soil
- Use aged manure or finished compost as a nutrient boost
Kitchen scraps and grass clippings are great but add them only in thin layers. Thick layers can cause bad odors and attract pests. Always avoid oily or meat scraps.
Compostable garden waste like leaves is safe for your soil. Untreated grass clippings also improve soil health over time. These materials break down naturally and add nutrients.
The top layer must be quality garden soil or a good soil mix. It should be 8 to 10 inches deep for most beds. This lets roots grow well and gives an even surface for seeds or seedlings.
Skip the bulk layer if your bed is less than 2 feet tall. Fill mostly with soil mix.
Never pile thick green layers without plenty of dry brown, this reduces smelly composting and pests.
How Deep Should Each Layer Be in Different Raised Bed Sizes?
The soil layers in a raised garden bed vary with the bed’s total height. A shallow 6-inch bed needs mostly soil mix with little layering. A 24-inch deep bed lets you make separate zones.
One zone helps with drainage. Others hold organic matter and topsoil.
Coarse materials like gravel or small stones go in first. Use expanded shale if you want. This layer should be 15-20% of the bed.
This layer forms the base and improves drainage below the roots. For example, in an 18-inch deep bed, allocate around 3 inches to this layer.
Above that, add 12 to 18 inches of organic matter like compost or decomposed leaves. This middle section cycles nutrients and supports root growth well. For beds less than 12 inches deep, make this layer smaller.
Avoid using coarse materials here. This keeps more space for planting.
Finally, topsoil forms the upper layer where plants grow. Aim for at least 8 to 10 inches of good quality soil mix.
This thickness supports most vegetables, leaves room for roots, and helps maintain moisture. For beds over 18 inches, topsoil could be up to two-thirds of the total depth.
| Bed Height | Coarse Drainage Layer | Organic Matter Depth | Topsoil Depth |
|---|---|---|---|
| 6 inches | None | 2-3 inches (minimal) | 4-6 inches |
| 12 inches | 1.5-2 inches | 5-6 inches | 4-5 inches |
| 18 inches | 3 inches | 7-8 inches | 7-8 inches |
| 24 inches | 4 inches | 8-10 inches | 10 inches |
Start filling from the coarse layer, then add organic matter, and top with soil mix. Use about 15 to 20% perlite or coarse sand in the soil mix to improve aeration. This layered design prevents waterlogging and encourages healthy roots.
Keep in mind root depth varies with plants. Leafy greens do fine with 8 to 10 inches soil.
But tomatoes need up to 18 inches. Adjust topsoil depth accordingly, but never drop below eight inches, or roots won’t thrive.
Filling a Raised Bed: Step-by-Step Layering Methods
You can fill your raised garden bed in different ways. It depends on your budget, time, and space. Choose what works best for you.
Full soil fill is the fastest but costs the most. Layering methods like lasagna gardening save money by combining organic materials. You build the bed in steps, adding these materials one at a time.
Method 1: Full Soil Fill
This method means filling the entire bed with a quality soil mix. This method suits shallow beds under 12 inches deep. Thick, bulky layers won’t fit well in deeper beds.
You get an instant, even growing medium for plants. But it can cost $150 to $280 for a 4×8 ft, 12-inch bed. The price depends on soil quality.
Fill your bed all the way up since soil will settle over time. Expect no extra breakdown or nutrient boost because there’s no organic layering base.
Filling a bed this way takes less than an hour on average. The bags are heavy and expensive if you need many.
- Calculate your soil volume by multiplying bed length, width, and depth in feet.
- Buy high-quality garden soil or a soil-compost mix for the entire volume.
- Spread the soil evenly to the top of your raised bed frame.
- Water lightly to settle the soil and fill any gaps.
Method 2: Lasagna Gardening Layering
Lasagna gardening means layering organic and compostable material in your bed. This method builds soil fertility over time. It also saves money by using free or cheap waste like cardboard and kitchen scraps.
It fits well with beds 12 to 18 inches deep. It takes a bit more time but cuts soil costs a lot.
Layer 6 inches of materials at a time. Alternate green layers like fresh grass with brown layers like dried leaves or cardboard. It encourages decomposition that feeds your plants for new growth.
- Lay down a weed barrier or cardboard to suppress weeds.
- Add a 3- to 4-inch layer of coarse materials like twigs or small branches.
- Place a 2- to 3-inch layer of green organic matter, like grass clippings or kitchen scraps.
- Cover with a 2-inch layer of brown matter such as dried leaves or shredded paper.
- Repeat these layers until the bed is full, ending with quality compost or soil.
- Moisten each layer lightly to speed breakdown and support microbes.
Method 3: Leaf and Organic Waste Layering
This budget-friendly choice fills your raised bed with mostly fallen leaves and yard waste. This works well if you get free leaves and organic scraps.
It’s great for backyard gardens on a tight budget. This method is slower to establish but improves soil over seasons.
Start by adding a thick layer of dry leaves at the bottom. This layer should be about one-sixth of the bed depth to prevent settling.
Then add kitchen scraps and green yard waste. Top with a thinner layer of soil or compost to help seedlings get started.
- Gather dry leaves and spread a 6-inch base layer in your raised bed.
- Add kitchen scraps and soft green waste on top of the leaves.
- Cover this with a 2- to 4-inch layer of garden soil or compost.
- Repeat adding green waste and soil layers if the bed depth allows.
- Water each layer slightly to keep it moist but not soggy.
Should You Use a Weed Barrier or Liner at the Bottom?
Using a weed barrier at the bottom of a raised bed stops grass. It also limits weeds from growing up into the soil. This keeps your garden cleaner and easier to manage.
Materials like cardboard or newspaper work well because they break down naturally over time. Put a layer of cardboard or newspaper flat on the ground first.
Use several sheets to cover the whole area. This base stops weeds and helps hold moisture.
Avoid plastic liners at the base because they block water drainage. Poor drainage can cause root rot and diseases, harming your plants. Raised beds on lawn grass may need only 6 inches (15 cm) of soil.
This depth can kill most weeds below the soil. In that case, a weed barrier isn’t necessary.
Landscape fabric is another option but be sure it is breathable. This type lets water pass but blocks weed roots. Cardboard costs little to nothing if you reuse boxes.
Commercial weed barrier fabric might cost $0.50 to $1 per square foot. Choose based on your budget and how long you want the barrier to last.
Don’t use plastic liners under raised beds; they trap water and kill roots.
For best results, start the bed with well-moistened cardboard. Overlap pieces to cover the whole bottom and tuck edges slightly up the sides. Add twigs or small branches on top when layering like a lasagna garden.
This helps airflow and improves drainage. Then add your soil and compost layers on top.
Avoiding Common Mistakes When Layering Raised Garden Beds
Poor drainage in raised beds often happens when water pools at the bottom. This usually occurs if you add large rocks or gravel, thinking it will help water flow.
Raised beds naturally drain well through soil. So these materials can cause water to sit and drown plant roots.
Soil compaction and settling happen when you use too much compost or neglect proper layering depth. Overusing compost can make the soil heavy and dense, leading to compaction. Compacted soil has less air and water.
This makes roots struggle to grow. They also can’t take in nutrients well.
Not leaving enough layer depth limits root growth space. Soil balance can also suffer. This reduces plant health.
Each layer needs to be deep enough to breathe and drain. Undersized layers cause moisture buildup or limit plant space, resulting in weak growth or root rot.
- Avoid gravel or rocks at the bottom, use soil or organic material instead.
- Keep compost to about 25% of the total soil mix to prevent heaviness.
- Maintain about 6 to 12 inches for topsoil and 3 to 6 inches for compost layers.
- Use coarse materials like shredded leaves or straw to improve airflow.
- Don’t layer non-decomposable items like plastic or thick cardboard; they block drainage.
- Loosen soil layers slightly as you build to avoid packing them down too hard.
- Water the bed moderately while layering to help materials settle evenly.
Some materials shouldn’t go into your raised bed layers. Don’t use stuff that won’t break down quickly. Plastic or thick cardboard can last too long.
Aim for materials that decompose in 1 to 2 seasons. These block airflow and water movement, leading to poor results.
If drainage is bad, remove compacted soil layers. Then add 75% topsoil and 25% compost. This mix helps water drain and roots breathe.
This ratio balances nutrition and structure without making soil too heavy. Add coarse organic matter to keep the soil loose and easy to work.
How Much Soil Mix Do You Need and How to Calculate It?
Calculating how much soil mix you need helps avoid waste and shortages. Use the formula: multiply length by width by depth to get cubic feet. For example, a 4-foot by 8-foot bed with 1-foot depth needs 32 cubic feet of soil.
Soil bag sizes vary, but many hold about 1 cubic foot. Divide your total soil volume by bag size, then round up to buy enough bags.
Bulk soil is cheaper for large beds. But make sure it’s a good garden mix.
A good soil-to-compost ratio is about 70% soil and 30% compost. Compost adds nutrients and improves water retention. Mix these before filling your bed to create a healthy root zone.
- Measure your bed’s length, width, and depth in feet accurately.
- Calculate volume by multiplying length × width × depth to find cubic feet.
- Decide on your soil and compost mix ratio, usually 70/30.
- Add soil and compost volume together based on the ratio for the total mix.
- Check bag sizes if buying bagged soil and divide total volume by bag size.
- Round up the number of bags to avoid running short during filling.
- Consider bulk soil for bigger beds. Order cubic yards by dividing cubic feet by 27.
- Ensure the bulk soil is high quality and matches your soil-compost mix needs.
Seasonal Layering and Maintenance Tips for Long-Term Bed Health
Keeping your raised garden bed healthy means adding materials seasonally. You should top up with compost or mulch to keep nutrients steady and soil from sinking. Regular checks and timely refreshes stop moisture problems and nutrient loss.
Spring Preparation and Layer Refresh
In early spring, check if the soil has settled or looks compacted. Add a 2-inch (5 cm) layer of fresh compost or nutrient-rich soil over the existing soil. This boosts nutrients right when plants start growing.
Pull out dead roots from last year first. Then mix new compost into the topsoil. Do this gently to avoid disturbing the soil too much.
Make sure the bed gets watered well after adding soil to help it settle evenly. This step prevents air pockets that dry out roots.
Summer Care and Moisture Management
Summer heat can dry out raised beds quickly. Spread 2 inches (5 cm) of mulch on top. Mulch helps hold moisture in the soil.
It also keeps the soil temperature steady. Water early in the morning to avoid evaporation and reach roots deeply.
Check for dry soil or plants wilting. These signs mean you need to water or add mulch.
Keep an eye on your garden regularly. Avoid piling mulch thicker than 3 inches (7.5 cm), as overly thick layers can cause mold or slow water absorption.
Fall Cleanup and Mulching
After harvest, clear leftover plants and weeds to reduce pests. Add a 2-inch layer of leaves or mulch to protect the soil from erosion. Add leaves in layers about 6 inches thick.
Press each layer down firmly before adding the next. Cover the top with soil or compost to add nutrients.
Fall layers prepare your bed for winter by locking in nutrients and moisture. Compost helps balance soil health and supporting moisture levels, according to EPA guidelines. Mulching saves you work and nutrients next spring.
- Remove dead plants and weeds
- Add 2 inches of leaves or mulch
- Compress leaves in 6-inch layers
- Top leaves with 8 to 10 inches of soil
- Water the bed after mulching
Winter Protection Techniques
Cover the bed with thick mulch if winters get cold and snowy. Mulch stops soil from freezing too deeply and protects beneficial microbes. Avoid heavy foot traffic on beds to prevent soil compaction during freezing temperatures.
Check the bed in late winter for signs of drying or settling. Add soil or compost before spring if you see shrinking layers. This gives plants a healthy start when the growing season returns.
Don’t let your soil stay bare in winter. Cover it with mulch to keep it alive and healthy.
Advanced Layering Techniques: Hugelkultur and Companion Planting
You can use hugelkultur and companion planting within your raised bed layers. Hugelkultur traps moisture and adds nutrients slowly. Companion planting fits in by placing plants that benefit each other close together as you layer.
Understanding Hugelkultur Layering
Hugelkultur uses rotting wood and branches as a base layer in the bed. Start by placing thick logs or large branches on the bottom. Add smaller woody debris on top, then cover it with compost or soil.
This woody layer holds water like a sponge and breaks down over several years. It helps keep your bed moist during dry times without extra watering. Wood pieces should be roughly 6 to 12 inches deep, depending on your bed’s height.
A common mistake is using fresh green wood in your garden. It rots fast and pulls nitrogen from the soil. This harms your plant growth.
Dry, dead wood works best and minimizes problems. This method costs more time and effort but saves water and feeds plants long-term.
Using Layers for Companion Planting Success
You can plan your layers to match companion plants’ needs and benefits. For example, plant deep-rooted crops on thick soil layers while shallow-rooted herbs go on top. This layering shares nutrients and space efficiently.
Legumes benefit from soil rich in nitrogen. So place them above a compost layer that has plenty of organic matter.
Root veggies do well with loose, sandy soil in upper layers. This setup improves overall bed health and productivity.
Combining plants that repel pests with those that attract pollinators also works well in layers. This mix helps natural pest control and supports pollination without chemicals. Avoid crowding plants too close, or they can compete rather than cooperate.
When to Choose Advanced Methods
Use hugelkultur if you want a low-water garden that stays productive for years. It suits beds at least 12 inches deep to fit wood and soil layers properly. This technique takes more time but reduces watering later on.
Choose companion planting layering if your space is limited or you want higher yields. It suits gardeners who enjoy planning and want to reduce pest problems naturally. You can start with simple plant pairings and add complexity over time.
Avoid advanced layering if you need quick results or have shallow beds under 8 inches deep. These methods work best with some experience and patience. Starting simple and adding these techniques later often gives better results.
Preparing the Site and Tools Needed for Layering Raised Beds
Clear your chosen spot well before assembling the layers. Remove all grass, weeds, and debris to prevent them from growing up through your bed. Doing this stops roots from competing with your plants later on.
Choose a location that gets at least six hours of sunlight each day. Morning sun is better than afternoon heat. So south or east facing spots work best.
This affects how your plants grow. It also decides what layers to add. These layers can improve drainage or moisture retention.
To prepare the ground, use a spade or garden fork to loosen the soil underneath. Loosening the soil by about 6 to 8 inches helps roots spread and water drain better. Avoid piling dirt on hard, compact surfaces.
This can block roots. It also causes poor drainage.
- Spade or garden fork for loosening soil
- Gloves to protect your hands
- Wheelbarrow or tarp for moving soil and materials
- Measuring tape or ruler for accurate bed dimensions
- Level to ensure even bed placement
- Garden rake to smooth and level the soil base
- Hand pruners or scissors for trimming roots or plants
Check the bed frame for levelness before adding any layers. A tilted bed can cause water to pool or runoff, affecting soil health. You want an even surface so water drains evenly and all plants get enough moisture.
Keep tools within reach during the layering process to save time. Setting everything up before you start means less back and forth. Your soil may be heavy clay or sandy.
Mix compost or mulch in first. This helps balance the texture.
Consider bed placement in relation to wind and rain as well. Too much wind can dry out layers quickly, forcing you to add more moisture-retaining materials. A spot that collects runoff might need extra drainage layers to avoid waterlogged soil.
Step-by-Step Action Plan for Layering Your Raised Garden Bed
Follow these steps to layer your raised garden bed and see good plant growth fast. Check each step to make sure your bed drains well and stays healthy.
- Before you start: Clear the site of grass and weeds. Look for no visible roots or plants left behind.
- Day 1: Lay a weed barrier or cardboard on the bottom. Make sure all soil is covered to stop weeds.
- Day 2: Add the first layer of coarse materials like small branches. It should be about 6 inches thick and loose for air flow.
- Day 3: Add a 4-inch layer of partially rotted leaves or grass clippings. Check that it’s spread evenly.
- Day 4: Spread a 6-inch layer of good garden soil mixed with compost. The soil should feel crumbly and moist.
- End of week 1: Water the bed lightly to settle the layers without waterlogging. The bed shouldn’t feel soggy.
- Week 3: Add mulch on top if planting is delayed. Mulch should fully cover the soil to protect it.
- Month 1: Start planting according to your design. The soil should be soft enough to dig into easily.
Frequently Asked Questions
Can I Use Kitchen Scraps to Layer My Raised Garden Bed?
Yes, kitchen scraps can work as part of the organic layer. Avoid meat, dairy, and oily foods to prevent pests and odors.
How Often Should I Refresh the Layers in a Raised Garden Bed?
Refresh the topsoil layer each spring for best growth. Add compost or fresh organic matter yearly to maintain nutrients.
What’s the Best Way to Layer Raised Beds in Clay Soil Areas?
Use a thick bottom layer of coarse material to improve drainage. Add sand or gravel before the soil mix to prevent waterlogging.
Can I Add Fertilizer Between Layers When Filling a Raised Garden Bed?
You can add slow-release fertilizer to the soil mix layer only. Applying fertilizer too deep may harm roots or wash away.
Should I Wet Each Layer While Building the Raised Bed?
Lightly wetting each organic layer helps it break down faster. Avoid soaking to prevent creating soggy, compacted layers.
Is It Okay to Skip the Rock Layer in a Raised Garden Bed?
You can skip it if your garden soil drains well. Rocks help drainage but aren’t needed everywhere; check your soil first.
Final Thoughts
Layering your raised garden bed with the right materials and order helps plants grow better. Keep your layers balanced for good water flow and nutrients. Start your next garden project by gathering the right layers and tools today.