How to Fill a Raised Garden Bed Cheap with 8 Practical Methods That Really Save
Filling a raised garden bed cheaply means using mostly compostable materials. Top this with 6 to 8 inches of good garden soil. This method reduces how much costly soil you need.
Begin with a bottom layer of branches, leaves, and cardboard. Keep this layer loose to allow air and water flow. It adds volume and breaks down into nutrients over time.
Focus your budget on topsoil and compost blend. That’s where plant roots grow and thrive. Avoid using expensive soil in the bottom layers.
Buying bulk soil or gathering free materials saves more money. Bagged soil for many beds can add up fast. This approach balances cost and healthy soil for your plants.
Key Takeaways
- Fill the bottom half of beds with cheap compostable materials like leaves and cardboard.
- Keep 6 to 8 inches of quality soil on top for healthy root growth.
- Buy bulk soil instead of bags to save 40 to 60 percent per cubic yard.
- Use a mix of about 70% topsoil and 30% compost for the best soil layer.
- Layer your raised bed in four parts from bottom to top for best results.
- The bulky organic layer breaks down, enriching soil and saving money over time.
1. The Cheapest Proven Way to Fill a Raised Garden Bed

Fill most of your raised garden bed with cheap or free organic material. Logs, branches, leaves, cardboard, and grass clippings work well. These bulky materials cost little or nothing and break down over time, feeding your soil naturally.
Save good quality soil for the top 6 to 8 inches. That’s where most plant roots grow and need nutrient-rich soil. Filling the bottom two-thirds with bulky material reduces how much expensive soil you need.
Begin by putting woody sticks and compostable scraps at the base. Next, add a few inches of compost to help break down materials. Top this with 6 to 8 inches of good soil for planting your raised bed.
This method works best for beds about 12 inches deep or taller. Use only soil for a shallow garden bed around 6 to 8 inches deep.
Roots won’t grow well where soil depth is very limited. Taller beds allow a thick base of cheap material, cutting costs.
Don’t rush to plant right away after filling. These organic materials settle and decompose over months, shrinking in volume.
Waiting a year before planting helps the bed stabilize. You can add a thin layer of soil and mulch in the meantime.
A raised bed 4 feet by 6 feet and 12 inches deep needs 2 to 4 cubic feet of soil. This is enough to cover the bed surface properly.
The rest of the volume can be free wood and yard waste. This mix keeps costs low while supporting healthy plants.
2. How to Layer Materials in Your Raised Garden Bed for Best Results
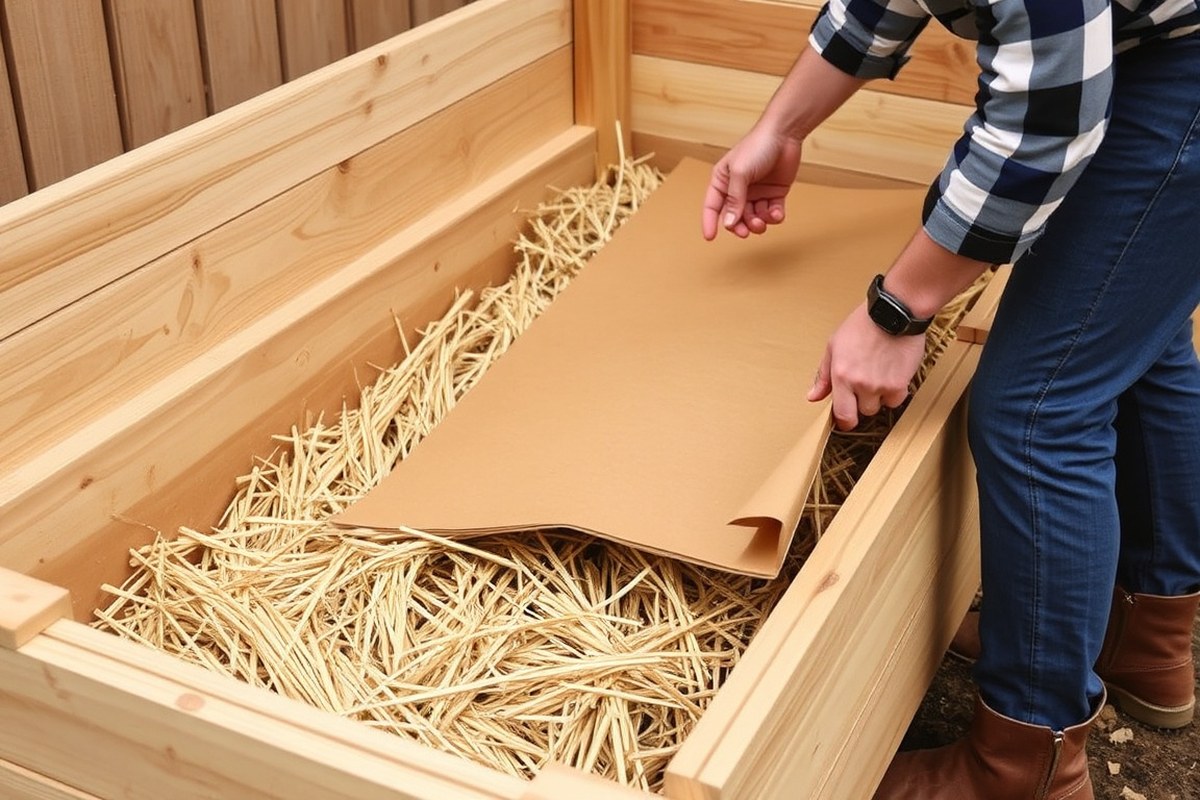
Fill your raised bed in layers that balance drainage, decomposition, and nutrient supply. Start with a barrier like cardboard, then add coarse woody materials, followed by softer organic matter. End with a rich soil and compost mix so roots grow best.
Start with Cardboard or Weed-Blocking Layer
Lay down a thick layer of cardboard or several sheets of newspaper at the bed’s bottom. This blocks grass and weeds while allowing water to seep through. Wet the cardboard so it stays put and starts breaking down faster.
This layer should be about 1 to 2 inches thick. Make sure to overlap the pieces to avoid gaps where weeds can sneak in.
Add Bulky Woody Material Like Logs or Branches
Put a 6 to 12-inch layer of logs, branches, or big sticks on the cardboard. Make sure they cover the surface evenly. This layer helps with drainage and structure.
These provide airflow and help hold moisture deep down. They break down in 3 to 7 years, slowly releasing nutrients.
Use dry branches or logs that fit snugly but don’t pack too tightly. This keeps drainage good and prevents soggy spots.
Follow with a Layer of Straw, Leaves, or Grass Clippings
Next, add some “brown” materials like dry leaves or straw. Then add “green” materials such as fresh grass clippings. Mix them well for balanced composting.
Aim for a 6 to 8 inch layer here. Alternate brown and green layers to balance carbon and nitrogen for faster breakdown.
This layer decomposes in about one season for straw and leaves, weeks for grass clippings. It helps retain moisture and feeds soil life.
- Dried leaves add free carbon and structure.
- Straw holds moisture without matting down.
- Grass clippings add nitrogen and break down fast.
- Kitchen scraps or homemade compost can go in thinly here.
- Mix layers slightly to avoid compacting.
Lumps or mats can block air, so fluff the layer as you go.
Don’t add thick layers of grass clippings alone; they mat and smell bad.
Top with High-Quality Soil and Compost Mix
Finish with 4 to 6 inches of good garden soil mixed with compost on top. This layer is where plant roots grow and get nutrients. Choose soil labeled for raised beds or garden use for best results.
Mixing well-rotted manure or aged compost into this top layer improves fertility and structure. This topsoil holds moisture near roots and supports strong plant growth.
3. Free and Cheap Materials You Can Use to Fill Raised Beds
Many free or low-cost organic materials work well to fill raised garden beds. Some break down fast and enrich the soil. Others take longer and add structure.
Knowing the pros and cons helps you pick the right one. Check what is available near you. Choose what fits your garden and budget best.
Woody Material: Logs and Branches
Logs and branches are great for the bottom of raised beds. They take years to break down, helping with drainage and filling space cheaply. Use small logs or chopped branches to avoid air pockets and uneven settling.
These materials cost nothing if you collect them yourself. Avoid large trunks in shallow beds; they might affect soil depth and root growth. Over time, they become a source of nutrients but won’t feed plants immediately.
Green Waste: Grass Clippings and Kitchen Scraps
Grass clippings and kitchen scraps are rich in nitrogen and break down quickly. They help speed up composting inside the bed.
But fresh clippings can mat down and smell if used thickly. So add them in thin layers.
Only use kitchen scraps without meat or dairy to avoid pests. Chop food scraps into small pieces to speed decay. This green waste is usually free if you save it from your yard or kitchen.
Brown Matter: Leaves, Straw, Cardboard
Leaves, straw, and cardboard add carbon and bulk to your bed mix. Leaves break down at a medium speed and are easy to collect in fall. Straw is light and fluffy, which keeps soil loose but can be pricey if bought fresh.
Cardboard is free from boxes you receive at home. Tear it into smaller pieces and remove tape before adding. These materials balance the green waste and prevent your bed from becoming too wet or compacted.
Bulk Products: Municipal Compost and Mulch
Municipal compost usually costs $10 to $30 per cubic yard. It’s full of nutrients ready to feed your plants. This makes it a good choice.
Mulch from bark or wood chips costs about the same but breaks down slower. Both work well, but compost feeds plants sooner.
Check local sources or your city’s yard waste program for cheap or free compost. Using them boosts soil health while saving money over store-bought soil mixes. Always inspect for contaminants and weeds before use.
| Material | Breakdown Speed | Cost | Best Uses | Warnings |
|---|---|---|---|---|
| Logs and branches | Slow (years) | Free | Bottom layer for bulk & drainage | Don’t use large logs in small beds |
| Grass clippings | Fast (weeks to months) | Free | Top layers or mixed with browns | Avoid thick layers, can smell |
| Kitchen scraps | Fast | Free | Compost ingredient, quick nutrients | No meat/dairy; cut small |
| Leaves | Medium (months) | Free | Bulk material; adds carbon | Remove thick sticks |
| Straw | Slow to medium | Low ($5-$10 per bale) | Light filler and mulch | Watch for weed seeds |
| Cardboard | Medium | Free | Layer base or weed barrier | Remove tape and labels |
| Municipal compost | Already decomposed | Low ($10-$30/yard) | Topsoil mix, nutrient-rich | Check for contamination |
| Mulch (wood chips) | Slow | Low | Mulch and slow organic matter | May tie up nitrogen initially |
- Never add meat, dairy, or oily kitchen scraps to your bed.
- Space green and brown materials evenly to avoid compaction.
- Use smaller wood pieces or shredding for faster breakdown.
- Turn or mix your bed materials annually if possible.
- Collect leaves and grass after mowing or raking for free mulch.
- Check local compost and mulch suppliers for deals or freebies.
4. How to Calculate the Right Amount of Soil for Your Raised Garden Bed
Calculating Soil Volume Correctly
You need to measure your raised bed before buying soil. Measure the length and width in feet. Then decide how deep the soil should be in inches.
Use this formula to find cubic feet: Length × Width × Depth (inches) ÷ 12. For example, an 8 ft by 4 ft bed filled 8 inches deep equals 21.3 cubic feet.
Why Soil Depth Makes a Difference
Different plants need different soil depths, usually 6 to 8 inches. Most raised beds use 6 to 8 inches of quality soil on top for roots. Deeper soil supports bigger plants like tomatoes better.
Keeping the top 6 to 8 inches as good soil means plants grow well. Below that, cheaper materials or compost can fill the rest to save money.
Adjusting for Layers in Your Bed
You only need quality soil in the top 6 to 8 inches of soil. Fill the bottom of your bed with cheaper stuff like leaves or wood chips.
To adjust, just calculate the soil volume using your desired soil depth only. This cuts the amount of soil you must buy and lowers costs.
Step-by-Step Calculation for Soil Needed
Follow these steps to figure out how much soil to buy. Write down your bed’s length, width, and soil depth. Then apply the formula to find cubic feet and convert it to cubic yards if needed.
- Measure length and width of the bed in feet.
- Decide soil depth in inches, typically 6 to 8 inches.
- Multiply length × width × soil depth in inches.
- Divide the result by 12 to get cubic feet.
- Divide cubic feet by 27 to convert to cubic yards.
- Buy this amount of quality soil mix for the top layer.
Worked Example: 8-by-4-foot Bed
Your bed is 8 feet long and 4 feet wide. You choose an 8-inch soil depth.
Multiply 8 × 4 × 8 = 256. Divide 256 by 12 = 21.3 cubic feet needed.
To convert cubic feet to cubic yards, divide 21.3 by 27. This equals about 0.8 cubic yards. Order 0.8 cubic yards of soil for the top layer.
5. Understanding Soil Types and Their Cost Impact in Raised Beds
Garden soil is usually a blend meant for improving existing soil. It often includes organic material and small amounts of fertilizer.
Raised bed mix is lighter and well-draining, made for containers or raised beds alone. Using garden soil by itself in a raised bed can cause compaction and poor drainage.
Topsoil might look like a budget option. It’s just the upper layer of earth, mostly mineral with little organic matter.
It tends to be cheap but doesn’t supply enough nutrients or good structure alone. Mixing topsoil with compost improves nutrients and moisture retention, helping plants grow better.
A good ratio for your raised bed mix is around 70% topsoil and 30% compost. This mix feeds your plants and keeps soil loose. Add 10-15% perlite or coarse sand to your mix.
This helps drainage and keeps roots from sitting in water. These amendments reduce soil weight and help roots breathe.
Potting soil is designed for containers and often contains fertilizers. It’s usually too light and drains too fast for raised beds. Potting soil alone can waste money.
It lacks volume and structure for deep beds. Blend a little potting soil into your topsoil and compost mix. This adjusts texture and nutrient balance.
| Soil Type | What It Is | Cost | Use in Raised Beds | Typical Mix Ingredients |
|---|---|---|---|---|
| Garden Soil | Mix to improve in-ground beds | Moderate | Not ideal alone; can compact | Local soil, organic matter, fertilizer |
| Topsoil | Upper earth layer, mainly minerals | Low | Better mixed with compost | Mostly soil, low organics |
| Raised Bed Mix | Custom blend for beds and containers | High | Used alone or with compost | Topsoil, compost, perlite or sand |
| Compost | Decomposed organic waste | Moderate | Mixed to improve fertility | Rich organic material |
Fill your bed halfway with topsoil and compost mix. Then add a lighter soil mix on top. Water the soil to settle it and check for drainage.
Adding perlite or sand helps keep the soil airy but don’t overdo it. Too much sand can make the soil heavy and hard to work.
Don’t use plastic liners at the bottom unless you want to block natural soil drainage. Good airflow under raised beds keeps roots healthy.
6. Tips for Buying Soil and Amendments Cheaply and Smartly
Buying soil in bulk usually saves you money compared to bagged soil. For example, buying a cubic yard of bulk garden soil costs around $20 to $60.
Bags add up quickly. Having more than one raised bed makes bulk soil delivery cheaper.
Look for local suppliers like garden centers, nurseries, or landscape supply companies. They often offer bulk soil that meets your needs at a lower price. Search online for garden centers near you.
Call them in spring or early summer. Look for sales during those times to save money.
Delivery fees vary by distance and amount. But spending $30 to $50 on delivery for large orders often makes sense and saves trips.
Using leftover soil or compost lets you cut costs and recycle. Compost adds nutrients and improves soil texture.
Start your compost pile early with kitchen scraps and garden waste. Mix this homemade compost into your raised beds to reduce how much soil you need.
- Buy bulk soil if filling multiple or deep beds
- Check prices from local garden centers and landscapers
- Ask about delivery fees and order enough to offset them
- Use homemade compost to boost soil quality at no extra cost
- Buy soil in spring or early summer sales for better deals
- Recycle leftover soil and mix it into new beds
Buying bagged soil can be handy for small projects or topping off beds. Still, it costs more per cubic foot. Plan ahead so you can buy in bulk and avoid paying for just a few bags.
Using recycled materials means less soil to buy and better plant growth. Check soil quality to avoid weeds or contaminants when using leftover soil.
7. Common Mistakes When Filling Raised Beds Cheaply and How to Avoid Them
Using too much fresh compost can cause problems. It holds a lot of moisture, which can drown plant roots. Plus, fresh compost often has high nitrogen levels that might burn young plants.
Spread compost in a thin layer about 2 to 3 inches thick. Keep the layer on top for best results. Use no more than 3 inches of compost.
Forgetting about soil settling is a big mistake. Over time, soil naturally compacts and sinks, leaving gaps near plant roots.
You should fill the bed slightly above its edge, overfilling by about 10%. This prevents gaps and keeps roots in good contact with soil as it settles.
Poor drainage can slow plant growth and cause root rot. Raised beds should have loose, well-draining layers at the bottom. Place coarse materials like small branches under soil layers.
Use shredded wood chips to help water drain. These materials keep water moving well in the soil.
Fresh manure and grass clippings look like great cheap fillers but need caution. Fresh manure can burn plants if not composted well.
Grass clippings might mat down and block airflow, inviting mold. Let manure age at least three months and dry clippings before use.
- Don’t fill beds with fresh compost over 3 inches thick
- Fill beds slightly higher to allow for settling
- Add coarse material below soil to improve drainage
- Use only well-aged manure, not fresh
- Dry grass clippings before layering to avoid matting
- Mix organic matter to prevent soil compaction
- Avoid any trash or treated wood that harms soil
Soil compaction slows water and air movement to roots. Avoid packing down soil too hard when filling or planting.
Mix in fibrous materials like straw or leaves to keep soil loose. Waiting for organic matter to break down also keeps soil healthy and easier to work.
Some materials can slow decomposition or even harm plants. Avoid trash, treated wood, or anything with chemicals.
Watch for large wood chunks that can take years to break down. Stick with natural materials to keep plants safe and soil fertile.
8. How Long Does It Take to Fill and Prepare a Raised Garden Bed Cheaply?
Filling a raised garden bed cheaply can take time, especially if using layers of organic matter. You can fill a bed in stages. Start with a thick base of yard waste or wood branches.
These materials break down slowly. So plan to add soil or compost later as the volume shrinks.
Organic matter like leaves or hay usually takes 6 to 12 months to decompose well. For faster breakdown, moisten the layers and turn the bed once or twice during that time.
Add 8 to 12 inches of soil or soiled hay on top. This keeps the bed warm and ready to plant.
You can plant in the bed earlier, within a few weeks, by focusing on the topsoil. Warm soil means plants start growing sooner.
Wait several months for the bed’s layers to settle. This helps roots get deep feeding before heavy feeders grow.
After the first growing season, the bed will settle and lose some height. Add a few inches of garden soil or compost to top it off.
This refreshes fertility and fills gaps from decomposition. Over time, maintain fertility cheaply by adding mulch or homemade compost annually.
Don’t fill a raised bed all at once with only fresh organic matter. It will shrink dramatically and need topping up.
Step-by-Step Action Plan to Fill Your Raised Garden Bed Cheap
Follow these steps to fill your raised bed using affordable materials and proper layering. Each step helps you build a healthy bed that grows strong plants.
- Before you start: Measure your bed’s length, width, and depth to calculate soil volume. Check your math by multiplying all three dimensions.
- Day 1: Lay a thick layer of cardboard or newspaper as the base. This blocks weeds and will break down in a few weeks.
- Day 2: Add bulky free materials like branches, twigs, and straw for good drainage. The layer should be about one-third the bed’s depth.
- Day 3: Cover the chunky layer with compost scraps. Use cheap compost from your local garden center. Spread it evenly to fill gaps.
- Day 4: Mix purchased topsoil with affordable amendments like shredded leaves or manure. Add this mix as the final soil layer about 6 to 12 inches deep.
- Week 2: Water the bed thoroughly to help layers settle and decompose together. Check if the bed settles by 2 to 4 inches.
- Week 3: Add extra soil or compost if settling created dips or thin spots. Level out the bed’s surface but avoid packing it down too hard.
- Week 4: Plant your seeds or seedlings when soil feels loose and crumbly. Healthy soil temperature and texture are good planting signals.
Frequently Asked Questions
Can I Use Cardboard as a Base Layer When Filling a Raised Garden Bed Cheap?
Yes, cardboard is a cheap, effective base layer that suppresses weeds. It breaks down over time, enriching the soil below your fill materials.
Is Buying Soil in Bulk Cheaper Than Buying Bags for Raised Beds?
Buying soil in bulk often costs 40 to 60% less than bagged soil. Check with local landscape suppliers for the best deals near you.
How Do I Prevent the Topsoil from Compacting in a Cheap Filled Raised Bed?
Adding a layer of mulch or compost at the top prevents soil compaction. It also helps retain moisture for your plants.
Can I Use Local Yard Waste to Fill Part of My Raised Garden Bed?
Yes, yard waste like leaves and wood chips are cheap fill options. They improve soil but break down slowly, so mix them well.
Does Skipping Potting Mix Really Save Money When Filling Raised Beds?
Skipping potting mix can cut costs significantly. Use compostable materials and compost instead to build rich, affordable soil.
Is It Best to Leave 6-8 Inches at the Top of Raised Beds for Garden Soil and Mulch?
Yes, you should leave 6-8 inches for good garden soil and mulch. This ensures nutrient-rich soil stays near your plants’ roots.
Key Points to Remember
Filling a raised bed cheaply means layering free or cheap materials smartly. Start with good preparation and measure carefully. Your next step is to gather your cardboard base and yard waste to begin layering.