How to Maintain Tomato Plants: 8 Essential Steps for Healthy Growth
Knowing how to maintain tomato plants helps you grow healthy crops all season. To keep tomatoes thriving, provide steady water, good soil, and plenty of sunlight. Watch your spacing and temperature to avoid stress that slows growth.
Start with young seedlings spaced about 18 to 24 inches apart for air and light. Water only when the soil feels dry but not saturated to prevent root problems. Use mulch to keep soil moist and reduce weeds around your plants.
Keep an eye on temperatures above 85°F that can reduce fruit set. Prune suckers regularly to improve airflow and focus the plant’s energy on fruit production. Remove any yellowing leaves to prevent disease spread.
These simple habits create a strong foundation for your tomato plants. Healthy roots and leaves mean better fruit later on. Focus on steady care to help your tomatoes grow well and resist pests.
Key Takeaways
- Space tomato plants 18-24 inches apart for better air circulation.
- Water when soil is dry, providing 1-2 inches weekly depending on weather.
- Begin growing seeds inside about 6 to 8 weeks before frost ends.
- Move plants outdoors when nighttime temps consistently exceed 32°F.
- Ensure tomato plants get at least 6 hours of direct sunlight daily.
- Apply compost when planting to improve soil moisture and nutrition.
1. How to Maintain Tomato Plants for Healthy Growth
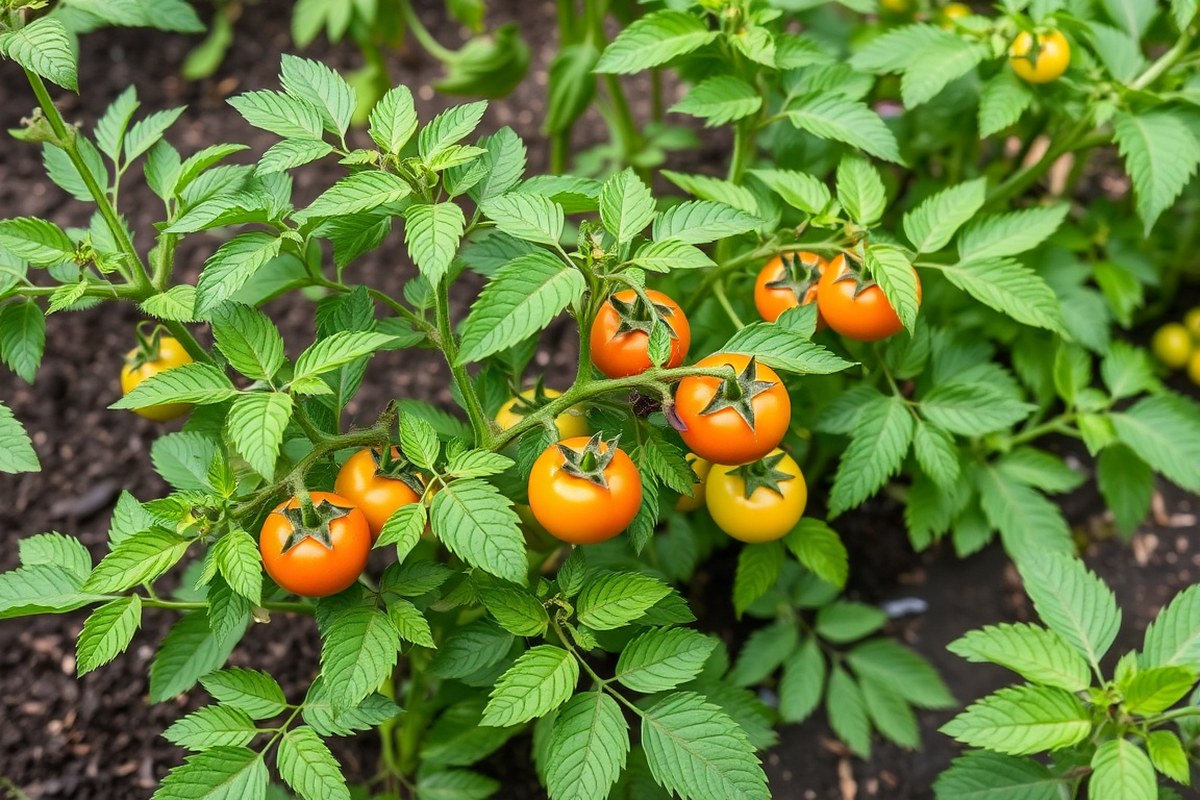
Tomato plants need daily or every-other-day attention in warm weather. Check soil moisture so it stays even but not soggy. Soil feels dry an inch down; it’s time to water your tomatoes.
Pruning is another core task you’ll do weekly. Remove small shoots called suckers that grow between main branches.
This helps air flow, reduces disease, and pushes energy into fruit. Use clean pruning shears or pinch shoots with your fingers.
Supporting your tomato plants early on prevents broken stems later. Install stakes, cages, or trellises right after planting.
Tie stems loosely with soft twine as they grow. This keeps fruit off the ground and lowers disease risk.
Tomatoes need about six hours of full sun daily for healthy growth. In cooler or shady spots, expect slower growth and fewer tomatoes. Aim for a warm spot where temperatures stay between 70 and 85°F during the day.
Soil should be fertile and drain well to avoid root rot. Water pools on the surface after watering. Add organic matter or sand to fix drainage.
A balanced fertilizer every few weeks feeds plants. But follow label directions to avoid burning roots.
Check plants for pests or disease signs while you prune and water. Early detection helps prevent costly damage. Look for yellowing leaves, spots, or holes caused by pests like aphids or hornworms.
Adjust your care for different containers or gardens. A tomato in a pot dries out faster than in the ground.
You need to water potted plants more often. Plants in garden beds often need support and pruning but less frequent feeding.
Healthy tomato plants have deep green leaves and strong stems. Fruit should develop steadily without cracking or wilting. Plants drooping or leaves yellowing fast could mean irregular watering or nutrient issues.
2. Best Watering Practices for Tomato Plants
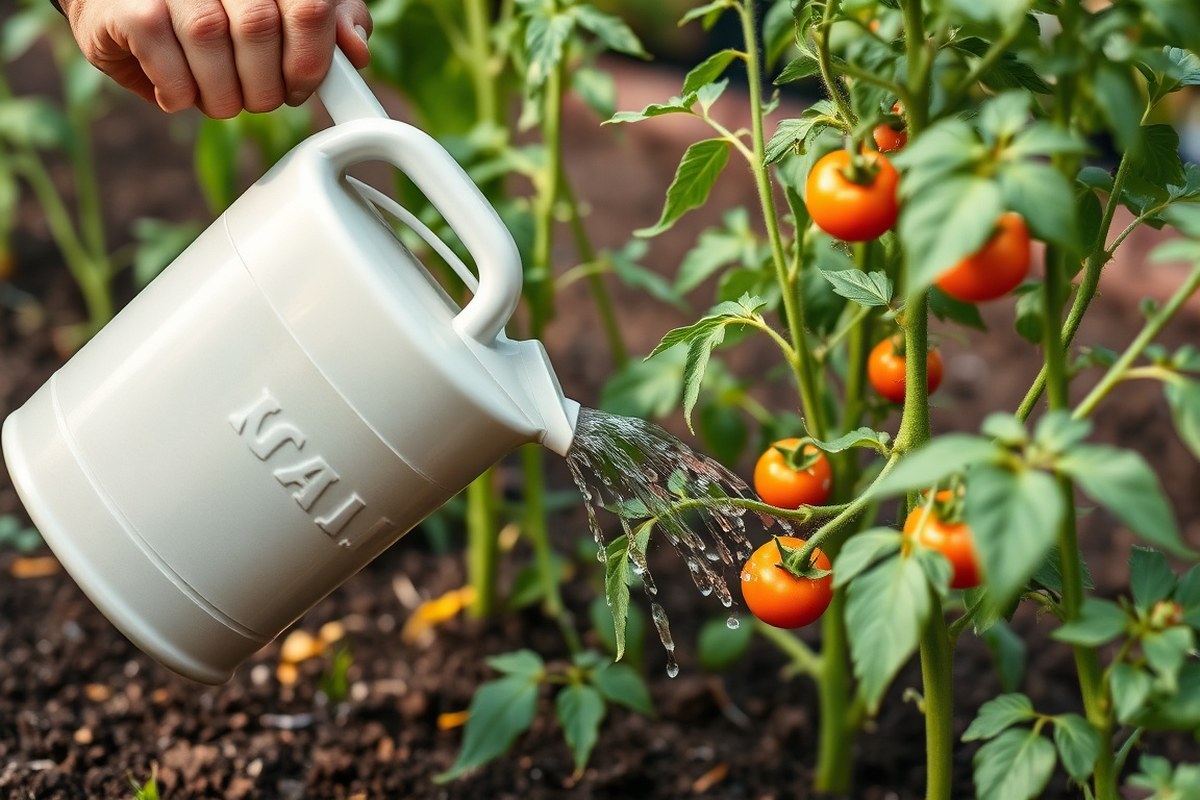
Tomato plants need about 1 to 2 inches of water each week in most conditions. The exact amount depends on soil type, weather, and where you plant.
Tomato plants in containers need different water than those in garden beds. Sandy soil and hot weather will dry out the soil faster, needing more frequent watering.
Water deeply to reach the roots, usually once or twice a week in the garden. Containers dry out faster, so water them daily in hot weather. Check the soil before watering by sticking your finger 1 to 2 inches deep.
Check the soil often. When it feels dry, water your tomatoes. Avoid watering if the soil still feels wet or soggy to prevent root rot and disease.
Wilting leaves or yellowing indicate watering stress. Wilting usually means your plant needs water. Sometimes, overwatering causes wilting.
This happens when soil stays soggy too long. Yellow lower leaves may signal fungal problems from water splashing or too much moisture. Keeping water at the base of plants helps avoid these issues.
Follow these steps for steady watering:
- Check soil moisture 1 to 2 inches deep before watering each time.
- Water slowly and deeply at the soil base, not overhead.
- Water early in the morning to reduce evaporation and disease risk.
- Adjust watering frequency for heatwaves by watering daily in containers.
- Use mulch around plants to keep soil moist evenly and lower watering needs.
- In dry climates, consider drip irrigation or soaker hoses to conserve water.
- Watch plants for signs like leaf wilting or yellowing to tweak watering.
Overwatering can cause root rot, so let soil dry slightly between sessions. Avoid sudden heavy watering after dry spells to prevent fruit cracking.
3. Choosing the Right Soil and Fertilizing Your Tomato Plants
Tomatoes grow best in loose, well-draining soil with a pH between 6.2 and 6.8. Fertilize tomatoes in stages using balanced fertilizers adjusted to their growth phase. Preparing your soil before planting ensures steady nutrient supply and better yields.
Ideal Soil Composition and pH
Tomato plants prefer soil rich in organic matter with good drainage. A mixture of garden soil, compost, and coarse sand works well. This mix holds moisture without becoming waterlogged, which prevents root problems.
The soil pH should stay between 6.2 and 6.8 to help nutrients absorb properly. Use a soil test kit to check pH before planting. Adding lime can raise pH, while sulfur lowers it.
Maintaining this pH range supports strong roots and healthy fruit development. Avoid heavy clay or sandy soils unless you improve them with organic amendments.
Fertilizer Types and Timing
Start with a continuous-release fertilizer that contains calcium, such as a product like Miracle-Gro® Performance Organics®. This type slowly feeds plants over weeks. Apply it as you plant tomatoes to avoid nutrient stress early on.
Supplement with a balanced fertilizer, for example, a 10-10-10 (N-P-K) blend, once plants establish. Fertilizers high in phosphorus promote root growth, so use them at planting.
Switch to higher nitrogen fertilizer in the vegetative phase. Then higher potassium during fruiting.
Keep magnesium and calcium levels steady throughout the season. This stops issues like blossom end rot.
Minor nutrients matter for healthy tomato plants. Adjust fertilizer types based on soil tests or visible plant signs.
Preplant Soil Preparation Steps
Clear weeds and loosen soil about a foot deep before planting tomatoes. Mix in plenty of compost or well-rotted manure for organic matter. This improves moisture retention and nutrient supply.
Test soil pH and adjust it if needed. Add lime or sulfur several weeks before planting to give it time to work. This step makes nutrients more available to growing plants.
In planting holes, mix a handful of slow-release fertilizer with the amended soil. This feeds seedlings as their roots spread, getting them off to a strong start.
Side-Dressing Techniques
Side-dressing means adding fertilizer alongside growing tomato plants. Apply fertilizer 2 to 3 weeks after planting once plants are 6 to 12 inches tall. Use about 1 tablespoon of balanced fertilizer per plant nearby but not touching the stem.
Lightly work the fertilizer into the topsoil and then water it in well. This avoids burning roots and helps nutrients reach them quickly. Repeat side-dressing every 3 to 4 weeks during the growing season.
Keep consistent feeding as tomatoes grow, especially as flowers form and fruit sets. Proper side-dressing improves yield and fruit size.
Adjusting Fertilizer According to Plant Stage
At the seedling stage, use fertilizer high in phosphorus to encourage strong root growth. A ratio like 5-10-5 works well. This helps young plants become established quickly.
During vegetative growth, increase nitrogen to support leafy development. Ratios like 10-5-5 are effective here. Avoid over-fertilizing nitrogen late; it can reduce fruit production.
When flowers and fruit start forming, shift to higher potassium formulas such as 5-10-15. Potassium helps fruit set, size, and flavor. Adjust feeding every few weeks based on plant size and fruit load.
4. Supporting and Pruning Tomato Plants for Strong Growth
Support Methods: Stakes, Cages, and Trellises
Tomato plants need support early to keep fruits off the ground. Stakes, cages, and trellises work well. They keep stems upright and reduce disease risks by improving airflow.
Stakes are simple wooden or metal poles driven next to the plant. Use a cage if you prefer around-the-plant support, especially for indeterminate tomatoes that grow tall.
Trellises suit larger gardens or commercial setups. You train tomatoes upward on a framework, maximizing space and ease of harvest.
- Choose a support type: stake, cage, or trellis based on space and plant type.
- Install supports right after planting to avoid root disturbance later.
- For stakes, drive a 6-8 foot pole about 3-4 inches from the stem.
- Place cages around young plants, ensuring they reach the top of the expected plant height.
- Set trellises with strong posts spaced about 3 feet apart for indeterminate varieties.
- Tie stems loosely with garden twine or strips of cloth to prevent damage.
- Check supports weekly and adjust ties as plants grow taller.
- Remove ties after harvest to avoid girdling or cutting into stems.
Pruning Techniques for Determinate vs Indeterminate Types
Pruning helps increase airflow and fruit quality by removing excess foliage. Indeterminate tomatoes benefit most from regular pruning.
They produce continuously. So you should remove suckers to focus the plant’s energy on fruit.
Determinate tomatoes grow to a fixed size and produce all fruit at once. Their pruning is minimal, mainly removing dead or unhealthy leaves.
Remove suckers that grow between the main stem and branches for indeterminate plants to avoid overcrowding. For determinate types, prune only if plants get dense and block airflow.
Timing Your Pruning Sessions
Start pruning when plants reach about 12 inches tall. This early action keeps the shape manageable and encourages stronger growth. Continue pruning every one to two weeks during the growing season.
Prune in dry weather to reduce disease risk. Avoid cutting more than 20% of the foliage at once, which can stress the plants.
Stop pruning new growth about a month before harvest. This helps plants focus on ripening their fruit. It improves the fruit’s taste and texture.
Common Pruning Errors and Fixes
One common mistake is pruning too much, which stresses plants and lowers yield. Remove only excess growth and damaged leaves to avoid this.
Another error is pruning during wet weather. Leaves stay wet longer and diseases spread more easily. Always prune when the plants and air are dry.
Avoid cutting into the main stem. Always pinch or cut off small suckers carefully.
Use your fingers or clean pruning shears to do this. This prevents damage and reduces infection risk.
5. Identifying and Managing Tomato Pests and Diseases Early
Keeping tomato plants healthy starts with spotting pests and diseases early. Knowing what signs to watch for lets you act fast to protect your plants. Using the right treatments and cultural practices helps stop problems before they take over.
Common Tomato Pests and Their Identification
Aphids are tiny green or black bugs that cluster on new growth and undersides of leaves. They make leaves curl and stunt plant growth by sucking sap. Another pest, the tomato hornworm, is a large green caterpillar.
It has white stripes. It eats leaves and stems quickly.
Whiteflies are very small, white flying insects that swarm when disturbed. They leave a sticky residue on leaves, which can attract mold and weaken plants. Check for these pests on leaves and stems often.
Look early in the morning or late afternoon. Regular checks help catch them early.
Typical Diseases and Early Symptoms
Early Blight causes dark spots with concentric rings on lower leaves. The spots enlarge and leaves turn yellow, eventually falling off. Look for wilting or black patches near the bottom of fruits.
These signs may mean Blossom End Rot. It happens from calcium deficiency.
Leaf mold creates yellow spots on the upper leaves and gray fuzzy growth underneath. It spreads quickly in humid, poorly ventilated areas. Detect diseases early by scanning leaves regularly and removing any damaged or discolored leaves promptly.
Organic vs Chemical Treatment Options
For aphids and whiteflies, spraying neem oil or insecticidal soap is a good organic option. These treatments work by smothering insects without harmful residues. Handpicking tomato hornworms early can control them effectively before they damage too many leaves.
Chemical pesticides may be necessary for severe infestations but should be a last resort. Use chemicals labeled for tomatoes and follow all safety instructions carefully. Organic methods take longer to work.
They lower risks to helpful insects. They also reduce chemical buildup in your soil.
Prevention and Cultural Controls
Space your tomato plants so leaves don’t touch to improve air circulation and reduce moisture buildup. Water plants at the base in the morning. This keeps leaves dry.
Dry leaves help prevent fungal infections like blight. Mulch around plants to keep soil moisture steady and block soil-borne diseases from splashing onto leaves.
Rotate tomatoes with unrelated crops to avoid disease buildup in soil year after year. Clean up plant debris after harvesting to remove places pests and diseases hide. Use shade cloth on hot days to reduce heat stress and keep your plants productive.
Spot problems early by checking plants every few days. Catching pests and diseases quickly makes treatment easier and more effective.
6. Sunlight Requirements and Temperature Effects on Tomatoes
Tomato plants require 6 to 8 hours of direct sun every day. This sunlight supports strong growth and tasty fruit production. Less than 6 hours usually results in poor growth and lower fruit quality.
Ideal daytime temperatures range between 70°F and 85°F for tomatoes. They slow growth below 55°F and stop flowering above 85°F. Nighttime temperatures should stay between 55°F and 70°F for best fruit set and flavor.
Heat stress often happens when temperatures rise above 85°F for several hours. You might see wilted leaves, yellowing, or flowers dropping off.
To protect plants during heat waves, find shade cloth with 30% to 50% sun blockage. Place it over plants during peak sun hours, usually from 11 a.m. To 4 p.m.
Mulching can also keep roots cooler during hot periods. Use straw, grass clippings, or shredded leaves about 2 to 3 inches thick.
Watering early in the morning helps too. Avoid watering hot leaves to prevent sunburn and fungal problems.
When temperatures fall below 50°F at night, cover plants with lightweight fabric or row covers. Remove these in the morning once temperatures rise to prevent overheating. This helps avoid cold damage, which can stunt growth or cause blossom drop.
Watch your garden weekly for heat stress signs. Flowers falling off with healthy leaves means you should add shade and water.
Wilting or browning leaves often signal the heat is too intense for plants. Consider moving potted tomatoes to a cooler spot or using fans in a greenhouse.
Adjust sunlight and temperature care depending on your location and season. In very hot climates, more shade and mulch are key.
Cooler areas may need full sun and protection only during unexpected cold nights. Adapting your approach keeps tomatoes healthy and productive throughout the season.
7. Effective Mulching to Conserve Moisture and Prevent Disease
Mulching keeps soil moist by reducing evaporation around tomato plants. It also helps block weeds from growing, which compete with tomatoes for water and nutrients. Mulch blocks rain from splashing soil onto leaves.
Soil often has disease spores that can spread. This helps keep lower leaves healthier.
Organic mulches like straw, shredded leaves, or grass clippings work well. They hold moisture and slowly break down, adding nutrients to the soil.
You can also use black plastic mulch to warm the soil for an earlier start. But it doesn’t add organic matter.
Apply mulch after the soil has warmed in spring and plants are well established. Put 2 to 3 inches of mulch around each plant. Leave a few inches gap from the stem.
This spacing protects stems from moisture buildup. This prevents stem rot and lets air circulate.
- Clear the area around your tomato plants from weeds and debris.
- Water the soil thoroughly to start with moist ground under the mulch.
- Spread a 2-3 inch layer of organic mulch evenly around each plant.
- Keep mulch about 2 inches away from the tomato stems to prevent rot.
- Check soil moisture weekly. Add more mulch if it dries out or thins.
- Remove any weeds that appear through the mulch promptly.
- In hot climates, apply mulch to keep soil cooler and reduce stress on roots.
- Spot disease symptoms? Replace the old mulch with fresh mulch. This helps reduce disease spores around the plant.
Mulching reduces soil temperature swings, which keeps roots steady and less stressed. It lowers water needs by holding moisture in. Mulch also cushions low-hanging fruit and cuts down weeds, which can harbor pests and diseases.
Without mulch, soil splash spreads fungal diseases like blight more easily. Mulch stops this splash and reduces leaf and fruit infections. Keeping the base dry with mulch helps keep tomatoes healthy during rainy spells.
8. Timing Harvest and Post-Harvest Care for Tomatoes
Ripe tomatoes usually have full, even color, red, pink, yellow, or orange depending on the variety. The fruit should feel slightly soft but not mushy when you gently squeeze it.
Check for shiny skin on the tomato. It should come off with a slight twist or tug from the vine.
Harvest tomatoes in the morning after dew dries. Do this before the day gets too hot. Use clean scissors or garden shears to cut the stem.
Leave about half an inch above the fruit. This method prevents damage to the plant and fruit, helping the tomato last longer after picking.
Stop heavy pruning 4 to 6 weeks before your area’s first frost. This helps flavor develop better. This change helps tomato plants use energy on ripening fruit.
They stop growing more leaves or branches. Light trimming to remove yellow leaves is fine. But avoid cutting new growth late in the season.
Store harvested tomatoes at room temperature, out of direct sun. Avoid fridge until fully ripe to keep flavor. Keep them around 65°F to 75°F on a countertop or bowl.
To slow ripening of many tomatoes, place them in a paper bag. Add a banana or apple to the bag to help.
These fruits release ethylene, which speeds up ripening when you want it. Once fully ripe, use or preserve the tomatoes within several days for highest quality.
Handle tomatoes gently during harvest to avoid bruising, which can lead to quick spoilage.
Step-by-Step Action Plan to Maintain Your Tomato Plants
Follow this plan to keep your tomato plants healthy and productive. Check each step to know you’ve done it right.
- Before planting: Choose well-draining soil with added compost. You’ll see rich, dark soil ready to feed plants.
- Week 1: Water deeply every other day, keeping soil moist but not soggy. Plants look green and upright, not wilted.
- Week 2: Set up stakes or cages firmly. Plants stand straight and feel supported when gently pushed.
- Week 3: Prune lower leaves and any small suckers to boost airflow. You’ll notice fewer damp spots on leaves.
- Weeks 4-6: Monitor closely for pests like aphids or hornworms. Find no large clusters or damage on leaves.
- Throughout growing season: Mulch around the base with straw or wood chips to keep soil moist. Soil stays evenly damp, and weeds stay low.
- Starting fruiting: Fertilize with tomato-specific nutrients every 2-3 weeks. Fruits appear firm and plants keep growing strong.
- Harvest time: Pick tomatoes when fully colored but still firm. Fruit tastes sweet and shows no cracks or soft spots.
Frequently Asked Questions
What Is the Best Way to Transplant Young Tomato Plants?
Plant young tomatoes after the last frost date in your area. Harden them off by placing outside for a few hours daily, boosting survival and growth success.
How Often Should I Check Soil Moisture for Tomatoes?
Check tomato soil moisture once a day, especially during hot weather. Use your finger to feel 1-2 inches deep; only water if it’s dry.
Can I Grow Tomatoes Successfully in Containers on a Balcony?
Yes, choose large pots with good drainage; tomatoes need extra water in containers. Use quality potting soil mixed with compost and feed regularly.
What Kind of Support Is Best for Indeterminate Tomato Varieties?
Use tall stakes or sturdy cages that are 5 to 6 feet high for indeterminate tomatoes. Secure the main stem gently to avoid damage as the plant grows.
How Can I Tell If My Tomato Plant Needs More Nutrients?
Yellowing leaves and slowed growth often show nutrient deficiency. Side-dress with high-phosphorus fertilizer when plants reach 6-8 inches tall.
Is Pruning Necessary for All Tomato Plants?
Pruning mainly helps indeterminate varieties by improving air flow and fruit size. Determinate types need less pruning since they grow to a set height.
The Bottom Line
Tomato plants need consistent care to give you a great harvest. Start with strong soil and steady watering. Check your plants weekly and adjust care as you see their growth and health.