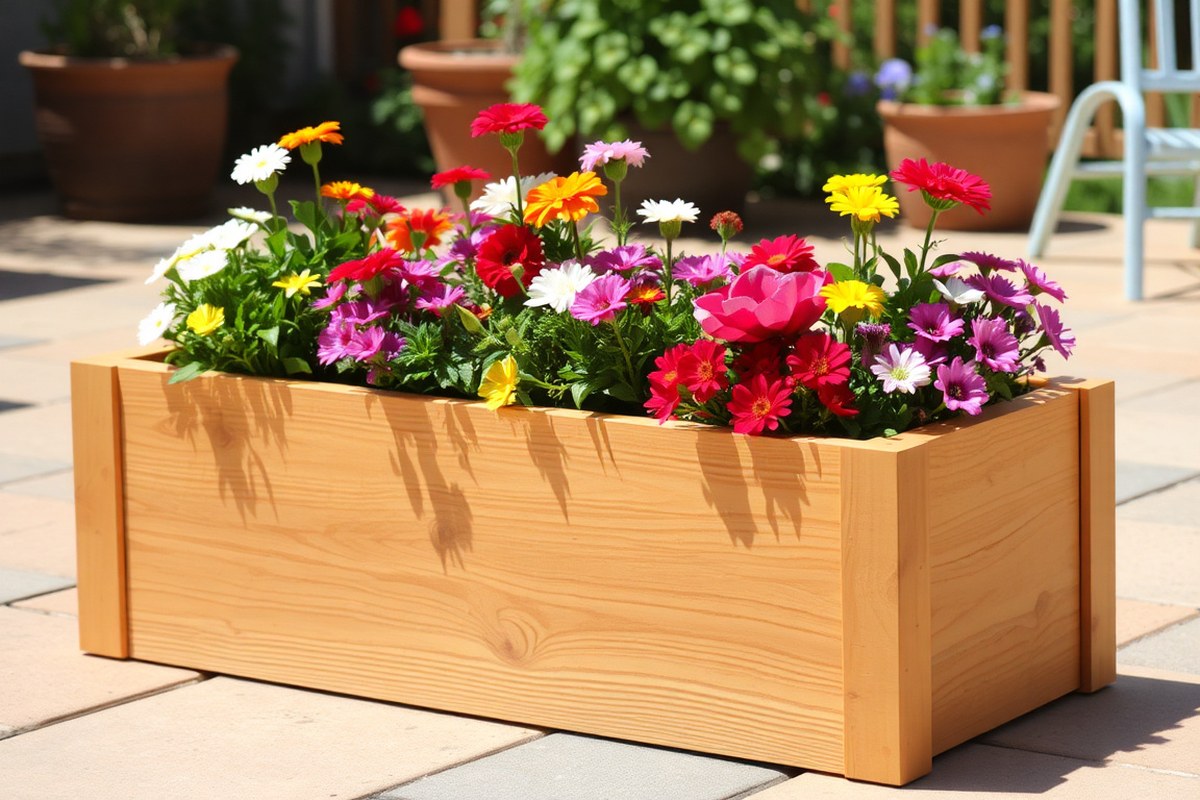
How to Make a Planter: Simple Steps and Expert Tips for DIY Success
Wondering how to make a planter that suits your garden and style? Start with choosing the right materials, like wood or recycled buckets, for durability and look. Cut the wood to your desired size.
Choose anything from 24 inches to 6 feet. This will make a sturdy base for your planter.
Drainage is key to healthy plants. So add holes or use a 5-gallon bucket inside to catch excess water. Keep your planter size practical.
Small planters fit windowsills well. Medium ones suit patios, and large ones work in yards. Secure each part with screws or nails to keep the structure solid and stable over time.
Your planter can be simple or stylish. Use stencils and modeling paste for a modern finish, all for about $10. Begin with a design that fits your space.
Pick plants you want to grow. Build carefully to avoid leaks or weak spots.
Key Takeaways
- Use wood or recycled buckets for affordable, durable planter bases.
- Cut wood between 24 inches and 6 feet to match your space.
- Include drainage holes or a bucket liner to prevent water buildup.
- Choose planter size based on location: small windowsills to large yards.
- Secure planter parts with screws or nails for long-lasting stability.
- Add style with simple design tools like stencils and modeling paste.
How to Make a Planter Step by Step
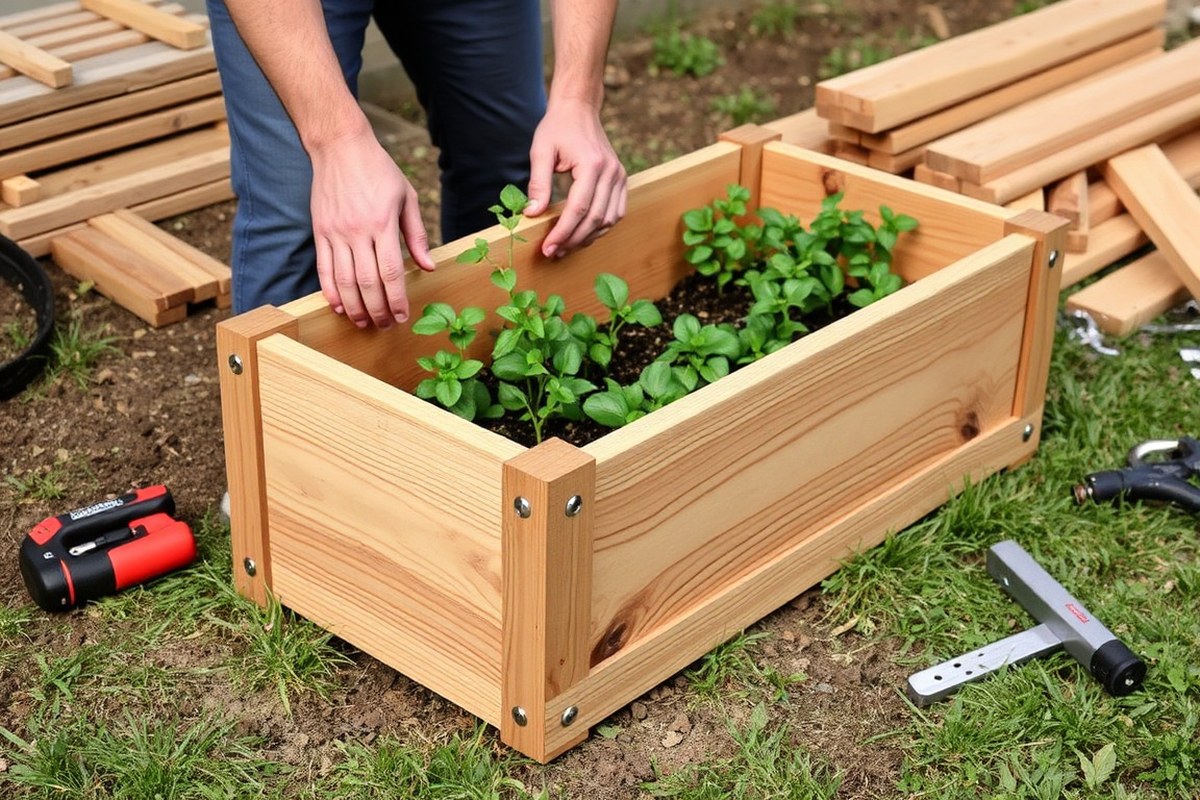
Building your planter from scratch means cutting, assembling, and securing wood pieces. This process needs patience and basic tools. The whole project usually takes between 2 and 4 hours.
Your skill level and the planter size affect the time. Bigger planters take longer to complete than smaller ones.
Follow these steps for a straightforward build. You’ll shape the frame first, then add the base and drainage. Taking your time at each step will keep the planter sturdy and lasting.
- Measure and mark your wood pieces. Use a tape measure to mark boards for the planter sides, base, and any legs. Double-check the markings before cutting to avoid mistakes.
- Cut the wood pieces to size. A circular saw works best for straight, even cuts. Smooth rough edges with sandpaper to prevent splinters.
- Assemble the planter frame. Join the side pieces using screws, making sure corners align squarely. Pre-drill holes to stop the wood from splitting during screwing.
- Attach the base. Secure a wooden board or slats to the bottom frame. Leave small gaps or drill holes for drainage to prevent water buildup in the soil.
- Reinforce corners if needed. Add small wood blocks inside corners for strength. This step helps the planter hold its shape against soil weight over time.
- Sand the full planter surface. This smooths areas where dirt or roots might catch. It also prepares the wood for sealing or painting if you want to protect it.
- Apply a sealant or paint if desired. Use a brush to coat all surfaces, especially edges and bottoms. This adds weather resistance and extends the planter’s life outdoors.
Each step usually takes 15 to 30 minutes, depending on your setup and wood type. Plan for extra time if you finish sanding and sealing. Taking breaks helps improve accuracy and safety during the build.
Choosing the Best Materials for Your Planter
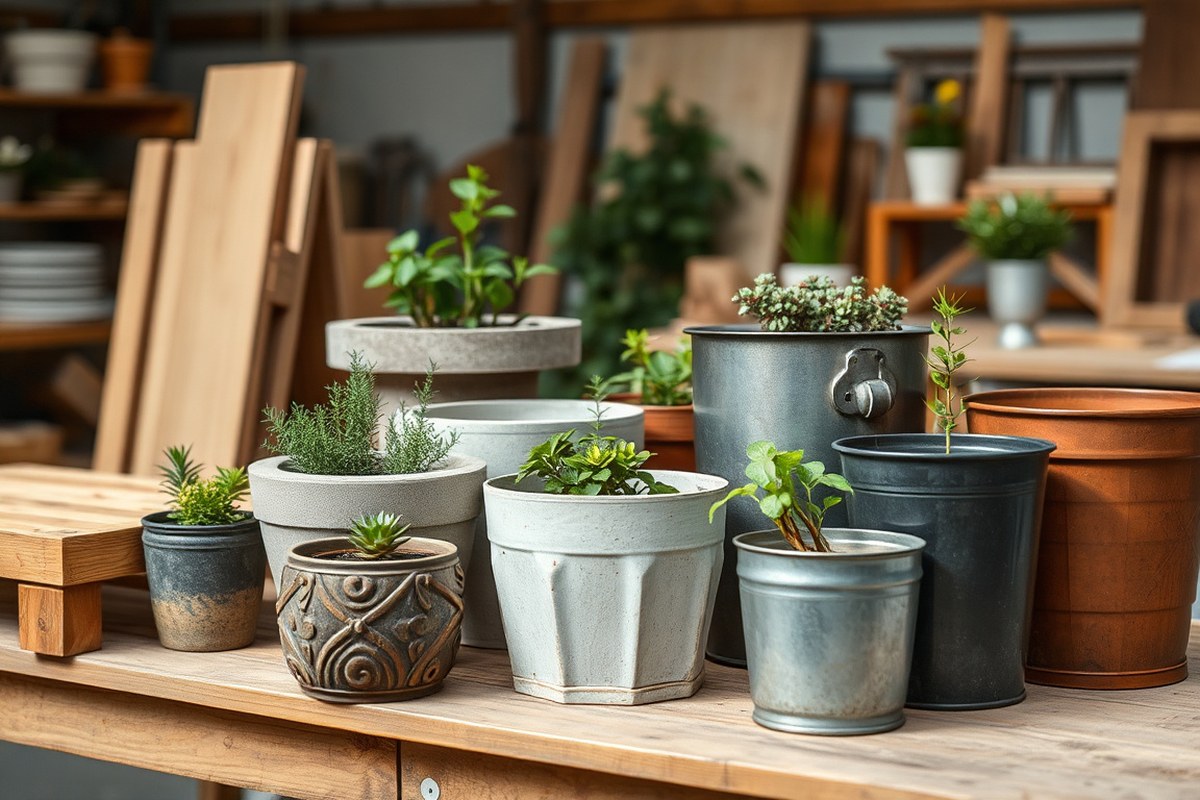
Wood is a popular choice because it looks natural and feels sturdy. Cedar and redwood resist rot well, lasting several years without much maintenance. Use corrosion-resistant screws to avoid rust over time.
Seal or stain the wood to protect it from rain. This also helps guard against sun damage.
Plastic planters can be very affordable and lighter to move around. They don’t crack easily but can fade with sun exposure over time. Look for thicker plastic to avoid warping, especially if your planter sits outdoors in hot weather.
Metal planters offer a sleek, modern look and strong durability. Some metals might rust, so pick a corrosion-resistant type like aluminum or galvanized steel. A coat of rust-proof paint can help if you choose steel.
Recycled materials like old pallets, buckets, or crates make budget-friendly options. Pallets need to be free from chemicals and well-sanded to avoid splinters. Make sure any container you recycle has good drainage holes to prevent water buildup.
| Material | Durability | Weather Resistance | Cost | Workability |
|---|---|---|---|---|
| Cedar Wood | High (5-10 years) | Excellent when sealed | Moderate ($20-$50 per planter) | Easy to cut and assemble |
| Plastic | Moderate (3-5 years) | Good, but can fade | Low ($10-$30) | Very easy, no special tools |
| Galvanized Steel | Very high (10+ years) | Excellent with proper paint | High ($40-$70) | Moderate, needs metal tools |
| Recycled Pallets | Variable (2-5 years) | Fair, depends on treatment | Very low (often free) | Requires sanding and prep |
| Old Buckets/Crates | Moderate (3-6 years) | Depends on material & drainage | Free to low | Easy, but may need holes |
Pick materials that suit your climate and style. For rainy areas, sealed wood or metal works well.
Dry, sunny spots might benefit from plastic to avoid cracking. Recycled planters add charm but usually need more care to last.
Make sure your planter has proper drainage using landscape fabric or drilled holes. This keeps soil healthy and prevents root rot. Skipping this step can ruin plants fast, no matter the material choice.
Always drill drainage holes in plastic and metal containers to avoid standing water.
Tools Needed to Build a DIY Planter
Making a DIY planter needs a few basic tools and some options for more advanced projects. You’ll want safety gear too, to keep things simple and safe. Knowing the tools helps you build a strong and neat planter without wasting time or money.
Basic Hand Tools for Simple Planters
You can start with just a few hand tools for basic wooden or plastic planters. A hammer and screwdriver are essential to join pieces together.
Measuring tape ensures your planter is the size you want. So plants have enough room.
Another helpful tool is a handsaw or a small hand-held circular saw. It lets you cut boards or plastic to shape without needing power. Sandpaper smooths rough edges, keeping the planter safe to handle and nice-looking.
Power Tools for Advanced Planter Projects
More advanced planter builds, like raised beds or complex wood designs, often use power tools. A drill with different bits speeds up screwing and drilling holes for drainage. A power saw, like a miter saw, cuts multiple pieces quickly with clean angles.
A jigsaw helps cut curves or unusual shapes in wood or plastic materials. For concrete planters, a mixing drill attachment blends the mix evenly. Utility knives are important for trimming liners or plastic sheets precisely.
Alternative Tools for Beginners
When you’re new, choose simpler tools instead of complex ones. Avoid power saws. Use premade wooden boards or plastic containers.
Hardware stores cut them to size for you. You can assemble with pre-drilled screws or use wood glue for mild projects.
Reusable plastic planters or barrels don’t need cutting tools, just drilling drainage holes. This reduces tool needs while still creating a durable planter. Always remember, slow and steady builds work just fine for beginners.
Safety Gear You Should Always Use
Protect your eyes with safety glasses, especially when cutting or drilling wood and concrete. Gloves guard your hands from splinters, rough edges, and sharp tools. Wear a dust mask when sanding wood or mixing cement to avoid breathing harmful dust.
Closed-toe shoes protect feet from dropped tools or heavy boards. Hearing protection is wise if using power saws or drills for longer periods. Safety keeps your project fun and injury-free.
Checklist of Essential Tools for DIY Planters
- Measuring tape, measures planter size accurately.
- Hammer and screwdriver, assemble planter parts.
- Handsaw or small circular saw, cuts wood or plastic.
- Drill with bits, makes holes, inserts screws, and drills drainage.
- Jigsaw, cuts curves or complex shapes.
- Sandpaper, smooths edges and surfaces.
- Utility knife, trims liners or plastic precisely.
- Mixing drill attachment, mixes concrete evenly.
- Safety glasses, gloves, dust mask, and hearing protection, protect during all steps.
This tool list covers from simple wooden box planters to large raised or concrete ones. Prices vary, but basic hand tools can cost under $50. Power tools and safety gear add to the budget.
A sturdy build with well-cut edges and neat assembly shows success. Rushing can cause splintered wood or uneven cuts, which harm the planter’s look and lifespan.
How to Choose the Right Size and Shape for Your Planter
Matching Planter Size to Plant Type
Pick a planter size based on your plant’s root system. Most herbs need at least 12 inches deep.
Deeper-rooted flowers require 18 inches or more. Giving roots enough space helps plants grow strong and healthy.
Vegetables like potatoes do well in wider, deeper boxes around 23 inches square. The wider space lets roots spread and stores enough soil to hold moisture. Small flowers or succulents need less deep planters, usually 6 to 8 inches.
Choosing Planter Shape for Drainage and Root Space
Planter shape matters for drainage and airflow. Rectangular or elongated boxes allow roots to spread in one direction and help airflow between plants. This shape fits well on narrow patios or balconies.
Round planters help prevent standing water at the roots. Tapered sides speed up drainage, cutting root rot risk. Choose shapes that match your plant’s growth habits and stop water from pooling.
Fit Planter Size to Your Space
Measure your available space before choosing planter dimensions. A rectangular planter around 52.75 inches long, 13.75 inches wide, and 33.5 inches tall fits many backyards and patios. It offers space for several plants plus storage underneath.
Smaller balconies or window sills get better with narrow and tall planters. They fit sunny spots without crowding. Match size and shape so your plants get sunlight and room to grow without clutter.
Decision Rule for Plant Types and Planter Dimensions
Use this rule: plant root depth plus 2 to 4 inches equals planter depth. For example, herbs need roots reaching 10 inches deep. So pick a planter at least 12 to 14 inches tall.
Root vegetables like carrots need 12 to 14 inches depth. So use a 16-inch deep planter.
Width and length depend on plant spread. A tomato plant needs 18 to 24 inches wide for good root space.
Small herbs can share a 12-inch-wide container. Give plants enough space to avoid overcrowding.
Combining Size and Shape for Good Growth
Choosing the right size and shape supports airflow and sunlight. A shallow but wide container works for lettuces or flowers that grow outward. Deeper planters suit root-heavy plants like potatoes or shrubs.
Planter height affects watering needs. Taller planters dry out faster, so prepare to water more often. Match your planter’s shape to the plant’s needs and your outdoor conditions for best growth results.
Planning Your Planter Design for Style and Function
Start by matching your planter’s look to your indoor or outdoor space. Choose size, color, and texture that suit your decor style and plant needs. Add features like trellises or wheels to boost both style and function.
Matching Style to Your Space
Pick planter shapes that fit where you want to place them. Round or square works in most spaces.
But long rectangular planters suit narrow patios well. Use colors that blend or pop against your walls or garden.
Pastel tones complement indoor areas with soft colors. Bright colors work well outside where sunlight highlights bold hues. Textures like smooth ceramic or rough wood add visual interest and fit different styles.
Adding Functional Features
Include features that help you use and move the planter easily. Attaching wheels makes larger planters portable, great if you shift plants to catch sunlight. Trellises add vertical growing space and give climbing plants support.
Benches built into large planters give a seating spot while framing a garden area. Drainage holes keep soil from getting soggy, which protects plant roots. Think about accessibility and convenience when designing these details.
Choosing Color, Texture, and Finish
Use outdoor paint if your planter goes outside to prevent weather damage. Matte finishes hide dirt and scratches better than shiny ones. Glossy finishes bring out bright colors but show water marks more easily.
Rough textures suit rustic or natural garden styles. Smooth finishes look clean and modern indoors. Try tester pots of paint on your planter material to check color and coverage before committing.
Planning Size and Placement
Size your planter to fit your plant’s root ball. Leave 2 to 4 inches of extra space around the roots. This helps the plant grow and spread out comfortably.
Larger planters dry out slower and hold more soil, which helps during hot weather. Think about weight too; a big planter might need wheels or extra support.
Place planters where they suit light needs and don’t block walkways. Group several small pots together for a colorful look. Use one big planter to create a garden focal point.
Both ways add interest to your space. Choose spots with easy access for watering and maintenance.
Make sure your planter has drainage holes. Without them, water buildup can kill plants quickly.
Prepping Your Planter Base and Adding Drainage
Drainage is key to keeping plants healthy in your planter. Water needs to escape to stop roots from sitting in moisture. Without drainage holes, plants risk root rot and poor growth.
Using landscape fabric inside the planter helps water flow while keeping soil from washing out. The base should provide room below the soil to collect extra water.
Usually, a 1 to 2-inch gap at the bottom works well. This space prevents water from pooling directly at the plant roots.
Follow these steps to prep your planter base and add drainage properly:
- Mark where drainage holes will go. Place holes evenly on the planter’s bottom to spread drainage.
- Drill holes about 3/8 to 1/2 inch wide. This size drains well but won’t let soil fall out.
- Lay a layer of landscape fabric across the base. Cut it bigger than the base to cover all the holes.
- Add a 1-2 inch layer of small rocks or gravel above fabric. It helps water move freely below the soil.
- Attach side boards securely. Make sure the base stays sturdy with holes unobstructed.
- Fill with soil on top of gravel and fabric layers. This protects drainage and supports root health.
If you have a wood planter, use treated lumber to resist rot where water drains. Plastic planters often have built-in drainage holes but drill extra if needed. Large planters may need more holes to handle heavy rainfall or frequent watering.
Planters without drainage require very controlled watering, which can be tricky. Drainage holes and fabric cost only a few dollars but save plant health and reduce mess. Check drainage holes occasionally to keep them clear and prevent clogging.
Filling Your Planter: Soil Choices and Planting Tips
A good potting mix suits most planter plants better than garden soil. It drains well and holds moisture just right. For vegetables or flowering plants, pick a mix labeled for containers with added nutrients.
Succulents and cacti need sandy soil with excellent drainage. Use a special cactus mix or add coarse sand to regular potting soil. This avoids root rot from too much water staying near the roots.
Adding organic matter like compost enriches plain mixes and aids plant growth. Avoid heavy clay soils, which often stay soggy and suffocate roots. Check that your planter has drainage holes to prevent standing water.
Fertilize new plantings after about 4 weeks to avoid root burn. Use a balanced, slow-release fertilizer following package directions. Repeat every 4 to 6 weeks during the growing season for steady nutrients.
You can also feed liquid fertilizer every 2 weeks for a quick boost. Dilute it to half-strength to avoid overfeeding. Plants in richer soil mixes need less fertilizer than ones in plain soil.
Common soil mistakes include using garden dirt or packing soil too tightly. Tight soil reduces airflow and water drains poorly, hurting plants. Loosen soil gently before planting and avoid compacting it as you work.
Another mistake is ignoring fertilizer needs, which leads to dull leaves and weak growth. Don’t guess on fertilizer amounts, follow the label and adjust for plant health. Overfertilizing causes leaf burn and wastes money.
Inspect soil moisture often. Dry soil stunts plants, but overly wet soil invites disease.
Stick your finger 1 to 2 inches in to check moisture. Water only when the top layer feels dry.
Maintenance Tips to Keep Your Planter Healthy Year-Round
Watering frequency depends on your plants and container size. Smaller planters dry out faster and may need daily watering in hot weather. Larger containers hold moisture longer, so watering every 2 to 3 days could work.
Fertilizing helps plants get nutrients they lack in limited soil. Use a balanced slow-release fertilizer once a month during the growing season. Avoid over-fertilizing, which can harm roots and cause leaf burn.
Pruning keeps plants healthy and encourages growth. Trim dead or yellow leaves weekly and remove spent flowers to boost blooming. Pruning also prevents overcrowding and allows better air flow.
- Check soil moisture by sticking your finger 1 inch deep weekly
- Water until excess drains through drainage holes
- Apply slow-release fertilizer monthly in spring and summer
- Prune dead leaves and stems regularly
- Remove pests by hand or use insecticidal soap if needed
- Rotate planter occasionally for even sun exposure
- Repot plants every 1-2 years to refresh soil and space roots
Watch for signs like wilting, yellow leaves, or stunted growth. Wilting often means underwatering or blocked drainage.
Yellow leaves can indicate overwatering or nutrient deficiencies. Adjust watering and check drainage holes regularly.
Refreshing soil helps prevent diseases and root crowding. Repot your planter in spring by loosening roots and adding fresh potting mix. This typically takes 30 to 60 minutes depending on planter size and plant count.
Always ensure your planter has drainage holes to avoid root rot.
Plants in self-watering containers should still be checked weekly. These planters regulate moisture but can dry out in very hot weather. Adjust watering based on plant type and seasonal changes to maintain healthy growth.
Seasonal Care Strategies for Outdoor Planters
Start spring by cleaning your outdoor planter and replacing the top layer of soil. This refreshes nutrients and improves drainage. Add slow-release fertilizer to support new growth during the warming weather.
As summer heats up, watch your plants closely for dryness. Water deeply every two to three days unless it rains. Move planters to shaded spots during extreme heat above 85°F to protect roots from sunburn.
Prune dead or yellow leaves in summer to keep plants healthy and prevent disease. Use clean, sharp scissors to avoid damage. Feed your plants with liquid fertilizer every four weeks for steady growth.
Autumn means slowing down care as temperatures drop below 60°F. Cut back perennials and remove spent flowers to prevent pests. Reduce watering to once a week because plants use less water in cooler weather.
Protect planters before winter freezes set in. Move smaller containers indoors or wrap them in insulating materials like burlap. Drain water to stop soil from freezing and cracking the planter.
Keep pests away all year by cleaning leaves and debris regularly. Inspect for common insects like aphids and spider mites especially in spring and summer. Treat infestations early using organic insecticidal soap to avoid chemical buildup.
Seasonal adjustments help plants thrive despite changing weather. For example, summer watering may cost more but prevents dry soil stress. Winter protection might mean buying covers or relocating planters inside.
Check your plant labels for specific needs since some species handle seasonal shifts differently. A tropical plant in a northern state needs more shelter than hardy herbs. Adapting care to your climate ensures your planter stays strong.
Creative Planter Ideas Using Recycled and Unusual Materials
Look around your home for items that can get a second life as planters. Old wooden crates, metal tins, and ceramic mugs make great planters. Plastic jugs and worn-out boots can work too.
They add charm to your garden space. These reused containers cut waste and add personality to your garden.
Before planting, clean your chosen container thoroughly with soap and water. Remove any dirt, rust, or residues for the best chance of your plants thriving.
To keep your planter from leaking, seal it inside using a waterproof paint or plastic liner. This also protects wood and metal from rotting or rusting over time.
- Wooden crates or pallets, left unfinished for a rustic style
- Old ceramic bowls or mugs, sealed with outdoor-grade polyurethane
- Plastic bottles cut in half, lined with landscape fabric
- Metal buckets or tins, painted with rust-proof spray paint
- Tree stumps hollowed out, just sanded and treated
- Well-worn rain boots, cleaned and filled with soil
To boost the look of recycled planters, use paint and decoration. Try spraying multiple colors on wood or metal and then distressing with sandpaper.
Stick some stones, shells, or small tiles for texture and a personal touch. You can also wrap bindings like jute rope or colorful wire for an earthy flair.
Keep in mind that some materials may not drain well on their own. Drill a few small holes in wood, plastic, or metal containers to stop water from pooling. Without drainage, roots can rot quickly.
Add a drainage layer at the bottom of your planter. Use gravel or broken pottery for better water flow. This step saves plants from sitting in water.
Safety Tips and Common Mistakes When Making Planters
Wear gloves and eye protection when you cut or hammer materials to avoid injury. Use sturdy, sharp tools to keep control and reduce accidents. Keep your work area clear of clutter to prevent tripping or dropping heavy items.
Poor drainage is a common planter mistake that harms plants. Drill several holes at the bottom, about ¼ inch each, to help water drain well. Without this, roots can rot and the soil stays too wet, which kills plants.
Choosing the wrong wood or material can shorten planter life. Untreated wood can rot quickly, especially outdoors.
Use cedar or redwood, or seal cheaper woods with waterproof paint. A sealed planter lasts much longer and saves money over time.
- Wear gloves, goggles, and closed-toe shoes for safety
- Use a dust mask when sanding or cutting treated wood
- Secure your workspace and clamp pieces when cutting
- Drill ample drainage holes, at least three per planter base
- Seal or treat wood if the planter will be outside
- Check for splinters and sand rough edges before planting
- Don’t overfill soil; leave space for watering and breathing
Not securing planter corners properly causes leaks and instability. Use wood glue and screws specifically sized for your materials.
Screws hold tight; glue keeps gaps sealed. This stops soil from spilling and water from leaking extensively.
A common error is planting without leaving room at the top. Soil that’s too full prevents proper watering and can cause runoff. Leave 1 to 2 inches between the soil and planter edge.
This helps with watering and air flow. It keeps your plants healthier. This simple step keeps plants healthier and easier to care for.
Avoid sharp tools distractions; set them down safely after each use to prevent injuries.
Step-by-Step Action Plan for Building Your Planter
Follow these steps to build a planter that fits your space and plants well. Check each step to make sure you’re on track.
- Day 1: Choose your materials and tools. Check that wood, screws, soil, and drainage parts are ready.
- Day 2: Cut the wood or material to size. Measure carefully and see that pieces match your design.
- Day 3: Assemble the planter base and walls. Use screws or nails and check the frame is square.
- Day 4: Drill holes or add drainage layers. Make sure water can escape to avoid root rot.
- Day 5: Line the planter with plastic or landscape fabric if you want. Confirm it fits without folds or gaps.
- Day 6: Fill the planter with soil suited to your plants. Confirm soil feels moist but drains well.
- Day 7: Plant your selected flowers or vegetables. Water lightly and check the soil stays moist over a few days.
- After 2 weeks: Assess plant health and soil moisture. Adjust watering or add fertilizer if plants look weak.
Frequently Asked Questions
What Is the Easiest Way to Start Making a Planter?
Start with a simple wood box design, like one hiding a 5-gallon bucket. It keeps your work easy and lets you focus on style and drainage.
How Can I Make a Planter Cost-Effective but Stylish?
Use basic materials like wood and add simple decorations such as modeling paste and stencils. This way, you get a unique look for about $10.
What Size Planter Is Best for Small Outdoor Spaces?
A planter around 19 by 18 by 19 inches works well for small areas. It fits most garden spots and offers enough space for a range of plants.
How Do I Hide Plastic Pots Inside a Wooden Planter?
Build a wooden box about 19.5 inches tall and big enough for 14-inch pots. This hides them while giving a neat and uniform look.
Can I Make a Planter That Withstands Seasonal Weather Changes?
Yes, by sealing or staining the wood, you improve its durability. Use a good paintbrush to apply the sealant evenly for best protection.
What’s a Simple Way to Add Drainage to a DIY Planter?
Drill holes in the bottom of your wooden planter box. This stops water from pooling and keeps plants’ roots healthy.
Final Thoughts
Building your own planter takes a few steps. It fits your garden perfectly. You’ll enjoy the custom look it gives your space.
Start with picking the right materials today. The sooner you begin, the sooner your plants will thrive in their new home.