How to Make Garden Compost: Simple Steps for Fast, Rich Soil
Wondering how to make garden compost fast and rich? Start by layering green and brown materials in a spot with good air flow. Mix greens like grass clippings with dry leaves.
Use about 25% greens and 75% browns. This helps balance your compost for best results.
Keep your compost pile moist but not soggy, similar to a wrung-out sponge. Turning the pile helps air reach microbes that break down material quickly. You want the center of your pile to feel warm to speed up composting.
A good size for your pile or bin is at least 3 feet in all directions. This size traps heat and supports beneficial bacteria that transform waste into nutrient-rich soil. Remember, compost usually takes 3 to 6 months, so patience pays off.
Key Takeaways
- Balance your compost with 25% green and 75% brown materials.
- Keep compost moisture like a wrung-out sponge for best results.
- Turn your pile when its center feels warm or reads 130-150°F.
- Keep compost piles at least 3 feet tall and wide for heat.
- Hot piles reach over 131°F, breaking down waste faster.
- Use finished compost by working 2-3 inches into garden beds.
How to Make Garden Compost Step-by-Step

Start your garden compost by collecting the right materials and layering them properly. Keep the pile moist and turn it regularly to speed up decomposition. These steps will help you create rich, crumbly compost for your plants.
Gathering and Preparing Materials
Find a dry, shady spot with good drainage for your compost pile or bin. You need dry brown materials like leaves or straw and green nitrogen-rich materials like kitchen scraps.
Prepare materials by shredding or cutting them into smaller pieces. Smaller bits break down faster and help airflow in the pile.
- Choose a suitable site that is level and shaded.
- Collect brown materials such as dry leaves, straw, or shredded cardboard.
- Gather green materials like vegetable scraps, garden trimmings, and grass clippings.
- Chop or shred up large materials to speed decomposition.
- Keep a bin or container nearby for kitchen scraps.
Layering Greens and Browns
Begin with a base of coarse brown stuff like straw. Add small twigs next.
This helps air flow through your compost. Add green and brown materials in alternating layers.
Layer about three parts brown materials to one part green by volume. Cover each green layer with brown to control moisture and odours.
- Lay down 4 to 6 inches of brown material at the bottom.
- Add a 1 to 2 inch layer of green material on top.
- Cover green material with a thin layer of brown.
- Repeat layering until you reach at least 3 feet high.
- Finish with a brown layer to keep flies away.
Turning and Watering the Compost
Turn the pile every 1 to 2 weeks to add oxygen and mix materials. This helps speed decomposition and prevents bad smells.
Keep the pile as damp as a wrung-out sponge. Water it during dry spells or mix in dry brown material if too wet.
- Use a garden fork to turn the pile and mix layers.
- Check moisture by squeezing a handful; it should feel damp but not dripping.
- Add water gradually if the pile feels dry.
- Mix in brown material if the pile is soggy or smells bad.
- Repeat turning and watering regularly for best results.
What Materials Can and Cannot Be Composted

Kitchen scraps like vegetable peels, coffee grounds, and eggshells work best in your compost. Fresh grass clippings, dry leaves, and small twigs are great garden waste choices. These materials break down quickly and add nutrients to your compost pile.
Avoid adding meat, dairy, cheese, and oils. These items can cause bad smells and attract pests like rodents and flies. Also, don’t add pet waste to your compost.
It can carry harmful bacteria. Avoid wood treated with chemicals, too, since it may contain toxins.
Weeds are tricky. You can compost them only if they haven’t gone to seed. Diseased plant parts should be tossed out because they might spread infection in your garden later.
Each time you add kitchen scraps, cover them well. Use dry leaves or garden prunings for this. This keeps flies and odors down.
- Safe materials: vegetable scraps, fruit peels, coffee grounds, eggshells
- Garden waste: dry leaves, grass clippings, small, untreated wood chips
- Do not compost: meat, dairy, oils, pet waste, diseased plants
- Avoid weeds with seeds or plants treated with herbicides
- Cover fresh scraps with dry browns to reduce odors and pests
- Keep compost moist but not soggy for good airflow
Keep your compost pile balanced, moist, and aerated, so effective decomposition happens. Oversaturation or too many “greens” can create a smelly, slimy mess. Use the checklist above to decide what goes into your compost.
It helps you pick items that keep your compost healthy. Leave out items that might cause problems.
Every time you add fresh kitchen scraps, cover them well. Use a few inches of dry leaves or shredded paper. This keeps flies and pests away.
Why Balancing Green and Brown Materials Matters
The ideal carbon-to-nitrogen ratio in compost is about 30:1 by weight. This balance helps materials break down quickly and produce nutrient-rich compost. Too much carbon slows decomposition, while too much nitrogen causes odor and sogginess.
Common Green Materials and Nitrogen Content
Green materials supply nitrogen, which stimulates microbial growth in the compost. Fresh vegetable scraps and grass clippings are typical green additions that heat up the pile. Coffee grounds and tea bags also add nitrogen and mix well.
These materials tend to be moist and break down faster than brown ones. You should chop larger green scraps to speed their decomposition further. Keeping a steady supply balances your pile’s nitrogen needs.
| Material | Type | Notes |
|---|---|---|
| Vegetable scraps | Green (Nitrogen-rich) | Rich in nitrogen, moist, decomposes quickly |
| Grass clippings | Green (Nitrogen-rich) | High nitrogen, raises pile temperature fast |
| Coffee grounds | Green (Nitrogen-rich) | Good nitrogen source, encourages microbes |
| Tea bags | Green (Nitrogen-rich) | Provides nitrogen, usually breaks down well |
Use green clippings and scraps as your nitrogen base. Don’t use too much at once or the pile may get slimy or smell bad. Mix green materials evenly with browns for better results.
Brown Materials and Their Carbon Levels
Brown materials contain mostly carbon, which feeds microbes and balances nitrogen. Dried leaves, straw, shredded cardboard, and newsprint are common browns. They help absorb moisture and add bulk.
These dry substances break down slowly and prevent the pile from becoming soggy. You often need three to four times more browns by volume than greens for good balance. Chop or shred bigger pieces to speed decomposition.
| Material | Type | Notes |
|---|---|---|
| Dried leaves | Brown (Carbon-rich) | High carbon, dry, adds structure |
| Shredded cardboard | Brown (Carbon-rich) | Absorbs moisture, breaks down slowly |
| Straw | Brown (Carbon-rich) | Light, carbon-rich, keeps air spaces |
| Wood chips | Brown (Carbon-rich) | Slow to break down, adds bulk |
Keep a good supply of brown materials ready. They help keep the pile aerated and dry enough for microbes. Avoid using large chunks, or decomposition slows and smells may develop.
Adjusting Ratios to Speed Composting
Too wet or smelly piles usually have too much green material. Add dry brown materials like shredded cardboard or dry leaves to fix this. Turn the pile well to mix and add air.
If the compost is too dry and not heating up, sprinkle water evenly. Adding fresh green waste will also boost nitrogen and speed decomposition. Chop big pieces for faster results.
| Situation | Adjustment Action |
|---|---|
| Compost too wet, smells bad | Add dry brown materials, turn pile |
| Compost too dry, slow to heat | Add water and some green material |
| Large pieces slow breakdown | Chop or shred materials before adding |
Balancing green and brown materials makes your compost pile work faster and smell better. Keep an eye on moisture and texture to know when to adjust. A good 3:1 brown-to-green volume ratio usually keeps things on track.
How Temperature and Pile Size Affect Composting Speed
Your compost pile should be about 3 feet wide and 3 feet high to heat well. This size holds enough warmth to keep microbes active and break down materials faster. Smaller piles lose heat quickly and slow decomposition.
Active composting happens between 130°F and 160°F. In this range, microbes work hard to turn scraps into rich soil quickly. Below 130°F, decomposition still happens but at a slower, cooler pace.
Heat matters because it kills weed seeds and harmful pathogens. A pile reaching 130°F or above for several days will reduce these risks. That makes your compost safer for your garden plants.
Use a compost thermometer with a long probe to check the temperature. Stick it into the center, where heat is highest, once or twice a week. When readings fall below 110°F, turn the pile or add water.
Turning your compost every 2 or 3 weeks brings in oxygen and redistributes heat. Always keep the pile moist like a wrung-out sponge. Too dry or too wet slows down microbial action and cooling.
Watch how the temperature responds after you turn the pile. Usually, heat rises again within a day or two to between 130°F and 160°F. Add green materials or a shovelful of garden soil to boost microbes.
A pile about 3 to 5 feet square fits most home gardens. This size also lets you build layers with the right mix of greens and browns. A well-sized, warm pile can cut composting time to as little as a few months.
Your pile might be too small if it doesn’t heat up after adjustments. Either add more materials to increase size or start a new pile nearby. Active heat is a reliable sign your compost is on track.
Recognizing When Compost Is Ready to Use
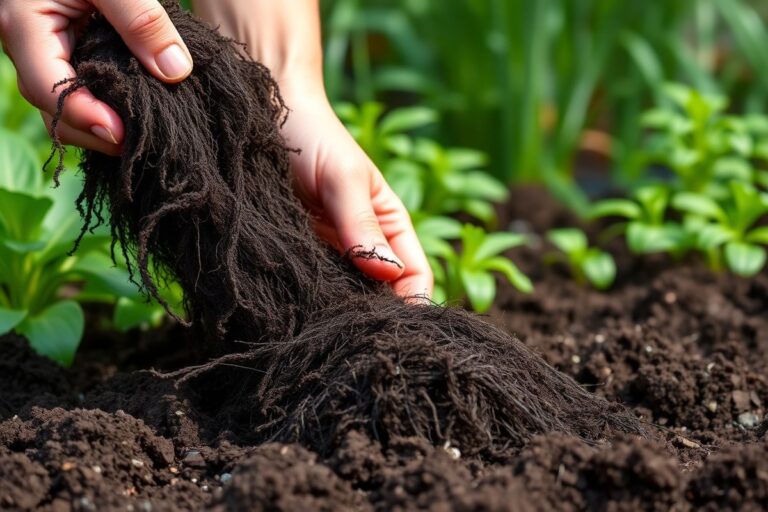
Your compost is ready when it looks dark brown and crumbly. It should feel loose, like rich soil, without large pieces or sticks. The smell is earthy and pleasant, never sour or rotten.
During active composting, the pile heats up to 110-160°F (43-71°C). When the temperature drops near the ambient outdoor level.
No steam rises, it signals decomposition is complete. Finished compost usually takes 3 to 6 months under normal conditions.
Applying incomplete compost can harm plants by tying up nitrogen or containing pathogens. Give it time to cure for several weeks after the hot phase. This resting period stabilizes nutrients and kills most weed seeds.
- Dark brown color with no visible original materials
- Crumbly, loose texture that feels like garden soil
- Earthy, mild smell with no sour or ammonia notes
- Temperature cooled to near outside levels (below 100°F)
- No heat or steam when you turn the pile
- Composting timeframe is usually 3, 6 months
- Optional curing for 2, 4 weeks after active composting
Never use compost if it smells bad or looks wet and slimy. It can damage plants or spread disease.
A hot compost pile heats rapidly and completes faster, within 2-3 weeks if managed well. In moderate climates, expect 6-8 weeks for good results with active turning. Cooler or larger piles take longer, so patience is key.
Knowing these signs helps you apply your compost safely and effectively. Spread a 1-inch layer of compost around your plants. You can also mix it with potting soil.
Use one part compost to three parts potting soil for containers. Your garden soil will get stronger and retain moisture better with nutrient-rich compost.
Comparing Hot, Cold, and Worm Composting Methods
Hot, cold, and worm composting differ in speed, work, and space needs. Hot composting creates compost fast but needs more effort and a bigger pile.
Cold composting takes longer but requires less work and space. Worm composting suits small spaces and kitchen scraps, though it’s slower than hot composting.
Hot Composting Overview
This method uses a large pile or bin filled all at once. Aim for about 3 feet wide and 3 feet high to keep heat inside. The pile heats between 130°F and 150°F, which kills most weed seeds and diseases.
You need to add about 75% brown materials and 25% green materials. Turn the pile when it feels warm in the center or the thermometer reads 130°F. This mix and turning speed up composting to finished compost in a few months.
Hot composting requires careful balancing of water, greens, and browns. It takes more work but gives fast results.
You get compost ready by spring or fall. This method fits if you want quick compost.
Cold Composting Basics
Cold composting lets you add new materials as they come without much mixing. It works for gardeners who want less work. You don’t mind waiting a year or more.
This method is low-maintenance but slow. The pile usually looks dry and slow to break down.
This method loses some nutrients to rain or leaching as it breaks down slowly. It might let weed seeds survive. Plant bits can also survive if compost stays cool.
This happens if compost never gets hot enough. You can compost a wider variety of organic matter, including tougher yard waste.
Cold composting fits gardeners with limited time or who add small scraps throughout the year. It takes up less labor but patience to see results.
Vermicomposting with Worms
Worm composting uses red wigglers in a worm bin to turn kitchen scraps into rich compost. It works best indoors or in shade and can fit easily in small spaces like apartments. Worms quickly break down vegetable peelings and fruit scraps.
Keep the worm bin moist but not wet. Use bedding like shredded paper or coconut coir. This helps worms stay healthy and active.
Finished worm castings take a few months. They help soil health and plant growth a lot.
Worm compost is worth the wait. Avoid putting meat, dairy, or oily foods in the worm bin.
Worm composting needs moderate daily or weekly care. It makes strong compost great for pots and small gardens. This method is nutrient-rich.
Use this table to compare the three methods side-by-side:
| Composting Method | Advantages | Disadvantages | Best For |
|---|---|---|---|
| Hot | Quick harvest; kills weed seeds and disease | More labor; needs large pile; careful balancing | Gardeners needing large batches fast, seasonal prep |
| Cold | Less labor; add materials as generated; minimal setup | Slow (1+ year); nutrient loss; possible weed spread | Low-maintenance gardeners; year-round small additions |
| Vermicomposting | Works in small spaces; process kitchen scraps fast | Requires moisture control; no meat or dairy; slower than hot | Apartment or small garden gardeners; kitchen waste recycling |
Choosing a method depends on how much space you have and how soon you need compost. Hot composting suits those who can handle extra work and want fast results in big batches. Cold composting fits gardeners with less time or space but patience for slow breakdown.
Worm composting works well where space is tight and kitchen scraps are the main waste. Each method recycles garden and kitchen waste.
The difference is speed and how much work you do. Both give useful soil for your plants.
Avoiding Common Composting Mistakes
A bad smell in your compost usually means it’s too wet or lacks air. This creates a sour or rotten odor instead of the earthy one you want. Fix it by turning the pile to add air.
Mix in dry brown materials like shredded leaves or straw. This helps balance moisture and speed up decay. Keep the moisture level like a wrung-out sponge to avoid sogginess.
Pests or rodents visit compost piles when food scraps like meat or dairy attract them. To prevent this, avoid adding these types of waste. Cover your compost heap with a lid or tarp.
Store it in a container or bin made of wood pallets or plastic. That keeps pests out and also holds heat inside your pile.
Check the size if your compost never heats up. A pile should be at least 3 feet wide and tall to trap heat well. Add the right balance of greens (nitrogen-rich scraps) and browns (carbon-rich materials) in thin, even layers.
Turn it every week or two to spread heat and oxygen. Your pile should reach 140°F in a few days.
This heat kills weed seeds and pathogens. It means your compost is working right.
Dry compost piles slow decomposition, while wet ones smell bad. Adjusting moisture is key. Add water in dry weather with a watering can spray.
Add more browns if it’s soggy. Thin layering helps even drying and airflow.
- Avoid adding meat, dairy, or oily foods to prevent pests
- Mix dry leaves or straw when pile is too wet
- Turn your compost every 7 to 14 days for better oxygen flow
- Keep pile size about 3 feet for proper heating
- Cover pile with tarp or use a bin to deter rodents
- Keep moisture like a wrung-out sponge, not dripping wet
- Use a compost thermometer to check for 140°F to kill seeds
Weed seeds and pathogens survive in piles that stay cool and don’t reach high temperatures. Hot compost kills these, but cold piles do not. So, keep turning and layering right to get the temperature up.
After 6 to 12 months, remove finished compost from the bottom. Then start fresh or turn over the pile. This keeps the process going.
Troubleshooting your compost takes time but keeps it healthy. Use the right container and compost materials. Manage moisture well and turn the pile often.
These steps help your garden compost do well. Watch for changes in smell, moisture, pests, and heat. Fix problems early to get great compost for your garden.
Tools and Bins for Efficient Backyard Composting
Your garden size determines the best compost bin type. For small gardens, a compact bin around 3x3x3 feet works well. Larger gardens benefit from multiple bins or a bigger container to rotate compost batches.
You don’t always need special tools, but some are helpful. A garden fork is great for turning your pile weekly to add oxygen.
You can skip a thermometer if you’re patient. But a compost thermometer can speed up hot composting by tracking temperature accurately.
Building a DIY bin is easy and affordable. Stack wooden pallets or wire mesh in a square or circle. Make it about 3 feet wide and 3 feet high.
Leave gaps for airflow. Use scrap wood or recycled materials to save money. Place the bin on bare soil to help drainage and critters move in.
- Choose a bin size around 3x3x3 feet or larger
- Turn your pile weekly with a garden fork for oxygen
- Consider a compost thermometer for hot composting
- Build a simple DIY bin with pallets or wire mesh
- Place the bin on bare soil, not concrete or pavement
- Keep the compost site shaded but accessible
- Have two or three bins to rotate compost stages
Pick a spot in your yard that’s easy to reach and drains well. Avoid full sun to keep the pile moist longer.
A shaded corner near your garden bed or shed usually works best. The pile should be at least 3 feet tall and wide to retain heat and moisture.
Keeping your compost pile moist but not soggy helps microbes break down material faster.
How to Use Finished Compost in Your Garden Best
Apply about two inches of finished compost to your garden beds. This amount supplies enough nutrients without overwhelming your plants or soil. Work the compost into the top 6 to 8 inches for better soil contact and fertility.
The best time to add compost is in early spring before planting. This timing lets soil microbes activate and release nutrients steadily during the growing season. You can also apply compost in fall to improve soil structure and moisture retention over winter.
Mixing compost with potting soil boosts its nutrient content and water-holding ability. A ratio of 25% compost to 75% potting soil works well for containers. Compost also works as mulch.
Spread a two-inch layer around plants. This helps keep soil cooler and moist.
Compost improves soil by breaking up heavy clay and loosening sandy soil. This creates better air spaces and helps water soak in slowly. Rich in nutrients, compost feeds beneficial microbes, which support plant roots and improve growth.
For a raised bed, blend one-third compost with soil and other materials. This balance supports strong seedlings and healthy roots. Using less compost works for existing beds.
Just add a thin top layer yearly. This helps maintain soil health.
When spreading compost as mulch, leave a small gap around plant stems. This prevents moisture buildup that can cause rot. A common mistake is piling compost too thick, which may suffocate roots and attract pests.
Use basic garden tools like a shovel and wheelbarrow to spread compost evenly. Raking it in lightly helps mix it with native soil. Avoid working compost into soil when it’s too wet, which can compact soil and slow growth.
Step-by-Step Action Plan for Starting Your Compost
Get your compost going with this simple timeline. You’ll see progress as layers break down and temperatures change.
- Before You Start: Choose a dry, shaded spot in your garden. Place your compost bin or pile there so it drains well and stays moist.
- Day 1: Add a 4-6 inch layer of brown materials like dried leaves or straw. This helps air flow and balances nitrogen.
- Day 2-3: Add a 2-4 inch layer of green materials like grass clippings or kitchen scraps. Keep the pile moist but not wet.
- Week 1: Turn the pile with a garden fork or shovel. You’ll notice some heat as microbes get busy. If it’s cool, add more greens or water.
- Week 2-3: Continue adding layers of greens and browns. Turn the pile every 1-2 weeks to keep it aerated. The pile should feel warm in the center.
- Week 4-6: Watch for dark, crumbly compost forming at the bottom. Stop adding new materials if the pile shrinks and smells earthy.
- Week 8-12: Sift compost through a screen or garden sieve to remove large pieces. Those go back in for more composting.
- After 3 Months: Use your finished compost as mulch or soil mix. Your plants will enjoy the richer soil and better water retention.
Frequently Asked Questions
How Long Does Garden Compost Typically Take to Break Down Fully?
Garden compost usually takes 3 to 6 months to break down fully. This depends on materials, pile size, and how often you turn it for air.
Can I Compost Weeds and Seeds Safely in My Garden Compost?
Avoid composting weeds with seeds or invasive roots to prevent spreading. Hot composting can kill seeds, but cold piles usually don’t reach high enough temperatures.
Should I Add Finished Compost Directly to New Garden Beds Before Planting?
Yes, work 2 to 3 inches of finished compost into garden beds before planting. This improves soil structure, moisture retention, and nutrient availability for plants.
What’s a Good Tool for Moving Compost from Bin to Garden?
A steel pail works well for scooping compost by the bucketful into your garden. It’s sturdy and easy to handle compared to large shovels in small gardens.
How Do I Reuse Old Potting Soil with Compost?
Mix used potting soil with garden compost at about a 4:1 ratio. This blend refreshes soil and helps raise soil levels in raised beds with lost volume.
Can Compost Be Used for Starting Seeds in My Vegetable Garden?
Homemade compost is usually too strong for seed starting or young plants. Use it by mixing with other soil or wait until it fully matures.
Wrapping Up
Making garden compost helps your plants grow better and cuts your kitchen waste. Start small and keep your pile balanced and moist. Take your first step today by gathering your brown and green materials.