How to Plant a Flower Bed: A Complete Guide with Step-by-Step Tips
Picking the perfect place is the first step to planting a flower bed. Flowers usually need six or more hours of direct sunlight to do well. Find a sunny spot with soil that drains well to support healthy growth.
Next, clear the area of grass and weeds by digging deeply to remove roots. Turn the soil with a shovel at a 45-degree angle to loosen it up. Adding compost or well-rotted manure improves poor soil and gives your plants the nutrients they need.
Pick flowers that suit your climate and soil type. Keep flower beds narrow, around three to four feet wide.
So you can reach all areas without stepping inside. This will help you maintain the bed easily over time.
Key Takeaways
- Choose a sunny spot with at least six hours of direct sunlight.
- Remove grass and roots completely by digging deeply before planting.
- Loosen soil by digging at a 45-degree angle toward the edges.
- Add 2-4 inches compost to improve soil low in organic content.
- Keep flower beds no wider than four feet for easy access.
- Match plant choices to your local climate and soil conditions.
How to Plant a Flower Bed Step by Step

Planting a flower bed step by step helps ensure your flowers grow well and look great. First, clear the area of grass and weeds. Next, dig a bed wide enough for your plants.
Make sure the bed is also deep enough to support roots. Proper spacing and planting depth protect roots and encourage healthy growth.
Follow these steps to plant your flower bed successfully:
- Clear grass and weeds. Use a spade or sod cutter to remove sod. Dig deep to get all roots, stopping weeds from coming back.
- Dig the flower bed.Make the bed about 12 to 18 inches deep. Set the width based on your desired design. Ensure it fits your plants well. Loosen soil for good root growth.
- Arrange plants on the soil. Place your flowers spaced as recommended on their tags or seed packets. Lay them out before planting to check the look and space.
- Dig holes for each plant. Make holes wide and deep enough for the roots without bending. Usually, a hole slightly bigger than the root ball works well.
- Plant carefully. Remove plants from containers gently. Place each in the hole at original soil level, then fill around roots with loose soil.
- Water the plants. Give each plant a good soak right after planting. This settles soil and keeps roots moist.
- Add mulch. Spread 2 to 4 inches of mulch over the bed. But keep it away from plant stems. Mulch holds moisture and cuts down weeds.
This sequence makes planting smooth and effective. Removing all grass roots avoids weed troubles later. Digging deep helps roots settle and absorb water well.
Placing plants just as you want before planting avoids crowding or bare spots. Careful planting protects delicate roots.
The whole process can take a few hours or a day, depending on size. Costs stay low if you use basic garden tools and local mulch.
Watch for plants not getting enough water or soil that feels hard or dry. Adjust watering and add more organic matter if soil is poor.
Choosing the Best Location Based on Sun and Soil
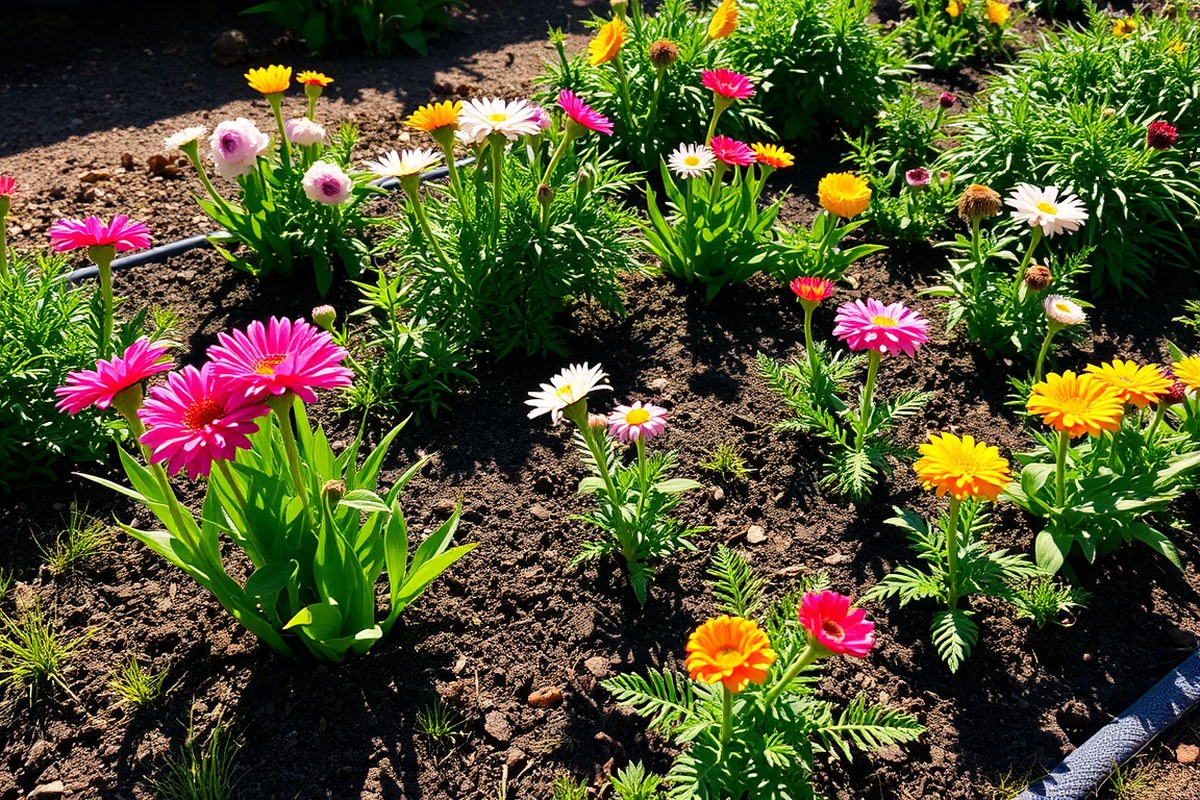
Choose a flower bed spot that matches the sunlight needs of your plants. Most flowers need 6 to 8 hours of direct sun daily. Pick a spot with morning sun.
Afternoon heat can harm some plants. Morning sun helps plants grow better. Your yard might have shady spots.
Choose flowers that handle partial or full shade. Some shade-loving flowers can thrive and still look beautiful.
Good soil is just as important as sunlight. The soil should be loose and rich with organic matter for healthy roots. Test the drainage by digging a hole about one foot deep and filling it with water.
Water should drain within 24 hours. This means your soil drains well. Soggy soil lasting longer means a problem.
You need to improve the soil or use raised beds. Checking soil pH is easy with a test kit costing around $10 at garden centers. Most flowers prefer slightly acidic to neutral soil with a pH of 6.0 to 7.0.
Hard, compacted soil hinders roots and can cause water to pool. Loosen soil with a garden fork or tiller. Add two or three inches of compost or peat moss.
This works best for clay or sandy soil. Do this before planting your flowers. This also helps balance moisture and nutrients.
Raised beds are a good option if digging is difficult or the existing soil is poor. They improve drainage and let you pick soil mixes tailored for your flowers.
Don’t plant sun-loving flowers where shade dominates, those plants won’t bloom well and may weaken.
Choosing the right spot means balancing sun, soil, and water for your specific flowers. Sunlight affects blooming and growth speed, while soil type controls root health. Testing drainage and pH helps avoid common problems like root rot or nutrient lockout.
You’ll spend some time digging and soil testing. But flowers that fit their location grow strong and need less care over time. This upfront work cuts down on frustration and plant loss later.
Preparing and Improving Soil for Healthy Flowers
Test your soil’s pH and nutrients before planting. This helps you choose the right amendments for healthy flower growth. Proper soil prep boosts plant health and avoids wasted effort.
Soil Testing Methods and pH Guidelines
Get a DIY soil test kit from garden centers or online. Follow package instructions to collect soil from several spots at 4 to 6 inches deep.
Mix samples in a clean container for one test. Home kits usually test pH, nitrogen, phosphorus, and potassium.
Aimed pH is between 6.0 and 7.0 for most flowers. Your soil pH is too low if it’s under 6.0, add lime to raise it.
Above 7.0, sulfur or peat moss helps lower pH. Check soil nutrients every two or three years, or if plants look weak.
Types and Amounts of Organic Amendments
Add 2 to 4 inches of compost or well-rotted manure if your soil lacks organic matter. These help with nutrients, moisture, and soil life.
Chicken manure pellets add nutrients like nitrogen, phosphorus, and potassium. They work well as an extra boost for your plants.
For sandy soil, compost and peat moss help hold water. Add about 2 inches of compost each year for sandy soil.
For heavy clay soil, mix in compost plus coarse sand or pine bark in equal parts. This opens soil air spaces and improves drainage.
Improving Drainage for Heavy or Compacted Soils
Heavy clay soil feels sticky and holds water for days. Mix in coarse sand and organic matter to loosen its texture.
This improves drainage, making roots less likely to rot. Use about equal parts sand, compost, and soil for significant improvement.
For compacted soil, till or loosen it deeply before adding materials. You can use a hand tiller or electric tiller depending on your flower bed size. Work amendments down to 8 to 12 inches deep for best results.
Incorporating Amendments Evenly into the Soil
After removing grass and weeds, spread amendments evenly over the soil surface. Use a rake or garden fork to mix compost into the soil. Add manure or sand too.
Mix it down 8 to 12 inches deep. This combines nutrients and improves texture for roots to access.
For small beds, a hand tiller works well to mix amendments. For larger areas, an electric tiller saves time and effort. Avoid leaving clumps of amendments or bare patches, which can cause uneven plant growth.
Designing Your Flower Bed: Layout, Height, and Color
Start by placing the tallest plants at the back or center of your flower bed. Tall plants like Perovskia atriplicifolia can reach 4 feet tall. They make a strong background in your flower bed.
This helps other plants stand out. Put medium-height plants in front or around the tall ones.
Place shorter plants at the edges. This shows all layers well.
Space plants properly to avoid crowding and encourage healthy growth. Most perennials need 12 to 18 inches between them. Give ground covers 6 to 12 inches of space.
This lets them spread out naturally. It stops them from crowding other plants. Good spacing allows air flow, making your bed easier to maintain and reducing disease risk.
Create a color scheme by repeating colors to unify the bed and avoid chaos. Choose two or three main colors and add a contrasting or neutral shade.
For example, pair blue, purple, and lavender blooms with white or silver-green foliage to balance brightness. Spread these colors evenly across the bed for a pleasing rhythm.
Think about bloom times to keep your flower bed colorful longer. Mix early, mid, and late-season bloomers so something is always flowering.
Plant a few daffodils or tulips for spring, coneflowers for summer, and asters for fall. This layered timing keeps your bed interesting through the gardening season.
Focal points give your flower bed interest and structure. Use a tall shrub or a striking plant like Yucca gloriosa ‘Variegata’ for a focal spot. Place it where your eye naturally falls to anchor the design.
Edge the bed with low plants or natural materials. Woven willow works well for a neat border. It fits the style you want.
Plan your layout by marking the bed edges with twine or a hose. Arrange your plants inside, checking the height and color plan before digging. This step saves digging and replanting.
Place plants in pots first to see their full size. This helps you plan spacing better. You avoid crowding when planting.
For easy maintenance, group plants with similar needs together. This limits extra trips with different water or fertilizer schedules. Don’t group plants too tightly.
Tight groups block airflow and shade neighbors too much. This can slow growth or cause disease. Instead, aim for a balanced layout that looks full but breathes well.
Selecting Flowers Suitable for Your Climate and Soil
Choosing flowers that fit your climate, soil, and sun or shade keeps them healthy and blooming. Start by figuring out how many sun hours your bed gets daily. Also, check your soil type.
This helps you pick the right plants. Then match flower types accordingly to get blooms all season long.
Top Flower Varieties for Full Sun
Flowers that like full sun need six or more hours of direct sunlight daily. Good picks include coneflowers and black-eyed Susans, which handle heat and sun well. These perennials build strong, colorful foundations that come back each year.
Annuals such as zinnias and marigolds also thrive in full sun spots. They fill gaps with quick color but won’t stick around after the season ends. Pair them with hardy perennials to keep your bed lively year after year.
Sun-loving flowers grow best in well-drained soil with consistent moisture. Avoid dry, compacted soils here, or the plants may wilt quickly despite sun exposure.
Best Flowers for Partial Shade or Shade
Partial shade flowers bloom with 3 to 6 hours of sun, often in the morning. Woodland plants like bleeding hearts and astilbes fit well here. They prefer cooler conditions and soils that stay moist without flooding.
In full shade, with less than 3 hours of sun, choose true shade lovers. Hostas and ferns do best, as they handle darker, richer soils. Make sure drainage is good to prevent root rot, which shade spots often suffer from.
Shade flowers often have softer leaves and lighter colors. These traits make the flower bed look fresh and calm.
Perennials vs. Annuals: Pros and Cons
Perennials grow back every year and create the core of your flower bed. They require less yearly effort but take time to establish fully. Examples include coneflowers and yarrow, which can last many seasons.
Annuals bloom all season but last just one year. They’re great for filling bare spots fast or adding bright new colors yearly. Mixing both lets you have steady blooms and fresh changes.
Annuals often cost less upfront but need buying each year. Perennials cost more once but save money and work over time.
Starting Flowers from Seed or Seedlings
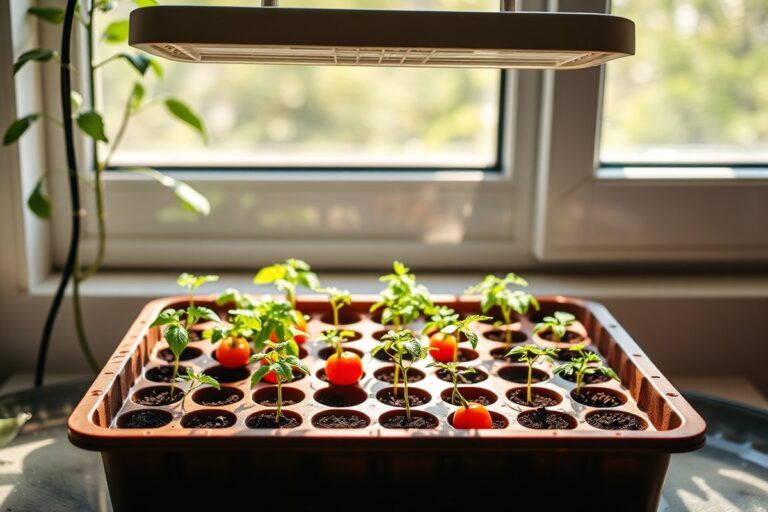
Sow seeds indoors six to eight weeks before the last frost. This gives seedlings a good head start for planting outside.
This timing helps seedlings grow strong before planting outside. Use pots or seed trays with seed starting mix for best results.
Seedlings you buy or start indoors can go straight into the bed after frost danger ends. This avoids the delicate early growth phase outdoors. Hardier perennials often do better started this way.
Some annuals can be sown directly outside once the soil warms up. Check seed packets for exact advice so your flowers get the right start.
Start seeds indoors early to extend your flowering season by weeks or months.
Watering, Mulching, and Maintaining Your Flower Bed
Water your flower bed deeply once or twice a week. Soak the soil around plants with about 1 inch of water each time. This encourages roots to grow deep and keeps flowers strong.
Newly planted beds need gentle care. Water every day for the first week, then slowly reduce to twice a week.
Check soil moisture by sticking your finger 1 inch deep. Dry soil means you need to water your plants now.
Use organic mulch like shredded bark or compost. Spread a 2 to 3 inch layer around plants.
Keep mulch 1 to 2 inches away from stems. Mulch holds moisture, stops weeds, and cools soil in summer.
Remove weeds regularly by pulling them out carefully. Do this when the soil is moist; weeds come out easier with roots intact. Avoid disturbing roots of your flowers by pulling straight upward.
As summer cools, reduce watering gradually to prepare plants for dormancy. In colder climates, clean up dead leaves and cut back perennials. Add fresh mulch to protect roots from frost during winter.
During dry seasons, water more often in the morning to avoid leaf diseases. Avoid overhead sprinklers; use drip irrigation or a soaker hose instead. This keeps leaves dry and reduces water waste.
Common Flower Bed Mistakes and How to Fix Them
Overwatering is a top mistake that drowns roots and invites disease. Water new flower beds regularly but only enough to keep soil moist, not soaked. Let soil dry slightly between waterings to avoid root rot.
Underwatering leads to droopy, yellowing leaves and weak plants. Check soil with your finger about 1 inch deep.
Water deeply when the soil feels dry to the touch. Adjust based on weather, as hot or windy days dry soil faster.
Poor spacing causes crowded plants that compete for nutrients and light. Plants may grow thin or get sick. Always follow spacing guidelines on plant tags or seed packets exactly to avoid overcrowding.
- Check soil moisture weekly with a finger or moisture meter
- Space flowers according to plant labels, usually a few inches apart
- Apply 2 to 3 inches of mulch to keep soil moist and cool
- Thin crowded plants by removing weaker ones to improve airflow
- Remove dead or yellow leaves promptly to prevent pests
- Inspect plants regularly for common pests like aphids or slugs
- Use insecticidal soap or handpick bugs if infestations appear
Yellow or wilted plants may reveal poor soil quality or watering issues. Fix this by testing soil drainage and improving it with compost. Good soil drains well but holds enough moisture for roots.
Pests and diseases thrive in overcrowded or stressed beds. Keep plants healthy with proper watering and spacing. Remove sick plants quickly.
Check leaves for spots, holes, or sticky residue. Watch for these signs to catch problems early.
Too dense beds block airflow, causing fungal diseases like powdery mildew. Thin plants early in the season by cutting some out, leaving space for others to spread. This reduces risk and improves bloom quality.
Seasonal Care and When to Divide or Replace Plants
Taking care of your flower bed through the seasons keeps plants healthy and blooming. Divide crowded perennials every 3 to 4 years in early spring or fall. Replace plants when they stop blooming well or show signs of disease.
Spring Planting and Bed Preparation
Start spring by cleaning your flower bed. Remove dead leaves, old mulch, and weeds to prepare for new growth.
Once you see fresh shoots, spread a balanced granular fertilizer over the soil. Water it in well to help plants absorb nutrients.
- Clear away debris like dead leaves and weeds.
- Loosen soil gently to improve aeration.
- Apply a balanced granular fertilizer according to package directions.
- Water the bed thoroughly after fertilizing.
- Plant new perennials or shrubs as soil warms, aiming for after last frost.
Do not fertilize too early in the season. Wait for visible plant growth to avoid burning roots.
Summer Watering and Deadheading
Water flower beds deeply once or twice a week, depending on heat. Early morning watering helps plants absorb moisture best.
Remove faded flowers by deadheading to encourage more blooms. Check plants weekly for signs of pests or disease.
Mulch helps retain soil moisture and controls weeds during hot months. Apply 2 to 3 inches of organic mulch around plants.
Fall Dividing and Soil Enrichment
Divide perennials every 3 to 4 years in early fall. Lift plants, break apart clumps, and replant healthy sections to prevent overcrowding.
Fall is also a good time to enrich soil with compost or organic matter. It breaks down over winter and boosts soil fertility for spring.
- Dig up overcrowded perennials carefully to keep roots intact.
- Use a sharp knife or spade to separate clumps into smaller sections.
- Discard old or damaged parts, leaving healthy roots and shoots.
- Replant divisions at the same depth as before.
- Water divisions well to help roots settle.
- Spread 2 to 3 inches of compost or well-rotted manure over the bed.
- Cover compost with mulch to protect soil over winter.
Dividing in fall lets roots establish before winter; avoid dividing during peak summer heat.
Winter Protection and Planning Ahead
Protect flower beds with a layer of mulch or straw to insulate roots from frost. Remove this in early spring once soil warms.
Use this downtime to plan next year’s flower bed. Note what worked well, which plants need replacing, and areas requiring improvement.
Replacing tired or diseased plants in early spring or fall gives new plants the best start. Avoid replacing in extreme heat or frozen soil.
Step-by-Step Action Plan
Follow these steps to get your flower bed started and thriving quickly.
- Day 1: Choose a sunny spot with well-drained soil. Check that the area gets at least 6 hours of sunlight daily.
- Day 2: Test your soil pH with a kit from the garden store. Aim for a pH between 6 and 7 for most flowers.
- Day 3: Clear the area of grass and weeds. Use a shovel or garden fork to loosen the soil about 6 inches deep.
- Day 4: Mix in compost or aged manure to improve soil texture and nutrients. The soil should look dark and crumble easily.
- Day 5: Mark your flower bed layout with string or spray paint. Arrange taller plants at the back and shorter ones in front.
- Day 6: Plant your flowers according to the package instructions. Water them right after planting until the soil feels moist.
- Week 2: Apply a 2 to 3-inch layer of mulch around your plants. This keeps moisture in and weeds out.
- Week 3 and beyond: Check soil moisture twice a week and water as needed. Look for new growth to confirm plants are settling in well.
Frequently Asked Questions
How Deep Should I Plant Flower Seedlings?
Plant flower seedlings at the same depth as in their pots. If you bury stems too deep, they might rot. Keeping the root ball’s original soil level helps the plant settle quickly and grow strong roots.
Can I Plant a Flower Bed on a Slope?
Yes, but use terracing or raised edges to prevent soil washout. Slopes can cause water runoff that washes away seeds and soil nutrients. Adding mulch helps hold moisture and keep soil in place.
Should I Mix Different Flower Types in One Bed?
Mixing types adds variety but consider each plant’s sun and water needs. Avoid crowding plants with different care requirements. Grouping similar plants together makes maintenance easier and helps plants thrive.
How Often Should I Remove Dead Flowers?
Deadhead flowers regularly to encourage new blooms and keep plants healthy. Removing spent flowers also cuts back disease risk and keeps your bed looking tidy. It helps plants direct energy to growth, not seed production.
Can I Plant Bulbs and Annuals Together in One Bed?
Yes, bulbs bloom early, while annuals cover later seasons, creating continuous color. Plan planting times carefully for blossoms to transition smoothly. This layering boosts your flower bed’s year-round appeal.
Is It Okay to Plant Flowers Under Trees?
Planting under trees is tricky due to shade and root competition. Choose shade-tolerant flowers and keep soil moist but not soggy. Mulching helps retain moisture and reduce root interference for your plants’ success.
Wrapping Up
A healthy flower bed grows with attention and care. Start your planting as soon as you can to enjoy blooms soon. Keep watching your plants to catch any issues early on.