How to Repair a Hole in a Water Hose: 8 Easy Methods That Last
Knowing how to repair a hole in a water hose saves you money and time. The best way is to find the leak first.
Then use a patch, tape, or hose repair kit. This stops water loss and keeps your hose working longer.
First, turn off the water and drain the hose completely. This makes the repair easier and more effective. Always pick a fix that matches the hole size to avoid wasting materials.
Smaller holes can be fixed with silicone tape or sealant. Bigger tears might need a hose mender.
Tightening clamps or replacing gaskets also ensures the hose stays leak-free. Testing your repair shows if you need to adjust anything.
Key Takeaways
- Drain your hose fully before starting repairs to avoid messes.
- Use self-fusing silicone tape for small pinhole leaks, it sticks tight.
- Match hose menders and clamps to your hose’s inside diameter.
- Replace worn gaskets every three to 10 years to prevent leaks.
- Wrap tape with 50% overlap and go 2 inches beyond the hole.
- Tighten hose clamps enough to hold without damaging the hose.
1. Effective Ways to Repair a Hole in a Water Hose
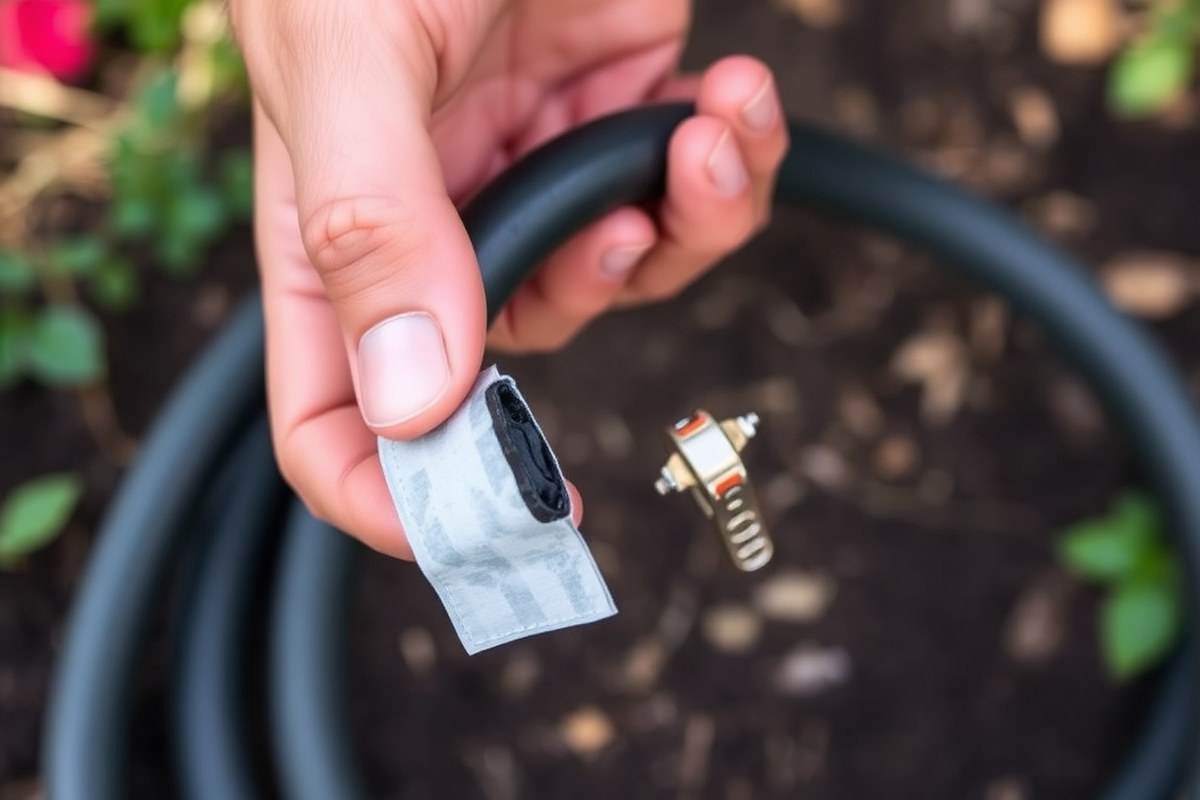
Small holes or punctures in a water hose usually call for patch kits or repair tapes. These can seal minor tears without cutting the hose.
For larger cuts or torn sections, a clamp coupler or compression mender works better. They let you remove the damaged part and reconnect the hose securely.
Leaks at hose ends often come from worn washers or fittings and need different fixes. Replacing washers or adding a new hose end can stop these leaks for good. Mid-hose leaks need patching or section replacement depending on the damage size.
The table below compares common repair methods, showing when and how to use them:
| Repair Method | Best For | How to Use | Cost Range | Result Durability |
|---|---|---|---|---|
| Patch Kit | Small punctures, cuts under 1 inch | Clean area, apply rubber patch with adhesive | $5, $15 | Good for months to years |
| Repair Tape | Very small leaks or temporary fixes | Wrap tightly around dry hose, overlap layers | $3, $10 | Short term, days to weeks |
| Clamp Coupler | Larger cuts, tears, removed hose sections | Cut damaged hose, insert coupler, tighten clamps | $10, $20 | Long lasting with proper installation |
| Compression Mender | Damaged mid-hose sections | Cut hose, insert mender, tighten compression nuts | $12, $25 | Durable when sealed well |
| Replacement Fittings | Leaks at hose ends, worn washers | Remove old fitting, attach new with washers | $5, $15 | Can last years with gasket replacement every 3, 10 years |
A patch kit or repair tape works well for pinholes and tiny tears. These stop water leaks by sealing the hole without cutting the hose. Patch kits last longer but take more time and need a clean surface.
Repair tape wraps on quickly. It only lasts a few weeks. Use it for quick fixes you can improve later.
You must cut out larger tears. Then join the hose with a coupler or compression mender. You need a sharp blade and steady hands to cut straight.
Insert the repair piece snugly and tighten clamps or nuts firmly to avoid leaks. This method restores hose strength and can last for years.
Leaks where the hose connects to a faucet or nozzle usually mean old washers or fittings. Replace washers regularly to prevent drips.
Swap out a cracked fitting with a new one. This fix is simple and often costs less than $15.
2. Essential Tools and Materials for Hose Repair
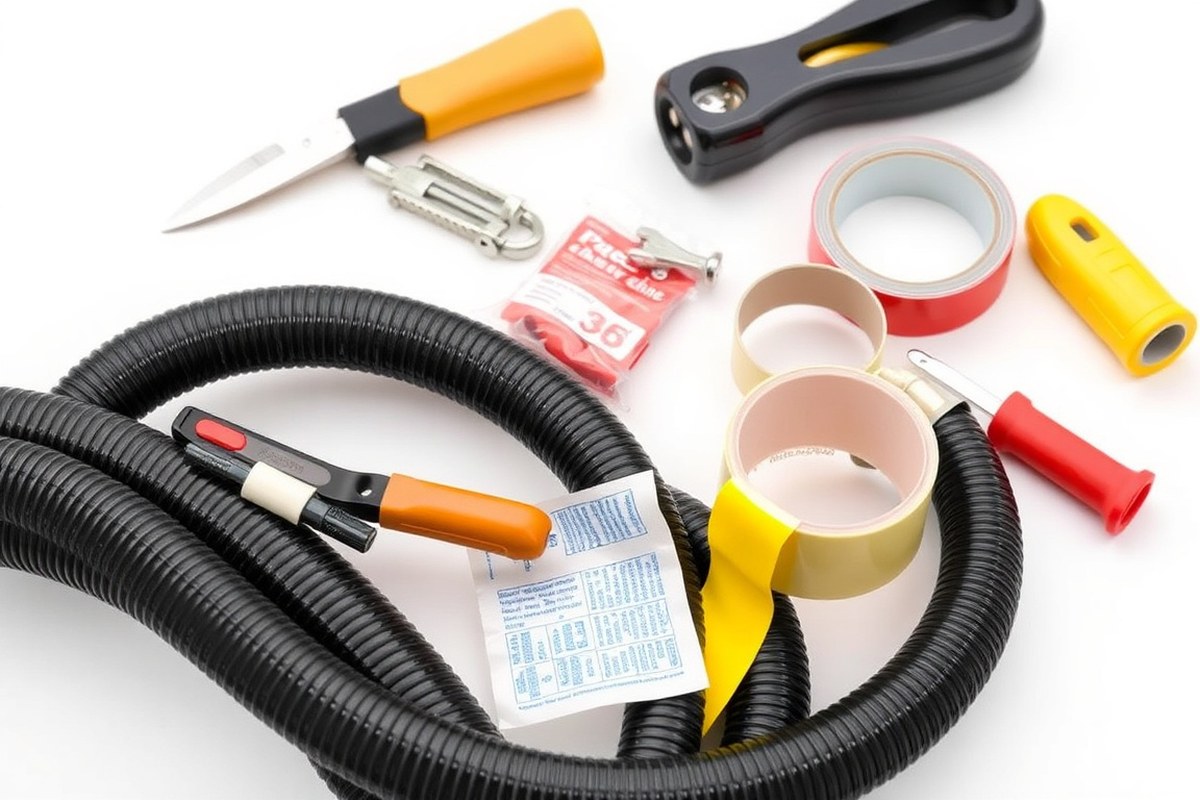
Gather the right tools and materials before you fix your garden hose. This makes the repair smoother and saves time. You will need items that match your chosen repair method.
For patching small holes, waterproof repair tape or a rubber patch kit works best. The tape should be strong enough to hold under water pressure. Damage near hose ends calls for replacement connectors or repair couplings.
These parts fit easily and save you from buying a new hose. These fittings help you cut out and replace damaged sections.
- Utility knife or scissors to cut the hose cleanly
- Waterproof repair tape or rubber patch kit for sealing leaks
- Replacement connectors and hose repair couplings for end or section damage
- Screwdriver to remove or tighten hose clamps
- Fine grit sandpaper to smooth hose edges before patching
- Waterproof adhesive or sealant for extra hold on patches
- Clean cloth and bucket of water for drying and testing
Cutting tools help you remove damaged parts neatly. Sandpaper smooths rough edges so patches stick well. Clean the hose surface with a cloth before applying tape or adhesive.
Use sealant only if the patch material doesn’t fully seal the hole. A bucket of water lets you test the repair for leaks afterward. Hose repair kits usually cost $10 to $20.
They help you avoid buying a whole new hose. Using a kit can save you money.
Always drain your hose and turn off water before starting to avoid injury or water waste.
Many repairs rely on hose couplings, especially when holes appear in the middle. Soften the hose in warm water before pushing connectors in. Dish soap helps lubricate the fitting end for an easier, tighter fit.
Tighten hose clamps firmly to prevent leaks. Skip temporary fixes like electrical tape unless it’s an emergency.
Tape often fails fast under water pressure. Using proper repairs lasts longer.
3. How to Find the Leak or Hole in Your Hose
You can find leaks in your water hose by checking it under pressure. Use simple tools to help spot small holes or cracks. Look closely at the hose surface for any signs of damage.
Soapy water helps show tiny pinholes by bubbling. Checking stretched spots or worn areas also points out hidden leaks.
Using Soapy Water to Detect Pinholes
Soapy water makes small leaks visible because air or water escaping creates bubbles. This method works well for tiny pinholes you can’t see with the naked eye. It’s a safe, easy, and cheap way to spot leaks without special gear.
Mix about one tablespoon of dish soap into one cup of water. Put this soapy solution in a spray bottle or use a cloth to wipe the hose. Spray or wipe the entire hose, focusing on joints and suspect areas.
Bubbles forming on the hose surface show where air or water escapes. These bubbles may appear as small bursts or slow bubbles. Look closely, especially around nozzle ends and connectors, which often develop leaks first.
Checking Visible Damage and Stretched Areas
Visible signs like wet spots, soft or bulging areas often indicate leaks. Run your hand along the hose to check for thin spots. These weak areas can break or leak soon.
Feeling the hose helps find problems before they get worse. Warped or stretched sections suggest internal damage where leaks might hide.
Inspect the hose ends carefully because they wear out faster. Deteriorated threads on plastic fittings cause leaks and may require repair or replacement. Noticing these signs early helps you catch leaks before water waste or damage spreads.
Pressurizing the Hose Safely for Leak Testing
Pressurizing your hose reveals leaks hard to spot when it’s empty or limp. Attach the hose to a faucet or nozzle, then turn on the water slowly. The water pressure will push air and water through leaks, making them easier to find.
Put parts of the hose in a bucket of water. Watch for bubbles escaping to find leaks. This method makes small leaks easier to spot and fix.
This works well for mid-length hose damage, where leaks might be invisible outside. Never over-pressurize; keep water flow moderate to avoid new damage.
Use this step-by-step method to find leaks with pressure and soap:
- Mix a soapy water solution using dish soap and water in a spray bottle.
- Visually inspect the hose for wet spots, cracks, or wear before pressurizing.
- Attach the hose to a water source and slowly open the tap to pressurize the hose.
- Spray or wipe the soapy solution over the hose length, focusing on fittings and suspect areas.
- Look for steady or burst bubbles indicating air or water escaping.
- Submerge sections of the hose underwater to spot bubbles if leaks remain hidden.
- Note any soft or thin spots while running your hand carefully along the hose.
- Turn off the water and dry the hose to prepare it for repairs.
4. Step-by-Step Repair Using Hose Repair Kits
Repairing a cut or damaged water hose section needs a repair kit with menders and clamps. You cut out the bad part, insert the fitting, and clamp each end tightly. This keeps water flowing without leaks and extends your hose’s life.
Cutting Out the Damaged Portion Cleanly
Remove any water left inside by lifting one end and shaking the hose. Use scissors or a utility knife to cut out the damaged section in straight lines. Clean cuts help the hose fit snugly on the repair mender.
Check and clear any small bits of hose inside using pliers or your fingers. That prevents leaks or blockages later. The cut should be long enough to remove all damage, not just the visible hole.
Inserting and Lubricating the Barbed Mender
Choose a barbed or compression hose mender that matches your hose diameter. Slightly moisten the hose ends with soapy water to ease sliding over the mender. Push each cut end firmly onto the mender’s barbs or inside the compression fitting.
Pushing well ensures a solid grip and stops water from leaking. Check the mender instructions.
Some require you to slide hose ends until they meet in the middle tightly. Using a lubricant avoids tearing the hose as you install the mender.
Securing Clamps and Tightening Screws Properly
Slide hose clamps over the hose ends before inserting the mender. Position each clamp about ½ inch from the cut edge, over the mender’s barbs. Use a screwdriver or wrench to tighten the clamps.
Tighten until the hose stays firmly on the fitting. Make sure the clamps are even all around.
Clamps should be snug but not overly tight to avoid cutting into the hose. Tighten screws until the hose stays secure when you gently pull on it. Over-tightening can damage the hose and cause new leaks.
Final Testing Before Finishing Repair
Turn on the water slowly and check for leaks near the repair. Watch the clamps and coupling for any dripping or moisture after a few minutes.
Leaks may appear. Tighten clamps gently or move the hose ends on the mender.
After confirming a tight seal, let the hose pressurize for 5 to 10 minutes. This ensures the fix holds under normal use. Proper sealing means water flows only through the hose, not around the repair site.
- Drain and dry the hose by shaking out water thoroughly.
- Cut out the damaged section using clean, straight cuts.
- Clear any small pieces inside the hose ends with pliers.
- Put clamps on before inserting the mender fitting.
- Moisten hose ends lightly and push onto the mender firmly.
- Position clamps about ½ inch from each end of the fitting.
- Tighten clamps securely but avoid over-tightening screws.
- Turn on water to check the repair for leaks.
5. How to Patch Small Pinhole Leaks with Tape or Sealant
Small pinhole leaks in garden hoses can be patched quickly with tape or sealant. Self-fusing silicone tape or rubber cement with patches works best for minor holes. These fixes work well but don’t last forever.
Heavy pressure or weather can wear them out. You may need to redo the repair later.
Preparing the Hose Surface for Adhesion
Clean the damaged area with water and let it dry completely. Dirt or moisture stops tape and glue from sticking well. Use a cloth or sandpaper to roughen smooth hose surfaces lightly.
Removing grime and oil around the leak improves sticking power. A dry, clean surface also helps rubber cement bond strongly. Gloves protect your hands from adhesives during prep.
Stretching and Wrapping Silicone Tape Properly
Use self-fusing silicone tape that costs about $6 to $12 for 10 feet. Stretch the tape about 50 to 75 percent before wrapping tight around the hole. Overlap each layer by half the tape’s width as you wrap.
Cover a 2-inch area on both sides of the hole to get a strong seal. Press the tape firmly as you wrap, ensuring no bubbles or gaps. The tape bonds to itself after a few minutes without adhesives.
Using Rubber Cement and Patches for Durable Sealing
Spread a thin, even layer of rubber cement over and around the hole. Let the cement dry until tacky but not wet, usually 5 minutes. Press a rubber patch over the hole, pressing out air bubbles carefully.
Clamp or weight the patch for 10 minutes for a tight seal. Rubber patches cost around $5 to $10. They resist weather and water better than tape but take longer to set.
Follow these steps for a quick, effective repair using tape or patch and cement:
- Dry and clean the hose surface around the leak thoroughly.
- For tape, start 2 inches away, stretch, and wrap tightly overlapping layers.
- For rubber cement, apply a thin layer covering the hole and 1 inch beyond.
- Let the cement become tacky, then press the patch firmly over the area.
- Use tape by wrapping it smoothly around the hose. Make sure no air bubbles or wrinkles appear while wrapping.
- Secure the patch with clamps or weights for 10 minutes.
- Wait at least 5 minutes before reconnecting water pressure to the hose.
- Test the repair by slowly turning on water and watching for leaks.
Keep the hose dry and clean before patching for the best bond. Moisture ruins tape adhesion and weakens glue.
6. Fixing Leaks in Hose Ends and Couplings
Leaks often happen at the hose ends because gaskets wear out over time. These rubber rings seal the connection between the hose and the fittings. When gaskets crack or flatten, water slips through, causing leaks at those spots.
Replacing a damaged gasket or the entire hose end can stop leaks quickly. You’ll want to pick a replacement part that matches your hose size and type. Measure the hose diameter first.
Most garden hoses are 5/8 inch or 3/4 inch. Buy hose ends made for that size.
Follow these steps to replace the hose end and gasket. It usually takes about 10 minutes, and parts cost between $5 and $12. Make sure to have a wrench and utility knife ready.
- Turn off water supply and drain any remaining water from the hose.
- Cut off the old hose end with a utility knife. Remove about one inch of hose. Make a clean, straight cut.
- Slide the new hose end fitting onto the hose opening.
- Insert the new gasket inside the fitting’s threaded section.
- Tighten the metal clamp (if included) around the hose to hold the fitting firmly.
- Screw the new hose end onto the spigot or nozzle by hand. Then gently tighten it with a wrench.
- Turn on the water and check for leaks around the new fitting.
Expandable hoses use fittings that often need specific types. Check your hose’s fitting requirements.
Double-check the fitting style before purchasing replacements. This ensures you avoid leaks caused by mismatched threads or sizes.
Crushed or corroded ends are another cause of leaks near the hose connection. Replacing the end restores a proper seal and avoids leaks that tape or sealants can’t fix.
Over time, standing water damages gaskets and causes failure. So swapping old parts is often the best fix.
7. Testing Your Hose Repair for Leaks and Durability
After fixing your hose, you need to test it gently to avoid new damage. Water pressure should be low at first to check if the repair holds. Watching closely lets you spot leaks before they get worse.
Follow these steps to test your hose repair safely and thoroughly.
- Attach the hose firmly to the spigot or your garden faucet.
- Turn on the water slowly, keeping the pressure low, around 10 to 20 PSI.
- Look carefully at the repaired area for any drips, sprays, or wet spots.
- Let the water run for about 5 minutes to see if leaks develop over time.
- No leaks? Slowly raise water pressure to 40 to 60 PSI.
- Check the repair again as you slowly raise the pressure, watching for leaks.
- Switch off the water and observe if any water pools around the repair.
- Repeat these steps if you reinforce the patch or add sealant.
Leaks still show after repair? You might need to recheck it.
Look at the patch or tape to see if it covers the hole fully. Missing spots or excess sealant inside the hose can cause failures.
Reapply the repair material carefully or try a stronger kit made for your hose size. Severe damage or splits might mean you should replace the hose. It’s often safer and can save money.
8. Tips to Prevent Future Holes and Extend Hose Life
Store your hose properly by draining all water before putting it away. Water left inside can freeze in winter and cause cracks. Keep the hose loosely coiled or flat.
Avoid sharp bends. Sharp bends cause kinks and hurt the hose material.
Water pressure needs careful control. Most garden hoses work best with water pressure between 40 and 60 PSI.
Too much pressure stretches the hose lining, raising the risk of bursts or leaks. Avoid sudden water surges by turning faucets on slowly and off gently.
- Drain all water before storage, especially before winter
- Coil hose loosely or lay flat to prevent kinks and twists
- Keep water pressure between 40 and 60 PSI to avoid damage
- Clean hose exterior regularly to remove dirt and prevent cracks
- Check and replace rubber gaskets in hose fittings every season
- Avoid dragging hose over sharp edges or rough surfaces
- Store hose in a shaded, cool place to protect from sun damage
Cleaning dirt and debris off your hose keeps the surface soft and flexible. Use a damp cloth or rinse it when you notice dirt buildup. Pay extra attention to hose fittings to stop grime from causing leaks.
Examine rubber gaskets for cracks or wear. Replace them with new ones priced around $1 to $3 at hardware stores.
Regular inspections help catch small problems early. Look for cracks, soft spots, or leaks along the hose length.
Test hose ends for tight fitting and replace any parts that feel loose or show corrosion. Good maintenance means fewer emergencies and a hose that lasts several years instead of months.
Drain your garden hose after each use. Do it before storing too. This stops freeze damage and cracks.
Step-by-Step Action Plan to Fix a Hole in Your Water Hose
Follow these steps to repair your hose quickly and check that the fix works well.
- Before you start: Find and clean the hole or leak area. This makes sure the patch sticks well.
- Day 1: Apply a hose repair kit or patch neatly over the hole. Wait for the recommended drying time.
- Day 2: Connect the hose to water and turn it on slowly. Watch for any leaks at the patch.
- Day 3: If leaks appear, adjust or add more sealant. Check again after it dries.
- Week 1: Use the hose normally but watch the repaired spot daily for new leaks.
- Week 2: Confirm the patch holds up under full pressure and daily use. No leaks means success.
- Ongoing: Store the hose properly after use to avoid new damage. Keep it out of harsh sunlight and extreme cold.
Frequently Asked Questions
How Do I Know If My Water Hose Has a Hole Inside It?
You can mix water and dish soap and apply it on the hose. Look for bubbles forming, as they show where the hole is. This method works well when the hole is too small to see.
What Causes Water Hoses to Develop Holes over Time?
Sunlight, bending, and freezing temperatures wear down hoses. These weaken the material, causing holes or cracks. Using hose reels and storage can reduce damage.
Can I Repair a Water Hose Hole Without a Repair Kit?
Yes, you can use waterproof tape or sealant for small holes. These work as temporary fixes until you get a repair kit. Make sure the hose is dry before applying.
How Do I Repair a Hose End That’s Leaking Water?
You may need to replace the hose connector or gasket. Removing the damaged part with a screwdriver helps. Then put on the new part and tighten it properly.
Is It Safe to Use a Repaired Hose for Drinking Water?
Use parts labeled NSF-certified or lead-free for potable water hoses. Regular repair kits might contain unsafe materials. Check product labels to be sure.
How Long Will a Repaired Garden Hose Last?
The lifespan depends on damage and repair quality. A neat, solid repair can last months or years. Regular care and proper storage help extend hose life.
Wrapping Up
Fixing a hole in your water hose is doable with the right steps. Start with cleaning, then patch carefully. Try your hose soon after to make sure the repair is solid and ready to use.