How to Replant a Staghorn Fern: Complete Step-by-Step Guide for Healthy Growth
Knowing how to replant a staghorn fern helps keep it healthy and growing strong. Replant your fern every 2 to 3 years or when it becomes rootbound. Water it thoroughly a day before starting to make the process easier.
Choose a mounting board or basket that is just a bit bigger than your fern’s size. Use biodegradable twine or old stockings to hold the fern securely in place. Make sure to keep the environment warm and humid to match the fern’s natural conditions.
Replanting this way reduces stress on your fern and supports fresh growth. Be gentle with the roots and give your plant time to adjust after transplanting. Proper care afterward helps your fern bounce back quickly.
Key Takeaways
- Water the staghorn fern 24 hours before repotting to ease transplant stress.
- Repot every 2-3 years or sooner if the roots are crowded.
- Pick a mount 2 inches wider than the fern’s current size for growth room.
- Use untreated cedar, redwood, or a wire basket as the mounting base.
- Secure the fern with 3-4 feet of biodegradable twine or nylon stockings.
- Keep temperature between 60°F and 80°F and humidity around 70-80% for best results.
When and Why You Should Replant Your Staghorn Fern

The best time to replant your staghorn fern is during spring or early summer. The warmer temperatures and increased light help it recover faster. Avoid replanting in cold months since the plant grows slower and stresses more.
You should replant your staghorn fern every 2 to 3 years. Also replant when the roots start to crowd the pot. This keeps your plant healthy and growing well.
A rootbound fern looks crowded, or its roots appear sticking out from the mount or pot. This crowding restricts growth and can cause poor drainage, leading to root problems.
Look for signs like slowed growth, yellowing fronds, or roots circling the base. These indicate the fern needs more space to breathe and grow. Replanting then helps restore healthy root development and keeps your fern vibrant.
You can technically replant your staghorn fern any time of year if needed. However, doing it during active growing seasons is safer. Replanting in winter risks slow recovery and may weaken the fern.
A helpful step before replanting is watering the fern well 24 hours in advance. This softens roots and reduces transplant shock. Take the fern off its old mount or pot with care.
Look for roots that are too packed or look damaged. Trim only the roots that need cutting to avoid harm.
Pick a new pot or mount that is 2 inches bigger than before. This gives the fern space to grow and lets air reach the roots. Make sure the new base drains well to stop root rot from too much water.
Taking these timing steps ensures your staghorn fern stays healthy and grows well. Rushing to replant or doing it in the wrong season can slow growth or damage roots. Plan ahead for the best results and watch your fern thrive.
Essential Supplies and Tools for Replanting

To replant a staghorn fern, you need a sturdy new mount or container. Untreated cedar or redwood boards work well and resist rot.
You can also use a wire basket 12 to 18 inches wide, which suits bigger ferns. These materials mimic the fern’s natural tree habitat, helping it thrive.
Moist sphagnum moss is essential to cushion the fern’s roots and keep moisture. This moss creates a natural base that holds humidity without waterlogging roots. Avoid regular potting soil since it can cause root rot in staghorn ferns.
You’ll also need something to secure the fern to its mount. Fisherman’s twine or cut-up nylon stockings work well because they’re soft and flexible. This holds the plant firmly without damaging the fronds or roots as it settles in.
- Untreated cedar or redwood board, or a 12, 18 inch wire basket
- Moist sphagnum moss to wrap fern roots
- Fisherman’s twine or cut-up nylon stockings to tie securely
- Pruning shears to trim dead or damaged fronds
- Spray bottle to mist the fern after planting
- Gloves to protect your hands while handling the moss and plant
Pruning shears help remove old fronds before remounting. Gloves protect your hands when handling moist moss or any twine used. A spray bottle keeps humidity levels up after you plant your fern.
You can find these supplies at garden centers or online plant stores. Cedar and redwood boards usually cost $10 to $20 depending on size and quality.
Keep the moss damp but never soaked; waterlogged roots lead to rot quickly.
Wire baskets provide good airflow but need extra moss lining for moisture. Some people use coconut fiber mats as a mount for plants. These mats hold water well but dry quicker than moss.
This makes them a good choice for some gardeners. Avoid treated wood since chemicals may harm the fern. Nylon stockings are handy for tying as they stretch gently and biodegrade over time.
Twine needs about 3 to 4 feet depending on fern size. So buy a bit extra.
Preparing the Staghorn Fern and Its New Mount
Prepare the staghorn fern by soaking it well while you get the new mount ready. Soak both the fern and the sphagnum moss to ensure they hold moisture. This helps the fern attach and grow on its new surface.
Soaking Sphagnum Moss Correctly
Use sphagnum moss as the growing medium because it holds water and supports the fern’s base. Soak the moss completely so it’s fully saturated but not dripping wet. Properly soaked moss creates a moist, stable environment for your staghorn fern’s roots to cling to.
Follow instructions on the moss package to mix with water or simply submerge it. Soaking for 30 to 60 minutes works well to get the moss soft and ready. After draining excess water, the moss should feel damp but not soggy.
Choosing and Preparing the Mounting Surface
Select a sturdy mount like a wooden plaque, bark slab, or wire basket. Wood or bark provides a natural look and long-lasting support. When using a basket, put a thick layer of moist sphagnum moss.
The fern should sit near the top of this moss. This gives roots plenty of space to grow.
Make sure the mounting surface is clean and free from pests or old soil. The mount should be large enough for your fern’s size, allowing space to expand. Avoid very small mounts to prevent crowding and root damage as the plant grows.
Removing Old Mounting Materials Safely
Gently detach the fern from its current mount to avoid breaking roots or fracturing the base. Remove old sphagnum moss and ties carefully without tugging harshly. Keeping the roots intact and unharmed boosts the chances of quick recovery on the new mount.
Inspect the base and roots for any dead or rotting material and trim it off. Removing old media also helps prevent mold or pests from transferring. Only handle the fern when it is hydrated to reduce stress during removal.
Follow these steps to prepare your staghorn fern and its mount for replanting:
- Water your staghorn fern thoroughly, soaking it for 30 to 60 minutes.
- Soak sphagnum moss separately in water until fully saturated but not dripping.
- Select a mounting surface large enough for your fern’s growth needs.
- Clean the mount to remove any old material or pests.
- Wet some sphagnum moss well before starting. Place a thick layer on the basket or wood mount. Make sure the moss stays moist.
- Carefully lift the fern from its old mount, removing old moss and ties gently.
- Check the roots for damage or rot and trim if necessary.
- Put the fern on the new mount carefully. Make it rest near the top of the moss. This helps keep it stable and healthy.
Step-by-Step Instructions to Replant or Remount Your Fern
Start by gently removing your staghorn fern from its current base without damaging roots or fronds. Then, secure it carefully on the new mount using twine or wire. Finally, position it with the roots facing down for proper growth and drainage.
Removing the Fern Without Damage
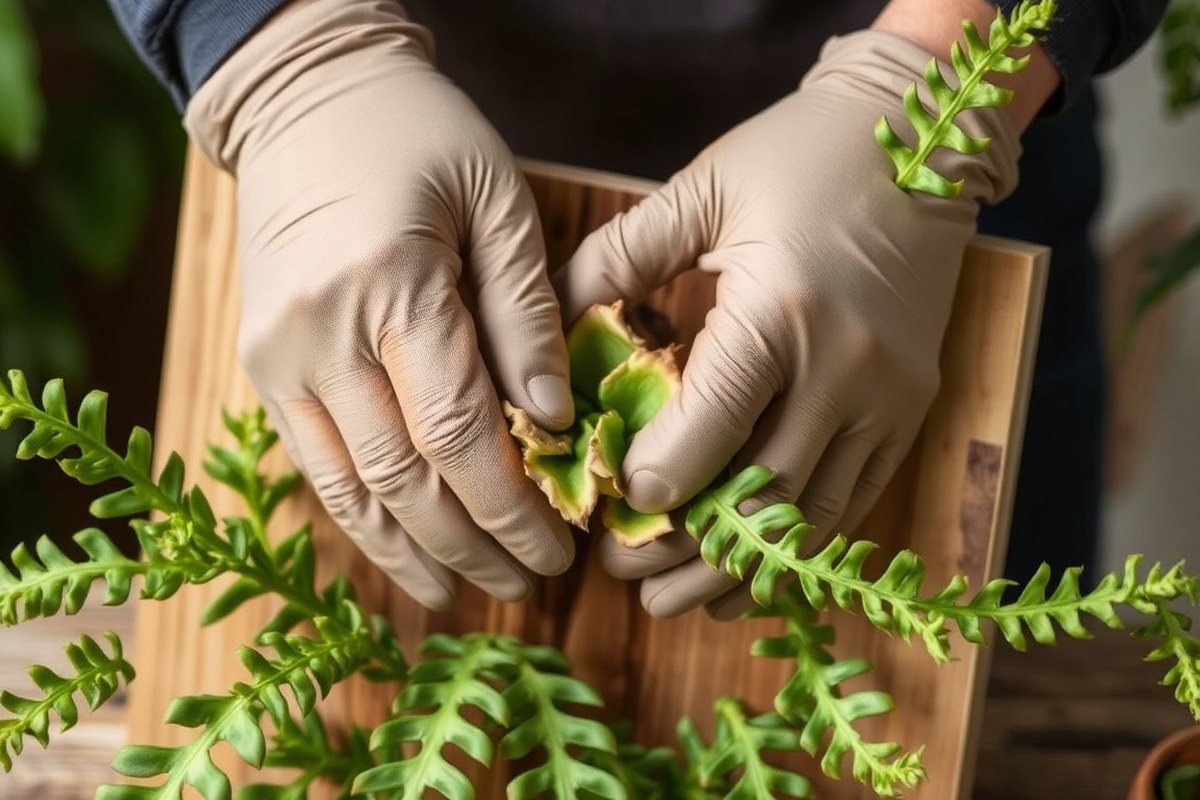
Handle your staghorn fern gently to avoid harming the basal fronds or roots. If some old mount debris sticks to the roots, remove it carefully. This helps prepare the fern for its new home.
Small pieces of the mount coming away with the plant is normal. Clean off any loose debris so the roots can settle well on the new surface.
Attaching Fern to the Mount with Twine or Wire
Use twine or wire to secure the fern without restricting root growth. Coir wrapped tightly but not too tight helps hold the fronds and roots steady. This support lets your fern grow comfortably in place.
Wire acts like the backbone, giving strong support while twine or coir keeps the base snug. Work slowly to avoid damaging the delicate roots or fronds during attachment.
- Lay the mount flat on your workspace.
- Position the fern’s roots downward against the mount.
- Wrap coir or moss around the root base to create a cushion.
- Use wire or twine to loop over the base, holding roots firmly but gently.
- Secure the wire ends on the mount’s back or sides for stability.
- Tuck shield fronds slightly over the mount for extra hold.
- Check the fern for any loose spots and adjust ties as needed.
Final Positioning and Angling for Drainage
Position the mounted fern so the roots face downward for natural growth. Angle the mount slightly to help water drain away from the plant base. This prevents rot and keeps the roots healthy.
Avoid direct sunlight for the first 7 to 10 days after remounting. This gives your fern time to adjust without stress while it settles into the new spot.
Dividing Staghorn Ferns During Replanting
You can divide your staghorn fern while replanting it. Divide it if it has grown big or has many crowns. This helps manage its size and health.
Dividing helps spread the plant and encourages new growth. Use a sharp knife and care for each section to avoid damage.
Identifying Healthy Sections to Divide
Look for mature parts of the fern with healthy fronds and firm root bases. Avoid sections with dead fronds or signs of disease. Dividing only strong, established growth increases your fern’s chances of thriving.
Choose either a rosette on elkhorn ferns or a pup on typical staghorn ferns. Each section should have a good root ball attached for better survival. You’ll want to keep the base intact to support quick root recovery.
Safe Cutting Techniques
Use a clean, sharp kitchen knife for precise cuts. Dull blades can crush the plant, raising infection risk. Cut slowly through the root ball, separating one rosette or pup at a time.
Make straight cuts where natural divisions appear between rosettes or pups. Avoid tearing fronds or breaking roots unevenly. Clean your knife with rubbing alcohol before and after to stop disease spread.
Post-Division Care and Mounting
After division, place each section in a humid environment. Keep temperatures between 60°F and 80°F to reduce stress. Water lightly to keep roots moist but not soaking wet.
Secure the divided ferns to new mounts using loose wire. Wrap wire so it holds the plant but doesn’t cut fronds. Monitor the plants for 2 to 3 weeks, reducing watering as new growth appears.
Follow these steps for dividing and mounting your staghorn fern:
- Inspect your fern and mark healthy rosettes or pups to divide.
- Clean a sharp kitchen knife with rubbing alcohol.
- Cut carefully through the root ball to separate sections.
- Remove any dead fronds or damaged roots from the divisions.
- Place each division in a warm, humid spot for a day or two.
- Mount each new section on a support board or plaque.
- Secure divisions loosely with wire, avoiding tight or sharp pressure.
- Water lightly and keep humidity high to encourage new roots.
Be gentle handling the root ball. Rough cuts can lead to root rot or slow recovery.
Post-Replanting Care for Optimal Recovery
After replanting your staghorn fern, water it deeply but let it drain well. Angle the fern about 10 to 15 degrees. This helps stop water from sitting at the crown.
Water sitting there can cause rot. Water your fern every 7 to 10 days while adjusting.
Check if the growing medium feels dry. Only water again if it’s dry.
Keep humidity high around your fern by misting it daily or using a humidifier nearby. These ferns prefer humidity levels above 50%.
So placing them in bathrooms or kitchens can help. Good airflow is important, too, set the fern where air circulates but avoid cold drafts.
Place the fern in bright, indirect light. Too little light slows down recovery, while direct sunlight can burn the leaves.
A north or east-facing window usually provides the right light. Avoid moving it too often during the first two weeks so it can adjust.
Hold off on fertilizing your fern for about a month after replanting. Fertilizer can stress the roots when they are trying to establish. After the break, feed your fern every 2 to 3 months.
Use a balanced, water-soluble fertilizer. Dilute it to half strength before applying.
The adjustment phase lasts about 7 to 10 days. Your fern might look droopy or pale during this time. It’s normal while it adapts.
This is normal if you follow watering and light guidelines. Watch for signs like browning edges or mushy stems that could mean overwatering or rot.
Signs Your Staghorn Fern Is Thriving or Struggling After Replanting
Your staghorn fern shows healthy adaptation if new fronds begin to appear. This usually happens within a month after replanting. The fern’s leaves should look vibrant green and firm, not limp or pale.
Watch for wilted leaves or brown spots during the first few weeks. These signs can mean the fern is stressed or facing transplant shock.
It occurs when roots get disturbed or if watering is off. A light yellow color on leaves may also indicate it’s adapting but needs support.
Check for root rot by smelling the root area or observing mushy roots. Root rot happens if the fern sits in excessive moisture.
Avoid watering more than once a week and ensure your mount or container drains well. This prevents soggy roots and fungal issues.
- New green fronds growing show good health.
- Brown or black spots on leaves may signal disease.
- Wilting or limp leaves often mean underwatering or shock.
- Soft, smelly roots reveal root rot problems.
- Yellow leaves with firm texture suggest mild stress.
- Mount should be stable and fit the root system.
- Water once weekly, not more, to prevent sogginess.
When you spot browning or mushy roots, carefully cut off those parts. Let the plant dry a few days before watering again.
Move the fern to indirect light and avoid fertilizer until it recovers. Problems worsening after two weeks mean you should ask a local nursery or plant expert for help.
Quick intervention can save a struggling fern. Changing the watering schedule or improving drainage helps most issues. A thriving staghorn fern keeps its fronds firm and steadily grows for several weeks after repotting.
Common Mistakes and How to Avoid Them When Replanting
Many people make the mistake of overwatering their staghorn fern after replanting. Too much water can cause root rot and kill the plant. Water only when the growing medium feels dry to touch.
This happens about every 1 to 2 weeks. Check the moisture before watering each time.
Placing the fern in poor light or the wrong spot often slows recovery. Staghorn ferns prefer bright, indirect light and good air circulation. Avoid direct sun or completely dark corners to keep your fern healthy.
Using the wrong mounting material can hurt your plant. A pot that is too tight around roots can also cause harm. Choose mounting and pot size carefully.
The roots need room to breathe and grow. Use a loose moss pad or coconut fiber mat for mounting. Don’t pack the medium too densely.
- Water only when the mounting feels dry, not on a strict schedule.
- Choose bright, indirect light with good airflow.
- Use coconut fiber or sphagnum moss as mounting material.
- Leave space around roots to avoid compaction.
- Inspect the fern’s base for any damaged or rotting parts.
- Don’t place the fern near heat vents or cold drafts.
- Handle roots gently to prevent bruising or breaking.
Water sparingly after replanting; soggy moss causes root rot quickly.
Check the base of the fern regularly. Remove any brown or mushy parts right away.
Those spots can spread rot and weaken your fern. Using clean, sharp scissors avoids damaging healthy sections.
Keep your fern away from temperature extremes. Heat vents dry out ferns fast, while cold drafts shock their roots. A steady room temperature around 60 to 80°F works best.
Final tip: patience helps. Staghorn ferns may look dull at first, but steady care leads to new growth. Don’t rush watering or repositioning in the early weeks.
Step-by-Step Action Plan
Follow these steps to replant your staghorn fern safely and watch it grow well.
- Before you start: Gather all supplies like mounting board, sphagnum moss, and wire. This prepares you to work efficiently.
- Day 1: Remove your fern gently from its old mount and clean off dead material. You’ll see fresh roots and healthy fronds ready for replanting.
- Day 1: Soak fresh sphagnum moss and place it on the new mount. The moss should feel damp but not soggy.
- Day 1: Put the fern’s base on top of the moss. Hold it tight using wire or fishing line. Make sure it stays in place securely. The fern should be stable and not shift when nudged.
- Week 1: Hang the fern in indirect light and mist it daily. Watch for new frond growth and firm attachment as signs it’s settling in.
- After 2 weeks: Reduce misting to every two to three days if moss stays moist. Check the fern for firm hold and no wilting.
- Month 1 and beyond: Feed with a diluted liquid fertilizer monthly. Healthy green fronds mean your fern thrives on its new mount.
Frequently Asked Questions
How Do I Prepare My Staghorn Fern Before Replanting?
Start by watering your fern thoroughly 24 hours before replanting. This keeps the plant hydrated and makes removal easier.
Can I Use Vitamin B-1 to Help My Fern After Dividing It?
Yes, soaking the divided pieces in Vitamin B-1 solution can reduce transplant shock. It helps the fern recover faster and grow well.
What Kind of Mount Should I Use for My Staghorn Fern?
Use a mount that mimics its natural environment, like a wooden board covered with sphagnum moss. This provides good support and moisture retention.
How Do I Avoid Root Rot When Replanting a Staghorn Fern?
Make sure the fern’s roots are not waterlogged before repotting. Good drainage and airflow prevent fungal diseases and root rot.
What Is the Best Time of Year to Replant My Staghorn Fern?
Replant every 2-3 years or when necessary, preferably during warm months. Spring or early summer helps the fern adjust better.
How Do I Care for My Staghorn Fern Immediately After Replanting?
Keep the fern in bright, indirect light and maintain high humidity. Avoid direct sun and let the fern stay moist but not wet.
Key Points to Remember
Replanting your staghorn fern helps it grow stronger and stay healthy. Start the process today with gentle handling and proper mounting. Watch closely to enjoy its new growth and beauty.