How to Fix a Leaky Garden Hose: 8 Effective Repairs for Fast Results
Knowing how to fix a leaky garden hose can save you time and money. The quickest way to stop leaks is by locating the exact spot where water escapes. Once identified, using the right repair method depends on the size and type of the leak.
Small holes often need simple patching or tape. Bigger tears require cutting and reconnecting the hose.
Always start by turning off the water and draining the hose for a clean repair. Checking your hose fittings and gaskets can also fix leaks near connectors.
Using quality materials like 3M Scotch Garden Hose Tape ensures a weatherproof and stretchy seal. Softening the hose with warm water before bending or patching helps the fix last longer. A careful repair helps you avoid wasting water and keeps your garden growing strong.
Key Takeaways
- Find the leak by running water slowly through the hose.
- Turn off the water and drain the hose before any repair.
- Use 3M Scotch Garden Hose Tape for small hole patches.
- Soak hose ends in warm water to soften before repairing.
- Cut out large tears and reconnect with a hose repair kit.
- Replace worn gaskets every 3 to 10 years to prevent leaks.
Identify and Locate the Leak Accurately

Finding the exact spot where your garden hose is leaking helps you fix it faster. Some leaks are easy to spot, like big holes or splits. But smaller holes or worn areas might be hidden until you check carefully.
Leaks under pressure often show up better because water pushes through the damaged spot. Look closely for wetness or tiny drips while the hose is running. Subtle signs include soft spots, cracks, or a weak spray from the nozzle.
Here are steps to find leaks in your garden hose. Look for hidden holes or worn spots. Check along the whole hose carefully.
- Lay the hose on a flat surface in the sun to dry if it’s wet. This helps you spot fresh wet spots later.
- Attach the hose to the water source and turn it on fully. Watch the entire hose length carefully for leaks.
- Feel along the hose with your hand, checking for water spray or damp spots. Move slowly, one foot at a time.
- Wipe areas with a dry towel or cloth. Watch for new wet spots forming. This shows where leaks might be.
- Use soapy water on tough-to-see leaks. Apply it with a sponge or spray bottle. Look for bubbles showing leaks. Bubbles will form over leaks.
- Check both ends, especially near fittings and gaskets, since leaks often happen there. Tighten or inspect those connections.
- Coil the hose and lift sections while water flows. This helps find leaks not easy to spot. Listen and look for squirts or drips.
- Mark leak spots with waterproof tape or a marker. This shows where you need to fix the hose. It helps you work fast later.
Avoid searching when the hose is cold or dry, as small holes might not leak then. Using water pressure reveals leaks more clearly.
Minor hose damage looks like soft spots or bulges. You can feel these changes when you touch the hose.
Spotting leaks early saves water and prevents bigger hose damage. It usually takes about 5 to 10 minutes to find leaks in a typical 50-foot hose.
Bigger tears or cracks are easier to see. So focus on finding tiny leaks with these methods first.
Tools and Materials Needed for Hose Leak Repairs

To fix a leaky garden hose, you need some basic tools and materials. These include cutting tools, sealing tapes, and replacement parts. Choosing the right items makes your repair work faster and more reliable.
Essential Cutting and Sealing Tools
A sharp hose cutter or garden shears are must-haves for trimming damaged hose sections. You’ll need a clean rag to dry the hose first. Make sure it’s completely dry before using tape or glue.
This helps the repair stick better. These tools keep the cut smooth, which helps the repair hold better.
You might want gloves to keep your hands safe and clean. A utility knife can help reach tight spots easily. These tools make the job simpler.
Having a flat work surface makes aligning new parts easier. These simple tools keep your repair neat and reduce the chances of leaks coming back.
- Sharp garden shears or hose cutter for clean cuts
- Utility knife for precise trimming
- Clean rag to dry hose surfaces
- Work gloves for hand protection
- Flat surface or workbench to assemble parts
Replacement Parts and Couplings to Stock
Keeps a few garden hose repair connectors and couplings in your toolbox. Compression menders and quick-connect couplers seal holes or tears without needing glue. These parts cost around $5 to $10 each at most hardware stores.
Before buying, measure your hose diameter (usually 5/8 or 3/4 inches) to get matching parts. Fresh rubber gaskets are useful to replace worn fittings and stop drips. You’ll save time with these ready-to-use pieces.
Best Tapes and Adhesives for Hose Repair
High-quality waterproof tape is a quick fix for small leaks. Electrical tape shines because it stretches well and sticks tightly in wet conditions. Keep in mind, this tape works best on clean, dry hose areas.
Garden hose repair kits often include special waterproof patch tape plus connectors and clamps. These kits cost from $10 to $20 and provide everything for different fixes. They’re worth it if you want a longer-lasting repair without using glue or clamps alone.
| Tape or Kit Type | Strength and Use | Cost |
|---|---|---|
| Electrical tape | Good stretch, waterproof, best for small holes | $3-$5 per roll |
| Waterproof patch tape (kit) | Strong adhesion, patches larger holes, includes connectors | $10-$20 per kit |
| Silicone or rubber repair tape | Self-fusing, creates airtight seal | $7-$15 per roll |
Always clean and fully dry the hose before applying tape to get a tight seal.
Fix Small Holes and Punctures Quickly
Small holes and punctures in garden hoses can be fixed fast. Use waterproof tape or self-fusing silicone for the repair. These materials seal leaks quickly and keep water inside.
These methods work well for minor leaks without the hassle of replacing hose sections. Tape or silicone fixes last longer than you might expect but are not always permanent solutions.
Preparing the Hose Surface for Repair
Cleaning and drying the hose surface before fixing a leak helps the repair materials stick better. Dirt or moisture can prevent tape or silicone from sealing the hole effectively. Use a cloth to wipe the hose and let it dry completely.
After cleaning, roughen the hose surface around the leak slightly using fine sandpaper. This step increases the bond strength for tape or silicone. Avoid sanding too hard and damaging the hose more.
Applying Tape or Sealant Correctly
Using the right tape makes a big difference. 3M Scotch Garden Hose Tape is made for this job and is waterproof and stretchy. Pull the tape tight as you wrap it over the hole.
Wrapping firmly makes a strong seal to stop leaks. Make sure the tape covers the hole completely.
For self-fusing silicone, apply a thin layer directly over the clean, dry leak. Then stretch and wrap the silicone tape around the hose to secure the area. Follow the product’s curing time to ensure a good seal before using the hose.
Tape repairs typically last several weeks to months under light garden use. Silicone seals tend to last longer but both fail if the hole grows or pressure spikes. Leaks that come back mean you need a repair kit.
You can also replace the damaged hose section to fix it. These options work better for stubborn leaks.
Use these steps to apply waterproof tape or silicone:
- Cut a piece of tape large enough to cover the hole with extra overlap.
- Stretch the tape while wrapping to ensure a tight seal.
- Overlap at least half of the tape width on each pass.
- Wrap tape at least 2 inches beyond the hole on all sides.
- Press the tape firmly against the hose surface as you wrap.
- Let silicone cure fully as directed before turning on water.
When to Consider Replacing Instead of Repairing
This quick fix works only for very small holes or punctures. Tape or silicone won’t fix tears or large cracks in hoses.
These bigger breaks need different repair methods or replacement. Don’t rely on tape alone for big damage.
Use a hose repair kit that replaces a hose section for bigger damage. These kits create a watertight seal that tape cannot match.
When many leaks appear or the hose is old, replacing it may cost less. Buying a new hose can save time and hassle later.
Check the hose condition before deciding to repair. Frequent taping wastes time and leaves you with unreliable repairs.
Repairing Large Tears and Cuts in the Hose
Cut out the damaged part of your garden hose. Then insert a hose mender. This fixes large tears or cut sections.
Hose menders come in plastic or metal types. They connect both hose ends.
This restores the water flow. You need to cut the hose ends straight and use the right mender to avoid leaks.
Cutting Out the Damaged Section Cleanly
Start by removing the damaged hose segment to get a solid repair. Use a sharp utility knife or hose cutter for a clean, straight cut. Uneven cuts can cause leaks or make the mender fit poorly.
Cutting straight ends also makes it easier to insert the hose fully into the repair coupling. Avoid jagged edges or angled cuts, as they reduce the seal’s strength. After cutting, check both ends for any loose or frayed material to trim away.
Choosing the Right Hose Repair Coupling
Pick a hose mender that fits your hose size exactly. Most hoses are 5/8 inch or 3/4 inch in diameter.
Menders match those sizes. Plastic menders are cheaper but metal ones hold up better against damage and pressure.
Compression fit menders use clamps to tighten the hose. They work well for rubber hoses. They also fit vinyl hoses.
Some menders slide inside the hose and seal with built-in O-rings for a snug, watertight fit. Check your hose material and size to pick the right style.
Installing and Securing Hose Menders Properly
Follow these steps to replace the damaged section with a hose mender. Proper installation stops leaks and keeps your hose strong. Tighten clamps firmly but avoid over-tightening, which can damage the hose.
- Turn off water and fully drain the hose before starting.
- Cut out the damaged section using a utility knife or hose cutter.
- Trim hose ends to make sure they are straight and clean.
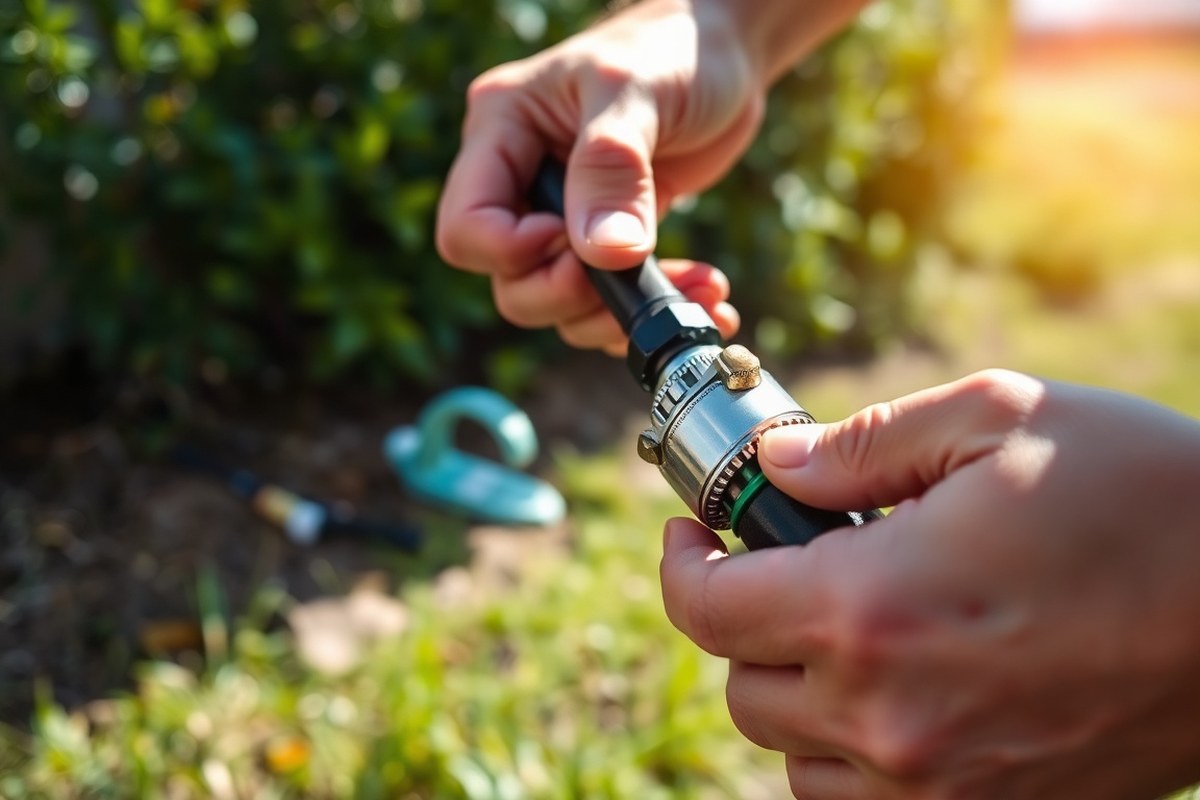
- Slide hose clamps onto the hose ends before inserting the mender.
- Push both hose ends firmly onto the mender’s connectors.
- Position clamps over the mender ends and tighten them securely.
- Check the repair by turning on water and looking for leaks.
Rubber hoses generally grip fittings better, so clamp tightly but not too much. Vinyl hoses may need extra care as they crack more easily under pressure. Use stainless steel clamps to prevent rust and keep the mender durable outdoors.
Replacing or Repairing Hose Fittings and Gaskets
Leaks often come from worn hose fittings or damaged gaskets. These parts keep the connection tight between your hose and spigot or nozzle. Replacing or tightening them can stop most leaks without changing the whole hose.
Garden hoses usually have three common inside diameters: 1/2 inch, 5/8 inch, and 3/4 inch. Most outdoor faucets and watering tools use 3/4-inch fittings. Matching this size when replacing couplings or washers avoids leaks and loose connections.
You should replace a hose fitting if it’s cracked, bent, or remains leaky after gasket replacement. Rubber washers inside the fittings often wear out from sun and water pressure. Taking out the old washer is a simple first step.
Put a new washer in to improve the seal. This helps stop leaks around the fitting.
Follow these steps to replace or repair hose fittings and gaskets:
- Turn off the water supply at the faucet to avoid sprays and mess.
- Disconnect the hose end or fitting that leaks by unscrewing it.
- Use needle-nose pliers to pull out the old gasket inside the female coupling.
- Check the gasket size; it should sit flat inside the coupling without folds.
- Insert a new gasket of the same size, pressing it snugly into place.
- Screw the fitting or coupling back onto the hose by hand. Tighten it well, then use pliers for a quarter turn. This extra twist ensures a firm connection.
- Turn on the water slowly and watch for leaks at the connection.
- Tighten more if water drips, but avoid overtightening to prevent damage.
Loose fittings lead to leaks, but overtightening may crack them. Tighten just enough to stop water from escaping.
Common Mistakes and How to Avoid Them
One common mistake is not drying the hose area before repair. Moist or wet spots prevent tape or patches from sticking well. Always dry the hose completely, especially after use or rain.
Another error is using regular tape instead of waterproof tape designed for hoses. Cheap tapes lose grip and let water leak again soon. Choose vinyl or rubber repair tape for lasting results.
Too much pressure in the hose also causes failed repairs. Water pressure that is very high can cause small fixes to fail. Test the hose at low pressure first, then slowly increase to normal levels.
- Not cleaning dirt or grime off before repair
- Skipping drying time before applying tape or patches
- Using ordinary tape instead of hose-specific waterproof tape
- Ignoring damaged fittings causing leaks beyond hose holes
- Reusing old patches without removing failed ones
- Over-tightening connectors, which can cause new cracks
- Repairing under high pressure without testing first
Sometimes tape peels off because you didn’t wrap it tightly enough. Wrap the tape around the hose in overlapping layers, stretching it as you go. That helps it clamp tightly to the hose material.
When a patch comes loose, check the surface for dirt or damage. Remove all old adhesive or patches completely. Clean the area with rubbing alcohol.
Let the surface dry before applying a new patch. After that, apply a new patch or tape.
For fixes on hose fittings, replacing worn gaskets stops leaks better than just sealing with tape. Tighten fittings evenly but don’t force or overtighten them. Over-twisting can crack plastic connectors and cause bigger leaks.
When tape repairs fail repeatedly, try removing the damaged hose section. Use a hose repair coupling to reconnect the hose.
This takes a bit more effort and costs around $8 to $15 for a coupling. But it holds stronger and lasts longer.
Leaks that continue after a good fix may mean internal damage. Your hose could have more than one leak. Professional help may identify problems and decide if hose replacement is a better option.
Preventing Future Leaks by Proper Hose Care
Store your garden hose properly to avoid damage and leaks. Coil it loosely on a reel or hanger. This stops kinks and twists.
Kinks and twists can weaken the hose over time. Avoid tight loops that create stress points, which often lead to cracks over time.
Keep your hose out of direct sunlight when not in use. UV rays break down the material, making it brittle and more likely to leak. Moving your hose’s storage location occasionally helps prevent sun damage and uneven wear.
Regular maintenance stops small problems from turning into leaks. Look over the hose and fittings every few months. Do this before and after each gardening season.
Check for any wear or damage. Replace worn gaskets every three to 10 years to keep connections tight and leak-free.
- Coil hose loosely to avoid tight bends
- Store in shade or rotate storage spots
- Drain water from hose before storing for winter
- Inspect hose and fittings for cracks or damage monthly
- Replace gaskets every 3 to 10 years
- Flush hose each spring to clear debris
- Keep hose off rough surfaces to prevent abrasions
Seasonal checks help spot damage early. Drain your hose before cold weather to stop water from freezing inside.
Freezing can cause cracks and leaks that last through the season. In spring, flush the hose with clean water to remove dirt and prevent blockages.
These simple steps take minutes but save you money. Well-maintained hoses last years longer and protect your garden’s water supply. Neglect, on the other hand, causes leaks that waste water and frustrate your outdoor efforts.
When to Repair vs Replace Your Garden Hose
Fixing small leaks often costs about $5 to $15 using repair kits. Replacing a garden hose usually costs $20 to $50, depending on length and quality. You should repair when leaks are small and hose material is still sound.
Think about replacing the hose if leaks keep appearing in different spots. Replace the hose if it feels stiff or cracks appear. Damage along most of its length also means it’s time to replace.
Check your hose carefully for these signs. These signs mean repairs won’t last long and a new hose saves money and frustration.
High-end hoses with thicker walls and durable fittings might be worth multiple repairs. Their higher original cost justifies repair spending over replacement. Cheaper hoses, however, often cost less to replace than fix repeatedly.
Most garden hoses last 5 to 7 years before wear causes frequent leaks. Harsh sun, cold weather, and rough handling shorten this span. Use the table below to compare typical repair costs against replacement for different hose conditions.
| Hose Condition | Typical Repair Cost | Replacement Cost | Repair Effectiveness |
|---|---|---|---|
| Single small leak | $5, $15 | $20, $50 | High, quick fix |
| Multiple leaks or cracks | $20+ | $20, $50 | Low, repairs fail soon |
| Old, rigid, or heavily damaged hose | High | $20, $50 | Poor, replacement better |
| High-end hose with few leaks | $5, $30 | $40, $70 | Good, repairs extend life |
Try fixing all small leaks first if your hose still feels flexible and works well otherwise. But watch for quick repair failures or hard spots. Then pick a new hose with thicker walls and better fittings to cut future problems.
Don’t delay replacing a hose that leaks in many places. Multiple repairs waste money and time.
Step-by-Step Action Plan to Fix Your Leaky Garden Hose
Follow these simple steps to find and fix leaks in your garden hose fast. You’ll save water and stop the mess.
- Before you start: Gather tape, patch kits, replacement washers, and a pair of scissors. Having tools ready speeds up the repair.
- Day 1: Turn on the hose and slowly check for leaks along the length. Mark any spots where water drips or sprays.
- Day 1: For small holes, wipe dry and wrap self-fusing silicone tape tightly over the hole. Check for no leaks by turning water on again.
- Day 2: Use scissors to cut out large damaged sections. Then join the hose using a rubber coupling. Make sure the hose isn’t leaking at the joints.
- Day 2: Inspect hose fittings and replace any cracked washers. Tighten fittings firmly but don’t overtighten.
- After repair: Water-test your hose for 10 minutes to ensure all leaks are fixed. Look for new wet spots or drips.
- Weekly: Store the hose properly on a reel or hook and drain it after use. This prevents kinks and cracking that cause leaks.
- Monthly: Review the hose and fittings for signs of wear. Early fixes stop bigger leaks later.
Frequently Asked Questions
Can I Use Duct Tape to Fix a Garden Hose Leak?
Duct tape can temporarily stop a small leak. However, it’s not weatherproof and won’t last long outside. Use specialized garden hose tape for a more reliable fix.
How Do I Fix a Leak in a Garden Hose Nozzle?
Tighten the nozzle or replace worn washers inside. Nozzle leaks often come from loose parts or old gaskets that need swapping out.
Is It Safe to Use Silicone Sealant on a Leaky Hose Joint?
Yes, silicone sealant can stop leaks at joints temporarily. Make sure surfaces are clean and dry before applying for the best hold.
How Do I Prevent Leaks at the Hose Connectors?
Use rubber washers and don’t overtighten the connectors. Proper assembly avoids strain and extends hose life while stopping leaks.
Can Freezing Weather Cause Garden Hoses to Leak?
Yes, frozen water expands and can crack hoses or fittings. Drain hoses in winter or store them indoors to avoid leaks caused by frost.
What’s the Easiest Way to Patch a Small Puncture in a Rubber Hose?
Use self-fusing silicone tape wrapped tightly around the hole. It sticks well and handles outdoor wear better than regular tape.
Final Thoughts
Fixing your garden hose leaks saves water and money. Start with small patches and replace parts if needed. Take action now to keep your hose working well all season.