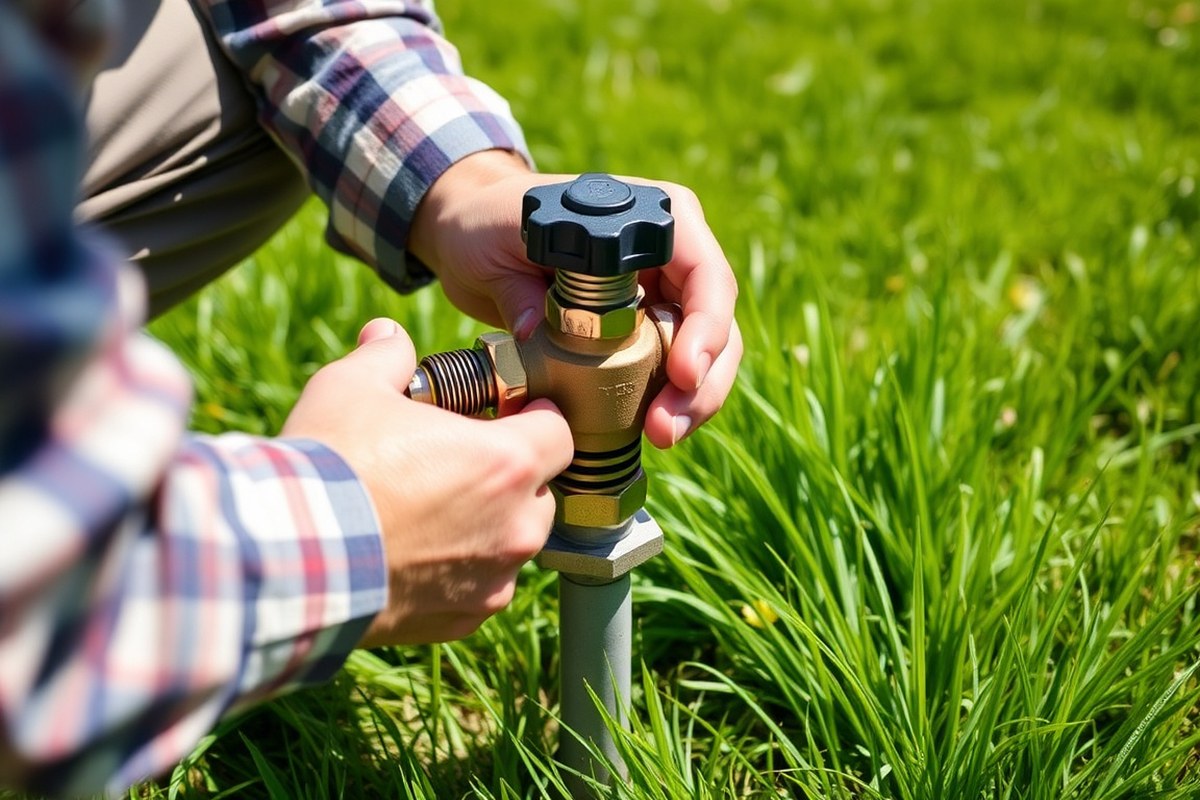
How to Restart Sprinkler System Safely: Step-by-Step Guide with Troubleshooting
Learning how to restart sprinkler system correctly helps avoid damage or leaks. Begin by checking the soil around your sprinkler pipes for deep frost or moisture.
Only turn on the system after the ground is dry. Make sure frost is gone at least 12 inches deep.
Next, inspect sprinkler heads, valves, and exposed pipes for cracks or blockages before starting the water. Manually run each zone for 3 to 5 minutes first. This lets water pressurize.
It also pops up the heads. This approach prevents sudden pressure surges that might harm your irrigation system.
Set your sprinkler controller for a short test cycle of 10 to 15 minutes. This run helps spot leaks or poor water flow early. Keeping these steps methodical ensures your sprinkler system restarts safely and efficiently.
Key Takeaways
- Check soil for frost at least 12 inches deep before restarting sprinkler system.
- Examine sprinkler heads, valves, and pipes for damage or obstructions first.
- Run each zone manually for 3 to 5 minutes to pressurize the system properly.
- Set the controller to a short 10-15 minute test cycle initially.
- Look for leaks or uneven water flow during the test cycle.
- Do not turn on the main valve if the handle is not perpendicular to the pipe.
How to Restart Your Sprinkler System Step-by-Step

To safely restart your sprinkler system, follow a clear order of steps. This method protects pipes and valves from damage and makes sure each zone works properly. Running zones one at a time helps spot leaks or blockages early.
- Turn off the main water supply valve completely. This stops water from flowing into the system during setup.
- Switch your sprinkler controller on. This powers up the system controls and prepares for zone testing.
- Open the main shut-off valve very slowly. Gradually allowing water in avoids pressure surges that can break pipes or fittings.
- Activate the first zone from your controller. Let it run for 3 to 5 minutes to let water reach all sprinkler heads.
- Watch the sprinklers for proper spray and leaks. Check if all valves are fully open when water pressure is low.
- Turn off the first zone. Then run each additional zone. Let them run 3 to 5 minutes each. This ensures every part of the system pressurizes well.
- After testing all zones, turn off the controller and close the main water valve. This prevents water damage if repairs are needed.
- Set your controller programming once you’re sure all zones function properly and no leaks show up.
Opening valves slowly especially matters to avoid water hammer effects. Each zone running for at least three minutes helps push out air from pipes. You’ll notice heads fully pop up and spray evenly.
Some zones may have less flow or not pop up. Check valves or filters before watering.
How to Inspect and Prepare Your Sprinkler System Before Restart
Before restarting your sprinkler system, inspect all parts for damage, debris, and leaks. Focus on sprinkler heads, valves, pipes, and backflow preventers. This inspection helps avoid costly repairs and inefficient watering later.
Check Sprinkler Heads for Clogs and Damage
Walk the yard and look closely at each sprinkler head. Remove dirt, leaves, or spider webs that might block water flow. Spray water manually on each head to check for clogging or uneven spray patterns.
Damaged heads often crack or break, causing poor coverage or leaks. Replace any heads that are cracked or have missing parts. Check that all heads pop up and retract smoothly from the ground.
Look for worn nozzles that produce uneven watering. These affect your lawn’s health and increase water waste.
Examine Valves and Backflow Preventer Condition
Valves regulate water flow to your sprinkler zones. Open the valve box and inspect for cracks or debris buildup. Clean around each valve to ensure smooth opening and closing.
Backflow preventers keep irrigation water from contaminating your home’s water supply. Check this device for leaks or corrosion. Make sure all caps and fittings are secure.
Operate each valve manually to catch issues before restarting the system. Damaged valves may need replacing to avoid leaks or pressure loss.
Look for Pipe Leaks or Physical Damage
Check all visible pipes for cracks, warping, or buried damage. Look especially near joints and fittings for weeping water or stains. Small leaks show as pools or soggy ground under heads or along pipe runs.
Press lightly on exposed pipes to detect softness or breaks. Any damaged pipe will reduce system pressure and cause uneven watering. Note pipe sections for repair or replacement before turning the system on.
Leaks often worsen if you restart the system without fixing them. Don’t ignore puddles around the yard, they almost always mean a pipe leak.
Verify Ground Frost Has Melted to 12 Inches Depth
Frozen ground can burst pipes when pressurized water runs through them. Check soil temperature with a simple probe or wait until daytime soil is consistently above 40°F. Hard, frozen ground usually reaches a foot deep or more in cold climates.
Don’t start your system too early in the season. Water moving through frozen pipes often causes expensive and messy breaks. Wait for consistent thawing before restarting.
Use a metal rod or long screwdriver to check soil depth. Do this around each valve and pipe area. This helps spot hard spots underground.
The soil is rock hard 12 inches down. Don’t start your system yet. Let the ground soften first.
- Clear visible debris from sprinkler heads with a small brush or cloth.
- Test each valve by turning it on and off manually to check function.
- Look for cracks, warping, or softness in pipes exposed above ground.
- Inspect backflow preventers for corrosion, leaks, or loose fittings.
- Feel soil temperature and consistency to ensure frost has melted enough.
- Replace any damaged sprinkler heads or valves before restarting.
Turn off the main water supply before any inspection to avoid accidental water release or damage.
When Is the Best Time to Restart Your Sprinkler System?
Restart your sprinkler system only after the ground thaws. Make sure the frost risk is over. That will protect your lawn and pipes.
The ideal soil temperature usually sits above 40°F (4°C). Wet, frozen, or partially frozen soil can cause uneven watering and damage your system.
Check the forecast for at least a week without frost before turning it on. You want the soil firm and dry enough to not trap water.
Signs like soft or muddy spots show the ground is still too wet. Restarting too early can crack pipes or cause pressure issues.
Timing depends on where you live. Southern states with mild winters often start in late February.
Northern regions might wait until April or May. Mountainous or higher elevation areas require even more caution due to late frosts and snowmelt.
| Region Type | Recommended Restart Time | Soil Condition to Check |
|---|---|---|
| Southern States (e.g., Florida, Texas) | Late February to early March | Soil above 40°F, dry surface |
| Mid-Atlantic and Midwest (e.g., Ohio, Pennsylvania) | Mid to late April | Firm, thawed soil with no frost days in forecast |
| Northern States and Mountains (e.g., Minnesota, Colorado) | Late April to May | No frozen soil, dry enough to support foot traffic |
| Pacific Northwest (e.g., Washington, Oregon) | Early to mid-April | Soil not saturated, check for snowmelt runoff |
Test your soil before turning on the system. Press your finger or foot into the ground. See how it feels to know if it’s ready.
The ground should feel firm and dry before you start. This means you can safely turn the system on. If the ground feels soggy, wait a few days.
Check the soil again before using your sprinkler. This prevents damage and lawn problems.
Restarting too soon risks water hammer and cracked pipes. You might also waste water because frozen or saturated soil doesn’t absorb water well.
Watch your local weather and soil temperature to protect your system. These simple steps keep your sprinkler and lawn safe.
How to Set and Program Your Sprinkler Controller After Restart
Resetting your sprinkler controller and setting new schedules helps your system run efficiently. Start by clearing old data to avoid mistakes. Then set watering times that match your plants’ needs.
Test each zone manually. This helps find any problems early.
Resetting to Factory or Seasonal Settings
Most controllers have a reset function that clears previous schedules and custom settings. Use this to remove outdated programming from last season. Setting the controller to factory defaults ensures a clean start.
Some controllers allow seasonal presets that adjust watering automatically for spring or summer. These presets save time by matching general climate needs. Reset before applying those seasonal settings for accuracy.
- Turn off the sprinkler controller to avoid errors during reset.
- Press and hold the reset or factory default button, found on most units.
- Release the button when the display flashes or shows a reset confirmation.
- Check the user manual if your controller uses dial settings or menu navigation instead.
- Choose a seasonal preset if available for your climate zone.
- Verify all zones are cleared of old schedules before programming new ones.
Programming Initial Watering Duration and Frequency
Start with conservative watering times to avoid overwatering after winter. Typical cycles run between 10-15 minutes, enough to check for leaks and flow. Frequency depends on your soil type and lawn or garden needs.
Set schedules for early morning or evening to reduce evaporation. Adjust based on seasonal rainfall and temperature changes. Avoid running all zones the same time; stagger them to maintain water pressure.
- Turn on the controller and select the program or schedule menu.
- Assign each zone a start time, usually 5-7 AM or 7-9 PM.
- Set watering duration to 10-15 minutes per zone for initial testing.
- Choose watering days according to local restrictions and typical weather.
- Save the schedule and exit the programming mode.
- Monitor plant reaction and soil moisture to adjust duration after a week.
Running Manual Zone Tests to Ensure Functionality
Manual testing the zones lets you spot clogged heads or wiring issues quickly. Running one zone at a time helps isolate problems without wasting water. This step checks valves, sprinklers, and overall zone coverage.
Switch your controller to manual mode and activate each zone for 10-15 minutes. Watch the sprinklers for correct spray patterns and coverage. Adjust heads if water flows unevenly or sprays off target areas.
- Switch the controller from automatic to manual or test mode.
- Select the first zone and run it for 10-15 minutes.
- Observe sprinklers for leaks, low pressure, or damage.
- Stop the zone and repeat with all other zones individually.
- Note any zoning mistakes, like water flowing from wrong heads.
- Fix problems before setting the system to automatic mode.
Adjusting for Weather and Soil Moisture Sensors
Modern controllers can connect to rain or soil moisture sensors. These sensors delay watering when conditions are wet, saving water and preventing plant stress. Integrate these sensors before finalizing your schedule.
Check sensor batteries and wiring before starting the season. Adjust your controller’s sensor override settings according to local weather patterns. This setup drastically improves watering efficiency.
How to Test Each Zone and Check System Pressure
Testing your sprinkler system’s pressure and running each zone helps spot uneven coverage or malfunctions. Check that pressure stays between 40 and 60 psi for most home systems. Watch for signs like misting or low spray, which hint at pressure issues or blockages.
Attach and Monitor Pressure Gauge
Begin by attaching a pressure gauge to the main water supply line or the backflow preventer. This lets you check the water pressure entering the system before running any zone. The ideal pressure range to look for is usually between 40 and 60 psi.
A pressure reading outside this range can cause poor watering performance or damage. Low pressure might mean a blocked filter or valve. High pressure could risk pipe bursts or misting from nozzles.
- Find the pressure gauge port near your sprinkler’s main valve or controller.
- Screw the pressure gauge onto the port firmly but gently.
- Turn on your sprinkler system controller to activate the main valve.
- Watch the pressure gauge reading while the system is running.
- Note if the pressure stays steady within 40 to 60 psi.
- Turn off the system and remove the pressure gauge carefully.
Do not ignore sudden pressure drops; they might indicate hidden leaks.
Run Each Zone for 5 to 8 Minutes
Next, run each zone separately for 5 to 8 minutes. Watch closely to see how well it waters. Note any dry spots or leaks.
This time is enough for the sprinklers to reach full spray and show any problems. Running all zones in sequence gives a complete view of system performance.
Listen for any unusual sounds and watch the water spray pattern. Sharp noises may point to water hammer or valve issues, requiring a regulator or repairs.
- Set your sprinkler controller to manual mode or use the app for zone testing.
- Turn on zone 1 and let it run for 5 to 8 minutes at full pressure.
- Turn off zone 1 before moving to the next zone.
- Repeat for every zone in your irrigation system.
- Check each zone’s spray coverage as it runs and note any irregularities.
Don’t rush through zones; short tests can miss hidden problems.
Look for Uneven Spraying or Low Output Areas
Uneven watering often points to pressure or nozzle issues. Look for zones that spray inconsistently, have dry patches, or spray water onto sidewalks. These signs can mean clogged nozzles, broken heads, or poor pressure control.
Low output or misting may also suggest pressure is too high or too low. Uneven watering damages your lawn and wastes water.
- Walk through each zone while it’s running and watch spray patterns closely.
- Mark any spots that receive too little or too much water.
- Check for sprinklers spraying water in the air or misting excessively.
- Identify any broken or misaligned sprinkler heads.
Don’t ignore water pooling or runoff; it means your system needs adjusting.
Adjust or Repair as Needed
Fix uneven coverage by adjusting sprinkler head direction, cleaning or replacing nozzles, or adjusting pressure regulators. Clean filters if pressure is low. Replace broken parts to avoid wasting water or straining your system.
Adjust watering times after repairs to match new settings. Problems still there?
Think about getting professional help. They can fix pressure regulators or valves.
- Turn off the system before making any sprinkler adjustments.
- Use a screwdriver to realign or clean sprinkler heads if needed.
- Replace clogged or damaged nozzles to restore even spray.
- Check and clean the system filter to improve water flow.
- Adjust pressure regulator settings for consistent pressure between 40 and 60 psi.
- Run test cycles again to confirm repairs fixed the issues.
Never adjust pressure without consulting your system manual; incorrect settings can cause damage.
Common Problems After Restart and How to Troubleshoot Them
Water may not flow or sprays might be weak due to clogged heads or low pressure. Dirt and debris often build up inside sprinkler heads during downtime.
To fix clogs, take off the sprinkler head first. Soak it in vinegar or scrub with a small brush.
Low pressure usually points to leaks or a partially closed valve. Check the main valve slowly to avoid water surges.
Turn the valve gently and watch system pressure, making sure it reaches your normal operating level. Normal pressure usually falls between 30 and 50 psi.
Check each sprinkler head when water flow is uneven. Broken or leaky heads let water waste and cause dry spots. Replace any head that drips continuously or has a damaged spray pattern.
New heads cost about $5 to $15 at garden stores. Snap in the new head after shutting off the system.
Controlling the system errors starts with inspecting the irrigation controller wiring. Look for cracked insulation or loose connections.
Replace damaged wiring with the same gauge wire rated for outdoor use. Faulty wiring or bad valves might stop valves from opening.
Valves often fail from wear or mineral buildup. Replace the valve if it doesn’t open after trying manually and electrically. Valve kits run between $15 and $30.
Turn off the water before removing the old valve. Install the new valve following its flow direction arrow.
Flushing the system before full use reduces clogs. Open the main drain and run water slowly for a few minutes.
This clears debris from pipes, protecting heads and valves. Avoid high pressure spikes by adjusting the main valve gradually.
Leaks can appear at joints, heads, or valves. Find leaks by running zones individually and seeing wet spots or soggy ground.
Tighten fittings or replace broken parts to stop water loss. Small repairs cost under $20; bigger pipe fixes may need pros.
Plan annual sprinkler inspections to catch problems early. Clean filters and test each zone for good spray coverage. This upkeep saves water and prevents bigger repairs later.
After fixing, turn on your sprinklers one zone at a time. Make sure water flows evenly in all areas.
Essential Safety Precautions When Restarting Sprinkler Systems
Wear sturdy gloves and safety glasses to protect your hands and eyes. Long sleeves and closed shoes help avoid scrapes or irritation from dirt and sharp parts. These simple steps prevent minor cuts and eye injuries while you work with valves and pipes.
Turn off electrical power at the main switch before checking or working on controllers and timers. Use a voltage tester to confirm no electricity flows to the wiring. This cuts the risk of electric shocks.
Shocks can cause serious injury. Water around the system makes shocks worse.
Open the main water valve slowly and steadily. A sudden rush of water creates “water hammer.” This is a pressure shock.
It damages pipes and connections. Watch for leaks or unusual sounds as pressure builds. Notice jerky pipe movement or banging noises?
Shut off the water. Call a professional.
- Put on gloves, safety glasses, and closed-toe shoes
- Switch off power to sprinkler controllers before touching wires
- Test for voltage with a non-contact tester
- Open the main valve gradually over 30 seconds or more
- Look for leaks or signs of pipe damage before full pressure
- Keep children and pets away during restart
- Have towels or rags handy to catch any drips or spills
Handling pressurized pipes carefully reduces risk of bursts or sprays. See cracked pipes or worn valve seals? Replace them first.
Then turn on the system. Watch for mineral buildup that can block flow or cause leaks. Doing a slow, cautious restart helps avoid costly repairs and keeps your system running smoothly.
When to Call a Professional for Sprinkler System Restart Help
Call a professional if your sprinkler system shows serious leaks, broken pipes, or wiring problems. Also, seek help when valves fail to open or the controller doesn’t respond after multiple attempts. These issues often need specialized tools and expertise that are hard to manage with DIY fixes.
Look for licensed irrigation technicians with good reviews and experience on your system’s model. Ask local garden centers or friends for trusted recommendations. A qualified pro can spot hidden damage and avoid costly errors during the restart.
Expect a professional visit to last one to three hours total. It depends on your sprinkler system’s size and condition. They will check everything carefully.
Typical costs start at $75 and go up to $150 per hour. Most restart services cost between $150 and $300.
The final price depends on your system. This includes inspection, minor repairs, and system programming.
Before hiring, confirm the contractor offers a clear service estimate and warranty on work done. Make sure the technician uses proper tools for the job. These include pressure gauges and wire testers.
Good tools help everything run smoothly. Professionals can adjust your sprinkler zones for efficient watering and prevent water waste.
Don’t delay calling a pro if your system repeatedly fails tests or looks damaged. Early repair saves water and prevents lawn damage later.
Step-by-Step Action Plan to Restart Your Sprinkler System
Follow this plan to get your sprinkler system running smoothly again. Each step has a clear goal and a way to check your progress.
- Day 1: Inspect and Clear Walk through your yard and look for visible damage. Remove debris from sprinkler heads and valves to ensure clear water flow.
- Day 2: Turn on the Water Supply Slowly open the main water valve. Check for steady water flow. Watch for leaks around the valve. Watch for leaks or low pressure to catch issues early.
- Day 3: Power Up the Controller Restore electricity or replace batteries in the sprinkler timer. Check the display lights and test the manual start function.
- Day 4: Program Your Sprinkler Controller Enter the right watering schedule for your lawn. Adjust timings based on local climate. Save the settings before exiting. Confirm each zone runs for the correct time during a test run.
- Day 5: Test Each Zone Activate one zone at a time and watch the spray coverage. Look for dry spots or broken heads and fix them immediately.
- Day 6: Adjust System Pressure Use a pressure gauge to check system pressure. Make sure it matches the recommended levels. Adjust the valve if needed. Lower pressure can cause poor coverage; high pressure can damage heads.
- Week 2: Monitor System Performance Check the lawn for even watering and no puddles or erosion. Make small timer and head adjustments as needed.
- Week 3: Schedule a Routine Check Inspect your sprinkler heads once a month. Clean out dirt and clogs during these checks. Keep notes on what you find each time. Prevention stops small problems from becoming big ones.
Frequently Asked Questions
What Are the Early Signs My Sprinkler System Needs a Restart?
Dry or brown patches on your lawn and uneven watering often mean it’s time. Also, if the system hasn’t run since last season, restarting helps check for hidden issues.
Can I Restart My Sprinkler System Without Shutting Off the Main Water Supply?
No, always turn off the main water supply before starting any work. This prevents damage and water waste while you inspect and restart the system properly.
How Long Should I Run Each Sprinkler Zone During a Restart Test?
Run each zone for at least 3 to 5 minutes. This allows enough pressure to push up the heads and helps spot leaks or blockages early.
Is It Necessary to Inspect Sprinkler Heads and Pipes Before Restarting?
Yes, a good inspection helps catch damage or clogs. Cleaning or fixing any issues first avoids worse problems once the water’s on.
Why Does My Sprinkler System Need a Professional Inspection Before Restarting?
Professionals can spot problems you might miss and ensure safe operation. Your system is older or complex; hiring a pro prevents costly repairs.
What Safety Steps Should I Take When Restarting My Sprinkler System?
Turn off power and water before beginning. Check for electrical connections and leaks to keep yourself safe and protect the system during restart.
Final Thoughts
Your sprinkler system will run well with careful restarting and regular checks. Watch how the lawn looks after watering and adjust as needed. Start today by clearing debris off the sprinkler heads to get your system ready.