How to Make a Small Greenhouse: Simple Steps and Best Materials Explained
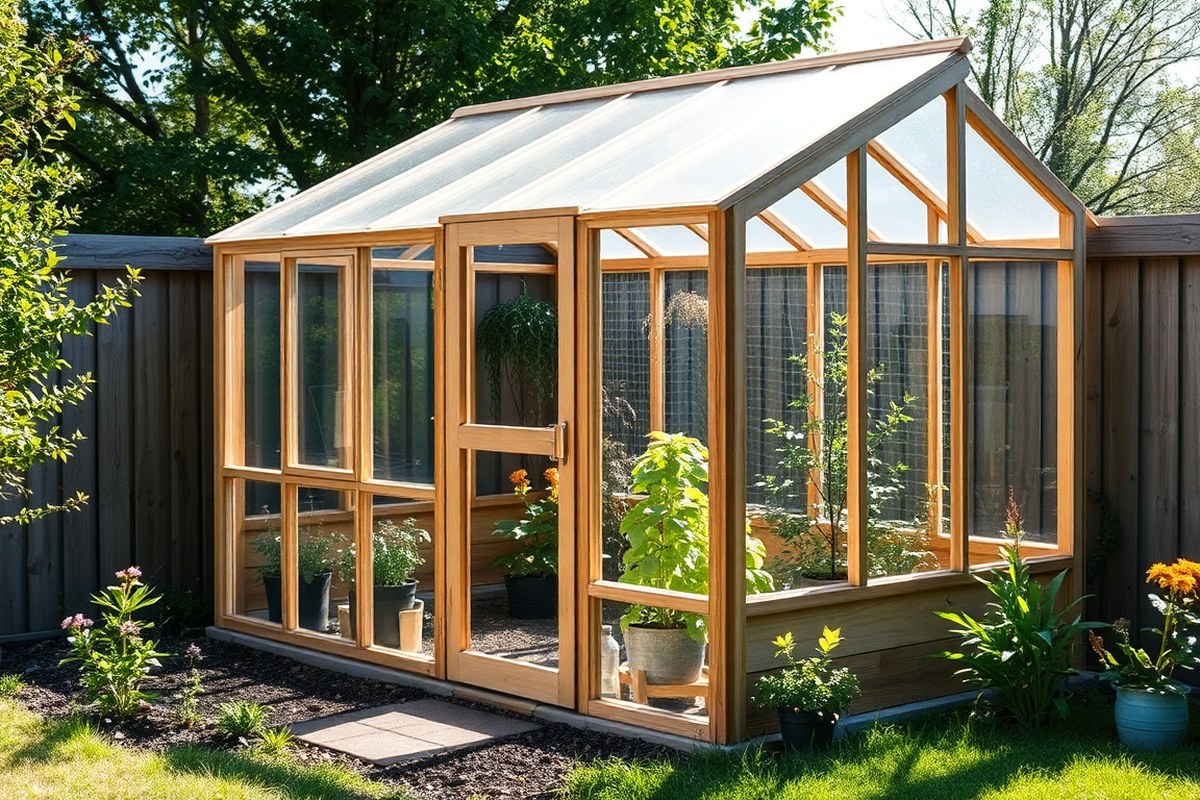
Wondering how to make a small greenhouse? It’s simpler than you think. Build a strong frame first.
Then cover it with clear plastic or glass. This lets sunlight pass through.
Your plants need warmth and shelter. At the same time, they require enough light to grow well.
Choose a location that receives 6 to 8 hours of direct sun daily. Size matters, so pick around 6×8 feet for small yards. This space fits well and stays manageable.
Building close to a wall or fence can save time and materials. Also, using materials like wood or PVC is easy for beginners and keeps costs down. Avoid spots with heavy shade or strong winds to keep your plants safe and growing healthy.
Key Takeaways
- Choose a spot with at least 6-8 hours of direct sunlight daily.
- A 6×8-foot greenhouse is a good size for small garden spaces.
- Building against a wall reduces the number of frame sides to build.
- Use clear plastic or glass covers to let sunlight in while trapping heat.
- Wood and PVC frames are beginner-friendly and usually cost less.
- Avoid windy or shady locations to protect your plants effectively.
How to Build a Small Greenhouse Yourself

Building a small greenhouse yourself takes between one and three days if you have basic tools. You don’t need advanced carpentry skills, just a saw, drill, screws, and a tape measure.
A foundation isn’t always required. But a simple one can improve stability and protect your plants from cold ground.
Start by choosing a spot with good sunlight and some protection from strong winds. A small greenhouse about 6×8 feet fits most small yards. It is easy to manage.
You can place it on patios too. Planning well saves time and helps you avoid common problems like poor ventilation or unstable frames.
Follow these steps to build a simple greenhouse. It will hold up well. Your plants will stay protected.
- Prepare a level foundation.Clear the ground first. Lay down treated wood or concrete blocks. This keeps the frame off the soil. This stops rot and helps drainage.
- Cut and assemble the frame. Use wood or PVC pipes for the skeleton. Cut the pieces to the right size. Screw or glue them together. Make a rectangular base with vertical supports.
- Attach additional frame supports. Fix horizontal braces and roof rafters for strength. Squared corners and braces keep the structure solid in wind or snow.
- Install the covering. Use greenhouse plastic sheeting or polycarbonate panels. Stretch plastic tight over the frame. Use staples or screws to attach it. Seal all gaps to keep heat inside.
- Add a door or flap.You can hinge a wooden or plastic frame. Cover it with the same plastic material. This allows easy access and ventilation.
- Check seals and ventilation. Use caulk or weather stripping on edges to keep cold air out. Leave adjustable vents or a small window to prevent overheating during the day.
- Set up shelves or plant beds. Add raised beds or shelves inside before use. This organizes your plants and makes watering easier.
Good results come from a sturdy frame with tight, well-secured covering. Avoid loose plastic or weak joints that can tear or collapse. Build your small greenhouse for under $200.
Use local lumber or PVC and plastic sheets. Basic tools are all you need.
Choosing the Best Location and Size for Your Greenhouse
Finding a Sunny Spot
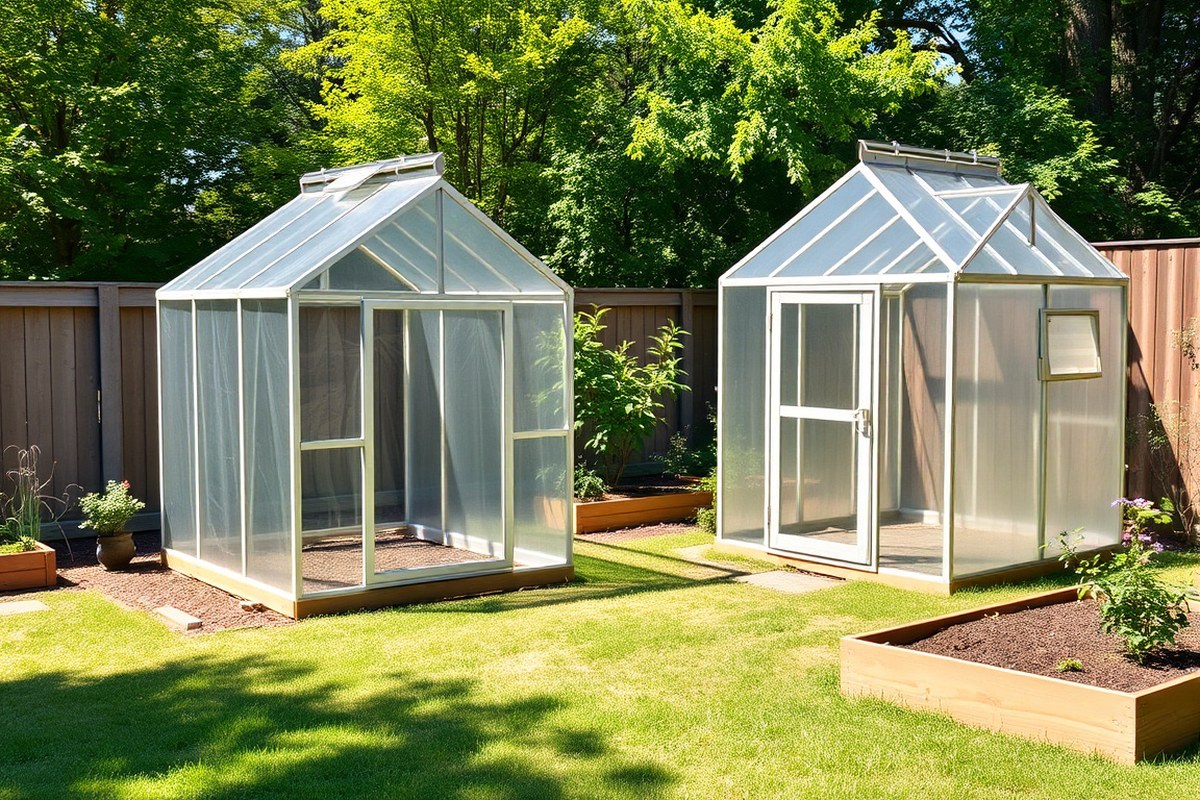
Your greenhouse needs at least 6 to 8 hours of sunlight daily. This means picking an open area away from shade by trees or buildings.
Shade blocks the sunlight and slows plant growth. So keep it clear on all sides.
Check your yard at different times, especially morning and afternoon. Note where shadows fall and pick a spot that stays bright the longest. Use reflectors or mirrors to bounce light inside the greenhouse evenly when sunlight is low.
Choosing an Accessible Location
Place your greenhouse close to your home for easy care and watering. Avoid spots that are hard to reach or far from a water source. This saves you from carrying heavy buckets or moving hoses long distances.
Think about weather shelter, too. Placing the greenhouse near a wall helps block wind.
It keeps plants warmer during cold months. But, make sure walls don’t block sunlight for most of the day.
Size Guidelines Based on Your Garden
Measure the space where you want the greenhouse to live. Pick a size that fits comfortably without crowding other plants or walkways. A narrow greenhouse can work well for tight spots but limits what you can grow.
A 6 by 8 feet greenhouse gives you enough room for trays and pots. Beginner gardeners often find this size useful. Larger greenhouses provide better airflow and more plant space but cost more to build and heat.
How to Decide Your Greenhouse Size
Think about what you want to grow and how many plants you need to fit. Small herb gardens fit well in 4 by 6 feet.
Vegetable growing may require 8 by 10 feet. More space gives room for shelves and moving around inside.
Remember to add space for ventilation and door clearance. Plan for the door to swing outwards to save interior space. It helps you access your plants easily without bumping into shelves.
Pick a spot that gets direct sun most of the day. This helps keep your plants healthy.
Comparing Frame Materials: Wood, PVC, or Metal?
Wood, PVC, and metal are the main choices for small greenhouse frames. Wood offers a classic look but needs maintenance. PVC is cheap and easy for beginners but less durable.
Metal stands up best over time and handles weather well. Still, it costs more and requires tools to build.
Wood Frame Advantages and Drawbacks
Wood frames look natural and blend well with garden spaces. You can paint or stain them to increase weather resistance.
Untreated wood like pine may rot or warp in wet weather. So plan to protect it with exterior wood paint.
Wood is relatively easy to cut and assemble with basic tools. However, it can be heavy and takes more time to build than PVC. Expect to spend about $50 to $100 on lumber for a small frame.
The exact cost depends on the wood quality. Plan your budget around this range.
PVC Frame Pros and Cons
PVC comes as light pipes that are simple to cut and fit together with 1-inch fittings. It’s one of the cheapest options at about $20 to $40 for a small greenhouse frame. Assembly usually only requires a saw and pipe cutter, making it ideal for beginners.
PVC resists rust and stays weatherproof but can crack under heavy cold or strong wind. It’s less sturdy for supporting heavy plants or snow loads. Over time, exposure to sun may cause it to discolor or become brittle.
Metal Frame Benefits and Limitations
Metal frames, often steel or aluminum, are the strongest and last for many years without damage. They resist rust if coated and handle heavy loads like large plants or snow. Metal frames cost more, usually $100 or more for a small model.
Building with metal may need extra tools like drills and screws. It’s less beginner-friendly but offers high durability in harsh weather. Metal fits well with polycarbonate panels, which add lasting protection to the greenhouse.
Here is a comparison table to help select your frame material based on key factors:
| Material | Cost Range | Durability | Weather Resistance | Ease of DIY Assembly |
|---|---|---|---|---|
| Wood | $50 – $100 | Moderate (needs maintenance) | Can rot if untreated; needs paint | Moderate; basic carpentry skills required |
| PVC | $20 – $40 | Lower; prone to cracking over time | Good; resists rust but degrades in sun | High; easy to cut and fit |
| Metal | $100+ | High; very long-lasting | Excellent with coating; resists snow, wind | Low to moderate; needs special tools |
Choose wood for a strong frame with a natural appearance. Wood frames need some maintenance to last well. This option suits those ready for upkeep.
Pick PVC for quick, low-cost setups or temporary greenhouses. Opt for metal if you aim for lasting strength and can handle more complex assembly. Think about your climate, budget, and how long you want your greenhouse to last.
Choosing and Installing Greenhouse Coverings
Choosing the right covering for your small greenhouse depends on light, insulation, durability, and budget. Polycarbonate sheets offer great insulation and strength but cost more.
Clear plastic film is cheaper and flexible but less durable. Glass and other materials work but need careful handling and support.
Polycarbonate Sheets: Strength and Insulation
Polycarbonate sheets are tough, lightweight, and provide good insulation thanks to tiny air channels inside. They keep heat in better than clear plastic film, helping plants survive frost and cold snaps. These sheets resist wind better than glass.
They handle impacts well. This makes them great for small greenhouses with changing weather.
Cut polycarbonate panels to size and attach them with flat-headed tacks or screws into your frame. Make sure to seal edges well to avoid drafts and moisture leaks. Over time, keep them clean to maximize sunlight for your plants.
Clear Plastic Film: Cost-Effective Choices
Clear plastic film or polyethylene sheeting is a budget-friendly way to cover your greenhouse. It lets sunlight through and traps heat but insulates less than polycarbonate. This covering is flexible and easy to work with, suited to smaller projects or temporary setups.
Attach plastic film with snap clamps or staples tightly. Secure edges with wood battens. You can also fold plastic into eyelets and hook it onto screws.
Use several eyelets spaced evenly along edges to avoid tearing in wind. Replace film every 2 to 3 years if it gets brittle or cloudy.
Glass and Other Coverings: Pros and Cons
Glass offers the best clarity and longevity but is heavy and requires a strong frame. It also has poor insulation and breaks easily.
Using offcuts or old windowpanes can save money but needs cautious handling. Glass works well if your greenhouse is sheltered and sturdy.
Other options include clear acrylic sheets or recycled materials like gallon jugs and plastic clamshells. Acrylic is light and durable but scratches easily.
Recycling plastics is sustainable but may not provide uniform insulation or light transmission. These materials can be creative solutions in DIY setups.
Here’s how common greenhouse coverings compare on key factors:
| Material | Insulation | Durability | Light Transmission | Cost Estimate |
|---|---|---|---|---|
| Polycarbonate Sheets | High (air channels provide good insulation) | Strong and impact resistant | Good, slightly diffused | Moderate to high ($20, $40 per 4×8 ft sheet) |
| Clear Plastic Film | Low to moderate | Less durable, prone to tears | Clear and bright | Low ($10, $30 for a 20×25 ft roll) |
| Glass Panels | Low insulation | Fragile, heavy | Excellent clarity | High depending on source |
| Acrylic Sheets | Moderate | Durable but scratches | Good | Moderate |
| Recycled Plastics (bottles, clamshells) | Varies widely | Variable, often less durable | Varies | Low to free |
Secure your covering by pulling it taut before fastening to avoid flapping and damage. Use snap clamps on plastic film for easy removal during repairs.
Seal edges with waterproof tape or battens to maintain heat and stop drafts. For reusable materials, inspect often and replace warped or cracked panels to keep your greenhouse effective.
Setting Up Ventilation and Temperature Controls
Mini greenhouses do need air holes to keep the air fresh and avoid overheating. Even a few small holes punched in plastic containers work fine. You can also leave a plastic bottle’s screw lid off to let air flow freely.
Fans help move air and keep temperatures steady, especially in larger mini greenhouses. Place small fans close to vents or windows. They push hot air out.
They also pull fresh air in. For simple setups, run the fan when the inside hits around 50°F. Turn it off once the air cools back down to about 45°F to save energy.
You can monitor temperature with a greenhouse thermometer. A hygrometer also works. Buy them in garden sections.
Put the thermometer in the greenhouse’s middle. This shows the real air temperature.
Your plants get this reading. Checking it regularly helps you avoid letting it get too hot or too cold.
Heat builds quickly inside small greenhouses when the sun shines. Without ventilation, plants can wilt or slow down growth. Open vents or turn on fans when temperature exceeds 90°F. This lowers the heat.
In cold weather, stop temperatures from dropping below 45°F. Close vents and add insulation. Use doubled plastic sheets or wooden boxes around plants.
Vent windows or vents positioned across from each other create good airflow. It pulls fresh air in while pushing warm air out naturally. Large greenhouses, about 6 by 8 feet or bigger, benefit from exhaust fans.
These fans boost air movement. Fans that vent air beneath the greenhouse also help reduce humidity and prevent mold.
Leaving some vents partially open lets fresh air in and reduces frost risk. But don’t open them too wide in cold weather.
Organizing Plant Space: Shelving, Containers, and Raised Beds
Use vertical shelving to stack plants and save floor space. Shelves must be level and sturdy enough to hold pots securely. Keep taller plants on lower shelves to prevent shading smaller ones above.
Choose container sizes based on plant needs. Small seedlings fit well in 4- to 6-inch pots.
Bigger vegetables need deeper containers or raised beds. Mix shallow containers for herbs with deeper ones for root crops to use space efficiently.
Raised beds let you grow directly in soil, improving drainage and root health. They cost more upfront than pots but hold more soil and moisture. Pots drain faster but are easier to rearrange.
You can start seedlings in pots inside your greenhouse. Move them to raised beds once it’s warm enough outside. This helps protect young plants until outdoor conditions improve.
- Install shelves along walls or use tiered stands in corners
- Arrange pots by plant size and light needs
- Use raised beds for heavier or larger crops
- Choose pot depth: shallow for herbs, deep for vegetables
- Water early or late to avoid sun damage on wet leaves
- Keep shelves stable to prevent toppling when watering
Watering in tight spaces needs care. Avoid watering plants in direct sunlight to stop leaf scorch.
Use watering cans or drip systems to reach plants without spilling on the floor. Group pots with similar watering needs together to save time.
Adding LED grow lights can help when sunlight is weak. You can extend your growing season or grow plants year-round this way. Keep light fixtures above shelves so they reach all plants evenly and don’t crowd your setup.
Using Budget-Friendly and Recycled Materials for Mini Greenhouses
Plastic bottles and containers make great materials for small greenhouses. Cut the bottoms off sturdy bottles, then stack or arrange them around your seedlings. Secure them with tape or clips to form a protective shell that traps heat and moisture.
Budget mini greenhouses work well with recycled items like plastic pint cups or stacking crates. You just flip the cups upside down over small pots. This method is cheap, easy, and good for starting seeds or protecting young plants.
Simple recycling projects include using clear food containers or windows from old furniture. These clear covers let sunlight in and keep winds out.
For a bigger enclosure, use plastic crates and plastic sheeting. This setup creates a small, enclosed space.
- Collect plastic pint cups for quick plant covers
- Use stacking crates stacked and covered with clear plastic
- Cut large plastic bottles to make cloche-like domes
- Reuse clear food containers as mini greenhouses
- Use biodegradable plastics lasting one or two growing seasons
These DIY mini greenhouses help protect plants in mild winter climates. They trap heat during the day and reduce frost exposure at night. For colder areas, add a layer of bubble wrap inside the cover to boost warmth.
You can find many suitable materials for free or low cost. Save used plastic containers from your kitchen or ask friends for empty crates. Look at your local recycling center or thrift stores.
They may have clear plastics you can use. These plastics usually last one to two years.
Protecting Your Greenhouse Plants in Winter and Cold Weather
Winterizing your small greenhouse means keeping plants safe from frost and freezing temperatures. Start by checking that the structure is sealed well to stop cold drafts. Cover gaps around doors and windows with weather stripping or foam tape.
Adding bubble wrap or greenhouse fleece to walls and roof will trap heat without blocking sunlight. Use these materials sparingly so light still reaches your plants.
Heating options depend on your climate and budget. Cheap ways include using a small electric heater with a thermostat set around 40°F to 50°F. This keeps tender seedlings alive on cold nights without overheating. You might try passive solar heat to avoid using electricity.
It works great in sunnier greenhouse spots. Paint dark-colored barrels or stones and place them inside to absorb heat during the day. They release warmth slowly when temperatures drop.
Raised beds inside the greenhouse warm soil faster and protect roots. Cover plants with frost cloth on cold nights for extra security. Avoid overdressing your greenhouse: open vents on warmer days to prevent overheating.
Temperatures in the teens can harm your plants. Use some heating and insulation to protect fragile ones.
Take off the greenhouse cover on warm days near frost times. This helps plants breathe and stops mildew growth.
Make sure insulation doesn’t block sunlight; light loss slows plant growth the most.
Keep watering needs low in winter but don’t let soil dry out completely. Check temperature daily and adjust heat or ventilation. Small heaters cost about $30 to $50 and run affordable on low power.
Bubble wrap and fleece are budget-friendly additions that work in most climates. For very cold zones, consider combining heated mats under seedlings with fleece covers above. This layered protection is key to surviving hard freezes.
Avoiding Common Small Greenhouse Mistakes and Troubleshooting
Building a small greenhouse comes with some common mistakes you want to skip. One mistake is poor ventilation, which can raise humidity and cause mold or plant diseases. Glass or plastic panels need vents you can open.
Install small fans to keep the air moving. Check that vents open fully and stay open during sunny days to avoid overheating.
Another frequent problem is plants not growing well despite your efforts. This often happens because of insufficient sunlight or wrong temperatures. Make sure your greenhouse faces south or southeast for the best light.
Use a thermometer to keep daytime temperatures between 70°F and 85°F for most veggies. Warm weather calls for opening vents or adding shade cloth.
This helps cool things down fast. Night temps should stay above 50°F to protect tender plants.
Moisture build-up inside the greenhouse often leads to fungal issues and attracts pests. Condensation forms when warm air meets cold surfaces, especially in mornings. Water plants early to raise humidity and reduce moisture.
Use a dehumidifier or fans to move air. Pests like aphids and whiteflies thrive in humid spots. So inspect plants regularly and wash off bugs with a spray of water.
Check common greenhouse problems with this quick list. Fix stuck vents or add new ones if air is still. Add a shade cloth or fan if temperatures rise above 85°F. Adjust watering times and improve airflow if moisture stays above 70%.
Remove infested leaves and treat pests with safe insecticidal soap. Keep track of humidity and temperature daily with a basic indoor gauge for better control.
Wilted or yellow leaves may mean overwatering or root problems. Check soil moisture and roots carefully. Check soil moisture before watering again.
Stick your finger 2 inches deep to feel dampness. Most small greenhouses cost under $200 to equip with fans and shade cloths.
These fixes help plants grow stronger and healthier. Small changes in airflow and temperature can stop many problems before they start.
Step-by-Step Action Plan
Follow these steps to build your small greenhouse and get it ready fast. Check each step to make sure you’re on track.
- Before you start: Choose a sunny, level spot with good drainage. Check for at least 6 hours of sunlight daily.
- Day 1: Gather your materials like frame wood or PVC and clear plastic sheeting. Make sure you have all the tools ready.
- Day 2-3: Build the frame following your chosen design. It should stand sturdy and square with no wobble.
- Day 4: Attach the greenhouse covering tightly. Look for no gaps or sagging to keep heat inside.
- Day 5: Set up ventilation openings like vents or windows. Test they open easily for fresh air flow.
- Week 2: Install shelves and place containers or raised beds inside. Confirm everything fits and you have space to work.
- Week 3: Add cold-weather protection like row covers or a small heater, if needed. Check plants stay healthy when temperatures drop.
- After 4 weeks: Monitor your greenhouse for problems like too much heat or pests. Adjust ventilation or shading as needed to keep plants thriving.
Frequently Asked Questions
What Is the Cheapest Way to Build a Greenhouse?
Using PVC pipes and clear plastic sheeting is the cheapest option. It is affordable and simple to assemble yourself with basic tools. This method works well for small greenhouses and keeps costs low.
Do Mini Greenhouses Stay Warm in Winter?
Mini greenhouses can stay warm with added insulation and heating. Using small heaters or heat mats helps protect plants from frost. Without extra warmth, cold weather may still cause damage.
Is It Cheaper to Build Your Own Greenhouse?
Building your own greenhouse usually saves money over buying a kit. You can use recycled or budget materials based on your needs. However, it requires more time, effort, and basic carpentry skills.
How to Make a Greenhouse for Beginners?
Start with a simple frame of PVC or wood and cover with clear plastic. Choose a sunny location and keep ventilation adjustable. Beginners should focus on easy assembly and basic plant care.
How to Make a Small Greenhouse?
Pick a compact design around 6 by 8 feet to fit small spaces. Use lightweight frames and durable plastic covering for easy setup. Add ventilation and consider heating for winter use.
Can I Build a Greenhouse on a Balcony?
Yes, you can build a small, portable greenhouse on a balcony. Use lightweight materials and ensure it fits the space safely. This setup allows growing plants even without yard space.
Final Thoughts
Building a small greenhouse helps you grow plants all year. Start by picking a good spot and gathering materials. Next, take one step a day to see your plants flourish in their new home.