How to Make a Pergola: Step-by-Step Guide with Expert Tips for DIY Success
Building a pergola that adds charm and shade is possible with the right steps. Start by choosing a good spot and measuring carefully to fit your space. Planning well keeps the pergola stable and looking good for years.
Set solid posts about 3 feet deep for strong support. Use straight, sturdy lumber at least 4-1/2 inches in diameter for the frame. Attach the beams, then add cross rafters to hold everything firmly in place.
Use galvanized or stainless steel fasteners to prevent rust and keep joints tight. Check that the structure is level and square before securing all connections. These details prevent wobbling and extend the life of your pergola.
Finish your pergola to protect the wood from weather damage. A good finish stops the wood from turning gray or rough quickly. With careful work, building a sturdy pergola takes just a few hours and lasts well.
Key Takeaways
- Pick a level site with room for a 1-2 foot pergola overhang.
- Set posts at least 3 feet deep and use 11-foot lumber for 8-foot height.
- Choose straight poles 4-1/2 inches wide or more for stable support.
- Square post layout by measuring and marking 3, 4, and 5-foot points diagonally.
- Attach beams and rafters snugly to maintain structure stability.
- Apply a water-resistant finish to protect wood from weather damage.
How to Make a Pergola: Step-by-Step Construction Process
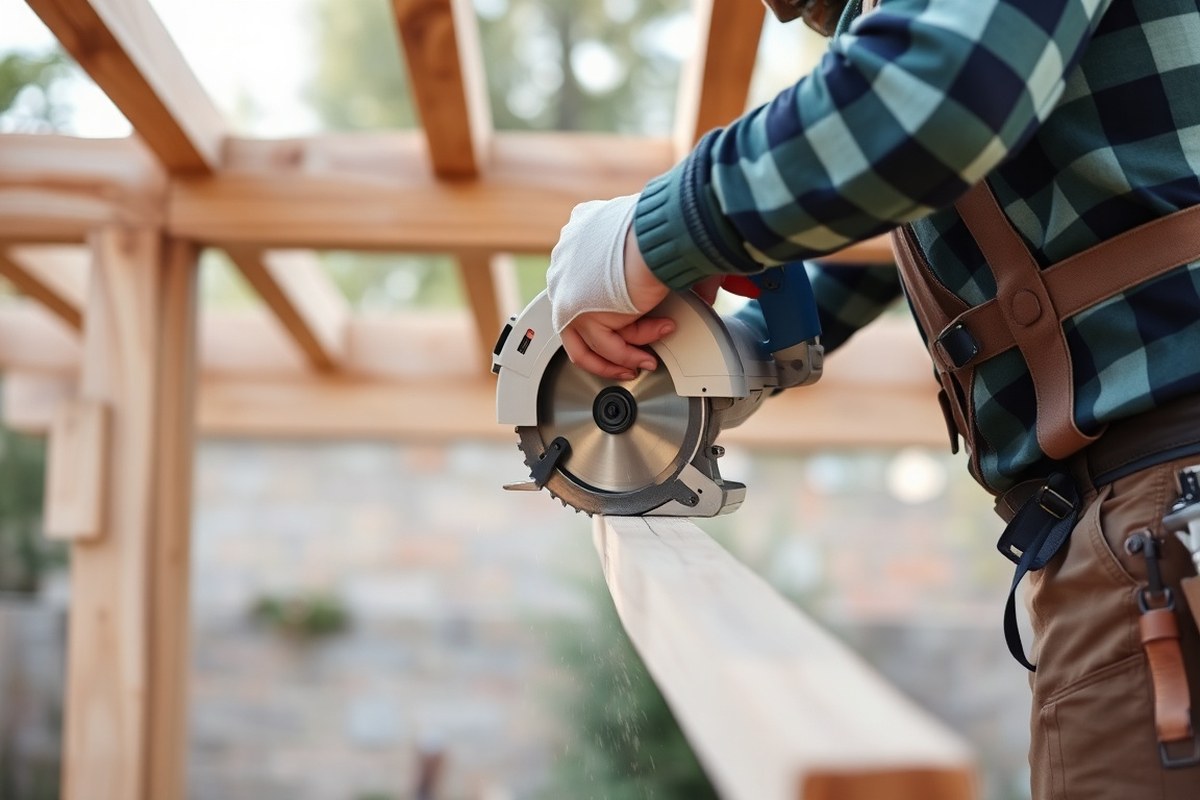
Building a pergola follows a clear, step-by-step process. You start by setting the posts firmly because they support the entire structure. Next, attach the beams first.
Then add the rafters in order. This keeps the structure stable and your work quicker. Taking your time and working in stages helps you avoid mistakes.
For a 10×12-foot pergola, start by digging post holes. Set posts at least 3 feet deep. Then attach beams with through bolts.
Lastly, install evenly spaced rafters. Plan on a day or two for this work, depending on help and weather. Using ready-made brackets can speed things up and improve accuracy.
- Mark and dig post holes: Measure your layout exactly for a 10×12 foot frame. Dig holes at least 3 feet deep to reach below the frost line. Add 6 inches of gravel for drainage. This ensures the pergola stays upright all year.
- Set posts in the holes: Use 6×6 pressure-treated posts about 11 feet long. This gives 8 feet above ground. The rest is for the footing depth. Make sure posts are straight and plumb, and brace them temporarily. No need to pour concrete if your ground is stable.
- Attach double beams on opposite posts: Cut 2×10 beams to length. Fasten them securely with through bolts directly to the posts. Adding two beams gives your pergola extra strength. It helps support the width better. It also supports extra weight like vines or lights.
- Install cross rafters evenly: Use 2×6 boards spaced about 12 inches apart. Secure rafters on top of the beams using brackets or screws. Make sure rafters line up neatly for a uniform look and strong roof frame.
- Add decorative cuts or notches: Customize your rafters with angled or curved cuts if desired. This step takes extra time but adds style to your pergola’s profile. Sand edges smooth to prevent splinters.
- Build planter boxes if desired: Attach 1×4 boards to 2×2 frames at posts with 1-5/8-inch screws. Planter boxes add charm and help anchor the posts visually. They take a few hours to assemble and attach.
- Check the structure: Look at all connections carefully. Use a level to confirm posts and beams are plumb. Make sure everything is square too. Tighten any loose bolts or screws before finishing. This avoids wobble or sag over time.
Choosing the Right Materials and Tools for Your Pergola

Choosing the right wood, fasteners, and tools sets up your pergola for years of use. Cedar, redwood, and pressure-treated pine offer durability at various prices. Use 4×4 posts for smaller pergolas but pick 6×6 posts for larger, taller structures.
Wood Types: Cedar, Redwood, and Pressure-Treated Pine
Cedar lasts 15 to 20 years outside without rotting and is naturally insect resistant. Redwood also resists decay but usually costs more. Pressure-treated pine is the cheapest option and performs well when properly maintained.
Cost and durability change depending on the wood. Here’s a quick look at common material choices for a 10×12-foot pergola with an 8-foot height:
| Wood Type | Durability | Price Range (Materials Only) | Maintenance |
|---|---|---|---|
| Cedar | 15-20 years without rot | $500, $1,000 | Low, natural resistance |
| Redwood | 15-25 years | $700, $1,200 | Low to moderate |
| Pressure-treated pine | 10-15 years with treatment | $400, $800 | Needs sealing or staining |
Pick cedar if you want natural durability without much care. Pressure-treated pine fits tight budgets but needs yearly sealing. Redwood offers a balance but costs more.
Post Sizes: 4×4 vs 6×6 and When to Use Each
Four-inch-by-four-inch posts suit pergolas up to 8 feet tall and smaller spans. They keep costs down and fasten easily with 4×4 brackets. For pergolas taller than 8 feet, 6×6 posts create stronger support and reduce wobble.
Here’s how to decide post size based on height and size. Trim longer posts to about 8 feet above ground once installed:
| Pergola Height | Recommended Post Size | Notes |
|---|---|---|
| Up to 8 ft | 4×4 posts | Use 10-foot posts for 8 ft tall structure |
| Greater than 8 ft | 6×6 posts | Heavier beams and cross rafters require 6×6 |
| Large pergolas 12 ft or taller | 6×6 posts, longer length | Posts usually 11 ft or more, cut to size |
Longer posts come in 10-foot or 12-foot lengths. Make sure posts go at least 24 inches underground per local code. Stability improves with wider posts.
Always use a long level or a post level. Check that posts stand perfectly plumb. Secure them only after confirming their straightness.
Essential Tools: Saw, Drill, Level, and Safety Gear
Keep your tool list simple but effective. A circular saw cuts posts and beams to length with clean edges. A power drill helps drive screws and drill holes efficiently.
Use a level at least 36 inches long or a post level to check vertical alignment. Don’t skip safety gear like gloves, eye protection, and ear plugs. These tools and gear keep your work safe and accurate.
| Tool | Use |
|---|---|
| Circular saw | Cutting wood posts and beams to size |
| Power drill with 3/8″ bit | Drilling holes for lag bolts and screws |
| Long level (36″ or post level) | Making sure posts and beams are plumb and level |
| Measuring tape and stakes | Marking post locations and spacing |
| Safety gear | Protecting eyes, ears, and hands during cutting and drilling |
Starting with these basics helps avoid mistakes and keeps your pergola strong. You might add clamps or a hand saw depending on your cutting skills and setup.
How to Measure and Design a Pergola That Fits Your Space
Measuring and designing your pergola carefully saves frustration later. You want a size that fits your yard and meets your needs. Marking the layout square and level helps the structure go up straight.
Determining the Pergola Size Based on Use and Space
Think about how you will use the pergola first. A 6-by-8-foot size works well for a small dining table or lounging area. You can adjust dimensions depending on your yard and furniture.
Measure your available space, leaving room to walk around the pergola. Make sure you avoid blocking windows, doors, or garden features. Spending time planning can prevent a cramped or awkward layout.
Spacing matters for comfort. Posts are usually 6 to 8 feet apart.
Cross rafters and beams typically sit 12 to 24 inches apart. This spacing provides good shade and stability without crowding.
Squaring the Layout with Strings and Stakes
Start by driving stakes into the ground at the pergola corners. Tie mason’s line or string between the stakes to outline the shape. You’ll adjust the strings to get a perfect square.
Use the 3-4-5 rule to check the corners. Measure 3 feet from the corner along one string.
Measure 4 feet along the other string. Adjust the lines until the diagonal between those points is exactly 5 feet.
A tape measure and speed square help keep the lines straight and level. A plumb bob or level can check vertical post spots. This method ensures your pergola frame sits square and will fit together cleanly.
- Choose your pergola size based on space and planned use.
- Clear and measure the installation area in your yard.
- Drive stakes at proposed pergola corners.
- Tie strings between stakes outlining pergola edges.
- Mark 3 feet on one edge and 4 feet on adjacent edge from corner.
- Measure diagonal between marks and adjust until it is 5 feet.
- Use a speed square to ensure edges are straight.
- Double check post spots with a level or plumb bob.
Adjusting Design for Attached and Freestanding Models
Decide if your pergola attaches to your house or stands alone. An attached pergola saves space and is easier to build on one side. It works well on small patios or narrow yards.
Freestanding pergolas give you full placement freedom. Place this type anywhere in your yard, even over a poolside deck or garden. Just plan for posts on all four sides and adequate footings in the ground.
Check local rules before building. Permits may be needed for attached pergolas or those over 200 square feet. They must follow building codes, so plan size and height carefully.
Setting Pergola Posts Safely and Securely in the Ground
Dig post holes that are about 16 to 18 inches wide and 30 inches deep. This size fits 6×6 posts and gives enough space to fill concrete around them for stability. The depth varies by climate.
Thirty inches usually meets local codes. It helps stop frost heave. This is important in colder areas.
| Climate Zone | Recommended Post Hole Depth | Notes |
|---|---|---|
| Cold (frost prone) | 30, 36 inches | Reach below frost line to prevent shifting |
| Moderate | 24, 30 inches | Standard depth for most pergolas |
| Warm (no frost) | 18, 24 inches | Depth mainly for support, not frost protection |
For safety, check for underground utility lines before digging. Use a posthole digger or auger carefully to avoid accidents or damaging cables.
Wear sturdy gloves and boots, and keep the area clear of debris. Mark your digging spots clearly and work slowly to maintain proper hole size and depth.
- Call local utility notification services before digging
- Wear gloves, boots, and eye protection
- Use a shovel or auger designed for post holes
- Keep soil piles away from hole edges
- Check hole depth regularly with a tape measure
- Brace posts temporarily with 2x4s until concrete cures
Setting posts directly on concrete slabs requires specific hardware like adjustable metal post bases. These bases keep wood off the slab and prevent rot. Set posts by digging holes in the ground.
Put 6 inches of gravel in the bottom for drainage. Then place the posts straight up.
After placing posts in the hole, brace them with 2x4s to hold them straight. Pour 80-pound bags of fast-setting concrete around each post, mixing per instructions.
Fill the hole completely with concrete and compact soil tightly around the edges. This method locks posts firmly in place and prevents wobbling or leaning over time.
Posts should be longer than the final height to allow cutting tops level after setting. Trimming before setting causes measurement errors because holes rarely line up perfectly. Once concrete is cured, mark uniform heights and cut the posts evenly.
Attaching Beams and Cross Rafters Correctly for Stability
Start by cutting all beams and rafters to the right lengths. Double 2×10 beams run the long sides of your pergola.
Rafters span across with a bit of overhang on both ends. Use bolts and heavy-duty brackets to hold everything tight and keep your pergola solid and square.
Cutting Beams for Overhang and Design
Cut your doubled 2×10 beams along the pergola’s length, usually 12 feet long. Rafters must span the 10-foot width of the pergola. Add 2 to 3 feet of overhang on each end.
This provides shade and improves style. Use a clean circular saw cut to avoid splinters or uneven edges.
Mark the beam and rafter lengths clearly before cutting. Trim posts to match your beam height for a level frame. Double-check all measurements before any cuts to keep the whole structure square.
Attaching Beams Using Bolts and Brackets
Use 10″ long galvanized carriage bolts to join beams and posts for strong connections. Drill matching holes through beams and posts with a 5/8″ auger bit. Add flat washers and nuts on bolts to prevent loosening.
Use heavy-duty metal brackets or joist hangers for support. These add strength to the structure. Place them where beams rest on posts.
Deck screws can temporarily hold parts in place before bolting. Fasteners should match beam thickness: use 10″ bolts for doubled 2x10s, 8″ bolts for smaller beams.
Installing Rafters and Securing Cross Pieces
Lay rafters across beams with equal spacing. Cut uniform notches in rafters or use ledger strips for extra grip. Secure rafters with 10″ screws or metal hangers for a tight fit.
Add blocking pieces between rafters at post locations to stop twisting and increase strength. Use deck screws for lattice tops, then replace with carriage bolts for permanent fastening. Always check rafters are level and parallel as you go.
- Check all posts for the same height using a 2×4 and level.
- Cut doubled 2×10 beams to final length, matching pergola width.
- Mark and drill 5/8″ holes through beams and posts for bolts.
- Attach beams to posts with 10″ galvanized carriage bolts, washers, and nuts.
- Cut rafters to span width plus overhang; add any decorative end cuts.
- Place rafters evenly across beams, level and square them carefully.
- Fasten rafters with 10″ screws or metal hangers securely.
- Add blocking between rafters where nailed to beams to prevent twisting.
Always bore through beams and posts before lifting to avoid misalignment and damage.
Finishing Your Pergola: Wood Protection and Decorative Options
Protect your pergola wood by applying a penetrating stain or sealer every 2 to 3 years. These finishes soak into the wood and block moisture without forming a peelable film. Avoid surface-film finishes like varnish or lacquer, as they peel and trap moisture, leading to damage.
Before refinishing, clean the wood with mild soap and water. Lightly sand any rough or peeling spots. Apply the finish evenly using a brush or sprayer.
Do this on a dry day. The ideal temperature is between 50°F and 85°F. This process takes a few hours to a full day depending on weather and drying time.
Sealing keeps wood from turning gray and rough like untreated wood does in 3 seasons. With regular care, your pergola can last 20 to 30 years with a strong, attractive look. Reapply stain or sealer as soon as fading or water no longer beads on the surface.
Painting is an option if you want a color change or more UV protection. Use a high-quality exterior paint and primer designed for wood.
Paint also needs repainting every 2 to 3 years to prevent peeling or cracking. Make sure to sand any flaky spots before repainting.
You can improve your pergola by adding fabric curtains. They provide privacy and more shade while softening the structure’s look. Use outdoor-grade fabrics and weather-resistant hardware like stainless-steel grommets and rustproof hooks for durability.
String lights are a popular upgrade. They allow you to use the pergola after sunset and create a cozy vibe.
Wrap weatherproof LED string lights around beams or rafters. Solar-powered options save wiring work and energy.
Shade cloth or retractable canopies add extra sun protection on hot days. Attach shade fabric to the roof rafters with clips or tension rods. These are affordable and easy to install or remove as needed.
Other roof add-ons include polycarbonate panels or corrugated metal sheets. These block rain but let light through. They need stronger framing.
Seal them well to prevent leaks. Expect these to cost $5 to $15 per square foot plus installation.
Regular maintenance matters most. Check your pergola yearly for cracks, peeling finish, or loose hardware.
Clean off dirt and debris to prevent mold growth. With simple upkeep, your pergola stays beautiful and ready for many summers of use.
Building Pergolas on Different Foundations and Situations
Attaching a pergola to your house saves space and materials but needs care. First, locate a sturdy wall, ideally supported by studs or a concrete foundation.
Drill pilot holes and use lag bolts to fasten a ledger board firmly to the wall. Seal the top edge with flashing to stop water from leaking behind the wood.
Building on a concrete slab is possible and often cost-effective. Use post anchors drilled into the slab with concrete screws or expansion bolts. These anchors keep posts stable without digging holes.
Check your slab’s thickness. It should be at least 4 inches thick for solid anchoring.
For tight budgets, pick pressure-treated lumber made after 2004. It’s cheaper and resists rot well.
Keep your design simple to save costs. A smaller footprint with fewer beams and rafters means less wood and faster building time.
Use hurricane or rafter ties to secure the rafters to beams. These metal connectors increase your pergola’s strength and meet building standards.
Never substitute nails or screws. Use only joist hanger nails because they handle shear forces better.
You can build a smaller pergola up to 12 by 12 feet. It usually takes about 1 to 2 hours. Use common lumber for this project.
Larger ones need more time and materials, so plan accordingly. Check local rules before you start building, especially if you don’t dig posts in the ground.
Budget builders should consider pre-cut kits. These kits reduce waste and save cutting time.
They include instructions and hardware, which helps ensure stability and proper fit. Shipping can add about $250, so include that in your budget.
Avoiding Common Pergola Building Mistakes and When to Hire Help
Skipping proper post alignment is a big DIY mistake. Your pergola will look tilted and may weaken if posts aren’t square or plumb.
Use a carpenter’s level and measuring tape often. Double-check diagonals before setting concrete to fix or prevent shifting.
Not securing posts deep enough causes stability issues. Posts should go at least 2 feet deep in undisturbed soil or below the frost line.
For rocky or sandy soil, deepen footings or use metal post anchors. This avoids movement during wind or freeze-thaw cycles.
Choosing the wrong wood or skipping protection invites rot and insect damage. Cedar is best for outdoor use.
Apply waterproof stain or sealant every 1 to 3 years depending on weather exposure. Untreated wood can warp, crack, or decay within a few seasons.
- Check post spacing with a square and tape measure before pouring concrete
- Dig post holes below frost depth or 2 feet minimum
- Use pressure-treated wood or cedar for durability
- Seal wood every 1 to 3 years depending on sun and rain exposure
- Tighten all bolts after the first winter to correct any settling
- Review local building codes and call 811 before digging
- Use a level frequently during beam and rafter installation
Never skip checking underground utilities with 811 before digging post holes.
Professional help is smart if your pergola needs permits or complex foundations. Call a pro when you see serious tilted posts or large concrete cracks. Costs for professional installation range from $3,000 to over $10,000.
DIY suits those comfortable with basic carpentry tools like drills and levels. Take your time measuring and securing parts tightly. Use a buddy’s help to hold heavy beams.
Fix alignment problems quickly to avoid bigger safety risks later. Your pergola should stand firm and level for many years if you do.
Step-by-Step Action Plan
Follow these clear steps to build your pergola efficiently. Each phase helps you move forward with confidence.
- Before you start: Gather all materials and tools based on your design. Check everything is on hand to avoid delays.
- Day 1: Mark the pergola’s footprint with stakes and string. Confirm measurements match your plan before digging.
- Day 2: Dig post holes and set the posts using concrete. Use a level to keep posts perfectly straight.
- Day 3: Attach beams securely across the posts. Make sure all connections are tight and level.
- Day 4: Install rafters spaced evenly on top of the beams. Check alignment and spacing as you fasten each one.
- Day 5: Apply wood sealant or paint to protect the wood. Let it dry fully before use to ensure good coverage.
- After 1 week: Inspect all joints and check stability. Tighten any loose fasteners and touch up any missed sealant spots.
- After 2 weeks: Add decorative elements like climbing plants or lights. Confirm your pergola handles the added weight comfortably.
Frequently Asked Questions
Is It Cheaper to Buy or Make a Pergola?
Making a pergola is usually cheaper than buying one pre-made. You can save money by choosing your materials and doing the work yourself.
How Can I Make a Simple Pergola?
Use basic tools and 4×4 posts to build a simple pergola. Cut beams to overhang posts by 12 to 18 inches for a classic look.
Can I Use a 4×4 Post for a Pergola?
Yes, 4×4 posts work well for pergolas and are easy to use. Just make sure they are tall enough for your desired height plus ground depth.
What Is the Best Wood to Use to Build a Pergola?
Cedar is the best wood because it resists rot and insects. It also looks good and lasts well outdoors without heavy treatment.
How to Make a Pergola?
Start by setting posts deep with gravel for drainage to keep it stable. Attach beams and rafters securely as you go.
How Far Apart Should Pergola Posts Be Placed?
Posts are usually set 10 to 12 feet apart for a sturdy pergola. This distance supports the beams and roof well.
The Bottom Line
Building a pergola does not have to be complicated or expensive. Start with a clear plan and take one step at a time. Try setting your posts today and see how solid your structure can be.