Do Crocus Bulbs Multiply? How to Encourage Growth and Spread Fast
Do crocus bulbs multiply naturally? Yes, crocus bulbs, also called corms, multiply underground by forming new cormlets. These smaller corms grow around the parent and become separate plants over several years.
The process is slow. So visible clumps can take 3 to 5 years to form.
The key is planting them correctly and allowing space for new corms to develop. Avoid crowding bulbs too close, or growth will slow.
Plant crocus bulbs 3 to 4 inches deep, pointing the tip upward. This depth guards against cold spells and supports healthy roots. Space bulbs 4 to 6 inches apart to help new cormlets grow freely.
Mulching helps maintain steady soil moisture, which encourages cormlets to form. Also, avoid digging or disturbing the soil near established bulbs to protect new growth. Fertilize with a low-nitrogen bulb fertilizer in early fall to supply nutrients for multiplication.
Key Takeaways
- Plant crocus bulbs 3, 4 inches deep with the tip facing upward.
- Space bulbs 4, 6 inches apart to prevent overcrowding and encourage growth.
- Crocus corms naturally multiply underground by forming new cormlets.
- Visible crocus clumps usually take 3 to 5 years to develop.
- Avoid planting crocus bulbs too shallow to protect from temperature swings.
- Leave room for cormlets to grow to speed up natural multiplication.
Do Crocus Bulbs Multiply Naturally Underground?
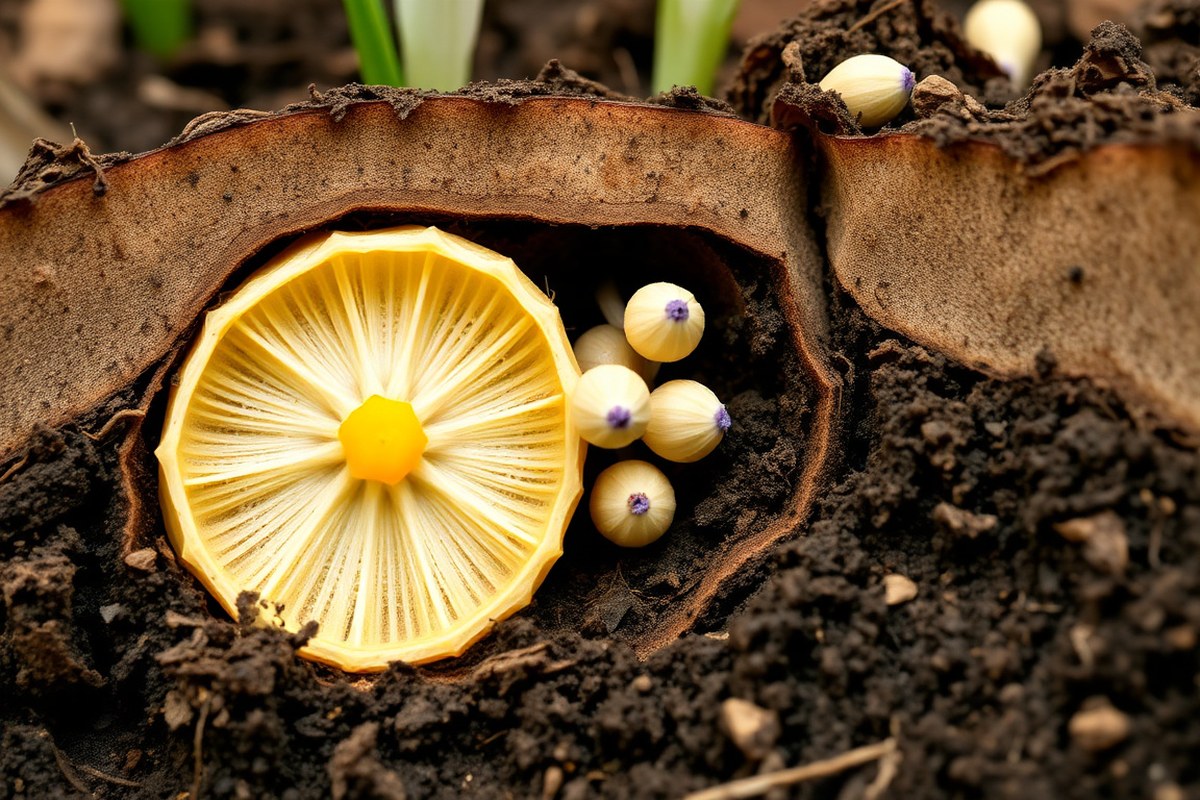
Crocuses multiply naturally underground by producing corm offsets. These offsets are small corms. They grow around the parent corm.
This happens during active growth. This is the main way crocus plants spread and increase in number.
Crocuses are often called bulbs, but they actually grow from corms. Unlike true bulbs that have layered scales, a corm is a solid, swollen stem base. It stores nutrients for the plant and produces new corms to multiply.
The parent corm uses stored energy. This energy helps it form new corms. These new corms grow at its base.
Over time, these new corms grow into full-sized plants that bloom in following seasons. This makes your crocus cluster grow larger each year.
You won’t see multiplication right away. It can take a few years for the new corms to become noticeable above ground.
Maintaining moderately moist, well-drained soil during growth supports healthy corm production. Avoid waterlogged or overly dry soil to prevent rot or poor growth.
The difference between crocus corms and true bulbs matters when planting or dividing them. Since corms are solid, they don’t have layers to peel apart like bulbs. When dividing, first wait for foliage to die back.
Next, separate the offsets from the parent corm. Do this before new shoots start to grow.
Corm offsets let crocuses multiply naturally. A single crocus can become a patch. This takes several growing seasons.
Proper care during growing and dormancy phases helps speed this up. Remember, pests like squirrels sometimes eat corms, which can reduce visible multiplication.
How Long Does It Take for Crocus Corms to Multiply Visibly?

Crocus corms take about 3 to 5 years to multiply enough to show a noticeable spread. The parent corm produces smaller cormlets underground, which grow into new flowers over several seasons. Planting them 4 to 6 inches apart allows room for these cormlets to develop without overcrowding.
Multiplying crocus by seed takes much longer. Seeds need cold treatment at about 10°C soil before sprouting. They usually sprout in late winter or early spring.
This cold helps trigger germination. After sprouting, seedlings take 3 to 4 years to bloom. Blooming marks when they show visible numbers in your patch.
By choosing well-drained sunny spots and maintaining proper spacing, you promote faster multiplication. Avoiding overcrowding prevents cormlets from struggling for nutrients.
Naturalizing crocus in lawns or under trees lets them spread. They expand by growing cormlets and dropping seeds.
Don’t plant crocus corms too close. Tight spacing limits new cormlet growth and slows spread.
How to Plant Crocus Bulbs to Encourage Multiplication
Planting crocus bulbs properly helps them multiply naturally over time. Depth, spacing, soil condition, and timing all affect how well the corms grow. Using mulch also supports healthy development and guards against common problems.
Optimal Planting Depth and Spacing
Plant each corm about 3 to 4 inches deep. This depth keeps the corm safe from large temperature swings. Space the bulbs 4 to 6 inches apart to stop overcrowding, which can slow down multiplication.
Spacing varies by the planting situation. In open sunny beds, keep 4 to 6 inches between corms.
For containers or raised beds, reduce spacing to around 3 inches due to limited soil depth. Shade-tolerant crocus types need 6 to 8 inches apart.
Best Soil and Watering Conditions
Choose well-draining soil mixed with grit or sand to prevent waterlogging. Crocus bulbs dislike soggy soil because it rots the corms and blocks propagation. Use soil rich in organic matter to encourage strong root and corm growth.
Water the bulbs moderately, keeping soil moist but never saturated. After planting fall crocus bulbs, water only if the soil is dry to protect root development. Regular moisture fosters multiplication while drought tolerance lets the bulbs survive dry spells.
Recommended Timing for Planting
Plant crocus bulbs in the fall about 6 to 8 weeks before the ground freezes. This timing lets the bulbs settle and develop roots before winter. Early planting in fall encourages better multiplication the following spring or fall bloom season.
Summer is the dormancy period for crocus, so avoid disturbing bulbs then. Let them rest underground without extra watering or disruption. Plant crocus bulbs in autumn for the best natural growth.
This timing matches their active growing cycles. It helps bulbs multiply well on their own.
Mulching Benefits and Techniques
Apply a 2-inch layer of mulch after planting to conserve moisture and suppress weeds. Mulch keeps the soil temperature steady, reducing stress on developing corms. It also prevents soil from splashing on fragile flowers and foliage above.
Use organic materials like shredded leaves or bark chips for mulch. Keep mulch pulled a few inches away from emerging leaves to avoid rot or mold. Remove mulch in early spring to let shoots get full sunlight as they grow.
Follow these steps to plant crocus bulbs and boost their natural multiplication:
- Choose a sunny spot with well-draining soil or amend heavy clay with grit for better drainage.
- Dig holes 3 to 4 inches deep for each corm. Space them based on your planting area and tips. Follow the spacing advice given above.
- Place the corm base-down and cover it with soil. Firm soil gently around the corm to eliminate air pockets.
- Water the planting area lightly to settle the soil, especially if soil is dry.
- Spread a 2-inch mulch layer over the planting zone, keeping it back from shoots after sprouting.
- Check moisture weekly during fall and early spring, watering if the soil dries out.
- In late spring or early summer, allow foliage to die back naturally without disturbance.
- When using containers, space corms about 3 inches apart. Plant each corm 1 inch deep in the soil. Adjust spacing to give them room to grow.5 to 2 inches deep.
When and How to Divide Crocus Corms Safely
Divide crocus corms after the foliage dies back in late spring or early summer. This timing matches their natural growth cycle and helps avoid plant stress. Dividing corms lets you multiply your crocus plants safely and keeps them healthy.
Recognizing the Right Time to Divide
The best time to divide crocus corms is just after the plants finish flowering. Wait until the green leaves turn yellow and wither. This stage shows the corms stored enough energy for division.
Your crocus patch looks crowded or blooms shrink. That’s a sign to divide.
Crowded corms compete for nutrients and reduce flowering. Dividing restores space for new growth and keeps blooms vibrant.
Tools and Preparation Needed
Grab a small garden fork or trowel to dig up the crocus corms gently. Have clean, sharp scissors or pruning shears ready to trim dead roots. Prepare well-draining soil enriched with some compost or bulb fertilizer for replanting.
Wear gloves to protect your hands from soil and sharp tool edges. Lay out a tray or bucket to hold separated corms during the process. Keep everything close for an efficient division.
Step-By-Step Division and Replanting Guide
Follow these steps carefully to divide and replant crocus corms without damage. Handle the corms gently to avoid bruising or breaking them.
- Dig around the crocus clump 3 to 4 inches deep using a garden fork.
- Lift the entire clump carefully from the soil to expose the corms.
- Separate the small cormlets attached to the main corm by hand or with scissors.
- Discard any rotten or shriveled corms to prevent disease spread.
- Trim dead roots with clean scissors to encourage fresh root growth.
- Plant each cormlet 2 to 4 inches deep. Make sure the pointed tip faces up. Space each cormlet 2 to 4 inches apart.
- Water the area well to settle the soil around the new corms.
Post-Division Care Tips
Keep the soil lightly moist until the new corms sprout leaves in fall or early spring. Avoid overwatering because soggy soil can cause rot. Mulch the area to keep soil cool and retain moisture during dry spells.
Apply a balanced, slow-release fertilizer about a month after replanting. This feeding supports healthy growth and faster multiplication. Watch for pests around the new plantings and remove any damaged foliage promptly.
How Climate and Growing Conditions Affect Crocus Multiplication
Crocus corms multiply best in USDA zones 3 through 8. These zones offer the right balance of cold winter and warm spring temperatures.
Cooler zones slow down corm spread. Zones above 8 risk poor winter dormancy and weak multiplication.
Temperature affects crocus growth significantly. They need soil to chill below 55°F for at least 6 to 8 weeks.
This cold period triggers corm division underground. If winters are too mild, multiplication may be minimal.
Moisture is another key factor. Crocus corms like well-drained soil that stays moist but not soggy.
Overwatering during their dormant summer months can cause corm rot. During fall and spring, keep soil lightly damp to encourage growth.
| USDA Zone | Typical Winter Soil Temp | Recommended Moisture | Effect on Multiplication |
|---|---|---|---|
| 3-5 | 20-40°F | Moderate, well-drained | Good corm divide with deep dormancy |
| 6-8 | 40-55°F | Lightly moist, avoid soggy | Good multiplication, faster growth |
| 9+ | Above 55°F | Consistent moisture needed | Poor dormancy, reduced spread |
Light fertilizing in early spring helps crocuses multiply. Use a balanced fertilizer with low nitrogen, like 5-10-10.
Too much nitrogen encourages leaves but weak corms. Apply every 4 to 6 weeks until blooming stops.
A thin layer of organic mulch after planting helps keep soil temperature steady. Mulch protects corms from freeze-thaw cycles in winter and keeps moisture even. Avoid thick mulch layers to prevent wet soil that leads to decay.
Check soil drainage before planting; standing water kills corms and stops multiplication.
For containers or raised beds, keep soil moist but let it dry slightly between watering. In heavy clay or poorly drained spots, mix in sand or grit to improve drainage. Drying soil at the right time encourages healthy corm separation.
Seasonal care includes stopping watering after flowering. Crocus corms need dry summer dormancy to grow strong offsets. Overwatering at this stage reduces corm health and multiplication rates.
How Naturalizing Crocus Supports Multiplication in Lawns and Beds
Naturalizing crocus means planting them where they can spread naturally. This happens over time without much help. You let the crocus grow and multiply on their own.
It helps multiplication by letting corms produce new ones naturally, filling in spaces without much help. You do this by planting bulbs in well-prepared soil and letting them grow year after year.
To naturalize crocus in your lawn, start by lifting the turf carefully. Then loosen the soil and add a bit of compost for nutrients. Plant corms about 3 inches deep.
Space them about 3 inches apart. This gives them room to grow and multiply.
This helps crocus multiply without needing you to divide bulbs often. Overcrowding occurs if you plant too close. It also happens when you never divide the bulbs.
This can cause smaller flowers or fewer blooms. Naturalizing lets them spread slowly, which avoids that problem and keeps flowers healthy.
In beds or containers with less soil depth, you can plant bulbs about 3 inches apart. Containers need more frequent division since the space limits growth. In open lawns or garden beds, corms can spread wider with less work from you.
Naturalization takes time. It takes a few years to see dense crocus patches. They grow in lawns or flower beds.
You need patience to watch them spread. The key is patience and not disturbing the plants too much after planting. Let foliage die back naturally to feed the corms underground.
Managing naturalized crocus mainly means watching for overcrowding or weak flowering. Bulbs that get too crowded produce smaller flowers. They also make fewer blooms overall.
Proper spacing avoids these problems. Divide the bulbs after leaves turn yellow and dry.
This happens in late spring or early summer. Dividing helps keep flowers healthy and strong.
This method reduces fuss because naturalizing uses crocus’ natural growth habit to multiply in place. It keeps your lawn or bed looking nice with flowers returning reliably each year. Naturalizing crocus takes some planning but pays off with a low-maintenance, self-sustaining display.
Pests and Problems That Prevent Crocus Bulbs from Multiplying
Squirrels and rodents often dig up crocus bulbs and eat them. This damage can stop bulbs from multiplying because the corms never get a chance to grow.
You can protect bulbs by covering planting areas with hardware cloth or chicken wire. Secure these barriers tightly to keep small animals out but still allow sunlight and water through.
Rot is another major problem that stops crocus multiplication. Bulbs left in soggy soil often develop fungal diseases. To avoid this, plant crocus corms in well-draining soil.
Adding coarse sand or organic matter improves drainage. Also, avoid overwatering, especially in wetter climates where water can sit around the bulbs.
Mulching helps in cold regions by protecting bulbs during fall and winter. Use straw or shredded leaves sparingly so soil doesn’t stay too wet.
Too much mulch can trap moisture and encourage rot. Remove or thin mulch by early spring to prevent overheating the bulbs as temperatures rise.
Some gardeners slow crocus growth by using strong-smelling fertilizers. These can repel helpful soil microbes and attract pests.
Instead, use mild organic fertilizers carefully in early spring. Avoid fertilizing late in the season to give bulbs time to store energy.
Blocking squirrel access is simple but needs consistency. Plant bulbs under heavy shrubs or ground cover.
You can also spread prickly pine needles or thorny branches on the soil surface. If squirrels still dig, try spraying the area with a safe, natural deterrent.
Differences in Multiplication Between Crocus Varieties and Planting Methods
Crocus multiplication rates vary by flowering season, planting method, and variety. Spring-flowering crocuses planted in fall multiply steadily, especially in the ground. Container-grown crocuses can multiply but usually slower and need more care to match garden bed results.
Spring vs Fall Flowering Crocus Multiplication
Spring crocuses multiply well when planted 6 to 8 weeks before ground freeze. They send out new corms underground, doubling or more every few years. Fall-flowering crocuses bloom late winter and often grow smaller clumps, multiplying at a slightly slower rate.
Spring varieties get a boost from fall compost and bulb fertilizer. This helps growth and offsets production challenges.
Apply them before winter arrives. Fall bloomers require milder conditions and may need shelter in colder zones to multiply reliably outside.
Container vs Garden Bed Multiplication
Container crocuses can multiply but need well-drained soil and regular watering. Pots dry out faster, so corms risk drying or rotting without careful care. Ground planting offers stable moisture, temperature, and nutrient access, which promotes healthier, faster multiplication.
For container crocuses, choose a deep pot. It needs 3 to 4 inches of soil beneath the bulbs.
Move pots outdoors in fall for natural cold exposure. Fertilize lightly each fall to support cormlet growth in containers.
Varietal Differences in Offset Production
Some crocus varieties produce more offsets than others, making them better for naturalizing. Early-blooming species like Crocus vernus tend to multiply faster than later or less common varieties. Choosing varieties known for strong offset growth speeds garden expansion.
Planting a mix of variants also extends bloom time but may affect overall multiplication speed. Varieties with larger corms sometimes take longer to form offsets but produce bigger flowers.
Recommendations by Planting Method
Using corm division is the fastest way to multiply crocuses, with offsets blooming next spring. For seed propagation, cold-stratified seed takes 1 to 2 years to flower. Seedlings from cormlets mature in one year but need more attention early on.
Plant crocus bulbs 3 to 4 inches deep, whether in pots or ground. Each fall, spread 1 to 2 inches of compost on garden beds. Add some bulb fertilizer as well.
This supports healthy growth. This routine maximizes multiplication especially for spring crocuses.
| Propagation method | Approx. Time to first bloom |
|---|---|
| Seed (cold-stratified) | 1, 2 years |
| Corm division | Next spring |
| Seedlings from seed | 2, 3 years to mature |
| Seedlings from cormlets | 1 year |
Don’t plant crocuses too shallow or they may dry out or be dug up by animals.
Step-by-Step Action Plan to Multiply Your Crocus Bulbs
Follow these steps over the next year to help your crocus bulbs multiply well. Watch for new corms and more flowers to know it’s working.
- Before planting: Choose a sunny, well-drained spot with loamy soil. Good soil and light boost growth and bulb division.
- Planting time (fall): Plant healthy crocus corms 3 to 4 inches deep and 3 inches apart. This space lets new corms form underground.
- First spring: Water lightly after flowers bloom but avoid soggy soil. Dry feet prevent rot, which stops multiplication.
- Summer dormant period: Let foliage yellow and die back naturally. This keeps energy in the corm for next season’s growth.
- After 2-3 years: Dig up clumps carefully in late summer. Separate corms gently and replant newly formed ones.
- Each fall: Add a layer of compost before planting or dividing. Nutrients help corms grow and multiply faster.
- Every year: Check for pests like rodents and squirrels. Use safe barriers if you notice damage to corms or flowers.
- Watch for results: More blooms and bigger clumps mean your corms are multiplying successfully. Take notes each season.
Frequently Asked Questions
How Do Crocus Bulbs Differ from True Bulbs?
Crocus plants grow from corms, not true bulbs. Corms are solid inside, unlike layered bulbs like tulips.
What Is the Best Soil Type for Crocus Multiplication?
Well-draining soil is best for crocus corms to multiply. Avoid heavy clay soil to prevent rot.
Can Crocus Bulbs Multiply from Seed in a Garden?
Crocus can spread by seed, but it takes much longer to see blooms. Seeds may take years before flowering.
Do Crocus Bulbs Need Fertilizing to Multiply Well?
Fertilizing crocus bulbs helps them grow healthier corms faster. Use a balanced, slow-release fertilizer after flowering.
What Happens If Crocus Bulbs Are Planted Too Shallow?
Shallow planting can cause bulbs to dry out or rot. Plant them 3, 4 inches deep for best results.
Can Crocus Corms Survive Being Left Undisturbed for Years?
Yes, crocus corms can stay in one spot for years and multiply. They usually naturalize well with little disturbance.
The Bottom Line
Crocus bulbs do multiply naturally, but they need care and patience. Space, soil, and proper division help the process. Start by planting your bulbs well this fall to see multiplication in a few years.