

How to Grow Anthurium Plants: A Complete Guide for Healthy Indoor Growth
Growing anthurium plants requires proper care to thrive indoors. These tropical plants need bright, indirect light and warm temperatures between 65 and 80 degrees Fahrenheit. Keep them away from cold drafts below 60 degrees at night to avoid stress.
Humidity is important; anthuriums prefer about 80% humidity. Mist the leaves or place a tray with water and pebbles nearby to increase moisture. Choose a spot with gentle sunlight, like a north-facing window or behind a thin curtain.
Water your anthurium carefully, keeping the soil moist but not soggy. Overwatering leads to root rot, while underwatering dries the leaves. Use light, chunky soil to help water drain well and give air to the roots.
Key Takeaways
- Keep anthuriums in rooms between 65°F and 80°F. They grow best within this range. Try to avoid colder or hotter spots.
- Provide 6 to 8 hours of bright, indirect light daily to encourage blooms.
- Maintain humidity around 80%, using misting or pebble trays if needed.
- Water when the top inch of soil feels dry, avoiding wet feet.
- Use loose, chunky soil mixes to improve drainage and root health.
- Protect your plant from cold drafts below 60°F at night.
Essential Growing Conditions for Anthurium Plants
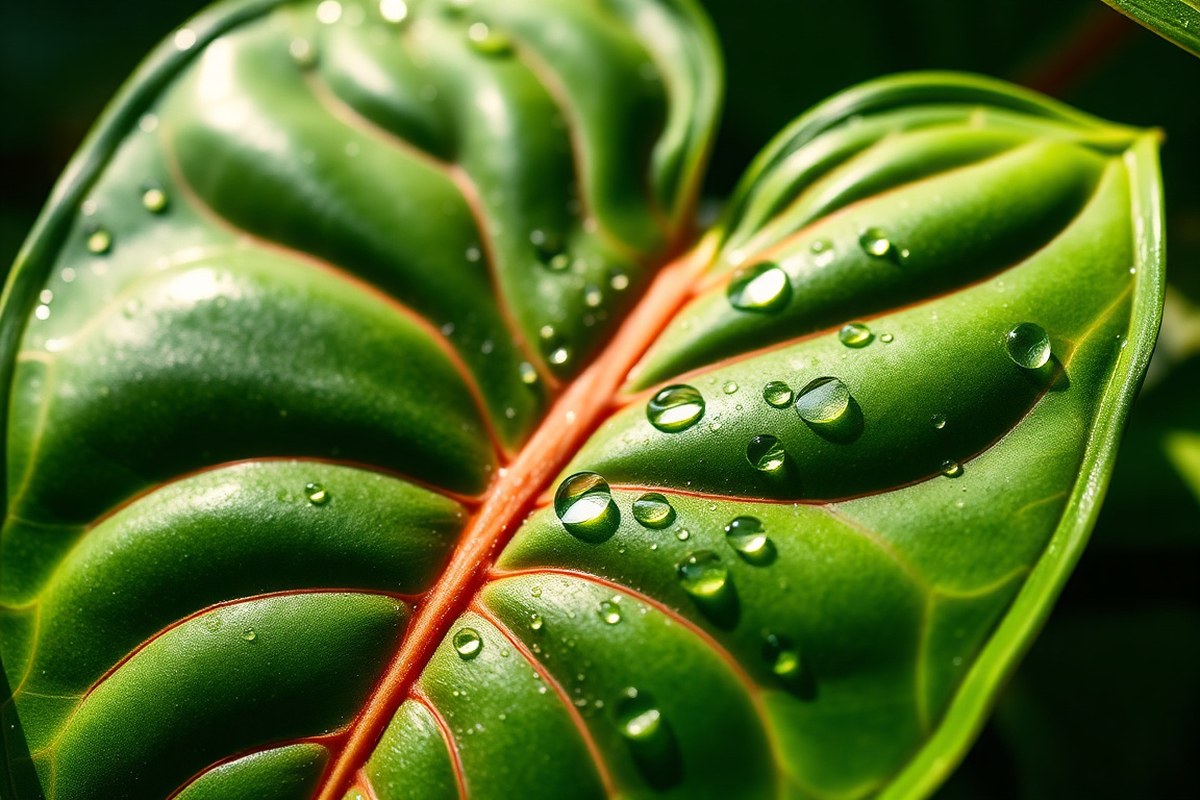
Anthurium plants thrive best in temperatures between 65 and 80 degrees Fahrenheit. They need warmth to grow and flower. Keep them away from cold drafts.
Avoid placing near glass surfaces that get chilly. Your plant’s growth can slow if nighttime temps drop below 60 degrees. It can stress the plant too.
Humidity is a big factor for these tropical plants. Anthuriums do best at around 80% humidity, but indoor air is often much drier. Raise humidity by putting the pot on a water-filled tray with pebbles.
Another way is to use a room humidifier close to the plant. Grouping plants close together also helps keep moisture levels up. Misting leaves can provide temporary relief but won’t maintain consistent humidity.
Light should be bright but indirect for anthuriums. Around 6 to 8 hours of filtered or diffused sunlight will support healthy leaves and blooms. Direct sunlight can scorch their leaves, causing brown spots.
A spot near an east or north-facing window is often ideal. Use a full-spectrum LED grow light when natural light is low.
Place it 12 to 18 inches from the plant. Aim for at least 200 foot-candles of light intensity to keep the plant thriving.
Choosing and Preparing the Ideal Soil and Pot
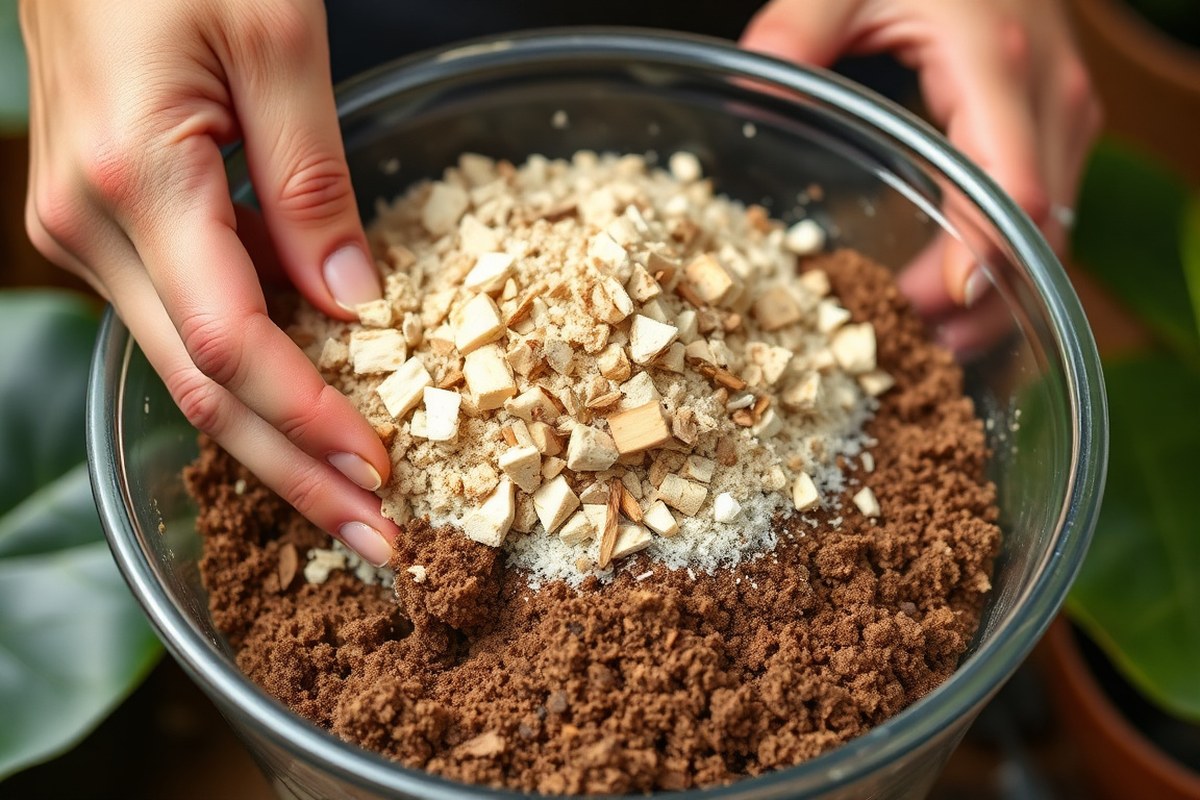
The best soil for anthuriums is loose and drains well. Use chunky bark and volcanic rock or similar materials. These keep the soil airy and prevent water buildup.
Pick a pot 1 to 2 inches wider than the root ball. Make sure it has drainage holes to stop waterlogging.
This helps keep roots healthy. Pots made of plastic, ceramic, or terracotta all work well if they drain properly.
Ideal Soil Mix Components
Anthuriums naturally grow on trees, so their soil needs lots of air and drainage. Use about half chunky bark in the mix for good drainage. Add 30% peat moss or coco coir for moisture retention.
Include 10% perlite and 10% volcanic rock or orchid bark. The chunky bark and volcanic rock keep soil open and airy.
This mix stops the roots from sitting in water while holding some moisture. You can buy aroid potting mixes made for plants like anthuriums. These mixes follow the right loose and well-draining mix.
This is a simple option to start with. Avoid heavy garden soils or plain potting soil because they hold too much water.
Choosing the Right Pot Size
Pick a pot 1 to 2 inches wider than your current root ball. For a 4-inch root ball, a 5- or 6-inch pot is perfect. It gives roots room to grow without excess soil that traps moisture.
A pot that’s too big holds too much water in soil. This keeps soil soggy and can make roots rot. Choose a pot sized right for your plant.
Repotting every two to three years also keeps the soil fresh and the plant healthy. Watch for roots growing out of holes or wilting leaves, they mean your plant needs repotting.
Pot Material and Drainage Importance
Drainage holes are a must to keep anthuriums healthy. Water should flow freely out to prevent root rot.
Place a saucer under the pot to catch excess water. But empty it after watering to keep roots dry.
Plastic pots hold moisture longer, which might be good in dry rooms. Terracotta lets soil dry faster, so it’s better for humid areas.
Ceramic pots are a midpoint but usually cost more. Your choice should reflect your home’s humidity and your watering style.
Never let your anthurium sit in standing water; always empty trays after watering.
Watering Anthurium Plants: When and How Much?
Water your anthurium when the top 2 inches of soil feels dry. This rule works best for pots 8 inches or smaller.
Larger pots need you to wait until 50, 75% of the soil depth is dry. Checking soil moisture prevents overwatering and root rot, which is very common in anthuriums.
Soil that stays soggy traps water around the roots and leads to fungal problems. Anthuriums evolved to grow on tree bark. So their roots need air and quick drainage.
Use a loose, well-draining soil mix instead of regular potting soil. Avoid watering on a strict schedule; check moisture instead. Seasonal changes also affect how often you water.
In warmer months, your anthurium will use more water and dry out faster. You may water once or twice a week then, depending on humidity and temperature at home. In winter, lower temperatures and less light slow the plant’s growth.
The soil can stay moist much longer. So reduce watering to about once every two weeks.
Water your anthurium carefully to keep roots healthy. Bottom-up watering lets roots drink slowly. Water does not sit on top.
This avoids mold or rot from water buildup. Here’s how to water your anthurium step-by-step:
- Check the soil dryness by poking your finger 2 inches deep or using a moisture meter.
- Fill a shallow tray or container that fits your pot with room-temperature water.
- Put the pot in water for 15 to 30 minutes. This lets the soil soak from the bottom. Don’t leave it longer than 30 minutes.
- Lift the pot and let excess water drain completely before returning it to its spot.
- Keep your plant away from drafty places and heating vents to keep conditions steady.
This way, roots pull up moisture by themselves. It cuts down the risk of overwatering. Your plant controls how much water it needs.
Use fresh, cool water, not cold or hot. Overwatering is easy and can ruin your plant. Watch for wilted leaves or yellowing as signs you may need to adjust watering timing.
Fertilizing Anthuriums for Vigorous Growth and Blooms
Use a fertilizer higher in phosphorus to encourage anthuriums to bloom. Formulas labeled for orchids or flowering plants usually work well. During the growing season, feed every 4 to 6 weeks.
Use a balanced fertilizer diluted to quarter or half strength. This helps the plant grow well without burning the roots. This prevents root burn while still feeding the plant enough for lush growth and bright flowers.
Stop fertilizing in fall and winter, when your anthurium grows more slowly. Feeding during these months can overload the roots since the plant uses less energy. You can skip fertilizer most of the time with rich soil.
Your anthurium will still bloom nicely without added food. But adding some fertilizer will increase flower production.
| Fertilizer Type | Nitrogen (N) | Phosphorus (P) | Potassium (K) | Use |
|---|---|---|---|---|
| Balanced (e.g., 10-10-10) | Medium | Medium | Medium | General growth stage |
| High phosphorus (e.g., 10-30-10) | Medium | High | Medium | Flowering stage |
| Orchid fertilizer | Low to Medium | High | Low to Medium | Promotes blooms and foliage |
| High nitrogen | High | Low | Medium | Avoid to prevent too much leaf growth |
- Feed every 4, 6 weeks from spring through summer.
- Dilute fertilizer to 25-50% to protect roots.
- Use fertilizers high in phosphorus during flowering.
- Avoid high nitrogen fertilizers to prevent leggy plants.
- Skip fertilizing in fall and winter to avoid stress.
- Water the plant before applying liquid fertilizer to prevent root burn.
- Do not fertilize if the plant shows signs of root damage or stress.
Always water before you fertilize. Wet roots take up nutrients better and reduce burning risk. Avoid fertilizers with salt buildup or harsh chemicals; these can harm anthuriums.
Products labeled for indoor tropical plants or orchids usually provide the right balance. Checking the label for recommended dilution and frequency keeps your plant safe and healthy.
Your anthurium’s leaves will stay glossy and firm with the right feeding. Flowers will open more fully and last longer. Signs that over-fertilizing happened include browning leaf edges and slowed growth.
Feeding your plant properly takes just a few minutes each month. This small effort gives you better results and healthier growth.
How to Repot Anthurium Plants Without Stress
Repot your anthurium every 2 to 3 years for mature plants. Younger plants may need repotting every 1 to 2 years. You’ll know it’s time if roots poke out from drainage holes or soil looks compacted.
Repotting refreshes nutrients and gives roots more room to grow. Avoid staying too long in the same soil since anthuriums dislike constant wet, soggy conditions. Repotting also helps prevent root rot and boosts overall plant health.
Use a slightly larger pot to avoid overpotting, which can lead to waterlogged soil. Changing all the soil is best if the old soil is dense or breaking down. Otherwise, you can gently loosen the surface and add fresh soil on top.
Follow these steps to repot your anthurium while keeping it stress-free and safe:
- Water the plant a day before repotting to hydrate roots.
- Remove the anthurium gently from its pot, loosening the edges if needed.
- Rinse off old soil from roots under lukewarm running water carefully.
- Inspect roots and prune any brown or mushy parts with clean scissors.
- Place fresh anthurium soil mix into the bottom of the new pot.
- Set the plant in, spreading roots lightly, and fill in around with soil.
- Press soil lightly to avoid air pockets but don’t pack it tight.
- Water lightly to settle the soil, then place the plant where it’s warm and bright.
Be gentle while handling roots; damaged roots need time to heal and recover.
Effective Propagation Methods for Anthurium Plants
Propagating anthuriums works best through stem cuttings, division, and rhizome propagation. Each method lets you grow new plants by using parts of the parent plant. Providing the right temperature and moisture ensures the new plants root and grow well.
Stem Cutting Propagation
Stem cutting is a popular method because it’s straightforward and produces healthy plants. It works by cutting a part of the stem that has roots or nodes. The ideal way is to use a peat-free acidic medium to encourage rooting.
Follow these steps for stem cutting:
- Choose a healthy stem with at least one node or aerial root.
- Cut a 4 to 6 inch section with a clean, sharp knife or scissors.
- Remove leaves from the lower half to prevent rot.
- Dip the cut end in rooting hormone to speed root growth (optional).
- Plant the cutting in a pot with moist, peat-free acidic soil.
- Cover the pot with a plastic bag. Put it in a closed mini greenhouse. This helps keep the humidity high.
- Keep the pot at 70 to 75°F (21 to 24°C) and out of direct sunlight.
- Check moisture often and water lightly to keep soil damp but not wet.
Roots usually start to form in 4 to 8 weeks. New shoots appear after roots establish. Avoid overwatering to prevent stem rot during this period.
Division Method
Division propagates anthuriums by separating the plant into smaller sections with roots. It works best in spring when the plant is actively growing. This method produces mature plants faster than cuttings.
Use these steps to divide an anthurium:
- Carefully remove the plant from its pot to avoid root damage.
- Gently separate the root ball into sections, each with leaves and roots.
- Trim damaged or rotted roots with sterilized scissors.
- Pot each division in well-draining, peat-free acidic soil.
- Water thoroughly but avoid waterlogging the new pots.
- Place pots in a warm area between 65 and 85°F (18 to 29°C).
- Maintain humidity around 60% to 80% to reduce transplant shock.
New plants from division often recover quickly and grow robustly. Watch for drooping leaves as a sign of stress and adjust watering if needed.
Rhizome Propagation
Rhizomes are thick underground stems that can produce new shoots and roots. Propagating from rhizomes taps into dormant buds that grow into fresh plants. This method is similar to stem cuttings but focuses on the horizontal stem.
To propagate using rhizomes, follow these steps:
- Locate a healthy rhizome with visible growth buds or small roots.
- Cut a 3 to 5 inch section ensuring at least one bud is included.
- Plant it in moist, peat-free acidic soil inside a pot with good drainage.
- Cover or enclose the pot to keep humidity high, ideally above 60%.
- Set the pot at about 70°F (21°C) to encourage root and shoot formation.
- Check soil moisture regularly and water lightly to keep damp.
Roots will show up in 3 to 6 weeks. Shoots come after 2 to 4 weeks. Keep new plants out of direct sun and maintain warmth and humidity for best results.
| Propagation Method | Temperature Range (°F) | Medium | Humidity (%) | Root Development Time |
|---|---|---|---|---|
| Stem Cutting | 70 – 75 | Peat-free acidic soil | High (covered environment) | 4 – 8 weeks |
| Division | 65 – 85 | Well-draining, peat-free acidic soil | 60 – 80 | Immediate to 4 weeks (establishing) |
| Rhizome | 70 | Peat-free acidic soil | 60+ | 3 – 6 weeks |
Identifying and Managing Common Anthurium Pests and Diseases
Common pests like aphids, mealybugs, scale, spider mites, and whiteflies often bother anthuriums. Look for tiny insects clustered on new growth or the undersides of leaves. Sticky residue or distorted leaves also signal their presence.
Root rot shows yellow leaves that wilt fast. The soil may smell musty.
Bacterial blight causes dark, water-soaked spots on leaves that spread quickly. Both problems happen when water lingers too long on leaves or roots.
- Remove pests by wiping leaves with soapy water or using insecticidal soap.
- Apply neem oil every 7 to 14 days to control lingering pests safely indoors.
- For root rot, cut away affected roots and repot the plant in fresh, well-draining soil.
- Use a copper-based fungicide to treat bacterial blight; follow label instructions carefully.
- Avoid overhead watering to reduce spread of bacterial blight and root rot.
- Keep humidity moderate and ensure good air circulation around the plant.
Checking plants weekly helps catch pests early before heavy infestation. Treat at the first sign to protect new leaves and flowers. Avoid harsh chemicals on indoor plants to keep your home safe.
Prevent root rot by using fresh potting mix. It should drain well. Water when the top inch of soil is dry.
Symptoms improve as you adjust care. But advanced root rot may kill the plant if ignored. Prompt action saves your anthurium’s bright blooms and shiny leaves.
Choosing the Best Anthurium Varieties for Your Home
Picking the right anthurium for your home depends on space, light, and humidity. Beginner-friendly types tolerate average indoor humidity and some low light. More demanding varieties ask for higher humidity and steady warmth.
Anthurium Andreanum
This species is popular for its big, heart-shaped leaves and bright flowers. Leaves can grow up to 24 inches long and 10 to 12 inches wide when mature. It thrives best at humidity levels between 50% and 60%.
Andraeum is fairly forgiving but prefers medium to bright indirect light. Keep it away from direct sunlight to prevent leaf scorch. The size means it needs enough room, so pick a spot with space.
Anthurium Scherzerianum
Also called the pigtail anthurium, it has a curled spadix and a compact size. It grows between 12 and 28 inches tall, fitting better in smaller areas. This variety handles average home humidity better than some hybrids.
Scherzerianum tolerates lower humidity, typically around 50%, and can survive in moderate low light. It needs indirect light to encourage blooms but avoid harsh sun. Its compact habit suits desks or small shelves.
Anthurium Crystallinum
This species is known for large, velvety leaves reaching 24 inches long. It needs consistent warmth above 64°F and humidity above 60%. Crystallinum prefers bright, filtered light but not direct sun.
The large leaves make it a statement piece. It’s less tolerant of dry air and lower light than scherzerianum. Use a humidifier or grouping plants if your home is dry.
Queen Anthurium (a. Warocqueanum)
This queen anthurium loves cloud forest conditions with humidity above 70%. Leaves can grow very large.
The mix it needs must be chunky for drainage. Temperatures should stay above 64°F at all times.
This choice suits experienced plant owners with a stable, humid indoor environment. It needs steady care and high humidity devices. You’ll pay more for this rarity, but its tropical look is unmatched.
| Variety | Leaf Size | Plant Height | Humidity Needs | Light Tolerance |
|---|---|---|---|---|
| Anthurium andreanum | Up to 24″ long, 10-12″ wide | Medium, up to 24″ | 50-60% | Medium to bright indirect |
| Anthurium scherzerianum | Smaller, compact | 12-28″ | About 50% | Tolerates lower light |
| Anthurium crystallinum | Up to 24″ long | Medium to large | Above 60% | Bright, filtered only |
| Queen Anthurium (A. Warocqueanum) | Very large | Large | Above 70% | Bright, indirect |
This table helps pick the best anthurium based on your space, light, and humidity. Beginners may start with scherzerianum or andreanum for their flexible care. Choose queen anthurium if you can meet higher humidity and temperature needs.
Keep anthuriums away from direct sun to avoid leaf scorch and damaged growth.
Step-by-Step Action Plan for Growing Anthurium Plants Indoors
Start your anthurium growing journey with clear steps to help it thrive indoors. Follow this plan to create the right environment and care routine.
- Day 1: Place your anthurium in bright, indirect light. Check if its leaves are facing the light source.
- Day 2: Plant your anthurium in well-draining, airy soil mixed with orchid bark. Confirm soil holds moisture but drains fast.
- Week 1: Water the plant thoroughly until water drains out the pot holes. Wait until top inch of soil dries before watering again.
- Week 2: Apply a balanced liquid fertilizer at half strength every two weeks. Look for greener, stronger leaves as a sign it works.
- Month 1: Check for pests like aphids or spider mites. Use insecticidal soap if you spot any and avoid leaf damage.
- Month 2: Repot only if roots crowd the pot. Use fresh soil and a slightly larger container. Watch for new root growth afterward.
- Month 3: Try propagation by dividing the plant during repotting or using stem cuttings. Success shows with new shoots or roots forming.
Frequently Asked Questions
How Tall Can Anthurium Plants Grow Indoors?
Anthurium plants usually reach between 20 and 35 inches tall indoors. The size depends on the species and care you give it.
Can Anthuriums Survive If Occasionally Exposed to Temperatures Below 60°F?
Anthuriums don’t like temperatures below 60°F, especially at night. Occasional drops can stress the plant and slow growth.
Is It Necessary to Mist Anthurium Leaves Regularly?
Misting can increase humidity but isn’t required if your room is naturally humid. High humidity is key for leaf health and bloom.
When Is the Best Time of Year to Repot an Anthurium?
The best time to repot is during spring or early summer. That’s when the plant is actively growing and recovers faster.
Should I Prune Anthurium Leaves or Flowers?
Pruning helps keep the plant healthy by removing dead or damaged parts. Cut spent flowers to encourage new blooms.
How Fast Do Anthurium Plants Grow?
Growth rate varies by species and conditions, generally moderate paced. They can show noticeable new leaves monthly in ideal care.
Key Points to Remember
Anthuriums do well in steady care with good light, moisture, and pest checks. Start by setting a bright, humid spot in your home. That will help your plant grow happy and healthy from the start.


