How to Adjust Lawn Sprinkler Heads for Perfect Coverage and Water Savings
Knowing how to adjust lawn sprinkler heads saves water and keeps your lawn green. You change the spray pattern, radius, and rotation to cover all areas evenly.
First, identify your sprinkler head type. It might be a rotor or spray head, and each type adjusts differently.
Most adjustable heads rotate between 30 and 360 degrees. You can also change how far water sprays by turning a screw or dial on the head. Check water pressure and clear clogged nozzles before adjusting for best results.
Adjusting a head usually takes 10 to 15 minutes if no major problems exist. If a head won’t spin, it likely has dirt or damage that you can fix yourself. Cleaning or repairing the head improves its function.
Dig a small circle around the head before adjusting. This helps you reach parts without causing damage.
Key Takeaways
- Identify your sprinkler head type before starting adjustments.
- Adjust spray arc by turning the adjustment screw or dial clockwise.
- Check and clean clogged nozzles to improve spray coverage.
- Dig a 1-2 inch clearance around the head for easier access.
- Test water pressure to ensure proper spray distance after adjustment.
- Adjust rotation between 30° and 360° based on your lawn’s layout.
How to Adjust Different Types of Lawn Sprinkler Heads
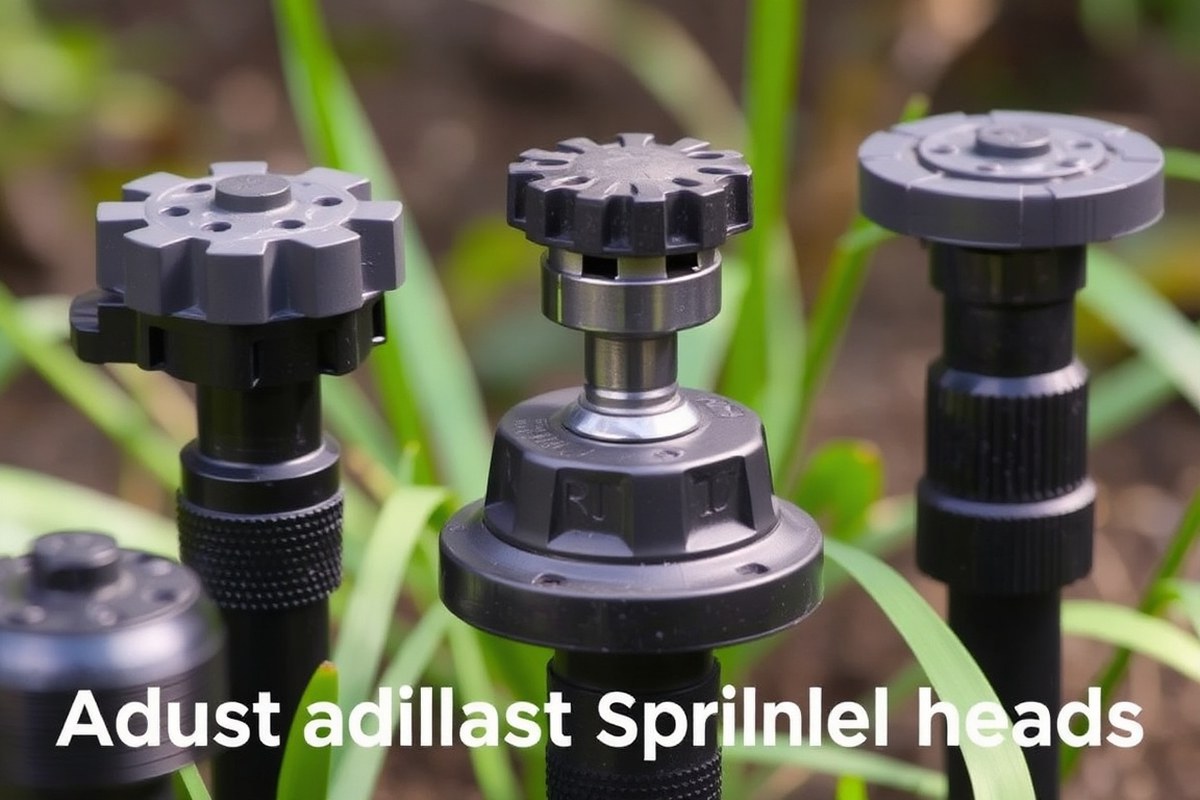
Different lawn sprinkler heads need different adjustment methods because their spray patterns and movements vary. Rotor heads rotate back and forth with a single or multiple water streams. Pop-up heads shoot a circular spray but stay stationary when up.
Impact heads spray in multiple directions via a rotating arm. Fixed spray heads cover a set fan width and stay put. So you mostly adjust their spray pattern or distance.
Adjusting each type ensures your lawn gets water evenly without waste. Rotors require you to set stops and adjust the arc and radius with special tools. Impact heads let you change the arc by moving the deflector shield.
You can adjust distance using the diffuser screw. Both controls affect how far and wide water sprays. Pop-up heads usually need you to rotate the nozzle or the stem to change spray coverage.
Fixed spray heads can’t change radius. You can twist their stem for minor changes. Or swap the nozzle to get a better spray pattern.
| Type of Sprinkler Head | Movement | Spray Pattern |
|---|---|---|
| Gear-driven rotor | Rotates back and forth | Single or multiple streams |
| Pop-up sprinkler | Pops up, stays stationary | Circular spray |
| Impact sprinkler | Sprays in different directions | Multi-trajectory streams |
| Fixed spray | Stationary | Set fan width |
Follow these steps to adjust most rotor and impact sprinkler heads properly.
- Identify your sprinkler head type by looking at its shape and spray style.
- For rotors, turn the head to the left stop position to start adjustments.
- Use a rotor adjustment tool or flathead screwdriver to set the spray arc. Turn the adjustment screw or dial slowly. Check the spray while you adjust for best results.
- Turn the radius adjustment screw to fine-tune how far the water sprays.
- For impact heads, turn the diffuser screw in or out to change spray distance.
- Move the deflector shield sideways to set the spray arc angle on impact sprinklers.
- For pop-up heads, rotate the nozzle or stem to adjust spray direction or pattern.
- Adjust fixed spray heads by rotating the entire stem first. If needed, swap the nozzle. This gives better coverage where you need it.
After every change, activate the sprinkler manually and check where the water lands. Keep adjusting the arc or radius if water misses lawn areas. Also adjust if water sprays hard surfaces like sidewalks.
Make small changes and check spray patterns often. Rotor heads cost $5 to $30, and impact heads run $7 to $30. So fixing instead of replacing saves money.
Fixed spray heads cost $3 to $25. But they rarely adjust for radius, changing nozzles works better for those.
Tools Needed to Adjust Lawn Sprinkler Heads
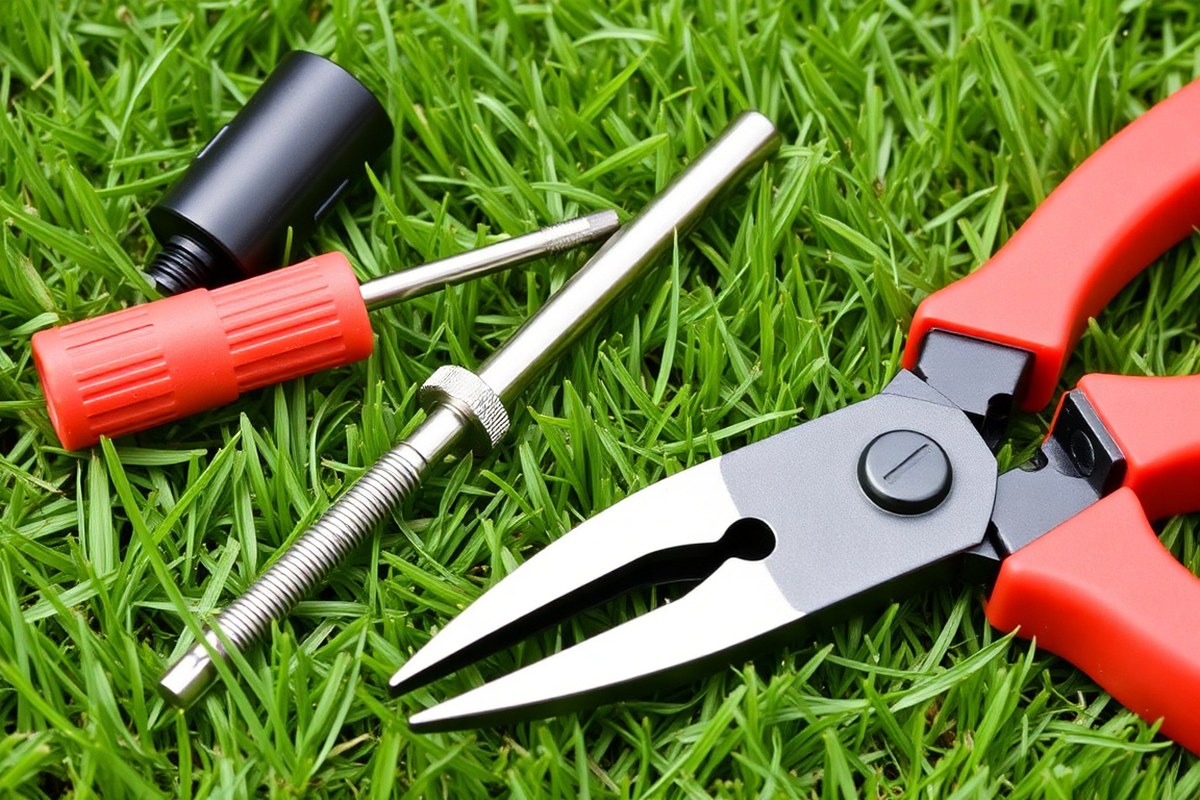
Adjusting lawn sprinkler heads requires a few basic tools everyone should have handy. A flathead screwdriver often works for opening head covers and turning adjustment screws. Many sprinkler brands offer special tools for adjustment.
These tools fit their heads perfectly. This makes fine-tuning easier and safer.
To work safely, shut off the water supply before touching any sprinkler heads. This prevents the risk of injury from high-pressure water or damaging the head. Use a pressure gauge to check system pressure.
Keep it within 15 to 45 PSI. The exact range depends on the head type.
- Flathead screwdriver to access adjustment screws
- Sprinkler-specific adjustment key for brand-specific heads
- Pressure gauge to monitor water pressure (ideal 15-45 PSI)
- Gloves for hand protection when digging or handling parts
- Towel or rag to clean debris from heads before adjusting
- Adjustable wrench for heads or fittings needing tightening
- Bucket or small container to catch water if needed
Using the right tool avoids stripping screws or damaging delicate parts. Some sprinkler heads have a small dial or slot. You turn it with a special key.
This sets the spray radius or arc. These tools usually cost between $5 and $15 and can save time and effort.
Too much system pressure causes heads to mist. Mist wastes water instead of spraying. It also lowers watering efficiency.
Low pressure causes poor coverage and can jam moving parts. Testing pressure before and during adjustments helps keep your irrigation system working smoothly and evenly.
Always turn off the irrigation water before adjusting sprinkler heads to avoid unexpected sprays or injury.
How to Tell When Sprinkler Heads Need Adjusting
Uneven watering is the first thing you’ll notice. Parts of your lawn look dry while others stay soggy. Sprinkler heads probably need adjusting.
Dry patches mean the water isn’t reaching some areas. Soggy spots show overwatering in others.
Overspray shows up as water hitting sidewalks, driveways, or your house’s foundation. Check for wet pavement or runoff.
This wastes water and can damage concrete or plants that don’t need extra moisture. Overspray usually happens when the arc or spray distance is too wide.
Sprinkler heads that don’t pop up fully or fail to rotate properly are another sign. Heads stuck below ground won’t water your lawn evenly.
Watch for heads that stay down or spin only partway. Dirt, grass clippings, or broken springs often cause this.
To spot overspray, look when the system runs. Notice if water splashes beyond your lawn border.
You should see water landing softly on grass, not puddling on hard surfaces. Adjusting the head angle or arc will usually fix this.
Your sprinkler head isn’t popping up. Gently dig around it to check for debris. Sometimes cleaning is enough to restore function.
Stuck or slow rotating heads may have low water pressure. The problem could also be mechanical inside the head.
Even watering without watering unwanted areas means you’ve got good results. Roots stay moist but not soaked.
Sidewalks and driveways stay dry, and heads pop up fully and rotate smoothly. Fixing these problems early saves water and keeps your lawn healthy.
Step-by-Step Guide to Adjusting Sprinkler Heads Correctly
Adjust your lawn sprinkler heads with the system running. This lets you see spray arc, direction, and distance in real time. Follow a clear step-by-step approach to fix coverage issues efficiently.
Preparing and Starting the System
Check your sprinkler system manual or control panel to find the active zone. Knowing the zone helps you identify which heads to adjust. Turn on that zone to watch the sprinklers in action.
Identify each head type, rotor or spray, since adjustments vary slightly. Rotors cover larger areas slowly and need direction and distance changes. Spray heads focus on closer, fixed patterns requiring arc and angle tweaks.
Adjusting Spray Arc and Direction
Hold the sprinkler head stem to turn it gently and guide the spray direction. This aligns water to the lawn, preventing runoff onto paths or driveways. Most heads turn clockwise or counterclockwise to shift where water lands.
Use a small flat-head screwdriver to adjust the spray arc screw on the sprinkler. Turn the screw clockwise to narrow the arc and counterclockwise to widen it. This controls the water angle, from a small pie slice to nearly full circle.
Modifying Spray Distance or Radius
Adjust the spray distance using the radius adjustment screw or collar on the head. Turn clockwise to reduce the spray radius; counterclockwise increases it. Check any clogging first because that limits distance more than settings do.
For rotors, set the radius so each head slightly overlaps its neighbor. This overlap keeps water coverage consistent without dry spots. Too much overlap wastes water and can cause soggy, unhealthy patches on your lawn.
Testing and Fine-Tuning Coverage
Place several empty containers across the lawn to catch water while the system runs. Measure how much water each container collects over 15 minutes to check evenness. Aim for less than 20% variation between containers for good coverage.
Take notes of weak spots where water lands less or too much. Adjust the heads again in small steps. Turn them about 10 to 15 degrees.
Try a quarter turn each time. Retest with containers after each adjustment until water spreads evenly.
- Turn on the sprinkler zone you want to adjust and watch heads carefully.
- Identify each sprinkler head type and locate its adjustment points.
- Manually turn the sprinkler stem to aim spray direction correctly.
- Use a screwdriver to set spray arc, narrowing or widening the spray.
- Adjust spray radius screw to control distance water reaches.
- Set rotor heads so their spray slightly overlaps with neighbors.
- Put containers around your lawn to measure spray uniformity over 15 minutes.
- Make small adjustments based on water collected and retest until even.
Common Problems During Adjustment and How to Fix Them
Sometimes, sprinkler heads won’t pop up or rotate because dirt or debris got inside. Turn on the system and watch the problem head.
When it stays down or spins poorly, clean or replace the filter. Cleaning usually just takes 10 to 15 minutes with a small screwdriver or pliers handy.
Clogged nozzles make spray weak or spotty. The small holes can fill with dirt or mineral buildup. To fix this, turn off the water and gently pull the nozzle off.
Rinse it with water and a soft brush or a thin wire to clear out blockage. Check the filter screen under the nozzle.
Clean it too. Snap everything back in place.
Sprinklers with broken gears or cracked heads must be replaced. A broken nozzle often shoots water straight up instead of out. Replacement heads cost around $10 to $20 and take about 15 minutes to install.
Tighten any loose fittings to stop leaks at the base. Loose or stripped parts let water escape, wasting water and pressure.
- Check for debris around the sprinkler base before starting
- Use needle-nose pliers to remove stuck filters or nozzles
- Clean nozzles every spring to avoid mineral buildup
- Test sprinkler rotation with system on for visibility
- Tighten loose fittings by hand first, then with a wrench
- Replace broken parts promptly to prevent lawn overwatering or dry spots
Weak spray might also mean the water pressure is low or a valve isn’t fully open. Look for partly closed valves or too many heads running in one zone, which reduces pressure.
You can balance pressure by spacing heads correctly with overlaps between 30% to 50%. This helps cover your lawn evenly and avoids dry patches.
Cleaning clogged sprinkler heads and addressing broken parts keeps your system running well. These fixes usually take a few minutes and need only basic tools. The sprinkler might need a pro if cleaning and adjusting don’t fix it.
Always turn off your irrigation system before removing sprinkler nozzles to avoid injury or water damage.
How to Conduct a System Audit Before Adjusting
Start by checking each irrigation zone separately. Run a water test with measurement cups placed around the sprinklers. Note where water hits too little or too much to figure out what to fix first.
Gathering Tools and Marking Zones
Keep a notebook or paper ready for notes. Bring straight-sided containers like tuna cans or plastic cups. Have a pen and a marker to label zones and spots.
Label each sprinkler zone on your system’s controller or a printed map. This helps you track where you test and what adjustments you make. Mark problem spots by writing short descriptions.
Running a Zone Test with Measurement Cups
Place about five to seven cups evenly around your active zone. They should sit in spray patterns but not block the water. Run the zone for 10 to 15 minutes to collect water.
- Turn on one irrigation zone at a time.
- Set containers on the ground within the spray radius of each sprinkler head.
- Leave the sprinklers running for 10 to 15 minutes to catch enough water.
- Turn off the zone after the set time.
- Measure and write down how much water each container caught in inches.
This shows how evenly water spreads over the lawn. Cups with very little water highlight gaps, while lots of water suggests overwatering.
Recording Data and Analyzing Coverage
Use a simple table with columns like zone number, cup location, water depth, and notes. Write exact measurements in inches to see differences clearly.
Check for cups holding water near or above half an inch. This shows heavy watering.
Note places with less than 0.1 inch water as dry zones. Compare each zone to spot which need more or less water. Record wet spots causing soggy or muddy areas to avoid overwatering.
| Zone | Cup Location | Water Depth (inches) | Observations |
|---|---|---|---|
| 1 | Front left | 0.25 | Even coverage |
| 1 | Front right | 0.05 | Little water, dry spot |
| 1 | Middle | 0.40 | Soggy, possible overwatering |
Best Practices for Adjusting Sprinklers Near Hardscapes
Sprinklers aimed at sidewalks or driveways waste 1.6 to 8 gallons of water each minute. One zone can use up to 5,760 gallons monthly. This is a lot of water.
Resource Central shares this info. Adjusting the spray angle stops water from hitting hard surfaces and keeps it on your lawn.
Begin by turning on the sprinklers and watching where the water lands. Use the adjustment screw or nozzle to change the spray angle. Make sure it waters only the grass.
Twist the head gently to aim the spray away from sidewalks. Adjust the arc to less than 360 degrees if you can. This avoids watering hard surfaces.
Try shrinking the spray radius when water still hits the pavement. Many heads have a radius adjustment that reduces how far they spray.
Shrinking this radius can keep water off driveways without leaving lawn edges dry. Adjust in small steps, then check the coverage again.
Trim the arc to 90 or 180 degrees for sprinklers near edges or corners. This focuses water only where the grass grows.
Some heads let you set a tight arc so water doesn’t overshoot. This reduces runoff and water waste significantly.
Lowering water pressure may help if the spray pattern is too strong. It can reduce splashes onto hard surfaces.
A pressure regulator or check valve can control flow without losing coverage. You don’t want droplets bouncing off pavement and drying out your lawn edges.
It costs nothing but a few minutes to adjust your sprinklers. Doing this regularly prevents dry patches and water waste. Proper adjustments keep your lawn healthy and save money on your water bill.
When and How to Replace Sprinkler Heads Instead of Adjusting
Replacing a sprinkler head makes sense when adjusting fails or damage shows. Cracks, leaks, or sticking parts usually need a new head. Replacement is simple, affordable, and stops water waste quickly.
Signs a Sprinkler Head Should Be Replaced
Look for cracked or broken plastic parts on the sprinkler head. When the riser sticks or fails to pop up smoothly, replace it. Constant leaks at the base mean the seals are worn out and won’t seal well again.
Older sprinkler heads may lose pressure or coverage despite adjustments. Heads that never spray evenly after cleaning or adjusting usually have internal damage. Persistent spray problems show when water sprays onto sidewalks, not your lawn.
Replacing Sprinkler Heads: Tools and Process
Start by turning off your irrigation system and water supply. Unscrew or pull out the old sprinkler head carefully with a wrench or by hand. Check the riser pipe for damage or clogs before installing the new head.
Screw the new sprinkler head onto the riser by hand, then tighten gently with a wrench. Adjust the spray direction and radius after turning the water back on and testing. Check the new head for leaks or uneven coverage before finishing up.
Always turn off water before removing sprinkler heads to avoid pressure injuries.
Cost and Water Savings of Replacement
New sprinkler heads cost between $5 and $20. Replacing a faulty head lets you save water and avoid costly waste during a growing season. Water waste due to broken heads can far exceed the cost of replacement.
Adjusting heads usually costs nothing but time, while repairs may require parts and labor. A head that fails repeatedly costs less to replace than fix. Replacing heads quickly helps maintain your lawn’s health and your water bill.
Step-by-Step Action Plan
Follow these steps to adjust your lawn sprinkler heads quickly and correctly.
- Before you start: Gather your tools, pliers, flathead screwdriver, and a small wrench. Check that your sprinklers appear uneven or dry in spots.
- Day 1: Turn on the sprinkler system and observe spray patterns. Note heads spraying onto sidewalks, driveways, or bare soil.
- Day 1: Adjust the sprinkler heads by turning the adjustment screw or rotating the nozzle. Aim to stop water from hitting hard surfaces.
- Day 2: Walk the lawn after watering. Check for dry patches and adjust heads or spray distance accordingly.
- Week 1: Conduct a system audit. Run the system twice to confirm even coverage and no overspray.
- Week 2: Recheck any problem areas. Fix common issues like clogged nozzles or broken heads.
- When needed: Replace damaged sprinkler heads that won’t adjust properly. Confirm new heads fit your system and cover the right range.
Frequently Asked Questions
How Do I Know If My Sprinkler Heads Spray Water Unevenly?
You can tell by watching your sprinklers run. Look for dry spots or overspray on sidewalks and driveways. Uneven spraying means you should adjust the heads to cover your lawn properly.
Can I Adjust Sprinkler Heads Without Turning Off the System?
Yes, most pop-up sprinkler heads are easier to adjust while the water is running. This allows you to see the spray pattern and make precise angle or distance changes. Just be careful not to get sprayed.
What’s the Best Time of Day to Adjust Lawn Sprinkler Heads?
Adjust sprinkler heads early morning or late evening. The water pressure is steady and sunlight won’t affect your view of the spray. Avoid windy days to get an accurate spray pattern.
How Often Should I Check and Adjust My Sprinkler Heads?
Check your sprinkler heads seasonally, at least four times a year. Lawn growth and weather changes can affect water coverage. Regular checks keep your system efficient and your lawn healthy.
Can I Use a Screwdriver to Adjust Sprinkler Heads?
Yes, a flathead or Phillips screwdriver is common for adjustments. It fits most sprinkler controls for arc and distance. Make sure to use the right size to avoid damaging the screws.
Will Adjusting Sprinklers Affect Water Pressure?
Minor angle adjustments won’t change water pressure. But turning the distance dial too far might reduce pressure to some heads. Check your entire system if you notice weak spray after adjustments.
Before You Go
Adjusting your sprinkler heads helps your lawn get water evenly without waste. Start by checking spray patterns on your first run. Then, adjust small changes and watch your lawn thrive over time.