What Do Potato Seeds Look Like? A Complete Visual Guide for Gardeners
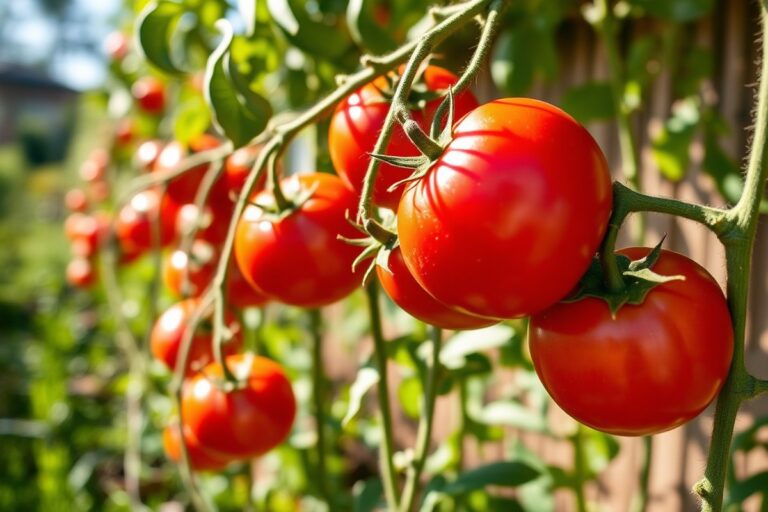
What do potato seeds look like? True potato seeds are tiny, round, and hard, about the size of a sesame seed. They usually come in small green fruit that look like miniature tomatoes on the potato plant.
Potato tubers are big and fleshy. Many gardeners think they are seeds.
Actually, tubers are a different part of the plant. True seeds develop inside the fruit that forms after potato flowers are pollinated.
Look for firm, dry seeds inside the green berries. They are brown to black in color.
The seeds can feel rough to touch. Tubers have a smooth surface instead.
Clean the seeds gently first to remove pulp. Then dry them for one or two weeks.
This helps before planting. This helps stop mold and prepares them for storage or planting.
Key Takeaways
- True potato seeds are small, hard, and round, about the size of sesame seeds.
- Potato seeds develop inside green, tomato-like fruit on the plant.
- Tubers are large, fleshy, and not true seeds.
- Extract seeds by cutting open ripe green berries and scooping out the seeds.
- Clean seeds with a mild detergent like a 10% trisodium phosphate solution.
- Dry potato seeds for 1 to 2 weeks before storing or planting to prevent mold.
What Do True Potato Seeds Look Like Compared to Tubers?
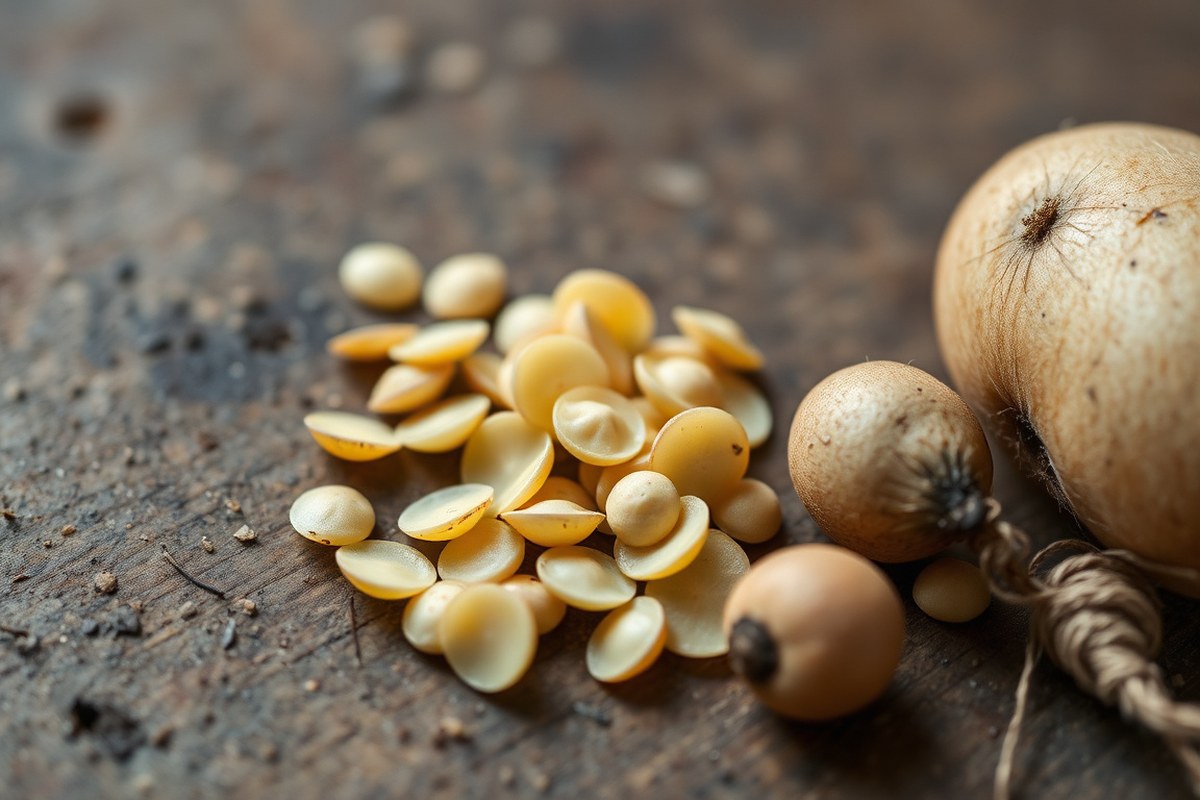
True potato seeds are tiny, flat, and hard, usually black or dark brown. They come from small green berries about the size of a cherry tomato. These seeds measure around 2 millimeters across, which is much smaller than seed tubers.
Potato seed tubers look very different. They are the actual small potatoes you plant, often called seed potatoes. These tubers are firm and at least egg-sized.
Their colors vary by type. Common shades include red, yellow, purple, or white.
You can easily tell true potato seeds and seed tubers apart by their size and texture. Seed tubers feel solid and have visible eyes, which are the spots where sprouts grow. True seeds are smooth, tiny, and do not have eyes.
A true potato seed is very small. It roughly matches the size of a grain of sand or sesame seed.
Seed tubers can weigh more than 2 ounces each. Seed tubers look like miniature potatoes, with skin and a shape that varies by variety.
The color difference helps, too. True potato seeds are almost always dark, sometimes shiny, and flat. Seed tubers feel rough on their surface.
Their color depends on the potato variety. Colors vary from light to dark.
Sprouting can also help you tell them apart. Seed tubers will have small, thick sprouts with a clear color.
True seeds don’t sprout in the same way. Instead, they must be started indoors and take 3 to 6 weeks before seedlings appear.
To spot good seed tubers, pick firm ones. Make sure they have no cuts or mold.
Avoid soft or wrinkled tubers with long, thin sprouts. True potato seeds, or TPS, are best obtained from trusted garden sources, not grocery stores.
Growing from true seeds lets you try new potato types. These seeds are not clones of the parent.
In contrast, tubers produce plants genetically identical to the mother. Both types have their place, but recognizing their differences saves time and effort.
How and Where Potato Seeds Develop on the Plant
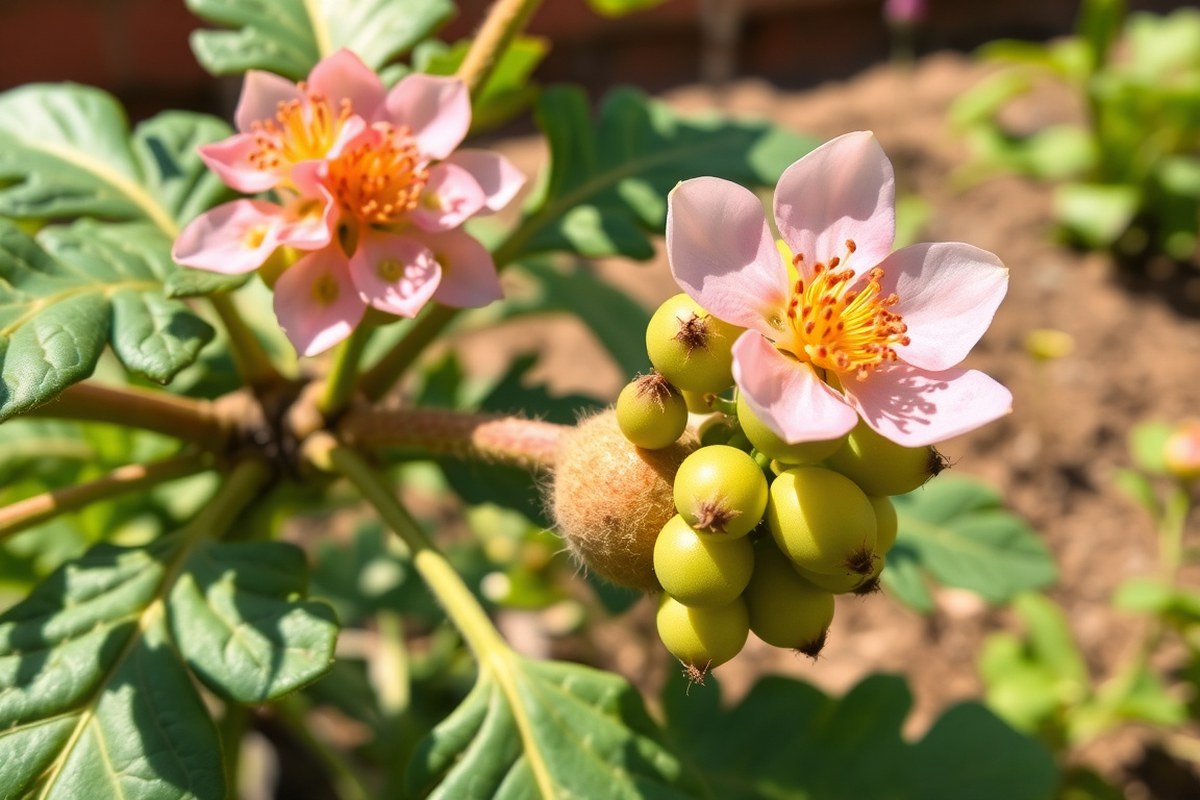
Potato seeds grow inside small green fruits called berries on the plant. These berries appear near the flowers, which develop about 60 to 70 days after planting. The flowers and berries are key to collecting true potato seeds.
Identifying Potato Flowers
Potato flowers usually bloom about 60 to 70 days after planting. They can be pale purple, pink, white, or even blue, depending on the variety. Each flower has a yellow center and looks star-shaped with five petals.
These flowers develop on above-ground stems and look a bit like small tomato blossoms. Each flower can contain up to 1200 ovules, which can become seeds if pollinated. Keep in mind, some potato varieties produce fewer flowers or none at all.
Recognizing Potato Berries
After pollination, the flowers drop petals and form small round fruits called berries. These berries usually look like tiny green tomatoes but can also be red or purple. The berries grow near where the flowers were and can hold hundreds of tiny seeds inside.
These green fruits are not edible and should be handled carefully to collect seeds. Many modern potato varieties do not produce berries because they are sterile. When berries do form, they’re the source of true potato seeds, also called TPS.
Seed Development Timeline on the Plant
About two months after planting, healthy potato plants start to flower. Once pollinated, flowers transform into berries over the next several weeks. Seeds inside these berries slowly mature, becoming ready roughly 3 to 4 weeks later.
Seeds develop inside the berries as they grow from tiny ovules. A single berry often contains fewer than 600 seeds, despite the flower’s potential for more. Harvest berries when they turn a dull green or slightly soften to collect viable seeds.
Wear gloves when handling potato berries to avoid skin irritation and keep seed quality high.
How to Extract and Clean Potato Seeds Safely
Extracting and cleaning potato seeds means handling the small seeds inside the potato berries carefully. The seeds are tiny and sit inside a slimy pulp that you need to remove. Clean them safely to prevent mold.
This keeps seeds ready for planting. Also, it helps when you store them.
Harvesting Mature Potato Berries
Wait until the potato berries on the plant turn fully ripe and soft. They usually change from green to yellow or orange and look like small tomatoes. Pick these ripe berries carefully to avoid damage or spilling the seeds.
Handle the berries gently because they are delicate and can burst easily. Overripe or damaged berries often contain poor-quality seeds. Collect the healthy ones for the best seed extraction.
Extracting Seeds from Berries
Start by cutting open each berry with clean scissors or a knife. Inside, the seeds are mixed with a sticky, pulpy material. You need to separate the tiny seeds from this pulp without crushing them.
Here’s a clear way to extract seeds step-by-step:
- Slice the berries and scoop out the pulp and seeds into a bowl of water.
- Use your fingers to gently scrub the pulp off the seeds while in the water.
- Stir the mixture to loosen any pulp stuck to the seeds.
- Let the solid seeds settle at the bottom for 10 to 15 minutes.
- Pour off the floating pulp and water carefully, keeping the seeds in the bowl.
- Repeat rinsing and settling until the seeds are mostly clean.
- Spread the seeds on a fine mesh screen or paper towel to drain excess water.
Cleaning and Drying the Seeds Safely
Cleaning potato seeds with care helps prevent fungus and diseases. Wash seeds in 10% TSP solution. Do this for about 10 minutes.
This disinfects the seeds well. This step removes bacteria and molds that might harm seed storage.
After washing, rinse the seeds thoroughly with clean water until no detergent smell remains. Lay them out on paper towels in a warm, dry place away from direct sunlight. Let seeds dry completely to prevent mold.
Drying usually takes 2 to 4 days. Don’t store them while wet.
Store dry seeds in paper envelopes or breathable containers. Keep them in a cool place. This preserves seed quality.
Keeping them at about 40°F (5°C) or colder extends seed viability. Avoid storing seeds in plastic bags or humid areas, as moisture can ruin them.
How to Identify Healthy and Viable Potato Seeds
Healthy potato seeds are firm, well-shaped, and free of cracks. They often have a slight matte finish and feel dry to the touch.
Avoid seeds with wrinkles or a sticky coating. This residue can block germination and signal poor cleaning.
Good seeds are usually cream to pale brown in color. You’ll often spot this when checking seeds for planting. It shows they’re ready to grow.
Seeds that look dark brown or black may have gotten too hot or moist during storage. These conditions damage the seed and lower your chances of successful sprouting.
Potato seeds need the right temperature and moisture to germinate well. Keep them around 60° F (16° C) for best results. Germination slows or stops if the temperature is too cold.
It also happens if it’s too hot outside. This wastes your garden’s time and effort.
- Seed texture should be firm, not soft or brittle
- Look for a uniform cream or light brown color
- Avoid dark spots or discoloration on seeds
- Seeds should be dry but not brittle
- Store seeds in cool, dark, dry places before planting
Before planting, test a few seeds by soaking them overnight. Seeds that float or don’t swell likely won’t sprout. Choose seeds that sink and feel heavier, showing they’re full and viable.
Also, gently rub seeds to check for powdery residue. Wash off any stuck material to improve germination chances.
The health of your seed batch shows directly in the plants you grow. Picking well-kept seeds saves you from wasting space and time on seeds that won’t grow. Check your seeds closely before planting every time.
Keep them stored in steady conditions. This helps them stay ready for your garden’s climate and soil.
Best Practices for Storing and Preserving Potato Seeds
Potato seeds stay good longer when kept cool and dry. Aim for 40°F (4°C) to 50°F (10°C) for storing true seeds. Avoid temperatures above 68°F (20°C) because heat drops seed viability fast.
Moisture is a big enemy to seeds. Keep relative humidity around 35% to 50%.
Too much moisture leads to mold and rot. Too dry, and the seeds might lose their ability to sprout.
Use airtight containers like glass jars with seals or plastic containers with tight lids. Include a dry pack of silica gel or a few grains of rice to absorb moisture. Label containers with seed variety and date.
| Storage Factor | Best Practice | Reason |
|---|---|---|
| Temperature | 40°F to 50°F (4°C to 10°C) | Keeps seeds dormant, slows ageing |
| Humidity | 35% to 50% relative humidity | Prevents mold and preserves viability |
| Container Type | Airtight glass or plastic with desiccant | Blocks moisture and pests |
| Storage Time | 3 to 5 years under good conditions | Seeds retain high germination rate |
| Light Exposure | Store in dark place | Light speeds deterioration |
Potato seeds last much longer than seed potatoes in storage. Seed tubers often spoil or sprout in weeks.
But true seeds can stay viable for 3 to 5 years. Keeping seeds dry and cold gives you a better chance of healthy sprouts later.
Seeds from plants grown in long daylight tend to have stronger dormancy. After storage, soak seeds in room temperature water overnight to help germination. Avoid freezing seeds, since ice crystals damage the cells and lower the sprout rate.
Store seeds in small batches so you can open just what you need, reducing moisture exposure.
Germinating Potato Seeds: What to Expect and How to Start
True potato seeds begin to germinate in about 10 days when kept at around 60° F. They need warmth, moisture, and light to sprout successfully. Seedlings look very different from tubers. They start as small green shoots with delicate leaves.
Environmental conditions play a big role in how well potato seeds sprout. Keep the soil evenly moist but not soggy to avoid rotting.
Light is needed for the seedlings to grow healthy stems and leaves. Cooler temperatures or drought slow or stop germination.
After planting, the young seedlings grow slower than tuber sprouts and need more gentle care. They take longer to develop. The first true leaves form after weeks.
It usually takes a couple of weeks for them to appear. Protect them from strong direct sun and sudden cold changes.
Follow these steps to give potato seeds the best start:
- Plant seeds in seed-starting mix about 1/4 inch deep in containers.
- Keep the soil moist with a spray bottle to avoid disturbing seeds.
- Place containers in a warm spot near 60° F with indirect light.
- Check daily for sprouts starting around 7, 10 days after planting.
- Once seedlings appear, give them 12, 16 hours of light daily with grow lights if indoors.
- Thin seedlings to one per cell or pot after they develop two true leaves.
- Harden off seedlings by gradually exposing them outdoors a week before transplanting.
- Plant seedlings outside after the last frost for your region to avoid cold stress.
Successful germination needs patience and steady care. Seedlings often take two to three weeks to develop strong leaves.
Avoid letting soil dry out too much or stay very wet. This causes fewer seeds to sprout and weakens seedlings.
Common Misconceptions About Potato Seeds and Seed Tubers
Many gardeners confuse potato seeds with seed potatoes, but they are very different. Potato seeds come inside small fruits that look like tiny green tomatoes.
Seed potatoes are small tubers or pieces you plant. They grow into new potato plants.
True potato seeds are hard, round, and about 3 to 4 millimeters wide. They look a lot like other garden seeds but feel harder and heavier for their size. Seed potatoes look just like the potatoes you eat.
They can be as small as a golf ball or bigger. You plant seed potatoes whole or cut into pieces, not the seeds inside those little fruits.
Most home gardeners use seed potatoes because they sprout faster and are easier to handle. Potato seeds are used mostly by breeders who want to create new varieties.
Growing potatoes from seeds takes longer. You also need extra care starting seeds indoors.
Tell the difference by checking these points. Potato seeds come from fruit after flowers fade. Those fruits are usually green or yellowish and about 1 inch wide.
Seed potatoes grow underground like regular potatoes and have eyes or buds on their skin. Potato seeds do not have these eyes since they are true botanical seeds.
Trying to plant the fruit or confusing seed potatoes for seeds leads to poor results. Planting seed potatoes results in quicker sprouting and more dependable crops. Planting true potato seeds needs careful timing and patience, with light, warm conditions for germination.
When sorting seeds, discard anything soft, lightweight, or plant debris. Potato seeds feel firm and heavy. Fruit pulp around seeds must be cleaned off carefully before planting to reduce mold risk.
Seed potatoes need to be kept cool (around 45 to 60°F) and dry. But true seeds store better in cool, dry places for months.
Practical Tips for Growing Potatoes from True Seeds
Starting true potato seeds requires careful planning and patience. Choose good seeds, prepare soil properly, and avoid common errors for the best chance at success. The variety you pick will shape how your plants grow and what to expect.
Choosing Quality Seeds
Look for seeds from open-pollinated varieties or landraces, not hybrids, to keep traits stable. Seeds should be clean, firm, and free of mold or discoloration. Avoid seeds that look shriveled or have spots, they often won’t grow well.
Where you get seeds matters. Select from reputable sources or saved seeds from healthy plants. Check if the seed packet or supplier confirms the variety and viability.
A quick checklist helps:
- Seeds are firm, smooth, and free from damage.
- Seed source is reliable with clear variety info.
- Seeds are not too old, fresh within 1, 2 years is best.
- Seeds stored properly in cool, dry conditions.
- Choose seeds meant for your growing zone and season.
Preparing Soil and Planting Seeds
Use loose, well-draining soil rich in organic matter for planting seeds. Till soil to a depth of 6, 8 inches to allow easy root growth. Avoid soil that stays wet or compacts too much.
Plant seeds shallowly, about ¼ inch deep, with 12 to 18 inches between plants. Space rows 2 to 3 feet apart for air and light. Water gently after planting, keeping soil moist but not soggy.
Timing is key. Start seeds indoors 8 to 10 weeks before the last frost. This gives them a good head start.
You’ll see stronger seedlings ready for planting. Move seedlings outdoors when 3 to 4 inches tall.
Make sure frost danger is low by then. This helps them grow in safe conditions.
Common Beginner Mistakes to Avoid
Starting too early indoors is a frequent problem. Seeds that get leggy or weak won’t survive transplanting well. Avoid planting deep or overcrowding seeds, as this limits air and water access.
Don’t confuse seed size with variety quality. Small seed doesn’t mean weak plants.
Also, skipping soil testing can lead to poor growth if pH or nutrients are off. Most potatoes prefer slightly acidic soil around pH 5.0, 6.0.
Watch for these pitfalls:
- Planting seeds too deep or too close together.
- Starting seeds in poor or waterlogged soil.
- Ignoring seed storage conditions leading to loss of viability.
- Overwatering seedlings causing rot or damping-off.
- Not hardening off seedlings before moving outside.
Hardening off seedlings before transplanting outdoors prevents shock and boosts survival.
Variety Considerations for Seed Growth
Seed shapes and colors vary by variety. Some true seeds are rounder or darker. It depends on the potato type you grow.
Plant growth also varies. Dairy dwarf varieties grow short stems, while traditional types stretch taller.
Choose varieties suited for your climate and taste preferences. Early season types often mature faster but produce smaller yields. Late-season varieties take longer but reward with bigger potatoes.
Be ready for different care needs:
- Compact varieties require less spacing and support.
- Vigorous types may need staking or hilling.
- Some varieties resist common diseases better than others.
- Flavor and texture vary, influencing your culinary uses.
Step-by-Step Action Plan for Growing Potatoes from True Seeds
Follow these steps to start your potato seed project with confidence. Each step shows what to do and how to check your progress.
- Before You Start: Collect ripe berries that look dark orange or red. Healthy seeds come from fully ripe fruit.
- Day 1: Extract seeds by gently crushing the berries in water. Good seeds sink; remove any floating debris.
- Day 2 to 3: Dry seeds on a paper towel in a warm, airy place. Check they are hard and dry before storage.
- Week 1: Sow seeds in seed trays with light, well-draining soil. Keep soil moist but not wet to see sprouts in 2, 4 weeks.
- After 2 Weeks: Look for tiny green shoots. Healthy germination means most seeds sprout within this time.
- Week 4: Thin seedlings so only the strongest remain. This helps plants grow well without competition.
- After 6 Weeks: Harden off seedlings by placing them outside for a few hours daily. This prepares them for planting outdoors.
- Week 8: Plant seedlings in the garden or larger pots, spacing at least 12 inches apart. Look for firm stems and healthy leaves.
Frequently Asked Questions
What Colors Can Potato Seeds Be?
Potato seeds are typically small, round and dark brown or black. Their color helps you distinguish them from other garden seeds and debris in your collection.
Do Potato Seeds Float or Sink in Water?
Potato seeds usually sink in water. This shows they are dense.
Dense seeds often mean they are healthy. Floating seeds might not be viable and should be discarded to avoid wasting garden space.
How Big Are Potato Seeds Compared to Tomato Seeds?
Potato seeds are usually slightly larger and rounder than tomato seeds. Both come from the same plant family but potato seeds look more solid and less flattened.
Can Potato Seeds Be Stored Dry or Do They Need Moisture?
Potato seeds should be stored dry and cool to keep their viability. Excess moisture will cause them to rot or sprout prematurely, ruining your chances of successful germination.
Do Potato Seeds Have a Protective Outer Shell?
Yes, potato seeds have a tough outer coating that protects the embryo inside. This hard shell helps the seed survive rough handling and storage conditions.
How Quickly Do Potato Seeds Lose Viability at Room Temperature?
Potato seeds can lose half their germination ability in about 10 years at room temperature. You improve their lifespan dramatically by storing them near freezing at 40°F or below.
Key Points to Remember
True potato seeds look quite different from tubers but are key for new plants. Use the ripe, clean seeds and follow careful steps to grow them. Start by collecting and drying some ripe berries today to get your seed supply ready.