Why Is My Spider Plant Dying? 8 Key Reasons and Practical Fixes
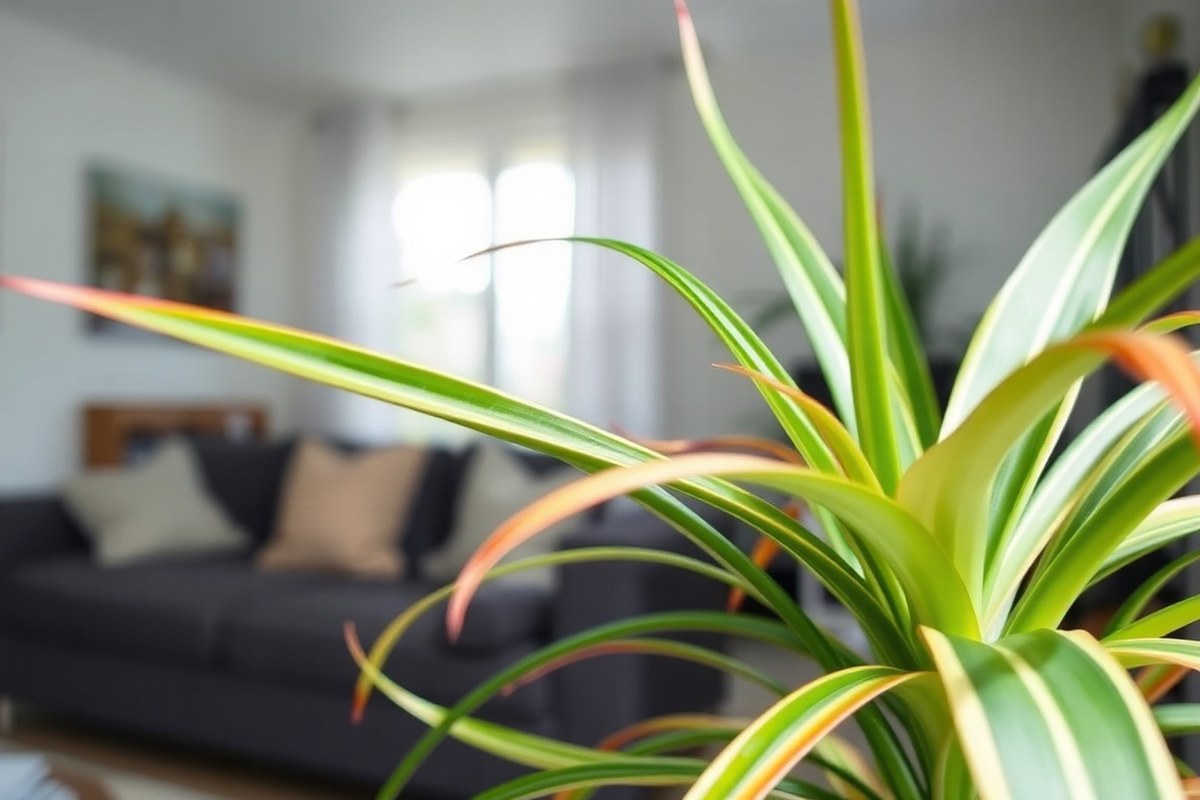
Why is my spider plant dying? The main cause is usually stress from its environment.
This includes issues like improper watering, wrong temperature, or low humidity. Fixing these keeps your spider plant happy and green.
Start by checking your watering habits. Overwatering or letting the soil dry out too much harms roots quickly. Water when the top two inches of soil feel a bit dry to avoid damage.
Temperature matters, too. Keep your spider plant between 65°F and 75°F for best growth. Avoid temperatures below 55°F or above 80°F, which cause brown tips and leaf dieback.
Humidity also plays a role. Spider plants like moderate humidity between 40% and 60%. Use a humidifier or group plants together if the air feels dry, especially in winter.
Key Takeaways
- Water your spider plant when the top 2 inches of soil feel dry.
- Keep room temperature between 65°F and 75°F for healthy growth.
- Don’t let temperatures drop below 55°F or rise above 80°F to avoid stress.
- Maintain humidity around 40% to 60% to prevent brown leaf tips.
- Repot with fresh soil if your spider plant shows no improvement after 4 weeks.
- Place your plant away from cold drafts or direct hot sun for better health.
1. Why Is My Spider Plant Dying? Key Symptoms and Causes
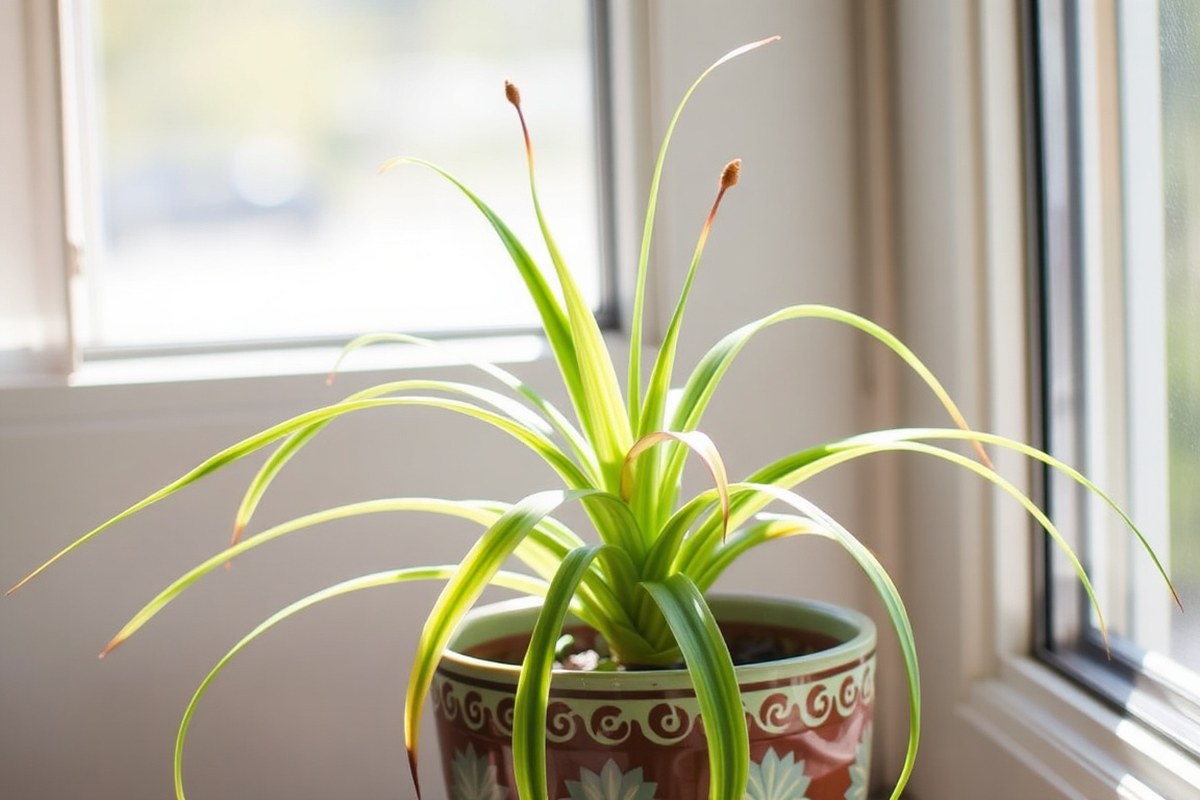
Yellow leaves and drooping stems are the first visible signs your spider plant is struggling. The leaves may turn yellow while the plant looks wilted or limp. Brown leaf tips often show up too, signaling stress in the plant’s environment or care routine.
Overwatering usually causes yellow leaves combined with drooping. The soil stays soggy, leading to root rot that stops water and nutrients from reaching leaves.
On the other hand, underwatering causes wilting but often with dry, crispy leaf edges. When leaves curl and look dry, your plant needs more water.
Temperature stress shows up as brown or black leaf spots. When your spider plant stays below 55°F for long, leaves can darken. High heat above 80°F will also cause brown edges and faded leaves.
For light stress, faded or bleached leaves mean the plant gets too much direct sun. Move it to a spot with bright, indirect light near east or north-facing windows.
To decide the cause, check the soil moisture first. When the soil stays wet for days, overwatering probably happened. When the soil feels dry and crumbly, your plant needs watering.
Look at leaf colour too. Mostly yellow and soft leaves point to overwatering.
Brown, dry tips lean toward underwatering or low humidity. Dark patches or black tips usually mean temperature stress.
Spider plants grow best in consistent care with proper light and temperature. They prefer bright, indirect light and daily temperatures between 65°F and 80°F. Keeping humidity moderate helps too. Noticing these symptoms early lets you act fast to correct care before the plant worsens.
2. How Improper Watering Harms Your Spider Plant

Spider plants need balanced watering to stay healthy. Overwatering causes root problems, while underwatering stresses the leaves. Check soil moisture before watering and adjust with the seasons for best care.
Signs of Overwatering
Leaves turning yellow usually mean your spider plant gets too much water. The soil stays soggy or smells musty, which harms roots. Overwatering often causes root rot that kills the plant over time.
Look for brown leaf tips and soft, limp leaves. These signs suggest waterlogged soil or poor drainage. The pot should always have drainage holes to help excess water escape.
- Yellow leaves, especially on lower parts of the plant
- Soft, limp or mushy roots if you check them
- Bad smell or soggy soil surface
- Browning leaf edges along with yellowing
- Wilting despite wet soil
Water less often and let the soil dry out before adding more. Overwatering is often easier to fix by cutting back watering frequency.
Indicators of Underwatering
Brown tips on leaves can also result from underwatering or low humidity. The soil will dry out completely, making leaves curl or get crinkled. Your spider plant looks droopy and less vibrant.
When spider plants don’t get enough water, their leaves feel brittle and dry. You might notice slow growth and smaller plantlets. Drought-stressed leaves turn brown, especially on the edges.
- Dry, dusty soil pulling away from pot edges
- Leaves curling, crinkling, or turning brown at tips
- Plant looks wilted or lifeless
- Slow leaf growth or smaller new plantlets
- Leaves dry and crispy to the touch
Water deeply once the top inch of soil feels dry. For quick rehydration, soak the entire pot in water for 15 minutes.
How to Check Soil Moisture
The best way to know when to water is by testing the soil moisture. Use your finger to check about one inch deep in the soil. If it feels dry, your spider plant needs water.
For more accuracy, you can buy a moisture meter at a garden store. It gives a number that tells if the soil is wet, moist, or dry. Do this especially in winter, when watering intervals should change.
- Stick your finger one inch deep to feel moisture
- Use a moisture meter for precise reading
- Look for soil color change, lighter means dry
- Check soil moisture before every watering
- Adjust watering to season: weekly in growth, biweekly in dormancy
Don’t water on a strict schedule; check soil moisture to avoid over or underwatering.
3. Choosing the Right Soil and Pot Size to Prevent Decline
Spider plants need well-draining, slightly moist soil in a pot that fits their roots well. Using the right soil mix and pot size helps avoid root rot and supports healthy growth. Watch for rootbound signs.
They tell you when to repot. Check if plant roots circle inside the pot.
Ideal Soil Characteristics
Spider plants like soil that drains quickly but holds some moisture. A loose, sandy or loamy mix works best to avoid soggy roots. Buy a general indoor potting mix.
Add perlite or coarse sand. This helps improve drainage for your plant.
Good drainage prevents root rot, a top reason spider plants die. The soil should feel a bit moist. Check the top 2 inches.
Don’t water if soil still feels wet. Avoid heavy, clay-like soils that hold water too long or dry out fast.
When and How to Repot
Watch for roots sticking out of drainage holes. Also, soil drying too fast after watering is a clue. These signs often mean the plant is rootbound and it’s time to repot.
Also, stop repotting too soon after planting new soil. Wait 4 weeks to see if recovery happens.
To repot, gently remove the spider plant and shake off old soil around the roots. Trim any black or mushy roots to stop root rot. Put it in fresh, well-draining soil and a pot with holes, watering lightly after replanting.
Choosing the Right Pot Size
Choose a pot with 1 to 2 inches more room. This space around roots helps spider plant growth.
Too large a pot can cause soil to stay wet longer and raise root rot risk. A pot one or two sizes bigger than the current one usually works well.
Spider plants like being slightly rootbound, which helps them produce baby plants. Your plant may stop growing.
Water might drain too fast through soil. Upsize the pot in these cases.
- Use a well-draining pot with drainage holes
- Choose soil that’s loose and sandy or mixed with perlite
- Water only when top 2 inches of soil are dry to moist
- Repot when roots grow out of drainage holes or soil dries too fast
- Trim damaged roots during repotting to prevent rot
- Pick a pot 1-2 inches larger than the root ball
- Keep spider plants slightly rootbound to encourage pups
4. The Impact of Light, Temperature, and Humidity on Spider Plants
Spider plants do best in bright, indirect light. Place them near a window with filtered sunlight, avoiding direct sun that burns leaves. Your plant might need more light when leaves turn pale or yellow.
Dim corners slow growth and cause drooping. Moving your plant closer to a window often revives its health.
Spider plants do best in 65°F to 75°F (18°C to 23°C) temps. Keep it away from cold drafts and hot heaters.
Sudden temperature changes cause drooping and yellow leaves. Growth slows and the plant gets stressed below 50°F (10°C).
Humidity matters too. Spider plants thrive with 40% to 60% relative humidity. Low humidity leads to brown leaf tips and dry, crispy edges.
Put plants close together to boost humidity around them. You can also use a small humidifier near the plant. Another way is to place the pot on a tray with water and pebbles.
Spray leaves sometimes but don’t overdo it. Too much wetness leads to rot problems. Make sure leaves dry well after misting.
Pay attention to your spider plant’s leaves for stress signs. Wilting, limp leaves often show temperature issues or dryness. Brown tips usually mean low humidity or salt buildup from tap water.
New leaves might stop if light or temperature isn’t right. Check both to help your plant start growing again. Regularly adjusting your plant’s spot based on these signs helps it bounce back.
5. Recognizing and Managing Common Spider Plant Pests
Pests like spider mites, mealybugs, and aphids often attack spider plants. You can catch infestations early by checking your leaves and stems regularly. Treating pests quickly helps prevent damage and spread to your other plants.
Common Spider Plant Pests
Spider mites are tiny arachnids that thrive in dry indoor conditions. They form fine webbing on the leaves and cause leaf speckling. Mealybugs appear as small, white cottony patches clustered around leaf joints.
Aphids are soft-bodied insects that suck sap from new growth and leaves. All these pests weaken the plant by extracting nutrients. They can also cause leaf yellowing, curling, or browning tips.
Symptoms of Pest Infestation
Look closely at the undersides of leaves and leaf nodes for tiny bugs or webbing. Sticky residue or a shiny film on leaves can signal aphids or mealybugs. Leaf edges curling or turning brown may be a sign pests have already caused damage.
Slow growth or wilting can mean pests are harming your plant. You might see black sooty mold on the leaves. Early detection is key to stopping pests before they spread.
Safe Treatment Options
Start by wiping leaves with a damp cloth to remove bugs and webbing. Regularly spraying your spider plant with water increases humidity and discourages spider mites. For mild infestations, insecticidal soaps work well without harming your plant.
Neem oil is another natural option that kills a variety of pests and prevents reinfestation. Apply the treatments once a week for 2 to 3 weeks, covering all leaf surfaces. Severe problems might require chemical pesticides made safe for indoor plants from garden centers.
- Manually remove visible pests with a soft brush or cloth
- Rinse the plant outdoors or in the shower with lukewarm water
- Apply insecticidal soap or neem oil every 7 days for several weeks
- Increase humidity around the plant to reduce spider mite outbreaks
- Isolate infested plants to prevent pests from spreading
- Avoid over-fertilizing, which can attract some pests
- Use chemical pesticides only as a last resort
Check your spider plant regularly. Catching pests early saves time and keeps your plant healthy.
6. Common Diseases: Root Rot and Leaf Spot Treatments
Root rot shows when your spider plant’s roots turn black and mushy. You might also notice a bad smell from the soil. The leaves wilt and turn brown.
Sometimes, they may even drop. This happens because roots can’t absorb water or nutrients well.
Fungal leaf spots appear as brown or black patches on the leaves. These spots often have a fuzzy or slimy look around them. Root rot and leaf spots come from overwatering.
Overwatering keeps soil too wet. This moisture helps fungi grow.
To fix root rot, gently take the plant out of its pot. Wash the roots using cool running water. Handle the roots carefully.
Cut off any black, mushy roots with clean scissors. Avoid cutting healthy white roots. Next, clean your pot well with disinfectant or use a new one to avoid fungi.
Use fresh potting soil when repotting. Make sure it drains well and isn’t too dense.
Avoid using old soil because fungal spores can stay there and infect your plant again. After repotting, water your spider plant lightly only when the top inch of soil feels dry.
For leaf spots, snip off any damaged leaves to stop the spread of the fungus. Wipe leaves gently with a damp cloth to remove spores.
Keep the plant in a spot with good air circulation and avoid overhead watering. This helps leaves stay dry and fungus-free.
To stop problems, water only when the soil feels dry. Use soil that drains well. Don’t let water sit in the saucer.
Check that your pot has drainage holes. Spider plants usually like to dry slightly between waterings. Overwatering invites fungal diseases and causes these problems.
Treatments need patience. It can take a few weeks to see new healthy roots and leaves after repotting. Your spider plant might still look weak at first.
But steady care improves recovery chances. Too much moisture too soon may cause the disease to return. So stick to a watering routine.
7. Reviving a Dying Spider Plant: Step-By-Step Care Plan
Start by checking your spider plant’s soil moisture. When the top 2 inches of soil feel dry, water well. Water until it drains from the pot’s bottom.
Water every 7 to 10 days to avoid overwatering. Overwatering can cause root rot.
The timing depends on your home’s humidity and temperature. Next, move the plant to a spot with bright, indirect light to encourage steady growth.
Prune yellow or brown leaves with clean scissors. Cut as close to the base as possible without damaging healthy stems. Removing dead foliage reduces stress and helps the plant focus energy on new growth.
Watch for pests like spider mites or mealybugs. Wipe leaves with a damp cloth. Use insecticidal soap made for houseplants if pests appear.
Fertilize your spider plant only after you see new growth, not immediately. Use a balanced liquid fertilizer diluted to half strength. Apply it once every 4 to 6 weeks during spring and summer.
Avoid fertilizing in fall and winter, when the plant rests. This schedule supports recovery without overloading the roots.
- Water when top 2 inches of soil are dry, about once a week
- Place in bright, indirect sunlight to support photosynthesis
- Prune dead or yellow leaves to stimulate healthy growth
- Clean leaves if pests appear, using insecticidal soap
- Fertilize with diluted balanced liquid fertilizer once new growth appears
- Wait to fertilize until spring and summer, avoid winter feeding
- Repot if roots are crowded or soil quality is poor
Keep an eye on your plant’s recovery for several weeks. Leaves should green up and show new shoots after you adjust light and watering. Slow growth?
Check the pot size and soil condition. Crowded roots or poor soil can stop your plant from growing. Repot to fresh soil every 1 to 2 years for long-term health.
Spider plants can recover well with steady care. Give them steady watering and light. Be patient during the early stages of decline.
8. Mistakes to Avoid for Long-Term Spider Plant Health
Watering mistakes harm spider plants the most. Using tap water can build up salts in the soil and block nutrient uptake. Rainwater is better because it is softer and has fewer chemicals.
Water your plant when the top inch of soil feels dry. Overwatering leads to root rot, while underwatering causes brown leaf tips.
Light and placement also matter. Spider plants prefer bright, indirect sunlight. Direct sun burns their leaves quickly, turning them pale or crispy.
Put your plant near an east or north-facing window or behind a sheer curtain. Avoid cold drafts and temperature swings under 50°F, which stress the plant and stunt growth.
Over-fertilizing is a common mistake, too. Feeding every week or using strong fertilizer can burn roots and leaves. Use a balanced, water-soluble fertilizer once a month in spring and summer.
Skip fertilizing in fall and winter when growth slows. Too much fertilizer turns leaf edges brown and causes leaf drop.
- Water only when soil is dry about 1 inch deep
- Use rainwater or filtered water if possible
- Place plant in bright, indirect light away from windowsills
- Keep temperature steady, ideally 65-75°F
- Fertilize monthly during growing months, dilute fertilizer
- Check regularly for pests and treat early
- Avoid sudden moves or drafts that shock the plant
Check your plant’s soil moisture by sticking a finger 1 inch deep before watering.
Prevent recurring problems by keeping a care routine. Water lightly but often enough not to dry out completely or stay soggy.
Move the plant if the light is too harsh or weak, not just once but seasonally. Keep an eye on leaf color and adjust care if you see brown tips or curling.
Regularly inspect for spider mites or insects. Use mild insecticidal soap early. Let your plant rest in cooler months no fertilizer and less water.
These habits keep your spider plant healthy for years. Consistency is easier than fixing damage later.
Step-by-Step Action Plan to Revive Your Spider Plant
Follow these steps to bring your spider plant back to health. Watch for signs of improvement after each action.
- Day 1: Check your plant’s soil moisture with your finger. Check the soil. Water more if dry; less if soggy.
- Day 2: Move your spider plant to a spot with bright, indirect light. Look for less leaf yellowing over the coming week.
- Day 3: Remove any dead or brown leaves. This helps the plant focus energy on new growth.
- Week 1: Repot the plant if its roots are crowded or soil drains poorly. Use a well-draining mix and a pot with drainage holes.
- Week 2: Check for pests like spider mites or aphids. Use an insecticidal soap if you spot tiny bugs or webs.
- Week 3: Keep humidity at 40-60% by misting daily or using a humidifier. Watch for fewer brown leaf edges.
- Week 4: Begin feeding your spider plant. Use a balanced liquid fertilizer every 4-6 weeks during the growing season.
- After 6 Weeks: Assess overall plant health. New leaf growth and less leaf dropping mean your care steps are working.
Frequently Asked Questions
How Often Should I Repot My Spider Plant to Keep It Healthy?
Repot your spider plant every 1 to 2 years to refresh soil and allow growth. Doing this prevents root crowding which can stress your plant and cause dying symptoms.
Can Using Fertilizer Harm My Spider Plant and Cause It to Die?
Yes, over-fertilizing can burn roots and harm your spider plant. Use a balanced fertilizer at half strength only during spring and summer to avoid damage.
Is It Normal for Spider Plants to Lose Leaves as They Grow?
Losing some older leaves is normal as the plant grows. Remove yellow or dead leaves promptly to keep the plant healthy and encourage new growth.
Can Spider Plants Tolerate Cold Drafts or Sudden Temperature Changes?
No, spider plants dislike cold drafts and rapid temperature shifts. Keep spider plants away from windows or doors that open to cold air.
Cold drafts can cause stress and make leaves die. Avoid placing them near these areas to keep leaves healthy.
Does the Type of Water I Use Affect My Spider Plant’s Health?
Yes, tap water with high chlorine or fluoride can harm spider plants. Use filtered or distilled water if you notice leaf tip browning or poor growth.
Should I Mist My Spider Plant Leaves Regularly to Improve Humidity?
Occasional misting helps, but it’s not enough alone to raise humidity significantly. Grouping plants or using a humidifier works better for spider plants in dry air.
Before You Go
A spider plant often shows clear signs when it’s unhappy. But you can fix these with proper care.
Acting quickly helps your plant recover faster and look better. Check your plant today and start the steps to bring it back to life.