How Deep to Plant Potatoes in Containers: A Complete Guide for Healthy Harvests
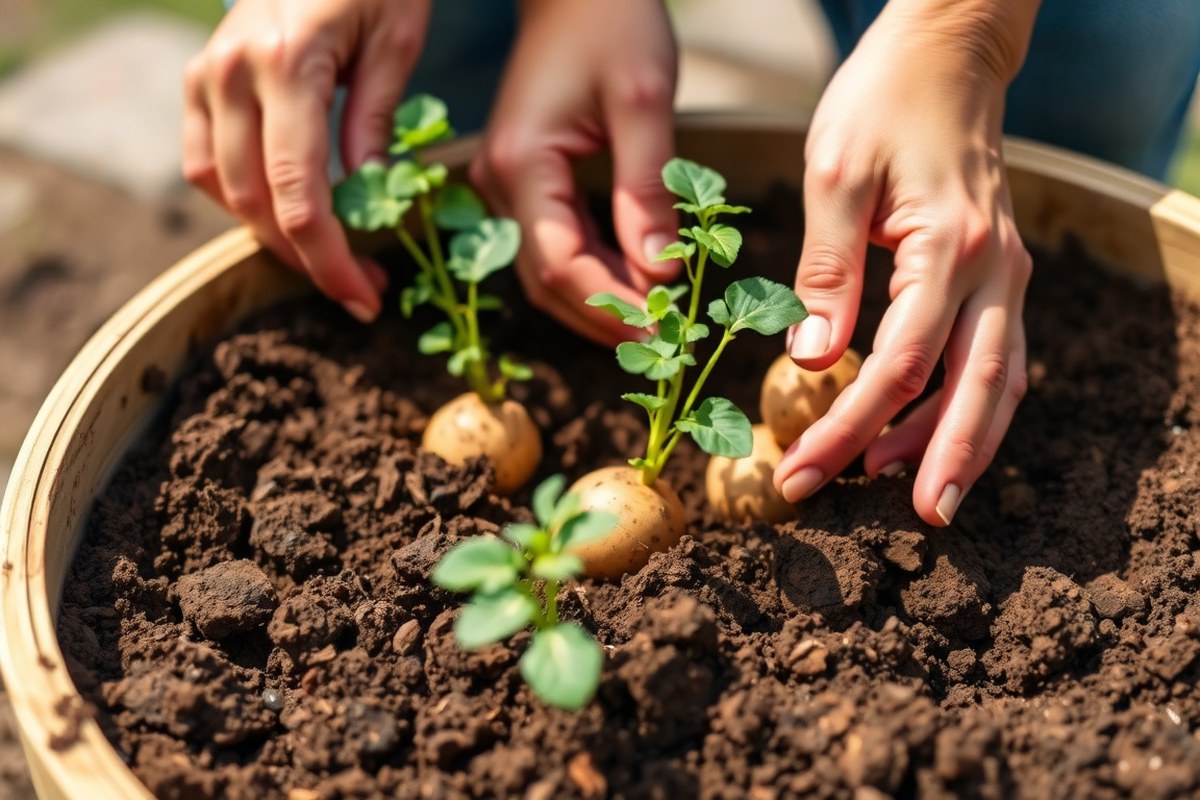
How deep to plant potatoes in containers is a common question for growers. Plant seed potatoes about 4 to 6 inches deep in loose, well-draining soil for best results. This depth gives those tubers enough space to sprout and grow healthy roots without rot risk.
Start by filling your container with 4 to 6 inches of rich soil or compost. After planting, cover seed potatoes with 4 inches of soil. This protects the shoots as they grow.
Use soil or potting mix for covering. Keep soil moist but not soggy to avoid rotting tubers.
Make sure your container is at least 14 inches deep with good drainage holes. Plant potatoes 1 or 2 weeks before your last frost. Soil temperature must be 40°F or higher.
This helps the potatoes start growing well. This helps them sprout right on time for spring weather.
Key Takeaways
- Plant seed potatoes 4 to 6 inches deep in loose, well-draining soil.
- Fill the container with 4 to 6 inches of rich soil before planting.
- Cover seed potatoes with 4 inches of soil or potting mix after planting.
- Choose containers at least 14 inches deep with good drainage holes.
- Plant 1 to 2 weeks before the last frost once soil is about 40°F.
- Keep soil moist but avoid waterlogging to prevent tuber rot.
How Deep Should You Plant Potatoes in Containers?
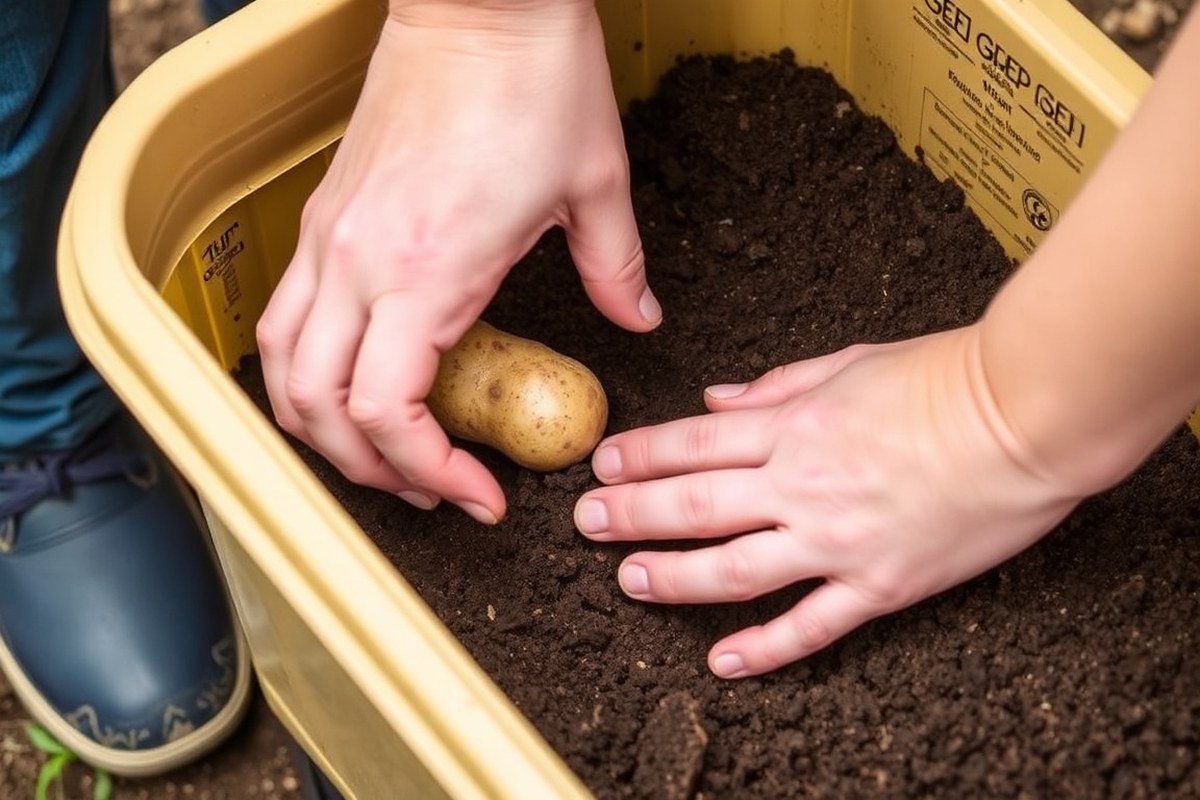
Plant seed potatoes in containers at least 14 inches deep. Bury them 4 to 6 inches deep. This helps the potatoes grow well.
Start with 2 to 3 inches of soil at the bottom. Place the potatoes sprout-side up on the soil. Cover them with 4 inches of soil.
This depth helps roots grow properly and protects tubers. It stops tubers from drying out or getting light. Light can make potatoes green and bitter.
Container size matters because smaller pots hold less soil. Less soil can stress plants if potatoes are too deep. Planting depth should match pot size.
In a container 10 to 15 gallons in size, 4 to 6 inches is ideal. This leaves room to add soil as the plants grow. For very deep containers, planting 6 to 8 inches deep works well.
Don’t bury potatoes deeper than 8 inches in containers. Deep planting makes it hard for shoots to reach the surface. Keep them shallow enough to grow up well.
Potatoes planted too shallow may develop green tubers or get sunburned, reducing quality and safety. Planting too deep slows potato growth and wastes space. It also increases rot risk if soil stays too wet.
Keep the soil depth balanced. Place potatoes on 2 to 3 inches of soil first.
Cover with 4 inches of loose soil after planting. Add more soil as sprouts grow, reaching 10 to 12 inches total.
Choosing the Right Container Size and Soil Depth for Potatoes
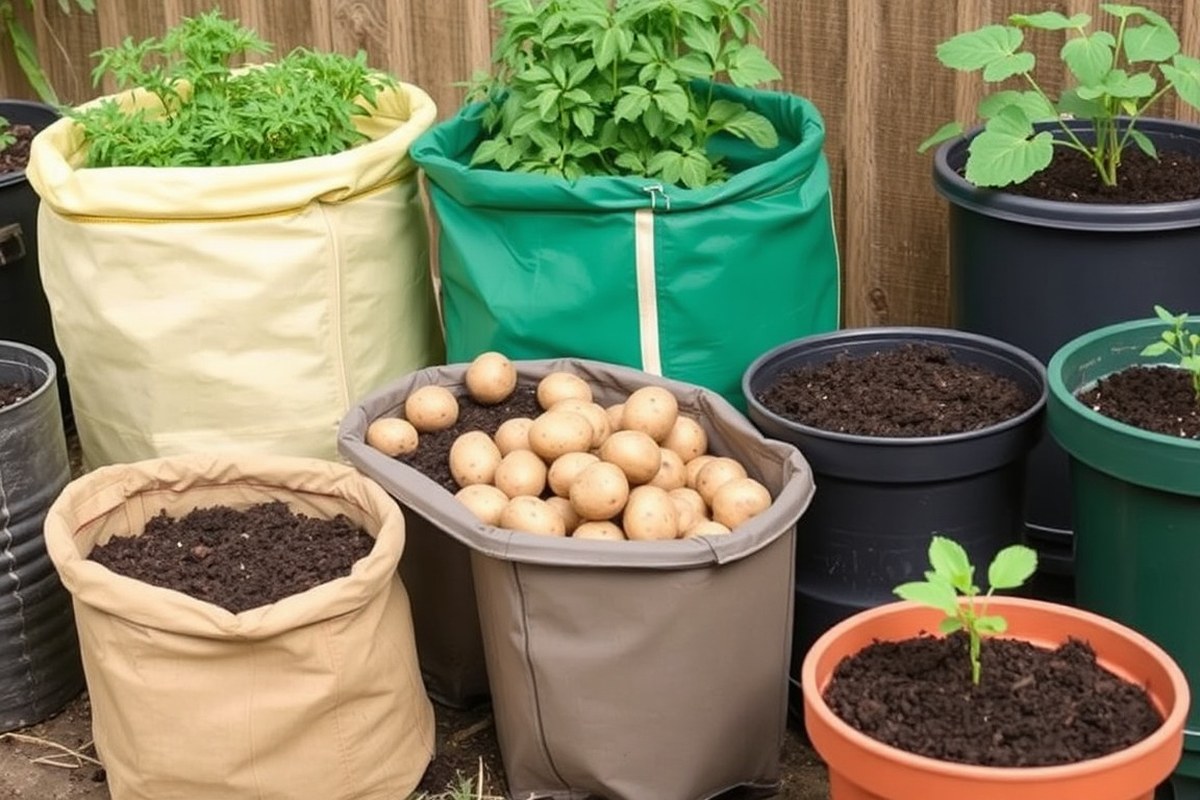
Container size and soil depth are the backbone of healthy potato growth. Potatoes need enough space below ground to expand their roots and tubers. Early potatoes do best in shallower containers since they grow fast and get harvested sooner.
Late potatoes require deeper containers because they take longer to mature. Fill the container with at least 6 inches of soil over the potatoes. This depth helps tubers grow properly.
It provides enough space for roots to spread. Choose a container at least 12 inches deep for potatoes.
It supports the root system well. The depth also allows you to hill soil as plants grow.
Size also drives how many seed potatoes you plant. A 12-inch diameter pot can hold about 3 seed potatoes spaced evenly. Larger containers hold more potatoes and produce bigger harvests.
But you’ll need deeper soil to match. Try to find containers at least 12 inches deep and 12 inches wide.
| Container Size | Depth of Soil (inches) | Potato Type | Seed Potatoes per Container | Notes |
|---|---|---|---|---|
| 10-inch pot (small) | 5 – 6 | First Early | 2 – 3 | Good for quick harvest, less yield |
| 12-inch pot (medium) | 6 – 8 | Second Early | 3 – 5 | Standard choice, enough depth for tubers |
| 15-inch pot (large) | 8 – 12 | Main Crop (Late) | 5 – 7 | Best for heavy crops, space to hill |
| Grow Bag (medium) | 8 | Any type | 3 – 6 | Provides excellent drainage and soil depth |
Fill containers with quality, moist soil to about 4 to 6 inches deep before planting. Place seed potatoes spaced evenly, then cover with another 5 to 6 inches of soil. This layering gives roots room to spread and tubers space to grow.
Overcrowding seed potatoes in shallow soil reduces tuber size and yield. Space and depth matter.
Remember that planting in a container smaller than 10 inches deep limits root growth. Potatoes might sprout but won’t develop many tubers. Narrow containers stop you from hilling soil properly.
Hilling keeps tubers from turning green. This happens when tubers get too much sun.
Preparing Soil and Seed Potatoes for Container Planting
Start by mixing a loose, nutrient-rich soil blend. Use seed potatoes that have begun sprouting, called chitting, to improve growth. Cutting large seed potatoes into pieces can increase your planting stock.
Mixing Compost, Potting Soil, and Drainage Materials
Good potato soil in containers needs to drain well and stay loose. Use a high-quality potting soil mixed with compost to provide nutrients and organic matter. Avoid regular garden soil because it compacts and may hold diseases.
Adding drainage materials like perlite or coarse sand helps prevent waterlogging. This mix keeps roots healthy and reduces rot risks. Compost also feeds plants as they grow.
Chitting Seed Potatoes for Best Sprouting
Chitting means letting seed potatoes sprout before planting. Place them in a bright, cool spot for 2 to 4 weeks. This encourages strong, short shoots to develop.
Keep the eyes facing up during chitting so sprouts grow evenly. When the shoots reach 1 to 2 inches, the seed potatoes are ready. Chitting speeds up the growing season and improves yield.
Cutting and Curing Seed Potato Pieces Safely
Cut large seed potatoes into pieces if they have 4 or more eyes. Each piece should have at least 1 or 2 eyes. Smaller seed potatoes can be planted whole.
After cutting, leave the pieces in a cool, dry place. Keep them there for 2 to 3 days to cure. This helps prepare them for planting.
This helps form a protective layer over the cut surfaces. Curing lowers the risk of rot and disease in the container.
Handle the seed pieces gently to avoid bruising. Use clean, sharp knives to make cuts. Follow these steps to prepare soil and seed potatoes:
- Mix equal parts potting soil and compost with some perlite for drainage.
- Choose seed potatoes with healthy eyes or sprouts.
- Place seed potatoes with eyes up in a cool, light spot. Leave them there for 2 to 4 weeks. This process is called chitting.
- Cut large seed potatoes into pieces each with at least one eye.
- Allow cut pieces to cure in a dry, airy area for 2 to 3 days.
- Fill your container with the soil mix, leaving space for layering.
- Place chitted seed potatoes or pieces on the soil surface.
- Cover them with 3 to 4 inches of soil and keep soil moist but not soggy.
Planting Seed Potatoes: Sprout Direction, Spacing, and Layering
Positioning Seed Potatoes Properly
Plant seed potatoes with the sprouts facing up. This helps shoots reach the soil surface quickly. When seed potatoes have no visible sprouts, lay them flat.
Planting sprout-up speeds up growth and reduces rot risk. Sprouts grow straight, avoiding tangled stems that waste energy. This positioning works well for all container sizes.
Spacing Guidance Inside Container Dimensions
Keep seed potatoes about 4 to 6 inches apart in containers. This space lets tubers form freely without crowding. It also improves airflow to reduce disease chances.
For a 15-gallon container, plant three to four seed potatoes. This fits well and often yields 10 to 15 or more tubers. Smaller containers need fewer potatoes, spaced evenly for best results.
Safe Layering and Offsetting of Potatoes
You can boost yield by layering seed potatoes inside tall containers. Place one layer of seed potatoes 4 to 6 inches deep. Cover lightly with soil, then add more soil and a second layer.
Set potatoes in the upper layer opposite each other and in gaps below. This offsetting avoids crowding and gives each sprout enough room. Limit layers to two or three to avoid root crowding and poor tuber growth.
Follow these steps for planting seed potatoes with proper sprout direction, spacing, and layering:
- Fill your container with 4 to 6 inches of loose, fertile soil.
- Place seed potatoes with sprouts facing up, spaced 4 to 6 inches apart.
- Cover the first layer with 1 to 2 inches of soil.
- When your container is tall, add more soil and plant another layer.
- Set the second layer’s seed potatoes opposite gaps in the first layer.
- Cover layers with 1 to 2 inches of soil each time.
- Repeat layering up to two or three levels, depending on container height.
- Keep soil loose to let sprout and root growth expand without resistance.
When and How to Hill Potatoes in Containers for Best Depth Control
Start hilling your potatoes when the plants reach about 6 to 8 inches tall. Add enough soil to cover roughly one-third of the plant’s main stems. This helps protect potato tubers and improve yield in containers.
Signs It’s Time to Hill Potatoes
Watch for when your potato plants stand around 6 to 8 inches tall. At that height, they need extra soil to cover their lower stems. Adding soil then stops tubers from getting exposed to light.
You may also notice the stems looking a bit thin or fragile near the base. That’s a sign to add soil and support the plant. The soil acts like a shield, keeping tubers cool and safe.
Amount of Soil to Add per Growth Stage
Add enough soil to bury about one-third of your plant’s height each time you hill. That usually means adding 2 to 3 inches of loose soil or straw mulch. Avoid piling soil above the plant’s leaves.
Space your hilling every 7 to 10 days while the plants grow. Each session, gently fill the container without pushing or breaking stems. You can also mix in a small amount of organic fertilizer when hilling.
Adding soil in layers with straw in between keeps it loose. This method helps roots grow better.
Loose soil makes a healthier container garden. This method prevents compaction and saves you re-digging once your potatoes grow.
Stopping Hilling Before Container Overflow
Stop adding soil when it reaches about 1 to 2 inches below the container’s rim. Too much soil risks overflowing during watering or heavy rain. This can cause root rot and stress your plants.
Avoid hilling if your potato plants have flowers. Flowering signals tuber formation is underway, so extra soil won’t help. Let the plants grow naturally from here till harvest.
Ensure container size matches your hilling plan during planting. Small pots fill too quickly, leaving no room for proper soil buildup as potatoes grow. Follow these steps to hill potatoes in containers correctly:
- Check potato plant height, ensure stems are 6, 8 inches tall.
- Gently add 2 to 3 inches of loose soil around stems.
- Include straw layers between soil for better aeration.
- Add a small dose of organic fertilizer, like pelleted potato feed.
- Repeat hilling every 7 to 10 days while plants grow taller.
- Stop hilling when soil reaches 1, 2 inches below container rim.
- Avoid hilling once plants start flowering.
Handle potato stems carefully while adding soil to avoid snapping them. Breaking stems can delay growth.
Common Mistakes When Planting Potatoes in Containers and How to Fix Them
Planting potatoes too deep in containers often causes rot and stunted growth. Yellow leaves or mushy stems near soil means potatoes are too deep.
Roots might struggle to access oxygen. Tubers can rot without good drainage or light.
Planting too shallow leaves tubers exposed. These dry out or get damaged. Plants may look weak or fail to produce well.
Plant seed potatoes 4 to 6 inches deep. Use loose, well-draining soil. This depth usually works well.
Poor drainage is a common problem in container potato gardening. Containers without enough drainage holes hold water, making the soil soggy.
This sogginess kills seed potatoes before they sprout or causes rot later. Fix this by choosing containers with many drainage holes or drilling extra ones yourself.
Overcrowding seed potatoes in a container limits soil volume and air circulation. Roots compete for nutrients and space, producing small or few tubers.
Tangled stems or crowded leaves mean plants need thinning. Try bigger containers next time.
- Check drainage holes before planting and add more if needed
- Plant seed potatoes 4 to 6 inches deep for optimal growth
- Use loose, well-draining soil to prevent soggy conditions
- Thin plants if they are too close to improve air flow
- Choose a container with at least 12 inches depth to allow root growth
- Remove rotted or diseased tubers immediately to stop spread
- Water evenly but do not let soil stay soggy
When dealing with rot, gently remove affected tubers to protect healthy ones. Avoid digging deep around plants to limit damage.
For overcrowding, transplant some small plants to another container or space. Adding fresh, dry soil on top can improve conditions if soil seems compacted or wet.
How Container Depth and Soil Temperature Affect Potato Growth
Potatoes grow best when soil temperature stays between 45°F and 70°F. Cooler soils slow sprout growth. Warmer soils can stress plants.
In containers, soil temperature can change quickly. So depth plays a key role in keeping it stable.
Deeper containers hold more soil, which warms up slower but stays cooler longer. Shallow containers heat and cool fast, causing more stress on seed potatoes. Aim for at least 12 inches of soil depth.
This keeps root zones steady. It helps keep the temperature just right.
Container color also affects soil heat. Dark-colored containers absorb more sun and warm soil faster.
Light-colored containers reflect sunlight and keep soil cooler during hot days. Pick container color based on your local climate, dark for cooler areas, light for warmer spots.
| Container Depth | Soil Temperature Fluctuation | Planting Depth Advice |
|---|---|---|
| Less than 8 inches | High, quick heating and cooling | Plant shallower; protect from heat spikes |
| 12 to 18 inches | Moderate, stable temperatures | Ideal balance for healthy growth |
| Over 18 inches | Low fluctuation; cool soil | May need earlier planting in cool climates |
In cool climates, a deeper container helps keep soil warm longer. Start potatoes in a warmer spot or add clear plastic over the container to raise temperature. In hot climates, use light-colored containers and some afternoon shade to avoid overheating.
Soil temperature can also depend on weather and time of day. Check it with a soil thermometer placed about 4 inches deep. Plant potatoes when the soil reaches at least 45°F to avoid rotting or slow growth.
Container depth and soil temperature work together. Correct depth stabilizes heat, while container color controls warming speed. These factors show how deep to plant seed potatoes.
Planting depth supports strong roots. It also helps tubers develop well.
Harvest Timing and Yield Expectations Based on Planting Depth in Containers
Planting depth in containers affects when your potatoes mature and how many you get. Early potatoes need about 10 to 12 weeks to grow. Plant them around 4 inches deep in shallow soil.
This suits quick harvesting times. Late potatoes need 120 to 135 days to mature.
They grow better about 6 inches deep in containers. This works well with enough soil depth.
Deeper planting often leads to better yields by giving tubers room to grow. Each seed potato can produce 5 to 6 potatoes. You typically get about 7 pounds per container.
Some years, harvests reach up to 13 pounds. However, pushing planting depth beyond 6 inches doesn’t always help and may slow early sprouting.
- Plant early potatoes 4 inches deep for faster harvest (10, 12 weeks)
- Use 6 inches depth in deep containers for larger late potatoes
- Harvest when leaves turn yellow or start dying back
- Gently dump container contents to avoid damaging tubers
- Black containers absorb heat faster, speeding growth
- Late potatoes take roughly 120, 135 days to mature
- Check soil moisture to keep potatoes from drying out
Watch your plants for when the vines yellow and die back, that’s the signal to harvest. Gently dump the container into a wheelbarrow to collect tubers without bruising. Using black containers helps speed up maturity by soaking in more sunlight.
Planting potatoes deeper in containers can increase yield. However, plants take longer to sprout and grow. This adds time before harvest.
Don’t wait too long to harvest; overripe potatoes in containers risk rot or sprouting.
Step-by-Step Action Plan for Planting Potatoes in Containers
Follow these clear steps to plant potatoes at the right depth and get a good harvest.
- Before you start: Pick a container at least 12 inches deep. Fill it with loose soil that drains well. This gives potatoes room to grow and prevents waterlogging.
- Day 1: Cut seed potatoes into pieces with at least one sprout each. Let them rest for 2 days to form a callus and avoid rot.
- Day 3: Plant the seed potatoes 4 inches deep with sprouts facing up. Space pieces about 6 inches apart to prevent crowding.
- Week 1 to 2: Water gently and keep soil moist but not soaked. Check that soil stays around 60 to 70°F for good sprout growth.
- Week 3: Start hilling by adding soil or mulch up to 2 inches over the plants. This shields new tubers from light and encourages more potatoes.
- Weeks 4 to 7: Repeat hilling every 1 to 2 weeks, adding soil as plants grow. Stop when soil reaches about 12 inches deep.
- After 10 to 12 weeks: Watch leaves yellow and die. This signals potatoes are ready. Carefully dig around the edges to check size without disturbing plants too much.
- Harvest time: Remove the entire plant from the container. Store potatoes in a cool, dark place to keep them firm longer.
Frequently Asked Questions
Can I Plant Multiple Seed Potatoes at Different Depths in the Same Container?
Yes, you can layer seed potatoes at varied depths in large containers. This helps increase yield by giving each potato room to grow upward as you add soil.
Should I Soak Seed Potatoes Before Planting in Containers?
Soaking seed potatoes overnight isn’t necessary but can speed sprouting. It softens the skin and boosts moisture, which helps shoots appear faster after planting.
Does Planting Depth Affect How Quickly Potatoes Sprout in Containers?
Yes, shallower planting can lead to faster sprouting because shoots have less soil to push through. Keep the depth at 4-6 inches for balanced growth.
Can I Plant Potatoes Closer Together in Small Containers?
You shouldn’t crowd seed potatoes even in small containers. They need space to grow tubers and roots. Keep about 6 inches apart for best results.
Will Planting Potatoes Too Shallow in Containers Increase the Risk of Disease?
Planting too shallow can expose tubers to sunlight, causing greening and possible disease. Cover seed potatoes by at least 2 inches of soil to prevent this.
How Often Should I Add Soil to Hill Potatoes in Containers After Planting?
Add soil every few weeks as green shoots grow. This protects tubers and encourages more to develop around the stems for a bigger harvest.
Before You Go
Planting seed potatoes about 4 inches deep in a container is best for growth and yield. Keep adding soil gradually as the plant grows to protect tubers and boost harvest size.
Choose the right container to begin your potato crop. Water carefully and hill the plants as needed.