How to Take Care of a Peace Lily: A Complete Guide with Proven Tips
How to take care of a peace lily is a common question for indoor gardeners. Give it medium indirect light and water every 7 to 10 days. Wait until the top inch of soil feels dry before watering again.
Keep humidity between 50 and 70 percent. Maintain room temperatures from 65 to 85 degrees Fahrenheit. These conditions help your peace lily thrive without too much fuss.
Pick a pot slightly bigger than the root ball. Make sure the pot drains well. This helps stop water buildup and root issues.
Watch for drooping leaves or brown flower tips as signs your plant needs attention. Deadhead spent flowers to keep your peace lily looking fresh. With simple care, your peace lily can brighten your space for years.
Key Takeaways
- Let the soil dry about an inch before watering again. Check by touch to know when it’s time to water. Avoid watering on a regular schedule without inspecting soil first.
- Place your plant in medium indirect light, avoiding direct sun.
- Maintain humidity at 50 to 70 percent for healthy leaves and blooms.
- Keep room temperature steady between 65 and 85 degrees Fahrenheit.
- Choose a pot just 1 to 2 inches larger than the root ball.
- Remove dead flowers promptly to encourage new blooms.
How to Water and Monitor Soil Moisture Correctly
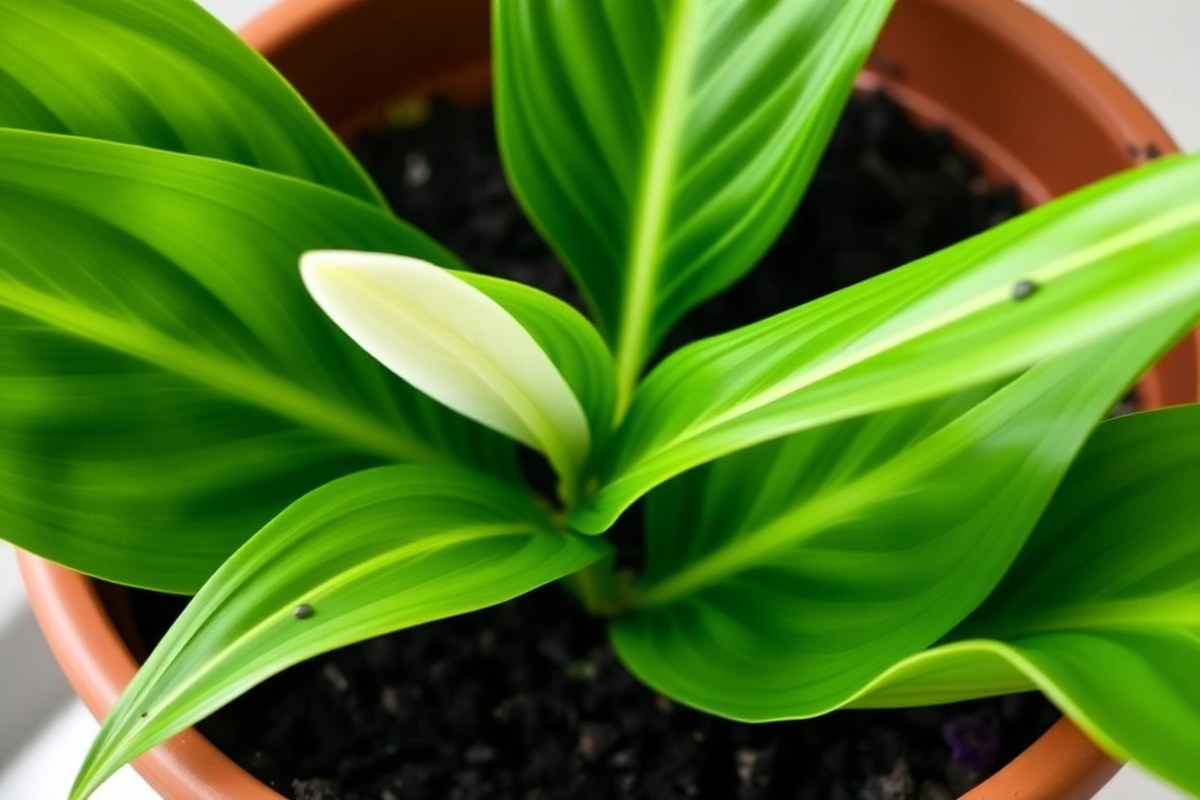
Water your peace lily every 7 to 10 days during spring and summer. In cooler months, stretch watering to every 10 to 14 days.
But don’t rely only on a schedule; instead, check the soil moisture before watering. Peace lilies prefer soil that stays moist but not soggy.
To decide when to water, test the top inch of soil. When the soil feels dry, you should water your peace lily.
Use your finger or a wooden skewer to check the soil. Insert it about 1 inch (2.5 cm) deep to test moisture.5 cm) deep for an accurate feel of its dampness.
Use filtered, rain, or tap water that has sat for 24 hours. The wait lets chlorine evaporate and reduces salts, which can harm your plant. Avoid hard tap water because it can cause brown leaf tips due to mineral buildup.
Overwatering can cause root rot, leading to drooping even if soil is wet. Your peace lily wilts even if soil stays moist. Check roots for softness or smell for rot.
Underwatering causes drooping leaves that perk up after watering. Brown tips on leaves can also signal watering issues.
Follow these steps to check soil moisture and water your peace lily properly:
- Insert your finger into the soil about 1 inch (2.5 cm) deep near the stem.
- Feel if the soil is dry or still moist. Only water if the top inch is dry.
- Water slowly until water drains out the pot’s bottom holes.
- Empty any excess water from the saucer after 30 minutes to prevent root rot.
- Use room temperature water to avoid shocking the roots.
- Let tap water sit in an open container 24 hours before using it.
- Adjust watering frequency in winter to avoid overwatering during slower growth.
Ideal Light, Temperature, and Humidity Conditions

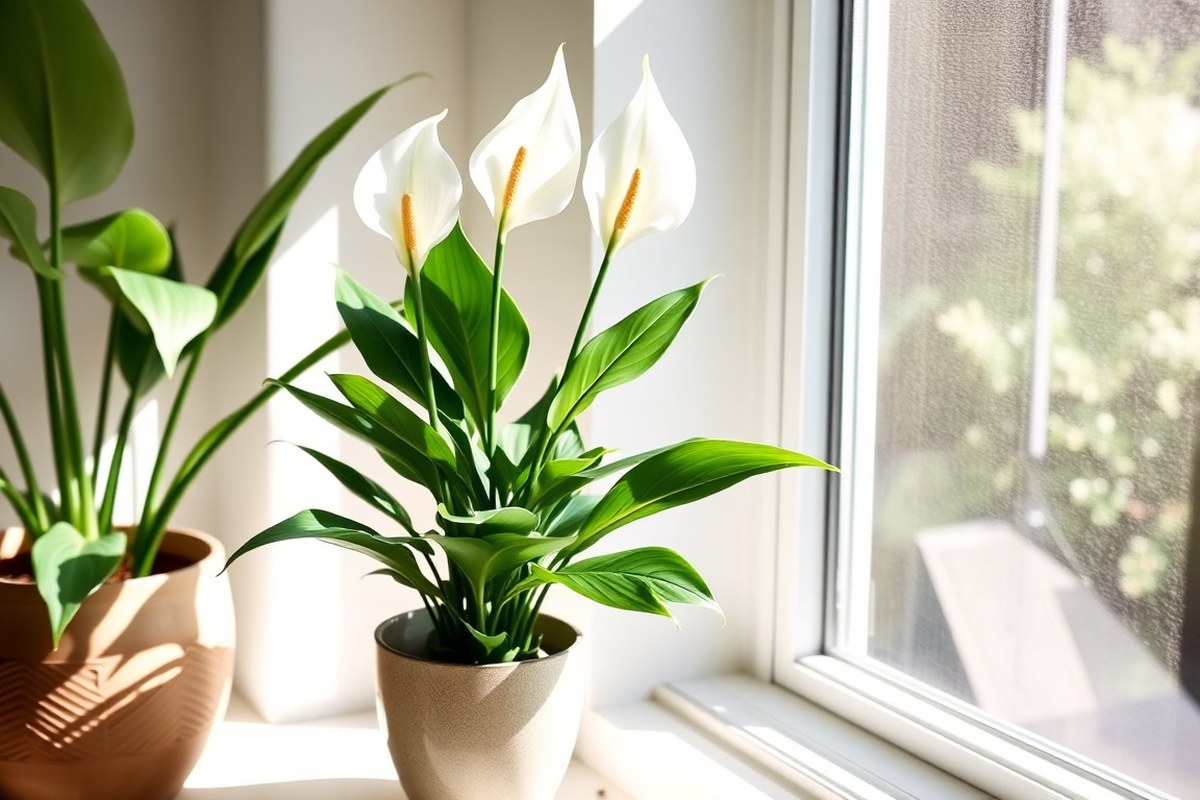
Your peace lily does best with medium, indirect light, stable moderate temperatures, and humid air. Place your peace lily where it gets bright, filtered light. Keep it away from cold drafts and hot vents.
Avoid direct sunlight to protect the leaves. Increase humidity around your plant to stop brown tips.
This is important when indoor air is dry in winter. Use a humidifier or mist the leaves often.
Preferred Light Levels Explained
Peace lilies thrive in medium indirect light, about 1,000 to 1,500 foot-candles. This usually means placing the plant a few feet away from a north or east-facing window. It avoids direct sun rays that can scorch leaves but receives enough light to stay healthy.
In lower light rooms, peace lilies still survive but bloom less often. Use a full-spectrum LED grow light 12 to 18 inches above your plant. Keep the light on for 12 to 14 hours each day.
This helps during darker months without natural sun. Aim for bulbs rated 5,000 to 6,500 Kelvin to simulate daylight.
You can place the peace lily in a shaded corner. It will still do fine with indirect light if you like the leaves more than flowers.
Clemson University notes peace lilies can flower in dim areas. But more light encourages better blooms.
Optimal Temperature Ranges
Keep the room temperature between 65 and 85 degrees Fahrenheit. That equals about 18 to 29 Celsius. This range supports healthy plant growth.
This matches what people find comfortable and keeps the plant stress-free. Avoid letting temperatures drop below 60 degrees or rise above 85 for long periods.
Don’t put your peace lily near cold drafts or outside walls in winter. Avoid air conditioning vents during summer too. These spots stress the plant.
Sudden chills or shifts in temperature can trigger leaf damage. In cooler months, peace lilies tolerate slightly lower temps if humidity and light are steady.
Practical Ways to Boost Humidity
Peace lilies like humidity between 50 and 70 percent to keep leaf tips from browning. Put a pebble tray filled with water under the pot. Make sure water stays below the pebbles to avoid root rot.
This raises humidity gently around the plant. This method raises humidity without soaking the soil or causing root rot.
Daily misting also helps by adding moisture to the air around the leaves. Another option is placing a small humidifier nearby, which works well in dry winter homes. Grouping your peace lily with other plants naturally increases local humidity too.
Never place your peace lily in direct contact with cold drafts or air conditioning vents.
Choosing the Right Soil and Potting Setup
Use well-draining, organic-rich soil in a pot slightly bigger than your peace lily’s root ball. Prepare pots with drainage holes to avoid root rot. Choosing the right materials and sizes helps your lily grow healthy roots and leaves.
Recommended Soil Types and Mixes
Pick a potting soil that holds moisture but drains well, like a peat-free houseplant mix. Organic Mechanics Premium Blend Potting Soil is popular as it balances moisture retention and air flow. Avoid heavy or clay-based soils that trap water and cause rot.
Mix in some organic compost if possible to add nutrients. The soil should feel light but crumbly, not dense or soggy. This mix supports healthy root growth and helps your peace lily absorb water evenly.
Selecting the Optimal Pot Size
Use a pot twice as wide as the root ball. Usually, this means 6 to 12 inches diameter. This size helps the peace lily grow well.
Choose pots only a few centimeters larger than the current one if your lily isn’t root-bound. Bigger pots hold extra moisture, which can harm the roots.
Pick a new container just a bit bigger for each division’s roots. Repotting every few years suits most peace lilies because they like to be a little root-bound. Match pot size to your plant’s current root system size.
Best Pot Materials for Peace Lilies
Plastic and ceramic pots both work well, but each has pros and cons. Plastic pots hold moisture longer and weigh less, making it easier to move your plant. Ceramic pots are heavier, low-maintenance, and often breath better but dry out faster.
Avoid metal pots since they can heat up and damage roots. Pick a pot material that matches how often you water. Plastic holds moisture longer if you water less.
Ceramic dries out faster and suits frequent watering. Make sure any pot you pick has drainage holes at the bottom.
Ensuring Proper Drainage
Drainage holes stop water from pooling at the pot bottom and hurting roots. Place a small layer of fresh soil or coarse material like gravel at the pot bottom. This keeps water moving and prevents root rot by letting excess drain out quickly.
Check drainage holes aren’t blocked when repotting. Choose a pot with drainage holes or drill some carefully if needed.
Use well-draining soil and a pot with drainage holes. This combo helps your peace lily thrive.
When and How to Repot Your Peace Lily
Your peace lily needs repotting when roots come out of drainage holes. The plant also looks tight or crowded in its pot. Both signs show it needs more space now.
Also, check if water drains very slowly; that often means compacted or old soil. Repotting every 2 to 3 years in spring refreshes nutrients and gives roots space to grow.
Before starting, water the plant about 12 hours earlier. This softens the soil, making it easier to remove the root ball. Handle the roots gently to avoid transplant shock, which slows recovery and growth.
Follow these steps to repot your peace lily properly:
- Choose a pot 2 inches wider in diameter than the current one, with drainage holes.
- Fill the new pot’s bottom with fresh, well-draining potting mix designed for houseplants.
- Loosen the soil and roots carefully before taking your peace lily out of its pot. Handle the plant gently to avoid damage during removal. Use your hands to ease it out slowly.
- Inspect roots and trim any black or mushy parts with clean scissors.
- Place the plant in the new pot, adding soil around roots to fill gaps.
- Press soil lightly to remove air pockets but do not compact it too tightly.
- Water thoroughly until water runs from drainage holes to help soil settle.
- Keep the pot in a warm, shaded spot for a few days to reduce stress.
After repotting, water your peace lily only when the top third of soil dries out. Avoid fertilizing for several weeks until you see new growth. Avoid direct sunlight to lessen stress while the plant recovers.
Watch for drooping leaves during the first week; this usually improves with proper care. Brown leaf tips can signal overwatering or nutrient issues.
So stick to a consistent routine. Treat new soil carefully, so roots get enough air and moisture after repotting.
Fertilizing Peace Lilies for Healthy Growth and Blooms
Feed your peace lily every 6 to 8 weeks during spring and summer. Use a balanced, water-soluble fertilizer with equal parts nitrogen, phosphorus, and potassium. This supports lush leaves and helps the plant produce its white blooms.
Choose fertilizer labeled for houseplants or one with N-P-K values like 20-20-20. Dilute it to half the strength recommended on the package. Stronger doses can stress your peace lily and cause brown leaf tips.
Signs of overfeeding include yellow, crispy edges on leaves and stunted growth. Underfeeding can make leaves pale green and reduce blooming. Watch your plant closely after fertilizing to catch these symptoms early.
Homemade fertilizer can work cautiously if it offers gentle nutrients. Compost tea or diluted fish emulsion are popular options.
But avoid anything too strong or salty. Always test on a small part of the plant first.
Use fertilizer when soil is moist, not dry. Water your peace lily a day before feeding or feed after usual watering. This prevents root damage from concentrated fertilizer salts.
Never fertilize your peace lily in winter when it rests. This can cause fertilizer buildup and harm roots.
Propagating and Dividing Peace Lilies Safely
Propagating peace lilies happens best by dividing the clumps in spring. You want to separate healthy roots so each new plant thrives. After division, keep soil moist and watch for mild drooping, a normal transplant shock.
Tools and Preparation for Division
Before you start, gather a sharp knife or garden shears and some clean pots. Use a potting mix that drains well but holds moisture. Prepare a shady spot inside to keep your new divisions safe from direct sun.
Spring is the best time to divide peace lilies. The plant is growing actively and recovers faster. Avoid dividing when the plant is flowering to prevent stress.
Step-by-Step Division Process
Separating your peace lily into smaller plants takes care and patience. Each division should have enough roots and leaves to grow on its own. Follow these steps carefully for the best results.
- Water the peace lily a day before dividing to ease root removal.
- Gently remove the plant from the pot, keeping the root ball intact.
- Loosen the soil around the roots carefully with your fingers.
- Look for natural clumps or offsets that can be separated.
- Cut through thick roots with your knife or garden shears.
- Make sure each division has at least 3-4 leaves and firm roots.
- Plant each division into its own pot filled with fresh potting mix.
- Water each new plant thoroughly, then place them in indirect light.
Caring for New Plants After Division
Keep the soil moist but avoid soggy conditions for the first few weeks. Don’t expect too much growth immediately; mild drooping is normal after dividing. Move your new plants to a darker spot if the light seems too strong.
Give the new divisions about 1-2 days to adjust. Avoid fertilizing right after dividing. Resume feeding once you see signs of active growth, usually after a month.
Signs of Successful Propagation
Healthy new leaves appearing after 3-4 weeks show your division worked well. Roots filling the new pot without signs of rot confirm success. Watch for steady leaf color and no drooping beyond the first couple of days.
Your peace lily divisions will grow stronger over time if cared for. Avoid letting the soil dry out or drain too much. Keep an eye out for pests, as weaker plants attract bugs more easily.
Common Problems, Their Causes, and Fixes
Brown leaf tips usually appear when your peace lily is too dry or over-fertilized. When soil dries out too long, leaf tips will turn crispy. Over-fertilizing can cause leaf tips to burn and brown as well.
You don’t need to worry about those brown tips hurting the plant. You can trim just the brown edges with clean scissors to keep the plant looking neat.
Yellow leaves often show your peace lily’s light or watering problem. Too much light or soggy soil causes leaves to yellow. Check these two first.
Peace lilies prefer lower light, so move it away from direct sunlight. Check the soil moisture. Constantly wet soil causes root rot, which also results in yellowing leaves.
When more than a third of leaves turn yellow, gently lift the plant. Check its roots for signs of trouble.
Healthy roots look white or light tan and are firm. Rotten roots are dark, mushy, and smell bad. Spot root rot?
Cut off the bad roots using clean, sterile scissors. Replant your peace lily in fresh, well-draining soil.
Water carefully to keep soil moist, not soggy. Using a pot with drainage holes also helps avoid future rot.
Pests like spider mites, aphids, and mealybugs sometimes attack peace lilies. Look for tiny webs, sticky residue, or small insects on leaves. Wiping leaves with a damp cloth and using insecticidal soap can clear pests.
Repeat treatments every week until bugs disappear. Isolate the plant to stop pests from spreading to others.
Your peace lily looks sick? Start by checking light, water, and soil. Adjust watering by feeling soil 1 to 2 inches deep.
It should feel slightly moist, never dry or soggy. Cut away damaged leaves and watch for new growth in weeks. Healthy leaves are shiny and vibrant green.
Growth stalls or problems stay? Try repotting to refresh roots and soil.
Differences Between Common Peace Lily Varieties
Peace lily varieties differ mainly in size and leaf or flower traits. Their growth rates vary, so you pick one that fits your space. Smaller types fit desks or shelves well, while taller ones thrive on the floor.
| Cultivar | Size | Notable Trait |
|---|---|---|
| S. Wallisii | 12, 18 inches | Most common houseplant variety |
| S. ‘Mauna Loa’ | 3, 4 feet | Popular office plant; large blooms |
| S. ‘Sensation’ | 4, 6 feet | Largest cultivar; deeply ribbed leaves |
| S. ‘Domino’ | 18, 24 inches | Variegated white-streaked leaves |
| S. ‘Piccolino’ | 10, 12 inches | Dwarf; ideal for terrariums |
| S. ‘Power Petite’ | 12, 15 inches | Compact; prolific bloomer |
Smaller varieties like ‘Piccolino’ and ‘Power Petite’ do well in tight spots or terrariums. Larger types such as ‘Sensation’ suit bigger rooms or offices. You need a deeper pot for taller plants to support root growth and stability.
Leaf care depends on the variety. Big leaves of ‘Sensation’ collect dust fast, so wipe them gently weekly. Smaller leaves need less attention but check all plants early for pests.
Peace lilies share similar light and watering needs. But bigger plants may drink water faster.
Dust your peace lily leaves with a damp cloth to keep them clean and healthy.
Growth speed differs among these types. ‘Mauna Loa’ and ‘Sensation’ grow faster under good light. So expect to repot them more often.
Compact ones like ‘Domino’ remain slow and steady. Adjust watering slightly; larger plants use more water and dry out sooner.
Step-by-Step Action Plan for Your Peace Lily
Follow these steps to keep your peace lily healthy and happy from day one. Check your plant often for signs it’s thriving.
- Day 1: Place your peace lily in medium, indirect light. The leaves should look bright but not bleached.
- Week 1: Check the top inch of soil and water only when dry. Keep the soil moist without making it too wet or dry.
- Week 2: Check humidity and temperature. Aim for 65% humidity and 65 to 80°F. You should feel comfortable around your plant.
- Week 3: Start feeding with a balanced, diluted fertilizer once a month. Watch for slow but steady growth and shiny leaves.
- Month 2: Look for new leaves or blooms as a sign of healthy growth. Adjust watering and light if the leaves look droopy or dull.
- Month 3: Consider repotting if roots crowd the pot or soil looks worn. Use fresh potting soil designed for indoor plants.
- Every month: Clean the leaves with a damp cloth to remove dust. Clean leaves help your plant breathe and soak up light.
Frequently Asked Questions
Where Is the Best Place to Put a Peace Lily in a House?
Put your peace lily in medium indirect light. Avoid direct sun to stop leaf burn. A north or east-facing window often works well.
Should I Cut the Brown Tips Off My Peace Lily Leaves?
Yes, trim brown tips with clean scissors to improve appearance. Check for causes like low humidity or over-fertilizing to fix the issue.
How Long Do Potted Peace Lilies Last?
Peace lilies can live several years with good care. Regular watering and proper light help them thrive and even bloom repeatedly.
How Often Should I Water Peace Lily?
Water your peace lily every 7 to 10 days when soil feels dry a inch deep. Overwatering can harm roots, so check soil moisture first.
Can Peace Lilies Grow Well in Water Alone?
Yes, peace lilies can grow in water if roots stay moist without base rot. Use distilled water and change it regularly to avoid mold.
Do Peace Lilies Need Fertilizer During Winter?
Generally, peace lilies need less or no fertilizer in winter. They grow slower then, so feeding can be paused until spring.
The Bottom Line
Your peace lily will reply to care with green leaves and occasional white blooms. Keep checking soil moisture and light levels regularly. Start today by finding the best spot with indirect light for your plant’s new home.