How to Use a Self Watering Planter: Complete Setup, Care & Troubleshooting
How to use a self watering planter is simpler than it seems. You fill its hidden reservoir.
The planter feeds water up to the roots as needed. This reduces overwatering and keeps your plants happier over time.
First, water from the top for a couple of weeks so roots settle in well. After that, rely on the water reservoir to maintain steady moisture levels automatically. Make sure the reservoir is refilled regularly, checking every few days or up to two weeks.
Using the right soil and plants helps the self watering system work efficiently. Avoid heavy soils and choose plants with roots deep enough to reach the water source. Watch for simple issues like clogged wicks or overflow to keep everything running smooth.
Key Takeaways
- Fill the water reservoir fully before planting your self watering planter.
- Water from the top for 1 to 2 weeks to help roots establish.
- Refill the reservoir every 3 to 14 days depending on plant needs.
- Use loose, well-draining soil for better water flow and root health.
- Pick plants with roots deep enough to reach the water reservoir.
- Add a thin wicking layer like coconut fiber to improve water delivery.
What Is a Self Watering Planter and How It Works

A self watering planter has a water tank built into its base. This hidden space holds water so you don’t have to water plants often. Plants take moisture from the tank when they need it, helping them grow well with less effort.
The planter uses a wicking mechanism to bring water from the reservoir up into the soil. The wick is made from a material that soaks up water. It stretches from the water tank into the soil.
This puts water close to the plant’s roots. The wick moves water up by pulling it naturally, not pouring it.
Water flows from the tank to the roots on its own. This method relies on natural attraction between water and the wick.
Capillary action happens because water molecules stick to each other and the wick’s fibers. As the soil dries, it draws water upward, keeping the roots moist without flooding. This method matches water supply to what plants need at the moment.
It stops giving too much or too little water to the plants. This keeps plants happier with just the right moisture.
Self watering planters work best with plants that like steady moisture. Choose soil that’s loose and lets air and water flow easily. This helps the plant roots get water without staying soggy.
Compact or heavy garden soil can block the wicking effect. So a lighter mix helps water move freely.
Some planters include a float or indicator to show water levels. So you know when to refill the reservoir every few days or weeks depending on conditions.
The reservoir size impacts how often you need to fill it. Indoor plants with moderate light might need a refill every 7 to 14 days. Outdoor plants in full sun often need water every 3 to 5 days.
Bigger self watering planters hold more water and need refills less often. They can go for weeks without needing extra watering. This saves you a lot of daily watering time.
How to Set Up Your Self Watering Planter Step by Step

Start by choosing a lightweight potting mix and prepping the soil. Fill the planter’s water reservoir up to the overflow hole.
Plant or transplant seedlings, then water lightly from above to settle the soil. The watering system will then supply moisture from below as the plant needs it.
Selecting and Preparing Potting Mix
Use a lightweight potting mix with good wicking ability. Mix peat or coconut coir with perlite to keep soil airy and moist without sogginess. This combination helps the water move up evenly to the roots.
Keep soil moist but not soaking wet before filling the planter. Dry soil repels water, so pre-moisten the mix to kickstart the wicking system. This avoids dry patches that roots cannot reach.
- Choose peat or coir-based potting mix with added perlite (30 to 50 percent).
- Moisten the mix with water until damp but not dripping.
- Fill the planter’s soil compartment loosely with the moistened mix.
- Leave about an inch of space at the top for watering and planting.
Pre-wetting the soil prevents it from repelling water and helps wicking start fast.
Filling and Testing the Water Reservoir
Fill the water reservoir completely until water spills out the overflow hole. This indicates the reservoir is full and won’t drown the roots.
The reservoir holds enough water for one to two weeks. This depends on the plant type and the environment.
Check for leaks or blockages before planting to ensure steady water flow. Use a hose or watering can to fill the reservoir after setup. Avoid overfilling, as it can cause soggy soil and root rot.
- Locate the reservoir fill hole or watering pipe on your planter.
- Slowly fill the reservoir with water until it reaches the overflow hole.
- Observe water to confirm it drains evenly with no leaks.
- Drain and refill if you suspect any blockages or standing water.
Always fill the reservoir from the designated hole to protect roots from drowning.
Planting and Initial Top Watering
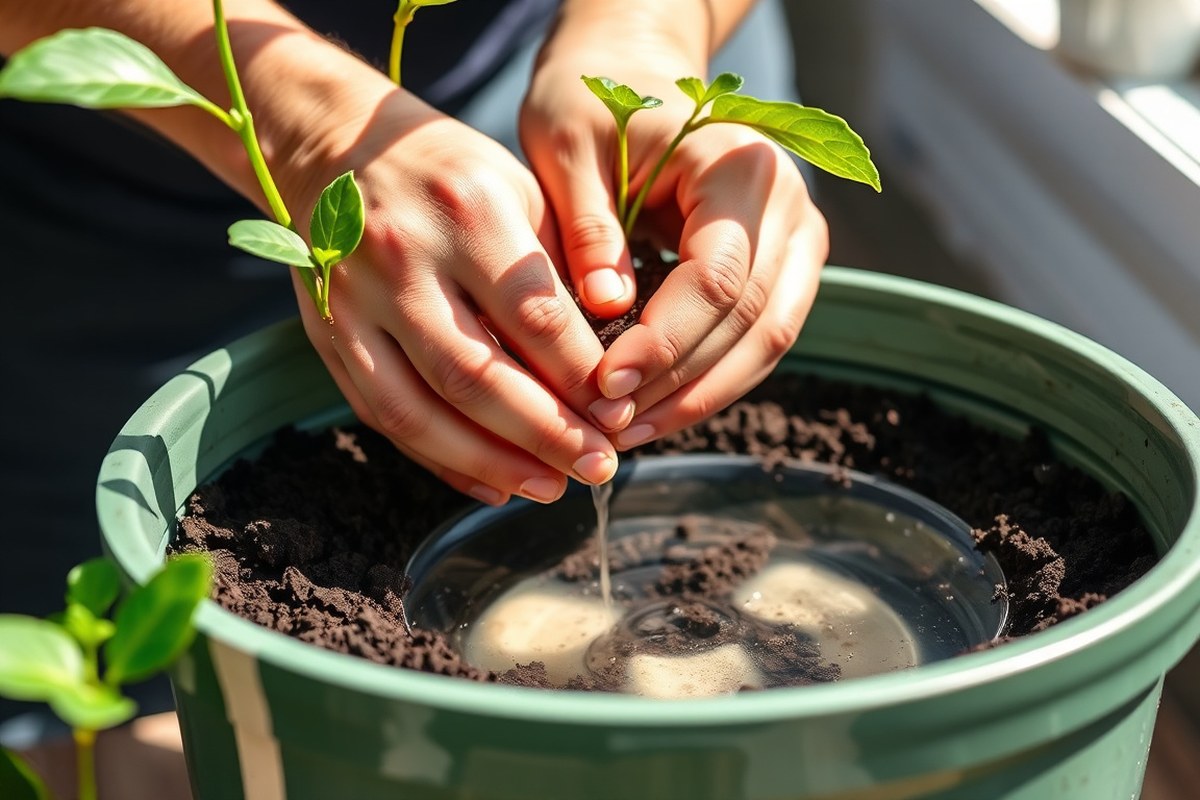
Plant freshly moistened seedlings gently into the prepared soil. Firm soil around roots slightly but do not compact it too much. Leave about an inch of space at the top to prevent overflow when watering from above.
Water lightly from the top right after planting to settle soil around roots. This helps seedlings adjust and ensures root contact with moist soil. Continue top watering for 1-2 weeks before relying on the reservoir system alone.
- Dig holes in the soil for each seedling sized to root ball.
- Place seedlings into holes and fill soil evenly around roots.
- Firm soil carefully with fingers, leaving space at the top.
- Lightly water from the top until soil feels evenly moist.
Top watering after planting settles roots and aids initial growth before wicking begins.
Activating the Wicking System
The soil must be moist and the reservoir full to start wicking. Water moves upward through capillary action to keep roots hydrated. Let the planter regulate its own watering after initial top watering.
During the first month, combine top watering with reservoir filling for best results. Check soil moisture regularly to avoid drying or overwatering. Use burlap-covered pipes or wicking strings if your planter design requires them.
- Fill the reservoir completely after planting and initial top watering.
- Watch soil moisture daily, watering from top if soil dries out quickly.
- Check and refill reservoir when water indicator drops.
- Remove covers or adjust wick placement if water uptake seems slow.
After roots adjust, stop top watering and let the reservoir supply all water.
How Often to Refill and Monitor the Water Reservoir
How often you refill the reservoir varies by plant, location, and planter size. Typically, you refill self-watering planters every 3 to 14 days. Plants that are large, in hot spots, or in small reservoirs need refilling more often.
Some planters come with a water level indicator. You can use it to see when water runs low. Without one, slightly lift the planter or reach inside the fill tube to check water levels.
Plants rarely go weeks without water in a self-watering planter. But aiming to refill once a month keeps moisture consistent and healthy. This approach avoids overwatering and under watering issues.
| Situation | Refill Frequency | Reason & Tips |
|---|---|---|
| Large, leafy plants in sun | Every 3-5 days | Higher water needs, use deeper reservoir |
| Small herbs indoors | Every 10-14 days | Lower water demand, smaller reservoir works |
| Medium plants with standard planter | Every 7-10 days | Moderate water use, check reservoir weight |
| Cool shaded location | Every 14 days | Slower evaporation, less frequent refills |
| Travel or inconsistent schedule | Fill reservoir fully; check monthly | Reservoir lets plants sip water steadily |
Yellow or wilted leaves signal too much or too little moisture. Ensure your planter size fits your plant’s root growth to avoid this. Also, the water should lower noticeably after some days, which means roots are drinking.
Water moves through a wick in many planters. The wick matches planter size and plant water use. A properly sized wick means even water delivery throughout the soil, reducing stress for your plants.
Keep the soil foot under 15% of your planter base. This limits water flow and helps avoid overwatering. Checking your plant and reservoir often saves you from common watering mistakes.
Choosing the Best Plants and Soil for Self Watering Planters
Choose plants that like steady moisture to get the most from self watering planters. Use nutrient-rich potting mix, not garden soil, to ensure proper moisture balance. Plants that need dry periods do better in other pots.
Best Plant Types for Consistent Moisture
Plants that enjoy regular watering thrive here. Leafy greens, herbs, and many fruiting plants grow well with steady moisture from the reservoir. These types benefit from the planters’ ability to reduce watering stress.
Seedlings also do well because they need consistent moisture for root development. A balanced approach to watering helps them get a strong start indoors or in containers.
| Plant Type | Suggested Water Flow |
|---|---|
| Succulents / cacti | Low |
| Herbs (basil, mint) | Medium |
| Leafy greens (lettuce) | High |
| Fruiting plants (tomatoes) | Medium-high |
| Seedlings | Low-medium |
Match water flow to the plant’s needs. Leafy greens need high, while succulents need low. Adjust wicking contact to control moisture around roots for best health.
Plants to Avoid or Use with Caution
Succulents and cacti usually don’t do well in these planters. They like dry soil between waterings, which self-watering planters don’t provide. Too much moisture can lead to root rot in these plants.
Snake plants and other drought-tolerant species have shallow roots. Their roots don’t reach far enough into the soil to use the planter’s water reservoir effectively. Use standard pots instead for these plants.
Recommended Soil Mix Ratios
Use good-quality potting mix that drains well and holds nutrients. Avoid garden soil or any heavy soil that compacts easily. This helps maintain healthy roots and proper moisture levels.
Mix in materials like perlite and coir to keep soil light and porous. A common mix uses 60% potting soil for nutrients and structure. Level the soil to keep moisture consistent around plants.
Preventing and Managing Common Problems
Algae growth in the reservoir happens when light reaches the water. To stop it, keep the reservoir covered and place the planter away from direct sunlight. Cleaning the reservoir every few weeks also helps prevent buildup.
Self watering planters usually lower the chance of root rot by avoiding overwatering. Still, filling the reservoir above the fill line can soak the roots too much. Stick to the recommended water level to keep roots healthy.
When the soil looks dry but the reservoir is full, check the wick. The wicking material might be clogged or broken.
Check the soil just below the surface to see if it’s moist. Loosening the soil gently can help water move upward properly.
- Cover reservoir to block light and prevent algae.
- Refill only to the fill line to avoid waterlogging roots.
- Clean reservoir and wicking system every 2 to 4 weeks.
- Check soil moisture an inch deep, not just the surface.
- Use well-aerated, fast-draining soil mix for healthier plants.
- Avoid watering if the water-level indicator shows full.
- Watch for overly glossy or soggy soil surface as a warning.
Plants like carrots and potatoes need careful attention in self-watering planters. They are more vulnerable to diseases caused by wet soil. Avoid overwatering to keep them healthy.
Using fast-draining mixes reduces this risk. Notice a water-logged surface?
Cut back on watering right away. Also, try to improve the soil drainage.
Always follow your planter’s fill line and avoid topping off the reservoir too often.
Regularly inspect the water level and soil moisture to stop problems early. Checking the reservoir by hand or using a water-level indicator keeps watering on track. Consistently moist soil just below the surface signals the wicking process works as it should.
Adjusting Watering and Care by Season and Environment
Water needs change with heat, light, and humidity. Higher temperatures and strong sunlight make plants use water faster. Hot weather means you might need to water your plants more.
Keep an eye on the soil to make sure it stays moist. Increase the water flow in your self-watering planter during summer.
Winter is different. Plants use less water when it’s cooler and light is weaker. Cut back the reservoir flow by about 20 to 30 percent.
Another way is to fill the reservoir only partway. Either method helps reduce water supply to your plants. This stops the soil from staying overly wet, which can harm roots.
Rain affects your watering plan too. Your plants might get extra water from rain. You can turn off the reservoir for a while to avoid overwatering.
Trust the natural moisture. But watch the soil to avoid dryness once the rain stops.
| Season | Typical Adjustment |
|---|---|
| Summer (high heat, strong light) | Increase the water flow by 10 to 15 percent for hot days. Adding a shade cloth helps cut down on water loss. Both steps help your plants stay hydrated longer. |
| Spring/Fall (moderate conditions) | Maintain baseline flow; watch for sudden temperature spikes |
| Winter (low light, cooler temps) | Decrease the water flow by about 20 to 30 percent to save water. Use the lower flow setting to meet your plants’ needs. This helps prevent excess moisture in the soil. |
| Unusually rainy periods | Turn off the reservoir briefly and use rainwater or natural soil moisture. This gives your plants a break from constant watering. Monitor soil to avoid drying out. |
To adjust the flow, use the valve connecting the reservoir to the wicking layer. Turn it slowly until you see a steady drip. This matches the plant’s moisture needs without waste.
Some plants handle constant moisture well, like herbs and greens. Choose these if you want less fuss.
Other plants need less water and soil that dries out a bit. So pick carefully based on your climate.
In winter, plants lose less water through their leaves. The reservoir may hold too much water if full. Try filling it halfway or use a planter with a removable liner to control moisture better.
Keep an eye on plants between refills. Touch the soil and check leaf health. You can also spray leaves lightly to raise humidity, especially indoors during dry spells.
Troubleshooting and Maintaining Your Self Watering Planter
Poor wicking in your self-watering planter usually points to watering or setup issues. Cleaning the reservoir and soil keeps water flowing and avoids blockages. Some problems need expert advice, especially if plants stay unhealthy after your fixes.
Signs of Poor Wicking and Root Health
Look for dry soil patches near the reservoir or leaves yellowing at the base. These signs hint your plant isn’t getting enough water through the wicking system. A wet surface combined with dry roots also means water isn’t moving up properly.
Check if the plant sits too deep or the root ball is too small. Plants like their roots near the moist wicking chamber. Keep a small gap between the roots and the water line.
This helps roots absorb moisture properly. Heavy soil or plants liking dry soil can block effective water uptake.
- Yellow base leaves
- Dry spots near planter edges
- Wet soil surface but dry roots
- Plant roots not reaching wicking layer
- Overfilled reservoir causing soil sogginess
- Use of heavy soil slowing water movement
Start top watering for 1, 2 weeks after planting. This helps roots grow into the reservoir area. Avoid letting the reservoir or soil fully dry out, or slow wicking might happen again.
Cleaning the Reservoir and Soil Layers
Drain the water reservoir first. Remove the plant carefully and separate the soil layer from the lower water chamber. Use lukewarm water for cleaning, it matches natural rainwater temperature and reduces plant shock risks.
Wash the reservoir with mild soap and scrub to remove any buildup or algae. Rinse thoroughly to avoid soap residue. Replace soil when it smells bad or feels hard.
Bad soil blocks water and stops roots from growing. Fresh soil keeps plants healthy.
- Empty reservoir and remove plant gently
- Separate soil from reservoir
- Clean reservoir with mild soap and lukewarm water
- Scrub algae and mineral deposits carefully
- Rinse well to avoid residue
- Replace soil if compacted or smelling foul
After cleaning, reassemble and add fresh soil. Plant roots should sit near the wetted wicking layer but not too deep. Fill the reservoir and allow water to soak through before planting again.
When to Get Professional Advice
Call an expert if roots look rotten or the plant worsens despite proper watering. A garden center or nursery can diagnose diseases or pest issues that block water uptake. They also advise on better plant choices for your self-watering setup.
Notice yellowing leaves, wilting, or mold on soil. These signs mean you should get help for your plants. Act soon to save them.
Professional advice can prevent plant loss and guide you on fixing planter problems long-term. Some cases need soil testing or root inspections beyond home care.
- Roots showing rot or fungus
- Persistent plant wilting or yellowing
- Soil mold or unusual smells
- Repeated failure to establish healthy growth
- Uncertainty about suitable plant or soil type
Keep notes on your watering habits and plant response before visiting. This info helps experts offer precise advice for your planter’s needs.
Safe and Effective Refilling Techniques
Refilling your self-watering planter without disturbing the plants or soil helps keep roots safe. Using the watering tube means you don’t lift the pot. It helps you add water without spilling soil.
You just top off the reservoir carefully. Pour slowly to avoid overflow, which can waste water and saturate the soil too much.
Many planters have a narrow tube reaching down into the water reservoir. This tube lets you pour water directly where it’s needed. Add water until it nearly reaches the fill line.
Watch for bubbles in the tube. Bubbling shows the reservoir is full.
Use a small watering can with a long spout. You can also try a funnel. These tools help control the water flow.
This prevents spills that make a mess around your planter. Clean spills quickly to avoid fungus or mold near your plants.
- Lift the planter’s lid or locate the watering tube opening carefully.
- Insert a watering can spout or funnel into the watering tube for steady flow.
- Pour water slowly, stopping when bubbles appear or water reaches the fill level.
- Remove the spout or funnel gently to avoid spilling water outside.
- Check soil moisture by feeling the surface; it should feel damp, not soggy.
- Wipe any spills immediately with a cloth to keep the area dry and clean.
- Replace the lid or close the reservoir to keep bugs and debris out.
Never overfill the reservoir; it can saturate the soil and harm your plants.
Step-by-Step Action Plan to Get Started with Your Self-Watering Planter
Follow these steps to set up and care for your self-watering planter. You’ll see your plants stay healthy and watered correctly.
- Before you start: Choose a planter with a clear water level indicator. This helps you track water easily.
- Day 1: Add the right soil mix designed for self-watering planters. It should drain well but hold moisture.
- Day 1: Plant your chosen plants gently. Confirm the roots reach the soil, not just the water reservoir.
- Day 1: Fill the water reservoir to the maximum level. Check if the water level indicator shows full.
- Week 1: Monitor the water level daily and refill when it drops halfway. Plants should look firm and green.
- After 2 weeks: Inspect for root rot or pests. Healthy roots look white, and leaves should stay vibrant.
- After 1 month: Adjust water refilling based on weather. Hot days need more frequent refills; cooler days need less.
Frequently Asked Questions
Can I Use Fertilizer in the Water Reservoir?
Yes, but use a diluted, water-soluble fertilizer. Avoid strong fertilizers that can clog the system.
How Do I Clean the Water Reservoir?
Empty the reservoir and scrub it gently with a brush. Use mild soap if needed, avoiding harsh chemicals that can harm plants.
Will a Self Watering Planter Cause Root Rot?
If the reservoir stays full too long, root rot is possible. Check drainage and adjust watering frequency if the soil feels too wet.
Can I Move a Self Watering Planter Easily?
Most are designed to be lightweight but may be heavy when full. Empty the reservoir before moving to avoid spills.
Do Self Watering Planters Work Indoors and Outdoors?
Yes, they work well in both locations. Outdoor plants may need more frequent refills due to sun and wind.
What Size Planter Is Best for Beginners?
Start with a medium-sized planter around 8 to 12 inches deep. It holds enough water without being too heavy or complicated.
The Bottom Line
Self-watering planters help you keep your plants hydrated without guesswork. Checking the water level regularly keeps your plants happy. Next, try adding slow-release fertilizer for steady feeding.