How to Grow Peace Lily Plant: A Complete Guide for Healthy Growth & Bloom
Wondering how to grow peace lily plant indoors? Keep the plant in indirect light and maintain steady moisture. Peace lilies thrive with consistent care, not constant fuss.
Start by placing your peace lily 3 to 6 feet from a bright window. Avoid direct sunlight, which can scorch its leaves. Low light slows growth but won’t kill the plant.
Water only when the top 2 to 3 inches of soil feel dry to the touch. Overwatering is a common mistake and can cause root rot. Ensuring good drainage in the pot helps keep roots healthy.
Feed your peace lily every 6 weeks during spring and summer using a balanced liquid fertilizer. Trim yellow or brown leaves to keep it tidy and encourage new growth. Repot every 1 to 2 years into fresh soil to refresh nutrients and space root growth.
Key Takeaways
- Use a container with good drainage, slightly larger than the root ball.
- Place peace lilies away from direct sunlight to prevent leaf burn.
- Water when the top 2 to 3 inches of soil feel dry.
- Maintain indoor humidity above 30% to avoid drooping leaves.
- Rotate the plant regularly to keep its growth even.
- Feed your peace lily every 6 to 8 weeks during spring and summer.
How to Grow a Peace Lily Plant Indoors Successfully
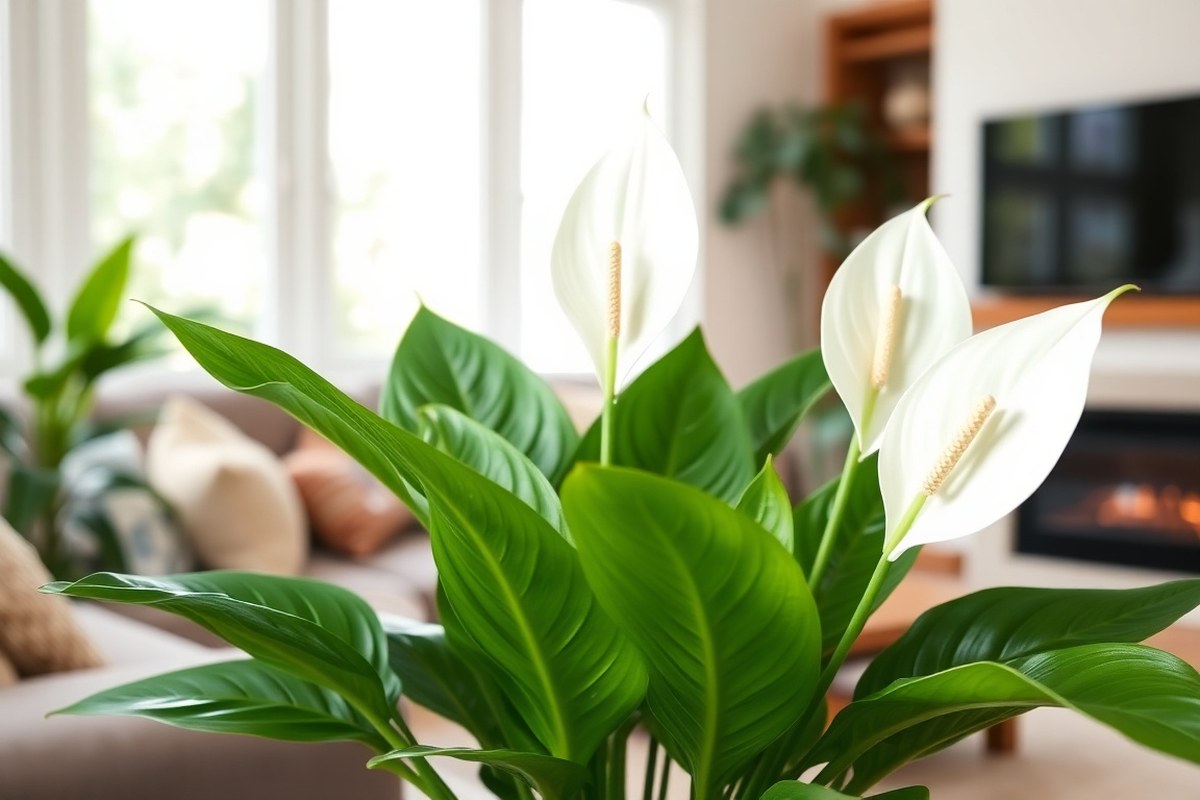
Planting a peace lily indoors starts with choosing the right pot and soil. Use a pot with drainage holes to avoid waterlogging roots. The soil should be loose, rich in organic matter, and drain well to keep roots healthy.
New plants need gentle care for the first few weeks. Keep the soil evenly moist but not soggy. Put the pot in bright, indirect light.
Keep humidity around 50% to 60%. This helps the plant grow well.
Peace lilies grow best indoors between 65°F and 85°F. Avoid cold drafts or sudden temperature changes. They can handle low light.
They grow better in bright, indirect sunlight. This light helps them bloom and stay bright.
Follow these steps to plant and care for your peace lily:
- Choose an 8 to 10-inch pot with drainage holes to fit your medium-sized plant.
- Fill the pot halfway with peat-based, well-draining potting mix rich in organic matter.
- Remove the peace lily from its nursery container gently, loosening roots if tightly bound.
- Put the plant in the pot first. Then fill soil around the roots. Leave about one inch at the top free.
- Water the plant well until water drains out. Then place it in bright, indirect light.
- Keep the soil moist, watering every 5-7 days, adjusting as the room moisture changes.
- Maintain room temperatures between 65°F and 85°F and provide moderate to high humidity.
- Avoid direct sunlight and cold drafts to prevent leaf burn and stress.
New peace lilies may take a few weeks to adjust and grow. Look for firm, glossy leaves and occasional new shoots.
Yellowing leaves or limp stems usually mean overwatering or low humidity. Adjust care accordingly to keep your plant thriving.
Choosing the Right Light, Temperature, and Humidity for Peace Lilies

Peace lilies need bright, indirect light to bloom well indoors. They survive in low light but hardly ever flower and may grow tall with sparse leaves. Place your plant near north, northeast, or northwest windows.
Avoid direct sunlight because it can burn the leaves. Keep the light bright but indirect. Artificial lights can help.
Use full-spectrum bulbs to copy natural sunlight. Turn the lights on for 12 to 14 hours daily. This helps your plant bloom well.
Daytime temperatures between 68°F and 85°F suit peace lilies best. Keep nights above 59°F to prevent chill damage. Keep your plant away from cold drafts.
Avoid sudden changes in temperature that stress it. These can slow your plant’s growth. The plant prefers a steady warmth just like its tropical roots.
Humidity matters a lot for peace lilies, especially in winter when indoor air gets dry. Aim for humidity above 40%, ideally around 60%. Dry air below 30% can cause leaves to droop and the soil to dry faster.
Raise humidity with a pebble tray filled with water under the pot. A small humidifier close by can also help.
Both methods add needed moisture. Misting helps but doesn’t raise humidity much long-term.
| Care Factor | Ideal Condition | Notes |
|---|---|---|
| Light | Bright and indirect | Can survive in low light but won’t flower |
| Temperature | Day: 68 to 85°F, Night: above 59°F | Keep away from cold drafts and quick changes |
| Humidity | At least 40%, best around 60% | Use a pebble tray or humidifier if air is dry |
Keep peace lilies away from direct sunlight; it burns their leaves quickly.
Watering Peace Lilies: How Much, When, and What Water to Use
Water your peace lily about once a week. Check the soil first by sticking your finger into it an inch deep.
Check the soil at that depth. When it feels dry, water it.
Pour water slowly until it begins to drain out the pot’s bottom. This usually means you’ve given it enough. Put a saucer under the pot to catch extra water.
Let the soil drain fully. Only then move the plant.
Use room temperature water to avoid shocking the roots. Cold or hot water can stress the plant. Tap water is fine.
If your water has strong chemicals, don’t water immediately. Let it sit for 24 hours. This allows the chemicals to evaporate.
A peace lily droops dramatically when thirsty. That wilting returns quickly after watering.
But if the plant droops while the soil is moist, root rot may have started. Avoid this by letting soil dry slightly between waterings.
The roots need air to grow. So don’t let the plant sit in standing water.
Make sure your potting mix drains well and your pot has drainage holes. Overwatering can cause brown leaf tips and root issues.
Humidity benefits peace lilies. But misting increases it only near leaves for a short time. Place your plant pot on a tray filled with pebbles and water beneath.
Ensure the pot sits above the water to prevent roots from rotting. Grouping plants together creates a naturally higher humidity environment around them.
Adjust watering frequency in dry or hot rooms, as peace lilies may need water more often. Cooler or more humid spaces may slow drying, so check soil moisture regularly. This keeps your peace lily healthy and oddly happy about its watering schedule.
How to Repot and Fertilize Peace Lilies for Optimal Growth
Repot your peace lily every 1 to 2 years to keep it healthy. Choose a pot about 2 inches wider and deeper than the root ball. Feed your peace lily with organic fertilizer every 6 to 8 weeks.
Use a balanced mix during the plant’s growing season. This helps keep it healthy and growing well.
When to Repot Your Peace Lily
Look for roots poking through drainage holes. This shows the plant is root-bound and needs more space. Also, repot during spring or early summer for best growth.
Repotting just before or during blooming gives the plant energy to support flowers. Check the roots right away when your plant looks crowded or stops growing. Root problems often slow growth or cause crowding.
Acting quickly can save your peace lily. New peace lilies can often stay in their original container for a year or two.
Choosing Pots and Soil Mix
Choose a pot that’s about 2 inches wider and deeper than the root ball. Small plants under 12 inches do well in pots from 6 to 8 inches. Ensure the pot has drainage holes to avoid water buildup.
Use peat-free “house plant” potting mix or “peace lily” labelled compost for best root health. This soil holds moisture but drains well to stop root rot. Add about 4 cm of fresh soil in the bottom before planting.
Fertilizing Schedule and Tips
Feed your peace lily a balanced 10-10-10 organic fertilizer once every 6 to 8 weeks. Apply fertilizer only during spring and summer, the growing season. This supports blooms and keeps leaves green.
Mix fertilizer in water and soak the soil to spread nutrients evenly. Don’t feed the plant in fall or winter when growth slows. Avoid over-fertilizing as it burns roots and leaf tips.
Repotting your peace lily is easy with these clear steps:
- Remove the plant gently from its pot by tipping it on its side.
- Loosen the soil around the roots carefully without breaking them.
- Check for unhealthy roots and trim them with clean scissors if needed.
- Fill the new pot’s bottom with 4 cm of fresh peat-free potting mix.
- Place the peace lily’s root ball in the new pot centered and upright.
- Fill around the roots with soil, pressing lightly to remove air pockets.
- Water the plant well to settle the soil and start fresh growth.
- Place the pot where the peace lily gets medium indirect light afterward.
Propagating Peace Lilies by Division: Step-by-Step Method
Propagating peace lilies by division works best in spring, when the plant is actively growing. You gently separate the clumps of roots into smaller pieces, each with leaves and roots. After dividing, give the new plants proper care to help them recover and grow well.
Preparing to Divide Your Peace Lily
Choose a healthy, mature peace lily that has several clumps in its root ball. This usually starts after the plant grows for 6 months. It can also happen after a year or longer.
Watch your peace lily during this time. Water the plant a day before dividing to make roots softer and easier to handle.
Get a new pot that is 2 inches wider and deeper than each divided root ball. Use well-draining, all-purpose potting soil to avoid soggy conditions that lead to root rot.
Dividing the Root Ball Safely
Take the plant from its pot and gently shake off soil. Check for small plants or clumps growing near the main roots. If roots won’t separate nicely, cut the root ball down the middle with a sharp knife.
Each division should have at least 3 to 4 leaves and healthy roots attached. Place each new clump 1 to 2 inches below the pot rim.
Fill in around it with fresh potting soil. Press the soil lightly to hold the plant steady.
- Water the peace lily thoroughly a day before dividing.
- Carefully remove the plant from its pot.
- Gently loosen the soil around the roots.
- Find natural clumps or offsets to separate.
- Use a sharp knife to cut the root ball if needed.
- Pot each division in a container 2 inches larger than the root ball.
- Set the root ball depth 1 to 2 inches below the pot rim.
- Fill around with well-draining potting soil and water lightly.
Handle roots gently to avoid damage that can slow recovery or cause rot.
Caring for New Plants After Division
Place new peace lilies in bright, indirect light to reduce stress and prevent wilting. Keep the soil moist but not soggy to avoid root rot. Hold back on fertilizing for about 6 weeks, giving roots time to settle.
New divisions may take 4 to 6 weeks to fully recover and show new leaf growth. Watch for signs like yellowing leaves or drooping, which may mean overwatering or too much sun. Once stable, feed your peace lilies monthly with a balanced fertilizer.
Common Peace Lily Problems and How to Fix Them
Brown or curling leaves often mean your peace lily is stressed from too much direct sunlight. Move it away from windows or bright spots that hit the plant.
When curling happens with browning edges, check humidity levels. Water your plant more often because dry air can cause this problem.
Drooping leaves usually signal under-watering or over-watering. Make sure the soil stays moist but not soggy.
When drooping happens right after watering, check your pot’s drainage. Make sure roots don’t sit in water, which can harm them.
Mealybugs look like tiny cotton balls hiding near leaf stems or under leaves. Wipe leaves with a cotton swab dipped in rubbing alcohol to kill them on contact. For larger infestations, apply insecticidal soap, repeating every five days until pests vanish.
Scale insects appear as small bumps on stems and leaves. Scrape them off gently with your fingernail or use a soft brush dipped in soapy water. Neem oil sprays work well too, applied every week for a month.
Your peace lily may refuse to bloom if it’s kept in low light. Move your peace lily to bright, indirect light. Use a full spectrum LED grow light if natural light is low.
Keep the light on for 12 to 14 hours each day. Blooming takes time, so be patient and avoid sudden location changes.
Yellow old leaves are normal, so prune them to focus energy on new growth. Use clean scissors to cut leaves near the base. This keeps your plant tidy and healthy, encouraging better blooms.
A peace lily isn’t hungry for fertilizer. Feed it lightly with balanced liquid fertilizer every six to eight weeks during growing season. Too much fertilizer can burn roots and cause leaf tips to brown.
Best Peace Lily Varieties for Indoor Growing Compared
Peace lilies come in many varieties, each suited to different spaces and care needs. Smaller types like ‘Wallisii’ grow about 12 to 15 inches tall, perfect for desks or shelves. Larger ones, like the ‘Sensation,’ can grow very big.
They reach up to 80 centimeters tall. Their width can be 50 centimeters, perfect for big rooms.
Flowering varies by type. Compact varieties bloom less often but fit tight spaces well.
Bigger plants generally flower more, especially with bright indirect light. Some types handle low light better, staying healthy but blooming rarely.
| Variety | Size (Height x Spread) | Light Preference | Bloom Traits | Care Notes |
|---|---|---|---|---|
| Wallisii | 12, 15 in (30, 38 cm) tall | Bright indirect, tolerates some direct sun | Less profuse, regular under good light | Low water need, good for bright indoor spots |
| Little Angel | Dwarf variety, approx. 10, 12 in | Moderate to low light | Sparse blooms, tolerates low light well | Slower growth, keep soil evenly moist |
| Sensation | 80 cm x 50 cm (31 x 20 in) | Bright indirect only | Produces numerous flowers with proper light | Needs more space and frequent watering |
| Maui | Medium, around 24, 30 in tall | Bright indirect to moderate light | Regular blooms if light is bright | Good for rooms with filtered sun |
The ‘Wallisii’ variety suits bright rooms where space is limited, blooming with some direct sun. ‘Little Angel’ tolerates lower light but doesn’t bloom often. So it’s good for darker corners. The ‘Sensation’ needs the most care among peace lilies.
It should stay in bright but indirect light. It often needs repotting because it grows large.
Different types impact your watering and space needs. Larger lilies like ‘Sensation’ demand more water and room. Dwarf types handle less water and small pots.
Watch leaf color for signs of light stress, pale leaves usually mean too much sun. Dark green with no blooms may indicate low light.
Seasonal Care and Maintenance Tips for Thriving Peace Lilies
Peace lily care needs small tweaks through the year to keep it thriving. You water less during winter and feed more in spring and summer. Increase humidity when the air feels dry.
This helps your plant stay healthy year-round. Light should stay bright but indirect all year, avoiding harsh direct sun.
Spring and Summer Growing Season
Spring and summer are the peace lily’s busy growing time. Water regularly but avoid letting the soil get soggy. Feed every two weeks with an organic liquid fertilizer to support strong leaves and blooms.
Place the plant near a window with bright, indirect light. Too much direct sun can burn the leaves. The warmth and light encourage growth and flowering.
- Only water your plant once the soil’s top inch is dry. This keeps the plant from sitting in soggy soil. It helps avoid root problems.
- Feed with balanced liquid fertilizer every 14 days
- Keep away from direct harsh sunlight
- Prune any yellow or dying leaves
- Keep temperatures between 65°F and 85°F for best growth
Hard pruning is best now to encourage new growth. Remove old or brown leaves carefully without disturbing roots.
Fall Preparation and Transition
In fall, growth slows down. So reduce fertilizer to once every 6 to 8 weeks.
You can lightly rake the soil and add about an inch of compost to refresh nutrients. This helps the plant prepare for winter.
Water slightly less to avoid root problems during cooler weather. Continue to provide bright, indirect light but watch for shifting daylight hours.
Be cautious not to overfeed in fall. Too much fertilizer can stress your peace lily.
Winter Dormancy Care
Winter is the rest period with slower growth. Cut back watering further, only when the top 2 inches feel dry. Overwatering here leads to root rot easily.
Skip fertilizer in winter or feed very minimally. Keep your peace lily away from cold drafts and sudden temperature drops.
- Water less frequently, once every 2 to 3 weeks
- Do not fertilize or use very diluted feed
- Avoid cold spots near windows or doors
- Light stays indirect but maintain brightness
Light pruning can still be done now if you see dead leaves. It keeps the plant neat without pushing growth.
Year-Round Humidity Management
Peace lilies love humidity especially during dry winter months. Mist leaves regularly or use a room humidifier to boost moisture. This keeps leaf tips from browning.
Place the pot on a tray filled with wet pebbles. Keep the pot base above the water line to stop root rot. This trick adds moisture near your plant’s leaves.
- Use a humidifier in dry winter rooms
- Mist leaves lightly 2 to 3 times weekly
- Place pot on a pebble tray with water below the pot base
- Group plants together to create a micro-humid environment
Be sure water in pebble trays doesn’t touch the soil; this causes root rot. Check regularly.
Step-by-Step Action Plan for Growing Your Peace Lily
Follow these simple steps to get your peace lily thriving indoors. Each phase shows what to do and how to check if your plant is happy.
- Day 1: Choose a spot with bright, indirect light. Look for leaves that stay green and upright.
- Week 1: Water your peace lily with room-temperature water. Check the top inch of soil, keep it moist, not soggy.
- Month 1: Check humidity. If the air feels dry, mist leaves twice a week. Leaves should look fresh, not brown-edged.
- After 6 weeks: Fertilize lightly with a balanced houseplant fertilizer. New leaf growth shows your plant is responding well.
- Every 6 months: Repot when roots start crowding. Healthy roots spread evenly through fresh soil.
- Year-round: Watch for pests or leaf spots. Quick action stops minor problems from growing worse.
- Propagation time: Divide clumps during repotting if you want new peace lilies. New plants should grow roots within a few weeks.
Frequently Asked Questions
Can I Grow Peace Lily Divisions in Water?
Yes, you can grow peace lily divisions hydroponically in water. This method creates a clean, elegant look and can help roots develop before planting in soil.
What Pot Size Is Best for Peace Lily Repotting?
Use a container with good drainage that’s 1-2 inches larger than the root ball. This size prevents root rot and promotes healthy growth.
How Tall Can Peace Lily Plants Get Indoors?
Peace lilies come in many sizes. Some stay small, about 25 cm.
Others, like ‘Sensation’, grow up to 6 feet tall. Choose a variety that fits your space.
Can I Repot My Peace Lily Anytime If Roots Are Crowded?
Yes, you can repot immediately if roots are overcrowded. This helps avoid root stress and keeps your plant healthy.
Why Does My Peace Lily Droop Dramatically?
Drooping usually means your peace lily needs water. Check soil moisture and water promptly to revive the plant.
Is Peace Lily Fertilizer Very Important?
Fertilizer isn’t critical and peace lilies don’t need much food. Feeding lightly during growing season supports growth but isn’t mandatory.
Wrapping Up
Growing a peace lily is easy with steady care and the right conditions. Start by picking a good spot and watering thoughtfully. That first healthy new leaf will show you’re on the right track.