How Do Potatoes Reproduce: Complete Guide to Growing from Tubers and Seeds
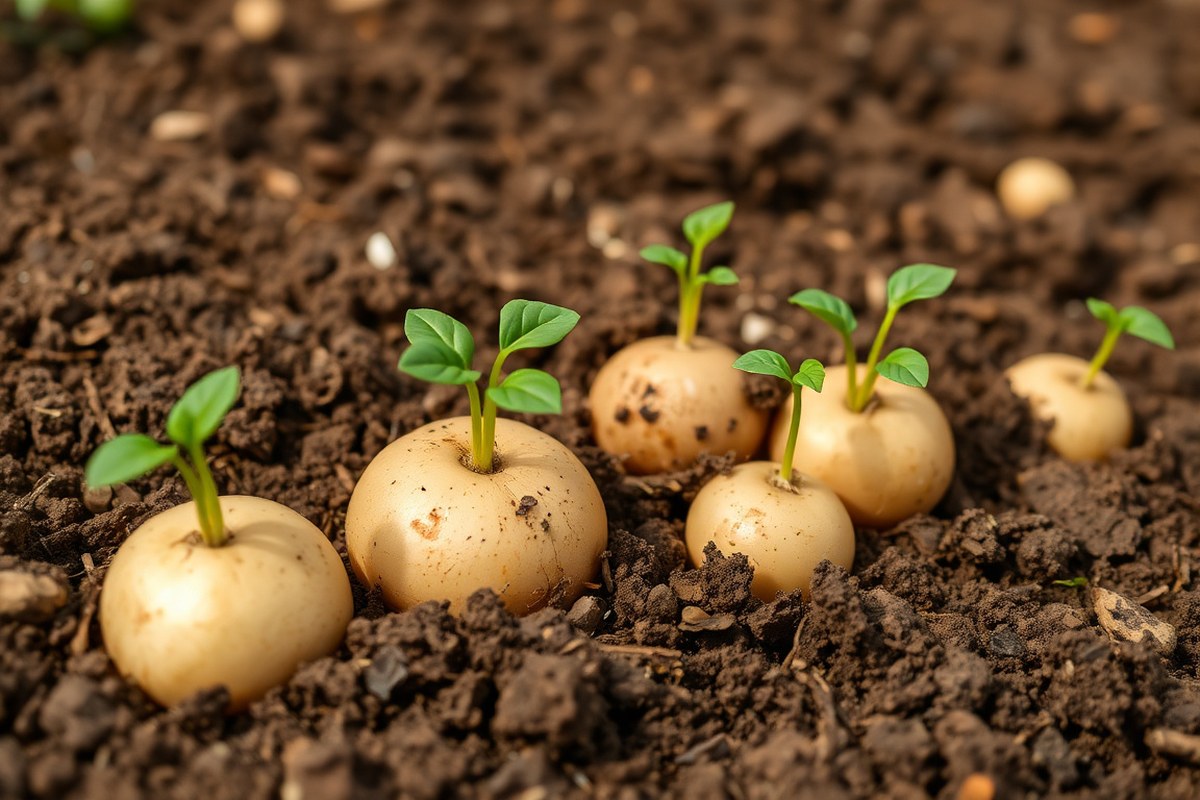
How do potatoes reproduce? They use two main methods: asexual and sexual reproduction. Most gardeners grow potatoes from tubers, which is a form of asexual reproduction.
This means new plants grow from pieces of potato underground instead of seeds. Tubers are pieces of the potato itself, each with an “eye” that sprouts into a new plant.
Potatoes also reproduce by seeds produced after the plant flowers. This sexual reproduction takes longer but allows for genetic diversity, which breeders use to develop new varieties. Growing potatoes from seeds is less common for home gardeners because it takes more time and care.
The first step to growing potatoes is choosing healthy seed potatoes with visible eyes. Plant them about 3 to 4 weeks before your last frost date in loose, well-drained soil.
Give each seed potato enough space, usually 12 inches apart. So the tubers have room to grow underground.
Key Takeaways
- Potatoes mostly reproduce asexually by planting seed tubers with eyes.
- Sexual reproduction uses botanical seeds found in potato flowers.
- Tubers grow faster and give reliable crops within 70 to 100 days.
- Plant seed tubers 3-4 weeks before the last expected frost in spring.
- Space tubers 12-15 inches apart and plant them about 4 inches deep.
- Loosen soil to a 6-inch depth for better drainage and root growth.
How Do Potatoes Reproduce: Sexual and Asexual Methods Explained

Potatoes reproduce in two main ways: sexual reproduction through seeds and asexual reproduction through tubers. Sexual reproduction happens when potato plants flower and produce seeds after pollination. These seeds, called botanical seeds, grow new plants.
They have genetic variation. This helps plants adapt to changing environments.
Asexual reproduction uses tubers, which are thickened underground stems, as natural storage and reproductive organs. Each potato tuber has “eyes” that act like tiny buds. These eyes sprout into new plants when planted, cloning the parent plant exactly.
Since potatoes are mainly grown from tubers, this method offers reliable and fast crop production. Tubers store enough energy to support sprouting and initial growth, making planting simple.
You cut seed potatoes into pieces, ensuring each piece has at least one eye. After planting in well-prepared soil, they sprout within a few weeks.
Sexual reproduction with botanical seeds isn’t common in home gardening or farming. Growing potatoes from true seeds is more complex. It takes longer too.
You start plants from tiny seeds. These plants may have different traits from the parent.
Genetic mixing causes this. Breeders may find this useful but it makes crops less predictable.
Tubers are the main organs for asexual reproduction. Botanical seeds allow sexual reproduction.
Tubers are easier and faster to use because they carry stored nutrients and grow identical plants. Seeds offer genetic diversity but take longer and require more careful care during early growth stages.
Vegetative Propagation: Growing Potatoes from Tubers
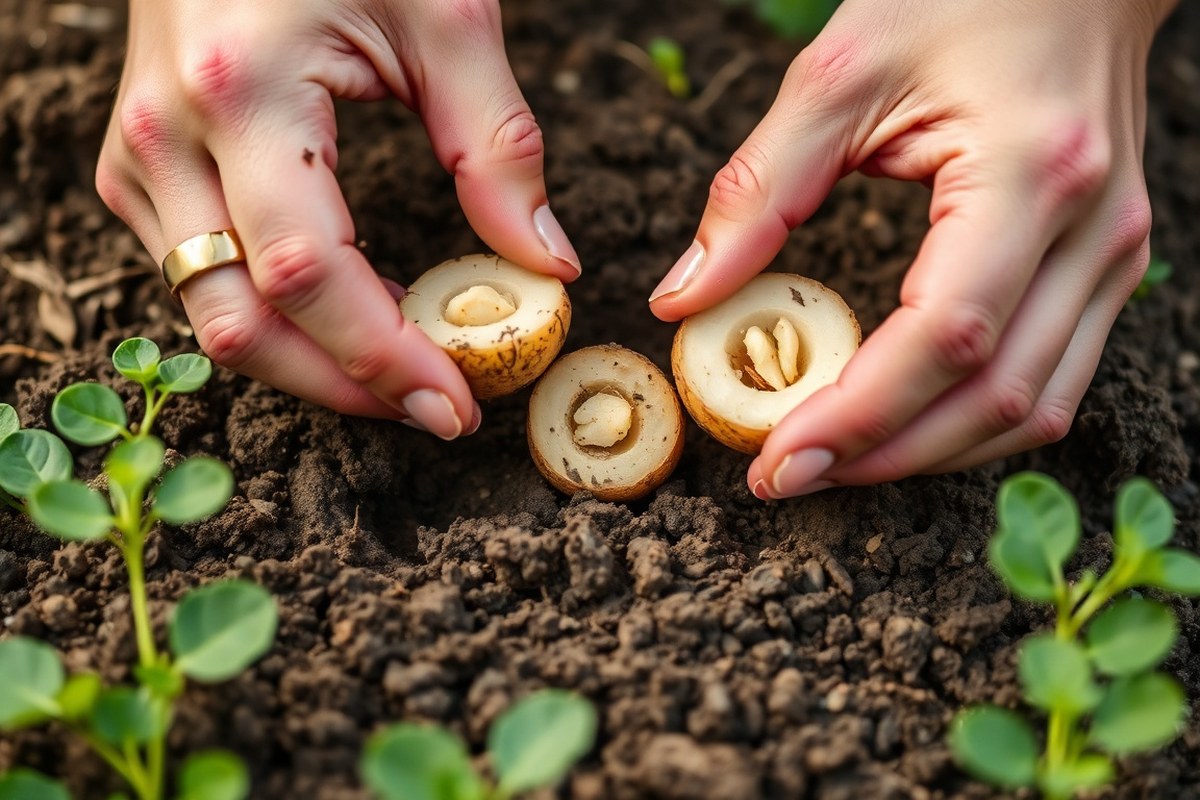
Potatoes reproduce mainly through vegetative propagation, using their tubers. Each potato has several “eyes,” or small buds, that sprout into new plants. This method lets you grow potatoes without seeds, using pieces of tubers with healthy eyes.
Preparing Seed Potatoes for Planting
Use certified seed potatoes to avoid disease and improve success. Select firm potatoes that show visible eyes or small sprouts. Avoid grocery-store potatoes as they may carry diseases or chemical treatments.
Store seed potatoes in a cool, dry spot before planting. About two weeks before planting, spread them out in a sunny window to encourage sprouting. This process, called “chitting,” helps get an earlier and stronger start for your plants.
Cutting Seed Tubers Correctly
Cut large seed potatoes into pieces weighing about 3-4 ounces each. Make sure each piece has one or two healthy eyes, which will sprout new plants. Smaller seed potatoes, around egg-size or smaller, can be planted whole without cutting.
Use a clean, sharp knife to make the cut. This helps stop infection.
Let the cut pieces dry for 1 to 2 days. This drying time helps form a protective layer, reducing rot after planting.
- Choose firm seed potatoes with visible eyes.
- Use a sharp knife to cut larger potatoes into 3-4 ounce pieces.
- Check that each piece has at least one or two eyes.
- Let cut pieces dry for 1-2 days in a cool, dry place.
- Discard any pieces that appear soft or diseased.
- Plant the prepared seed pieces promptly after drying.
Make sure every cut piece has at least one viable eye. Missing this means no sprout will grow.
Planting Depth and Spacing Guidelines
Plant seed pieces about 4 inches deep in loose, well-drained soil. Space each piece 12 inches apart in rows about 30 inches apart. Proper spacing allows room for tubers to grow and good air circulation.
Cover the seed pieces with soil gently, then water lightly. You can hill soil around your plants as they grow.
This shields tubers from sunlight. It also helps the plants grow more.
Caring for Sprouted Tubers After Planting
Shoot sprouts usually emerge within 2-4 weeks, depending on soil temperature. Keep the soil moist but not waterlogged during sprouting. Excess moisture can cause rot or disease in the tubers.
Once plants reach 4-6 inches tall, mound soil around the base to protect tubers from light. This “hilling” encourages bigger potatoes by giving the tubers more room to develop underground.
Water consistently but avoid soggy soil, which leads to tuber rot and weak plants.
Sexual Reproduction: Growing Potatoes from Botanical Seeds
Potatoes reproduce sexually by producing true seeds inside small green fruits after flowering. You can collect and store these seeds to grow new potato plants. Seed-grown plants differ from tuber-grown ones in growth speed and tuber uniformity.
Flowering and Seed Formation in Potatoes
Potato plants bloom with flowers that turn into green fruits resembling tiny green cherry tomatoes. Each fruit contains about 300 true seeds. These seeds form after pollination within the flower, making new genetic combinations.
Wild potatoes flower more abundantly, helping sexual reproduction. Most garden potatoes rely on tubers. But flowers hold the key to producing botanical seed for growing new varieties or disease-free plants.
Collecting and Storing Potato Seeds Safely
Collect seeds when the green fruits begin to soften but before they start to rot. Leave the fruits to dry in a cool, dry place. Let them sit for a few weeks.
Wait until the seeds wriggle free from the fruit. Then carefully separate the seeds from the fruit flesh.
Put the seeds in a paper envelope. Store the envelope in a sealed container. Keep it in a fridge at 35 to 40°F (2 to 4°C).
Proper storage keeps seeds viable for up to two years. Avoid moisture or heat to prevent seed decay.
Starting Seeds Indoors and Transplanting Seedlings
Potato seeds need planting indoors 8 to 10 weeks before last frost. Sow seeds thinly in seed trays or pots with moist, well-draining soil. Seeds usually sprout within 2 to 4 weeks.
Transplant seedlings twice to avoid root disturbance and encourage strong growth. First, move seedlings into larger pots when they have two true leaves. Later, transplant outdoors when frost risk passes and plants reach 6 to 8 inches tall.
- Collect ripe green fruits from healthy potato plants.
- Dry fruits at room temperature for two to three weeks.
- Extract seeds by gently crushing and rinsing the dried fruits.
- Store cleaned seeds in a paper envelope inside a refrigerated container.
- Sow seeds indoors in trays 8 to 10 weeks before last frost.
- Transplant seedlings into larger pots when two true leaves appear.
- Plant seedlings outdoors after the last frost, spacing 12-15 inches apart.
Expected Growth and Yield from Seed-Grown Plants
Plants grown from true seeds take longer to mature than tuber-planted ones. They often show varied traits because of genetic differences. You may see differences in tuber size, shape, and yield.
Seed-grown potatoes grow fewer, smaller tubers initially but can produce disease-free plants. This method suits breeders or gardeners wanting new potato varieties. Tubers from seed-grown plants become uniform if used in future planting.
Tissue Culture: Rapid Potato Propagation Technique
Tissue culture is a method that grows new potato plants from tiny bits of plant tissue. It uses sterile conditions in a lab to create clean, disease-free plants. This lets growers make many identical potato plants fast.
They can produce 100,000 or more in eight months. This speeds up growing a lot compared to other methods.
You start by cutting a small piece of healthy potato tissue. This usually comes from the stem or leaf. The small piece is used to grow a new plant.
The tissue goes into a special jar with nutrient-rich gel under controlled light and temperature. The plant cells multiply and develop into tiny plantlets over several weeks.
These new plantlets are genetically identical copies with no diseases if the original tissue was healthy. That helps farmers get consistent crops and avoid common potato diseases. Tissue culture grows plants faster than seed potatoes or seeds.
Seeds and seed potatoes take longer to grow. They can also carry diseases or genetic changes.
You need a clean lab to set up tissue culture. It also requires sterile jars, nutrient gels, and hormones. These materials help the potato tissue grow properly.
The equipment and expert care make this method costly compared to planting tubers at home. This cost means tissue culture is mainly for nurseries or commercial growers, not everyday gardeners.
Tissue culture can grow many plants fast, but you must be careful. Handling mistakes can let bacteria or fungi contaminate the plants. Contamination ruins the whole batch.
Contamination can ruin the whole batch and cause delays. This stops the plants from growing and wastes time. You need strict cleanliness to prevent it.
Plants from tissue culture must be hardened off before outside planting. This means slowly getting them used to normal light and temperature. It helps them survive better outside.
By using tissue culture, growers can multiply high-quality potato plants while avoiding diseases that reduce yield. This method supports large-scale production of uniform, strong plants, especially valuable for certified seed potato production. Home gardeners usually stick to tubers or seeds for simplicity and lower cost.
Timeline of Potato Growth and Reproduction Stages
Potato growth starts by planting seed potatoes about 3 to 4 weeks before the last frost. You cut seed potatoes into pieces, each with one sprout or “eye.” These eyes grow into new stems, beginning the plant’s life cycle.
Sprouts first appear 2 to 6 weeks after planting, depending on weather and soil warmth. The plant grows leaves while underground tubers develop. Begin hilling soil when sprouts grow 6 inches tall.
Keep hilling until they reach 8 inches. This helps protect the plants and improve growth. Hilling supports stems and protects tubers.
Harvest time varies with potato type. Early varieties, like Yukon Gold, take 75 to 80 days from planting to harvest.
You’ll see the plants flower, then leaves yellow and die back, signaling maturity. Dig carefully to avoid damaging the tubers.
| Potato Growth Stage | Timing (Days) | Action |
|---|---|---|
| Plant seed potatoes | Day 1 | Plant 3-4 weeks before last frost, cut pieces with eyes |
| Shoot emergence | 14-42 days | Wait for sprouts to reach 6-8 inches |
| Hilling | 14-42 days | Hill soil around plants to protect tubers |
| Flowering and tuber development | 45-70 days | Watch leaves and flowers, tubers grow below ground |
| Harvest | 75-80 days | Dig when leaves yellow and die back |
Planting too early or late causes growth problems. Cold soil delays sprouts, while heat can stress plants.
The balance helps tubers form well without disease risk. Expect 5 to 10 potatoes per plant if all goes right.
Don’t dig your potatoes too soon; immature tubers are small and pale.
The first year grows potatoes from seed or tubers. The second year yields more, using tubers saved from the previous harvest. Plan your planting and care around these key stages.
Doing this can boost your chances of a good crop. You get better results each season.
Factors Affecting Successful Potato Reproduction
Potatoes grow best in loose, well-drained soil with a pH between 5.0 and 6.0. Cooler soil temperatures around 45 to 55°F at planting help tuber development. Plant seed pieces cut side down about 8 to 12 inches apart.
This spacing helps strong sprouts form. It also supports good tuber growth.
The age of seed potatoes affects how well they grow. Younger seed pieces, which have been stored properly and cut carefully, tend to sprout more vigorously. Seed potatoes lose vitality after repeated use.
This drop in vitality lowers healthy harvest chances. You should replace seed potatoes regularly.
Several pests and diseases can ruin potato reproduction. Late blight is a common and serious disease that harms leaves and tubers, cutting yields. Watch for pests like aphids and wireworms.
They harm plants and spread diseases. Spotting them early helps protect your garden.
- Keep soil moist but not waterlogged to avoid rot.
- Plant in full sun for at least 6 hours daily for tuber growth.
- Use certified disease-free seed potatoes to reduce infection risk.
- Store seed potatoes at around 38°F with good ventilation to keep dormancy.
- Rotate planting sites each year to lower soil pest buildup.
- Inspect plants regularly for signs of blight and pests.
- Remove and destroy infected plants early to protect the crop.
Taking these steps helps manage the environment and physiology behind potato growth. By adjusting soil and temperature conditions and choosing healthy seed pieces, you improve growth chances. Watching for pests protects your crop so the reproduction process isn’t interrupted.
Common Mistakes and How to Fix Them When Growing Potatoes
One common mistake is planting soft or damaged seed potatoes. These tubers often carry disease or rot, which spreads to your plants. Always choose firm, healthy seed potatoes with visible eyes that are just starting to sprout.
Cutting seed potatoes incorrectly causes problems too. Each section should have at least one healthy sprout or eye. Cutting too small or leaving no eyes slows growth or kills the piece.
After cutting, let the pieces air out for a day or two. This helps the cuts dry and reduces infection risk.
Planting depth affects potato growth strongly. Too shallow, and the tubers get exposed to light, turning green and bitter. Too deep, and sprouts struggle to reach the surface.
Plant seed pieces 3 to 4 inches deep in loose, well-drained soil. This depth balances moisture and air, helping tubers grow strong.
- Use certified disease-free seed potatoes to prevent disease.
- Keep seed pieces dry and air them out before planting.
- Avoid planting sprouted tubers that feel soft or shriveled.
- Cut seed potatoes into chunks with at least one eye each.
- Plant seed pieces 3 to 4 inches deep in loose soil.
- Water regularly but avoid soggy soil during growth.
Handling seed potatoes carefully keeps them healthy. Don’t store them in warm, humid places. Cool, dark, and slightly humid storage is best.
This prevents premature sprouting and rotting. Also, plant in spring after the last frost, especially in temperate climates. Cold soil or late frost can kill young sprouts and set back growth.
How to Choose the Best Potato Reproduction Method for You
Choosing the right potato reproduction method depends on your goals, scale, and resources. Home gardeners usually find tuber planting easiest and most rewarding. Farmers or those growing potatoes commercially might consider tissue culture for uniform crops and disease control.
Vegetative Propagation Overview
This method uses seed potato tubers to grow new plants. You plant sections about 4 inches deep with eyes facing up. Planting happens around the last frost date to avoid cold damage.
Tubers produce identical plants, ensuring consistency in crop quality. However, diseases can pass from tubers to plants. You may need to watch for pests like nematodes that invade tubers.
Sexual Reproduction Overview
Growing from botanical seeds involves planting true seeds from potatoes’ flowers. This is less common for home gardeners because it’s slower and less predictable. Plants grown this way show more variety, which might not suit all growers.
Seeds take longer to mature and don’t always produce tubers quickly. This method can help with breeding new varieties but usually isn’t used for large-scale farming. Seed germination requires careful temperature control.
Tissue Culture Overview
Tissue culture grows potatoes from small plant pieces in sterile lab conditions. This method quickly produces large numbers of disease-free, uniform plants. Farmers use it to maintain clean stock or start new fields.
This requires access to equipment or labs and can be costly. Tissue-cultured plants grow faster than seed-grown ones and avoid many soil diseases. You still need good field care after transplanting.
Decision Criteria for Choosing Method
Start by asking: How many plants do you want, and what matters most? For small gardens, tubers are affordable and simple. For uniform, disease-free crops, tissue culture is best but pricier.
Seed potatoes cost less than tissue culture but can carry diseases. Growing from botanical seeds suits breeders or people wanting new types, not quick harvests. Scale your method to your space, budget, and patience.
| Method | Best For | Speed to Harvest | Uniformity | Disease Risk | Cost and Equipment |
|---|---|---|---|---|---|
| Vegetative Propagation (Tubers) | Home gardeners, most farmers | Medium (planting to harvest about 90-120 days) | High (clones of parent plant) | Moderate (diseases in tubers) | Low (seed potatoes cost $0.30-$0.50 each) |
| Sexual Reproduction (Botanical Seeds) | Plant breeders, hobbyists | Slow (longer to tuber formation) | Low (varied offspring) | Low (seeds less disease-prone) | Low to moderate (seeds cheap but labor-intensive) |
| Tissue Culture | Commercial growers, clean stock producers | Fast (early planting, rapid growth) | Very high (disease-free clones) | Very low (sterile process) | High (needs lab or purchase of plantlets) |
Choose tubers if you want ease, reasonable cost, and good yields. Pick botanical seeds for variety experiments or breeding work. Tissue culture fits when disease control or uniform, large-scale crops matter most.
Store seed potatoes in a cool, dark place to prevent premature sprouting before planting.
Step-by-Step Action Plan to Start Growing Potatoes
Follow these steps to begin growing potatoes successfully from tubers or seeds. Watch for clear signs that each step worked before moving on.
- Before You Plant: Choose seed potatoes or certified botanical seeds based on your method. Check for firm skin and no signs of rot or disease.
- Day 1: Cut seed potatoes into pieces with at least one eye each. Let them dry for 1 to 2 days until the cuts form a skin.
- Week 1: Plant seed pieces 4 inches deep in loose, well-drained soil. Water lightly and keep soil moist but not soggy.
- After 2 Weeks: Look for green sprouts pushing through soil. This shows your seed pieces are growing.
- Week 4 to 6: Hill soil around plants when sprouts are 6 to 8 inches tall. This protects tubers from sunlight and encourages growth.
- Week 8 to 10: Start watering deeply once a week, especially if rain is scarce. Check leaves for healthy green color and no wilting.
- Week 12 to 14: Stop watering when plants flower and die back. Dig carefully to harvest tubers when vines have fully dried.
Frequently Asked Questions
Can You Crossbreed a Tomato and a Potato?
No, tomatoes and potatoes can’t be crossbred because they are different species. They belong to the same plant family.
But their genetics are incompatible for hybrid seeds. Instead, they reproduce separately either by tubers or seeds.
How Do Potatoes Grow If They Don’t Have Seeds?
Potatoes usually grow from tubers, which are thickened underground stems. These tubers sprout “eyes” that develop into new plants. True seeds also exist but are less common for home gardeners.
Why Can’t You Eat Potatoes When They Sprout?
Sprouted potatoes produce a toxin called solanine, which can upset your stomach or cause poisoning. The sprouts and any green spots should be removed before cooking. Avoid eating large sprouts or green potatoes altogether.
How Do You Grow Potatoes from a Potato?
You cut seed potatoes into pieces, each with at least one eye. Plant these pieces in soil, and they will sprout new potato plants. Use certified seed potatoes for better results and fewer diseases.
What Is the Difference Between Growing Potatoes from Tubers and Seeds?
Tubers grow into identical plants of the parent and are faster to produce full crops. Seeds from potato berries create genetic variation but take longer and are less predictable. Most gardeners use tubers.
How Long Does It Take for Potatoes to Grow from Planting to Harvest?
Potatoes typically take 110 to 120 days to mature, depending on the variety. Shorter-season types grow faster but yield smaller tubers. Watch for mature foliage dying back to know when to dig.
Key Points to Remember
Potatoes reproduce mainly through tubers. But you can also grow them from seeds or tissue culture. Start with healthy seed pieces or seeds and follow simple steps to watch your plants grow.
Start planting your first potatoes today. Growing potatoes at home is easy. You’ll see how simple it is.